本文主要是介绍⚡【C++要笑着学】(24) 模拟实现栈和队列类:Functor 仿函数 | 模拟实现 stack | 模拟实现 queue | 模拟实现 priority_queue,希望对大家解决编程问题提供一定的参考价值,需要的开发者们随着小编来一起学习吧!
🔥 订阅量破千的火热 C++ 教程
👉 火速订阅《C++要笑着学》
| 🔥 CSDN 累计订阅量破千的火爆 C/C++ 教程的 2023 重制版,C 语言入门到实践的精品级趣味教程。 了解更多: 👉 "不太正经" 的专栏介绍 ← 试读第一章 订阅链接: 🔗《C语言趣味教程》 ← 猛戳订阅! |
- 💭 写在前面:在上一章中,我们讲解了STL的栈和队列,本章我们来模拟实现一下它们。在讲解优先级队列的同时我们顺便把上一章提到的仿函数进行一个讲解,使用仿函数可以有效替换使用难以理解的函数指针的场景。我们通过仿函数 less 和 greater 去控制优先级队列的 Compare,从而能同时适配升序和降序。
目录
Ⅰ. 模拟实现 stack
0x00 实现思路
0x01 代码测试
Ⅱ. 模拟实现 queue
0x00 实现思路
0x01 代码测试
Ⅲ. 模拟实现 priority_queue
0x00 基本实现思路
0x01 写死了的大堆优先级队列
0x02 仿函数(functor)
0x03 加了仿函数后的优先级队列
0x04 迭代器的实现
Ⅳ. 完整代码
0x00 stack
0x01 queue
0x02 priority_queue
Ⅰ. 模拟实现 stack
0x00 实现思路
 插入数据删除数据这些逻辑其实没有必要自己实现,而是采用转换的方式。
两章前我们讲解了适配器的知识,这里采用的就是一些其它的适配的容器去实现。
至于这里转换什么,我们可以进一步思考,似乎有很多容器都适合去转换,
所以 STL 增加了一个模板参数 Container,利用 Container 来进行转换。
在上一章的末尾,我们讲述了利用 deque 去实现栈和队列是最合适不过的了:
template<class T, class Container = deque<T>>(至于 deque 的底层我们放到后面去说,我们先学会如何用 deque 去实现栈和队列)
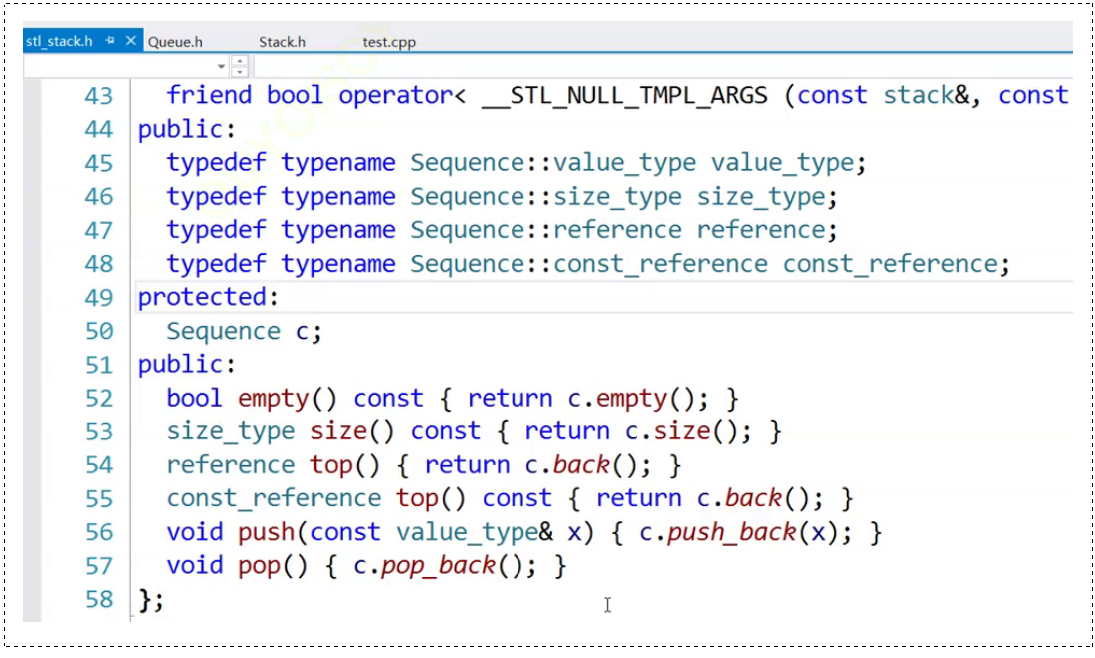
 对于栈而言,push 插入数据就是尾插 push_back,pop 删除数据就是尾删 pop_back,
void push(const T& x) {_con.push_back(x);    // 对于栈而言,入栈就是尾插
}
void pop() {_con.pop_back();      // 对于栈而言,出栈就是尾删
}
返回堆顶数据我们可以用 back(),即可达到返回尾上数据的效果,本质上是一种封装。
const T& top() {return _con.back();  // 返回尾上数据
}![]() 这里甚至都不需要考虑断言,因为那是下层需要做的事情,这里我们要做的只是 "转换" 。
这里甚至都不需要考虑断言,因为那是下层需要做的事情,这里我们要做的只是 "转换" 。
💬 代码:stack
#include <iostream>
#include <deque>
using namespace std;namespace foxny {template<class T, class Container = deque<T>> class stack {public:void push(const T& x) {_con.push_back(x);    // 对于栈而言,入栈就是尾插}void pop() {_con.pop_back();     // 对于栈而言,出栈就是尾删}const T& top() {return _con.back();  // 返回尾上数据}size_t size() {return _con.size();  // 返回大小}bool empty() {return _con.empty(); // 返回是否为空}private:Container _con;};
}
0x01 代码测试
 先默认用 deque 去存储:
#include <iostream>
#include <deque>
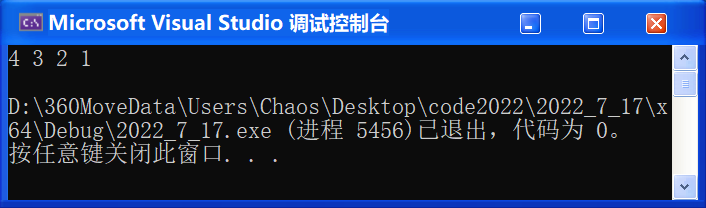
using namespace std;namespace foxny {void test_stack1() {stack<int> st;st.push(1);st.push(2);st.push(3);st.push(4);while (!st.empty()) {cout << st.top() << " ";st.pop(); }cout << endl;}
}🚩 运行结果:
 默认传 deque,如果不想用 deque,你可以自由的去传。
#include <iostream>
#include <deque>
#include <vector>
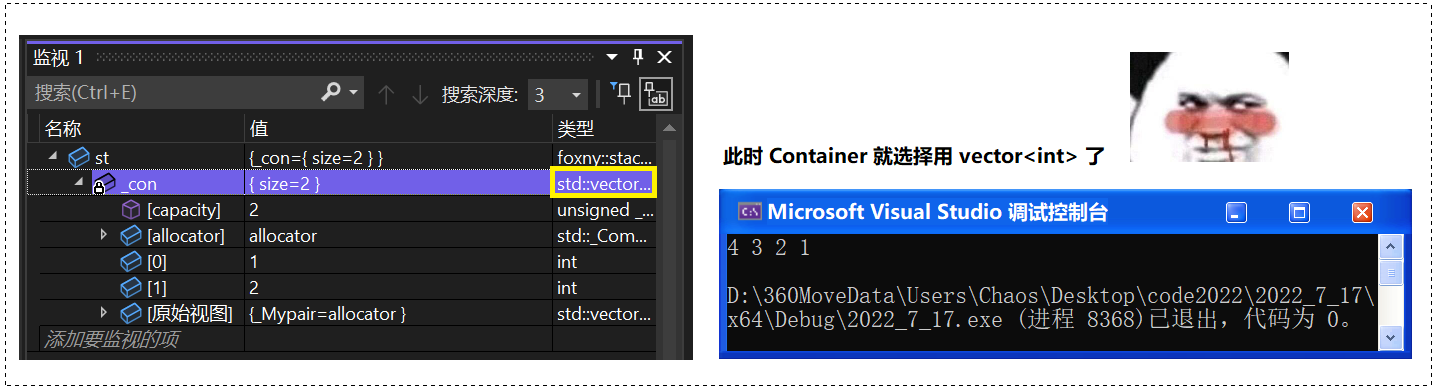
using namespace std;namespace foxny {void test_stack2() {stack<int, vector<int>> st; // 我想默认用 vectorst.push(1);st.push(2);st.push(3);st.push(4);while (!st.empty()) {cout << st.top() << " ";st.pop(); }cout << endl;}
}
🚩 运行结果:
 我们再试试默认用 list 可不可以:
#include <iostream>
#include <deque>
#include <list>
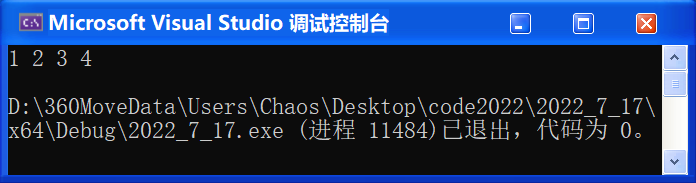
using namespace std;namespace foxny {void test_stack3() {stack<int, list<int>> st; // 我想默认用 listst.push(1);st.push(2);st.push(3);st.push(4);while (!st.empty()) {cout << st.top() << " ";st.pop(); }cout << endl;}
}🚩 运行结果:

❓ 思考:可否用 string?
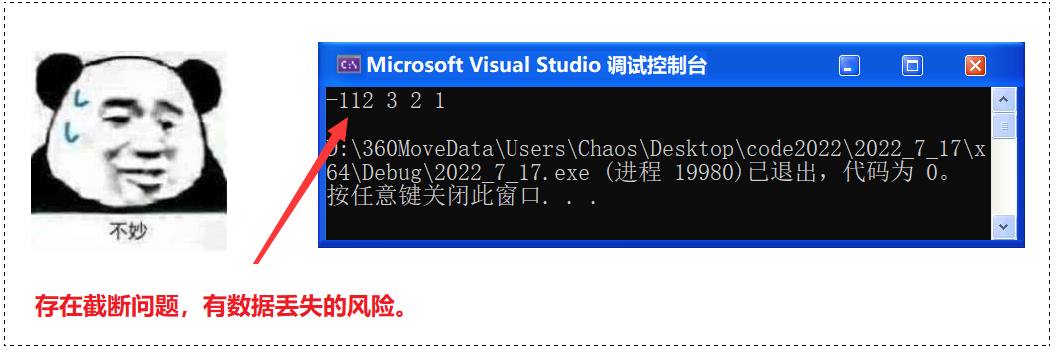
勉强可以,只要你是顺序容器都可以。但是用 string 是有风险的,可能会出现溢出和截断。
#include <iostream>
#include <deque>
#include <string>
using namespace std;namespace foxny {void test_stack4() {stack<int, string> st;  // 我想默认用 stringst.push(1);st.push(2);st.push(3);st.push(400);   // 这里推一个400看看while (!st.empty()) {cout << st.top() << " ";st.pop();   }cout << endl;}
}
🚩 运行结果:
🔺 总结:从上层角度来看,其默认是一个双端队列,我底层用什么存,去实现这个栈并不重要,只要其符合要求就行。它保存的是栈的性质,复用的是容器的代码。
⚡ 优化:我们可以用 const 来限定成员函数,这意味着你不能在类对象上调用这些函数来修改内部状态,除非类对象自身被声明为 mutable(在这种情况下,它仍然可以修改内部状态)。更严格地限制了对象的常量性,有助于避免潜在的错误。
template<class T, class Container = deque<T>> class stack {public:void push(const T& x) {_con.push_back(x);}void pop() {_con.pop_back();}const T& top() const {    // const 修饰return _con.back();}size_t size() const {     // const 修饰return _con.size();}bool empty() const {      // const 修饰return _con.empty();}private:Container _con;
};
const T& top() const 中的两个 const 限定符分别适用于不同的情况。
-
第一个
const限定符const T& top()表示top()函数不会修改调用它的对象的内部状态。这意味着你可以在一个常量对象上调用top(),并且它不会导致对象的状态被修改。这是对对象的“只读”承诺。 -
第二个
const限定符const在const T& top() const表示该函数返回的引用不能用于修改底层容器_con中的元素。这个const限定符是用于确保函数不会意外地修改堆栈的底层数据。在这种情况下,它适用于返回类型,表示返回的引用是一个常量引用,不允许修改。
这两个 const 限定符的组合是为了提供对堆栈对象的只读访问,并且还保护了堆栈的内部数据免受意外的修改。
像 size 函数只是返回堆栈的大小,不会修改堆栈的状态或底层容器的内容。因此,只需要在函数声明和定义中使用一个 const 限定符,以确保这个函数不会修改对象的内部状态。这足以满足只读访问的要求,而不需要额外的 const 限定符。
Ⅱ. 模拟实现 queue
0x00 实现思路
 一回生二回熟,其默认容器也是 deque,直接照着 stack 的基础去修改成 queue 即可。
template<class T, class Container = deque<T>>queue 是先进先出的,queue 的 push 仍然是尾部的插入,而 pop 需要支持头部的删除。
void push(const T& x) { _con.push_back(x);  // 进队
}
void pop() { _con.pop_front();   // 出队
}值得注意的是,queue 不能用 vector 去适配,因为 vector 压根就没有 pop_front 这个接口。
 (我看你是在刁难我胖虎.jpg)
queue 的 front 和 back 我们直接调 front 和 back 去取队列头尾的数据即可:
const T& front() { return _con.front();
}
const T& back() {return _con.back();
}
剩下的 size 和 empty 都不用变。
💬 代码实现:queue
#include <iostream>
#include <deque>
using namespace std;namespace foxny {template<class T, class Container = deque<T>> class queue {public:void push(const T& x) { _con.push_back(x); }void pop() { _con.pop_front(); }const T& front() { return _con.front(); }const T& back() {return _con.back();}size_t size() { return _con.size(); }bool empty() { return _con.empty(); }private:Container _con;};
}
0x01 代码测试
 先测试默认用 deque 去存储:
#include <iostream>
#include <deque>
using namespace std;namespace foxny {void test_queue1() {queue<int> q;q.push(1);q.push(2);q.push(3);q.push(4);while (!q.empty()) {cout << q.front() << " ";q.pop();}cout << endl;}
}
🚩 运行结果:
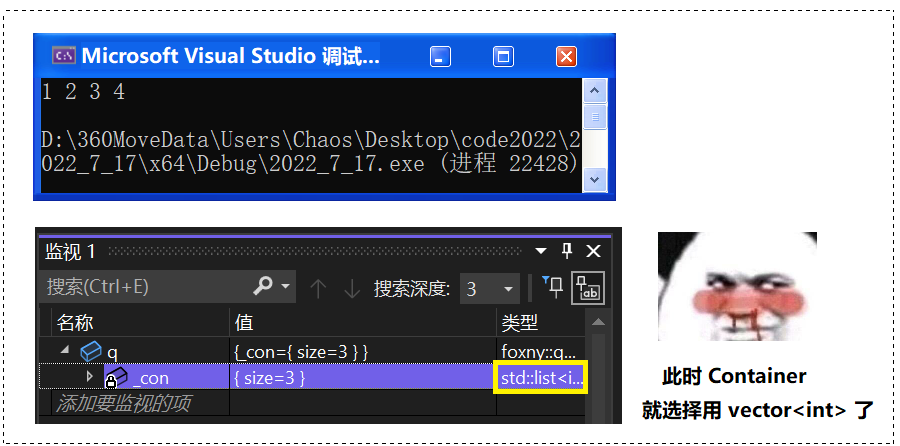
 指定用 list 去存:
#include <iostream>
#include <deque>
#include <list>
using namespace std;namespace foxny {void test_queue2() {queue<int, list<int>> q;q.push(1);q.push(2);q.push(3);q.push(4);while (!q.empty()) {cout << q.front() << " ";q.pop();}cout << endl;}
}
🚩 运行结果:
 我们来试一下指定用 vector 会怎么样:
#include <iostream>
#include <deque>
#include <vector>
using namespace std;namespace foxny {void test_queue3() {queue<int, vector<int>> q;q.push(1);q.push(2);q.push(3);q.push(4);while (!q.empty()) {cout << q.front() << " ";q.pop();}cout << endl;}
}
🚩 运行结果:
error C2039: "pop_front": 不是 "std::vector<int,std::allocator<T>>" 的成员
1> with
1> [
1> T=int
1> ]
1>D:\360MoveData\Users\Chaos\Desktop\code2022\2022_7_17\2022_7_17\test.cpp(62): message : 参见“std::vector<int,std::allocator<T>>”的声明
1> with
1> [
1> T=int
1> ]
1>D:\360MoveData\Users\Chaos\Desktop\code2022\2022_7_17\2022_7_17\test.cpp(14): message : 在编译 类 模板 成员函数“void foxny::queue<int,std::vector<int,std::allocator<T>>>::pop(void)”时……
 正所谓 —— 明知山有虎,别去明知山。明知 vector 无头删,队列就别用 vector!
用其他东西转换搞出来的栈和队列,只要符合要求就可以。实际上也不一定真的是直接转换。
 我们下面还要学一个更复杂的
Ⅲ. 模拟实现 priority_queue
0x00 基本实现思路
 据我所知,在优先级队列中,插入数据和删除数据的时间复杂度为
 。
默认情况下的优先级队列是大堆,我们先不考虑用仿函数去实现兼容大堆小队排列问题,
我们先去实现大堆,先把基本的功能实现好,带着讲解完仿函数后再去进行优化实现。
 优先级队列相较于普通的队列,其区别主要是在 push 和 pop 上,
即需要在插入 / 删除数据的同时,增添调整的功能,并且 STL 的优先级队列是由堆来维护的:
void push(const T& x) {_con.push_back(x);AdjustUp(_con.size() - 1);
}
入队时将数据推入后,从最后一个元素开始进行上调。
出队时采用堆的删除手法,将根元素(即队头)和最后一个元素进行交换,并调用尾删掉队头。
既然用了头尾交换法,我们就不得不对队列重新调整,所以从根位置进行下调,即可完成出队。
void pop() {assert(!_con.empty());swap(_con[0], _con[_con.size() - 1]);_con.pop_back();AdjustDown(0);
}
既然需要上调和下调操作,我们不可避免地需要实现上调和下调的算法。
我们这里暂时写死,设计成大堆的 AdjustUp 和 AdjustDown:
/* 向上调整算法 */
void AdjustUp(size_t child) {size_t father = (child - 1) / 2;while (child > 0) {if (_con[father] < _con[child]) {swap(_con[father], _con[child]);child = father;father = (child - 1) / 2;}else {break;}}
}
/* 向下调整算法 */
void AdjustDown(size_t father) {size_t child = father * 2 + 1; // 默认认为左孩子大while (child < _con.size()) {// 判断右孩子是否存在,并且是否比左孩子大?if (child + 1 < _con.size() && _con[child] < _con[child + 1]) {child += 1;}if (_con[father] < _con[child]) {swap(_con[father], _con[child]);father = child;child = father * 2 + 1;}else {break;}}
}
这里我就不重复讲解了,如果你对这一块知识比较生疏,建议复习一下数据结构的堆。
🔗 链接:【数据结构】堆的概念 | 从零开始实现数组堆
向上调整算法和向下调整算法实现完后,我们把剩下的可以直接用 _con 转换的接口实现一下:
const T& top() {return _con[0];
}size_t size() {return _con.size();
}bool empty() {return _con.empty();
}![]() 很简单,不过值得注意的是,返回堆顶数据的 top 接口,我们用了 const 引用返回。
很简单,不过值得注意的是,返回堆顶数据的 top 接口,我们用了 const 引用返回。

❓ 思考:为什么这里要用引用?为什么还要加个 const?
① 考虑到如果这里 T 是 string,甚至是更大的对象,传值返回就有一次拷贝构造,代价就大了。
② 如果能让你随随便便修改我堆顶的数据,那岂不是 显得我很随便? 很危险?
0x01 写死了的大堆优先级队列
💬 代码:写死了的大堆优先级队列 demo
#include <iostream>
#include <vector>
#include <assert.h>
using namespace std;namespace foxny {template<class T, class Container = vector<T>>class priority_queue {public:/* 向上调整算法 */void AdjustUp(size_t child) {size_t father = (child - 1) / 2;while (child > 0) {if (_con[father] < _con[child]) {swap(_con[father], _con[child]);child = father;father = (child - 1) / 2;}else {break;}}}/* 向下调整算法 */void AdjustDown(size_t father) {size_t child = father * 2 + 1; // 默认认为左孩子大while (child < _con.size()) {// 判断右孩子是否存在,并且是否比左孩子大?if (child + 1 < _con.size() && _con[child] < _con[child + 1]) {child += 1;}if (_con[father] < _con[child]) {swap(_con[father], _con[child]);father = child;child = father * 2 + 1;}else {break;}}}/* 入数据 */void push(const T& x) {_con.push_back(x);AdjustUp(_con.size() - 1);}/* 出数据 */void pop() {assert(!_con.empty());swap(_con[0], _con[_con.size() - 1]);_con.pop_back();AdjustDown(0);}/* 返回堆顶数据 */const T& top() {return _con[0];}/* 返回大小 */size_t size() {return _con.size();}/* 判断是否为空 */bool empty() {return _con.empty();}private:Container _con;};
}
💬 测试:目前我们是写死了的大堆,还没有加入仿函数,我们先跑一下看看
void test_priority_queue1() {priority_queue<int> pQ;pQ.push(2);pQ.push(5);pQ.push(1);pQ.push(6);pQ.push(8);while (!pQ.empty()) {cout << pQ.top() << " ";pQ.pop();}cout << endl;
}
🚩 运行结果:
![]() 我们写死的最大问题是 —— 如果想按升序排列,就没办法排了。
我们写死的最大问题是 —— 如果想按升序排列,就没办法排了。
我们这里写的用来排降序的大堆,如果想排升序我们需要写小堆,
C++ 在这里有一种叫仿函数的东西,可以控制这些东西,我们下面先来介绍一下仿函数。
0x02 仿函数(functor)
📚 概念:使一个类的使用看上去像一个函数。可以像函数一样使用的对象,称为函数对象。
其实现就是在类中重载 operator(),使得该类具备类似函数的行为,就是一个仿函数类了。
C语言优先级,() 圆括号使用形式为 表达式 或 "作为函数形参列表的括号"
我们这里重载的其实就是:函数名(形参表)
💬 代码:我们来写一个最简单的仿函数
namespace foxny {struct less {// 仿函数(函数对象)———— 对象可以像调用函数一样去使用bool operator()(int x, int y) {return x < y;}};void test_functor() {less lessCmp;   // 定义一个对象(这里我用小驼峰,能看上去更像函数)cout << lessCmp(10, 20) << endl;   // 是对象,但是却能像函数一样去使用}
}
🚩 运行结果:1
这里定义对象的时候我用的我是小驼峰,这样看上去更像是一个函数了,以假乱真。
我们定义的 lessCmp 是一个对象,但是我们却可以像使用函数一样给它传递参数:
lessCmp(10, 20);
ohhhhhhhhhhhhhhhh!!!
 我们还可以使其能够支持泛型,我们加一个 template 模板:
// 支持泛型
template<class T> struct less {bool operator()(const T& x, const T& y) const {return x < y;}
};void test_functor() {less<int> lessCmp;cout << lessCmp(10, 20) << endl;
}
less 是用来比较谁小的,对应的,我们再实现一个比较谁大的 greater:
// less: 小于的比较
template<class T> struct less {bool operator()(const T& x, const T& y) const {return x < y;}
};
// greater: 大于的比较
template<class T> struct greater {bool operator()(const T& x, const T& y) const {return x > y;}
};void test_functor() {less<int> lessCmp;cout << lessCmp(10, 20) << endl;greater<int> GreaterCmp;cout << GreaterCmp(10, 20) << endl;
}
🚩 运行结果:1 0
一个对象能像函数一样用,看上去很神奇,实际上调用的只是我们重载的 operator() 而已。
这些操作都是归功于运算符重载功能,这就是仿函数!
❓ 思考:我们在C阶段不是学过函数指针么,用函数指针不香吗?
函数指针确实可以做到这些功能。但是在这里函数指针跟仿函数比,一点都不香。
 反而很臭!啊,啊,啊♂ 啊♂ 啊♂ 啊啊啊!!!
在 C++ 里其实是非常鄙夷使用函数指针的,函数的指针在一些地方用起来非常复杂。
static void( * set_malloc_handler(void (*f)()))() {void (* old)() = __malloc_alloc_oom_handler;__malloc_alloc_oom_handler = f;return(old);
}
这个函数的参数是什么?函数的返回值是什么?
这就很阴间了,这就是函数指针的杰作…… 所以 C++ 搞出了仿函数,简化了好多点。
📚 仿函数的优势:很多场景,替换了函数指针。
0x03 加了仿函数后的优先级队列
 我们现在用仿函数去比较那些数据,这样就不会写死了。
💬 代码:priority_queue
#include <iostream>
#include <vector>
#include <functional>  // 这里放的是一些仿函数
#include <assert.h>
using namespace std;namespace foxny {// less: 小于的比较template<class T> struct less {bool operator()(const T& x, const T& y) const {return x < y;}};// greater: 大于的比较template<class T> struct greater {bool operator()(const T& x, const T& y) const {return x > y;}};template<class T, class Container = vector<T>, class Compare = less<T>>class priority_queue {public:/* 向上调整算法 */void AdjustUp(size_t child) {Compare cmpFunc;size_t father = (child - 1) / 2;while (child > 0) {// if (_con[father] < _con[child]) {if (cmpFunc(_con[father], _con[child])) {swap(_con[father], _con[child]);child = father;father = (child - 1) / 2;}else {break;}}}/* 向下调整算法 */void AdjustDown(size_t father) {Compare cmpFunc;size_t child = father * 2 + 1; // 默认认为左孩子大while (child < _con.size()) {// if (child + 1 < _con.size() && _con[child] < _con[child + 1]) {if (child + 1 < _con.size() && cmpFunc(_con[child], _con[child + 1])) {child += 1;}// if (_con[father] < _con[child]) {if (cmpFunc(_con[father], _con[child])) {swap(_con[father], _con[child]);father = child;child = father * 2 + 1;}else {break;}}}/* 入数据 */void push(const T& x) {_con.push_back(x);AdjustUp(_con.size() - 1);}/* 出数据 */void pop() {assert(!_con.empty());swap(_con[0], _con[_con.size() - 1]);_con.pop_back();AdjustDown(0);}/* 返回堆顶数据 */const T& top() {return _con[0];}/* 返回大小 */size_t size() {return _con.size();}/* 判断是否为空 */bool empty() {return _con.empty();}private:Container _con;};
}
💭 测试:我们来测试一下效果如何:
// 大于比较,搞小堆
void test_priority_queue2() {priority_queue<int, vector<int>, greater<int>> pQ;pQ.push(2);pQ.push(5);pQ.push(1);pQ.push(6);pQ.push(8);while (!pQ.empty()) {cout << pQ.top() << " ";pQ.pop();}cout << endl;
}
🚩 运行结果:1 2 4 6 8
// 小于比较,搞大堆
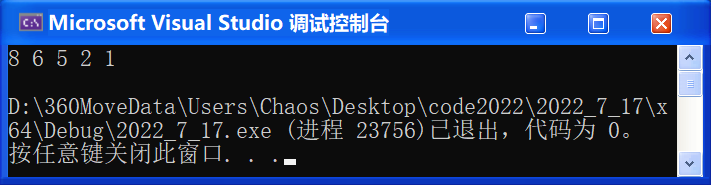
void test_priority_queue1() {priority_queue<int> pQ;pQ.push(2);pQ.push(5);pQ.push(1);pQ.push(6);pQ.push(8);while (!pQ.empty()) {cout << pQ.top() << " ";pQ.pop();}cout << endl;
}🚩 运行结果:8 6 5 2 1
 这里的仿函数在编译器视角是这样的:
if (cmpFunc(_con[father], _con[child]))👇
if (cmpFunc.operator()(_con[father], _con[child]))👇// 以 less 为例template<class T> struct less {bool operator()(const T& x, const T& y) const {return x < y;}};最后返回 _con[father] < _con[child] ,true 还是 false
0x04 迭代器的实现
// 创造空的优先级队列
priority_queue(): _con()
{}// 迭代器
template<class InputIterator>
priority_queue (InputIterator first, InputIterator last) : _con(first, last)
{while (first != last) {_con.push_back(*first++);}for (int father = (_con.size()-1-1) / 2; father >= 0; father++) {AdjustDown(father);}
}
我们就可以拿这个来解决一些问题,比如:
void test_priority_queue3() {// TOP Kint arr[] = {1,4,2,7,8,9};priority_queue<int> pQ(arr, arr + 6); // 传一个迭代器区间}Ⅳ. 完整代码
0x00 stack
#include <iostream>
#include <deque>   // 做Container
#include <vector>  // 测试用
#include <list>    // 测试用
using namespace std;namespace foxny {template<class T, class Container = deque<T>> class stack {public:void push(const T& x) {_con.push_back(x);    // 对于栈而言,入栈就是尾插}void pop() {_con.pop_back();     // 对于栈而言,出栈就是尾删}const T& top() {return _con.back();  // 返回尾上数据}size_t size() {return _con.size();  // 返回大小}bool empty() {return _con.empty(); // 返回是否为空}private:Container _con;};void test_stack1() {stack<int> st;st.push(1);st.push(2);st.push(3);st.push(4);while (!st.empty()) {cout << st.top() << " ";st.pop();   }cout << endl;}void test_stack2() {stack<int, vector<int>> st;  // 我想默认用 vectorst.push(1);st.push(2);st.push(3);st.push(4);while (!st.empty()) {cout << st.top() << " ";st.pop();   }cout << endl;}void test_stack3() {stack<int, list<int>> st;  // 我想默认用 listst.push(1);st.push(2);st.push(3);st.push(4);while (!st.empty()) {cout << st.top() << " ";st.pop();   }cout << endl;}
}int main(void)
{foxny::test_stack1();foxny::test_stack2();foxny::test_stack3();return 0;
}
0x01 queue
#include <iostream>
#include <deque>  // 做Container
#include <list>   // 测试用
using namespace std;namespace foxny {template<class T, class Container = deque<T>> class queue {public:void push(const T& x) { _con.push_back(x); }void pop() { _con.pop_front(); }const T& front() { return _con.front(); }const T& back() {return _con.back();}size_t size() { return _con.size(); }bool empty() { return _con.empty(); }private:Container _con;};void test_queue1() {queue<int> q;q.push(1);q.push(2);q.push(3);q.push(4);while (!q.empty()) {cout << q.front() << " ";q.pop();}cout << endl;}void test_queue2() {queue<int, list<int>> q;q.push(1);q.push(2);q.push(3);q.push(4);while (!q.empty()) {cout << q.front() << " ";q.pop();}cout << endl;}
}int main(void)
{foxny::test_queue1();foxny::test_queue2();return 0;
}
0x02 priority_queue
#include <iostream>
#include <vector>
#include <functional>  // 这里放的是一些仿函数
#include <assert.h>
using namespace std;namespace foxny {// less: 小于的比较template<class T> struct less {bool operator()(const T& x, const T& y) const {return x < y;}};// greater: 大于的比较template<class T> struct greater {bool operator()(const T& x, const T& y) const {return x > y;}};template<class T, class Container = vector<T>, class Compare = less<T>>class priority_queue {Compare _cmpFunc;public:// 创造空的优先级队列priority_queue(): _con(){}// 迭代器template<class InputIterator>priority_queue (InputIterator first, InputIterator last) : _con(first, last){int count = _con.size();int root = ((count - 2) >> 1);for (; root >= 0; root--) {AdjustDown(root);}}/* 向上调整算法 */void AdjustUp(size_t child) {Compare cmpFunc;size_t father = (child - 1) / 2;while (child > 0) {// if (_con[father] < _con[child]) {if (cmpFunc(_con[father], _con[child])) {swap(_con[father], _con[child]);child = father;father = (child - 1) / 2;}else {break;}}}/* 向下调整算法 */void AdjustDown(size_t father) {Compare cmpFunc;size_t child = father * 2 + 1; // 默认认为左孩子大while (child < _con.size()) {// if (child + 1 < _con.size() && _con[child] < _con[child + 1]) {if (child + 1 < _con.size() && cmpFunc(_con[child], _con[child + 1])) {child += 1;}// if (_con[father] < _con[child]) {if (cmpFunc(_con[father], _con[child])) {swap(_con[father], _con[child]);father = child;child = father * 2 + 1;}else {break;}}}/* 入数据 */void push(const T& x) {_con.push_back(x);AdjustUp(_con.size() - 1);}/* 出数据 */void pop() {assert(!_con.empty());swap(_con[0], _con[_con.size() - 1]);_con.pop_back();AdjustDown(0);}/* 返回堆顶数据 */const T& top() {return _con[0];}/* 返回大小 */size_t size() {return _con.size();}/* 判断是否为空 */bool empty() {return _con.empty();}private:Container _con;};// 小于比较,搞大堆void test_priority_queue1() {priority_queue<int> pQ;pQ.push(2);pQ.push(5);pQ.push(1);pQ.push(6);pQ.push(8);while (!pQ.empty()) {cout << pQ.top() << " ";pQ.pop();}cout << endl;}// 大于比较,搞小堆void test_priority_queue2() {priority_queue<int, vector<int>, greater<int>> pQ;pQ.push(2);pQ.push(5);pQ.push(1);pQ.push(6);pQ.push(8);while (!pQ.empty()) {cout << pQ.top() << " ";pQ.pop();}cout << endl;}
}int main(void)
{foxny::test_priority_queue1();foxny::test_priority_queue2();return 0;
}

📌 [ 笔者 ]   王亦优
📃 [ 更新 ]   2022.7.26 | 2023.10.20(重制)
❌ [ 勘误 ]   /* 暂无 */
📜 [ 声明 ] 由于作者水平有限,本文有错误和不准确之处在所难免,本人也很想知道这些错误,恳望读者批评指正!| 📜 参考资料 C++reference[EB/OL]. []. http://www.cplusplus.com/reference/. Microsoft. MSDN(Microsoft Developer Network)[EB/OL]. []. . 百度百科[EB/OL]. []. https://baike.baidu.com/. 比特科技. C++[EB/OL]. 2021[2021.8.31]. |
这篇关于⚡【C++要笑着学】(24) 模拟实现栈和队列类:Functor 仿函数 | 模拟实现 stack | 模拟实现 queue | 模拟实现 priority_queue的文章就介绍到这儿,希望我们推荐的文章对编程师们有所帮助!


