本文主要是介绍LayoutInflater.inflate全面解读,希望对大家解决编程问题提供一定的参考价值,需要的开发者们随着小编来一起学习吧!
方法解析
LayoutInflater.inflate() 是 Android 系统中用于将 XML 布局文件转换成相应的 View 的方法。在 Android 开发中,我们经常使用此方法来动态创建和填充布局。
public View inflate(@LayoutRes int resource, @Nullable ViewGroup root, boolean attachToRoot)
或者
public View inflate(@LayoutRes int resource, @Nullable ViewGroup root)
参数含义:
-
int resource: 这是要加载的 XML 布局资源 ID;
-
ViewGroup root: 可选的 ViewGroup 参数,它作为新创建View的父容器。如果提供了父容器,inflate 过程会考虑父容器的 LayoutParams,并可能根据需要调整新创建视图的属性;
-
boolean attachToRoot: 是否应将新创建的View立即附加到提供的父容器中。如果为 true,则新生成的视图层次结构会立即添加到父容器内;反之则不会立即附加,但可以手动添加。
inflate两个参数的方法内部调用了三个参数的方法,有如容器就把生成的View添加到父容器中,反之就不添加。

以下示例演示以三个参数来演示
示例
创建一个简单的Activity来演示,activity_main是一个ConstraintLayout布局,宽高都是match_parent,背景颜色是绿色
item_test是要inflate的布局,宽高分别是300dp和100dp,颜色是蓝色,在约束布局中居中显示
class MainActivity : AppCompatActivity() {override fun onCreate(savedInstanceState: Bundle?) {super.onCreate(savedInstanceState)setContentView(R.layout.activity_main)val clContainer = findViewById<ConstraintLayout>(R.id.cl_container)}
}
<?xml version="1.0" encoding="utf-8"?>
<androidx.constraintlayout.widget.ConstraintLayout xmlns:android="http://schemas.android.com/apk/res/android"xmlns:app="http://schemas.android.com/apk/res-auto"xmlns:tools="http://schemas.android.com/tools"android:layout_width="match_parent"android:layout_height="match_parent"android:id="@+id/cl_container"android:background="@color/design_default_color_secondary_variant"tools:context=".MainActivity">
</androidx.constraintlayout.widget.ConstraintLayout>
<?xml version="1.0" encoding="utf-8"?>
<LinearLayout xmlns:android="http://schemas.android.com/apk/res/android"android:layout_width="300dp"xmlns:app="http://schemas.android.com/apk/res-auto"android:background="@color/design_default_color_primary"app:layout_constraintLeft_toLeftOf="parent"app:layout_constraintRight_toRightOf="parent"app:layout_constraintTop_toTopOf="parent"app:layout_constraintBottom_toBottomOf="parent"android:layout_height="100dp"></LinearLayout>
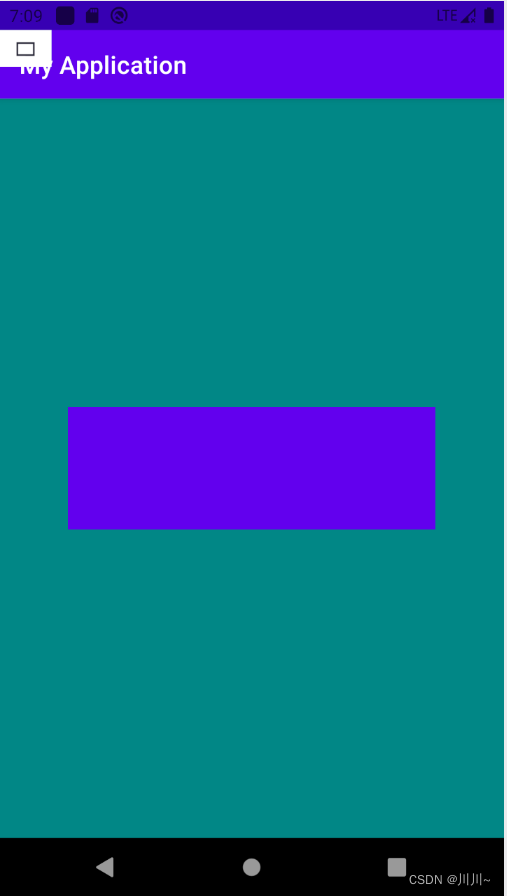
root不为null,attachToRoot为true
class MainActivity : AppCompatActivity() {override fun onCreate(savedInstanceState: Bundle?) {super.onCreate(savedInstanceState)setContentView(R.layout.activity_main)val clContainer = findViewById<ConstraintLayout>(R.id.cl_container)val view = LayoutInflater.from(this).inflate(R.layout.item_test, clContainer, true)}
}
效果:view在父容器中居中显示
root不为null,attachToRoot为false
class MainActivity : AppCompatActivity() {override fun onCreate(savedInstanceState: Bundle?) {super.onCreate(savedInstanceState)setContentView(R.layout.activity_main)val clContainer = findViewById<ConstraintLayout>(R.id.cl_container)val view = LayoutInflater.from(this).inflate(R.layout.item_test, clContainer, false)}
}
效果:view未添加到父容器clContainer中

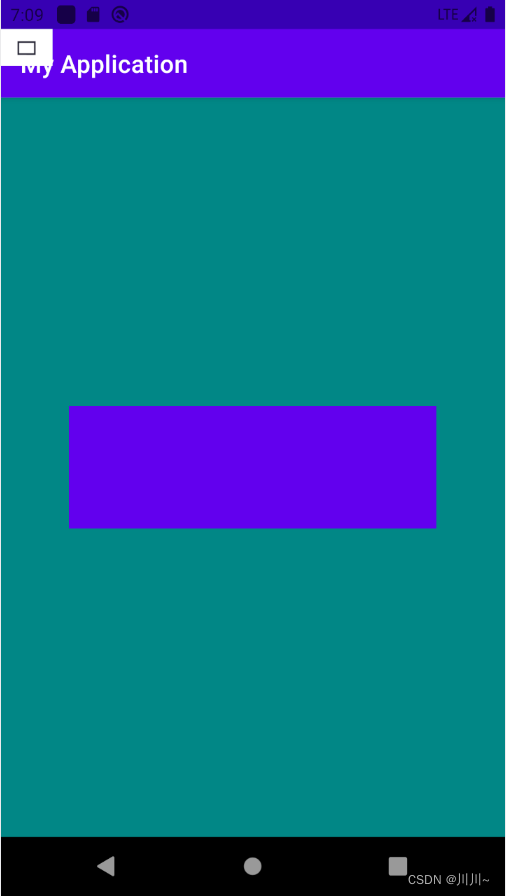
手动添加View
class MainActivity : AppCompatActivity() {override fun onCreate(savedInstanceState: Bundle?) {super.onCreate(savedInstanceState)setContentView(R.layout.activity_main)val clContainer = findViewById<ConstraintLayout>(R.id.cl_container)val view = LayoutInflater.from(this).inflate(R.layout.item_test, clContainer, false)clContainer.addView(view)}
}
效果:view被手动添加到父容器clContainer,居中显示
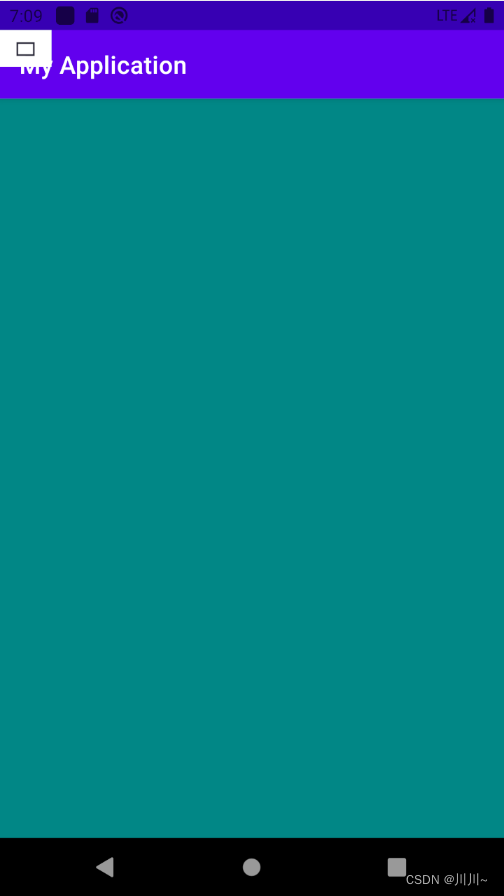
root为null
root为null,attachToRoot参数已经没有意义了,所以不用考虑
class MainActivity : AppCompatActivity() {override fun onCreate(savedInstanceState: Bundle?) {super.onCreate(savedInstanceState)setContentView(R.layout.activity_main)val clContainer = findViewById<ConstraintLayout>(R.id.cl_container)val view = LayoutInflater.from(this).inflate(R.layout.item_test, null, false)clContainer.addView(view)}
}
效果:为什么不显示item_test的蓝色方块呢?因为root为null,inflate 过程会不能参照父容器的 LayoutParams来进行了,也就是,所以无法生成相应的布局参数,宽高属性会失效。
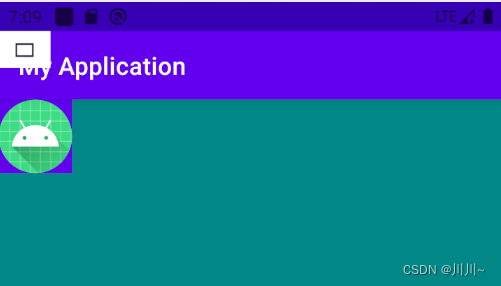
如果我们在item_test布局里添加一个Image,会发现布局会包裹ImageView,因为ImageView会处于容器LinearLayout中ImageView宽高有效
<?xml version="1.0" encoding="utf-8"?>
<LinearLayout xmlns:android="http://schemas.android.com/apk/res/android"android:layout_width="300dp"xmlns:app="http://schemas.android.com/apk/res-auto"android:background="@color/design_default_color_primary"app:layout_constraintLeft_toLeftOf="parent"app:layout_constraintRight_toRightOf="parent"app:layout_constraintTop_toTopOf="parent"app:layout_constraintBottom_toBottomOf="parent"android:layout_height="100dp"><ImageViewandroid:src="@mipmap/ic_launcher"android:layout_width="60dp"android:layout_height="60dp"/>
</LinearLayout>
关于The specified child already has a parent异常
众所周知,Android中每个View只能有一个父View,如果需要再一个新的父View中使用该View,需要先把该View在当前的父View中删除才行。
如果inflate已经帮我们将View添加到父容器了,我们又手动addView了,该View机会有两个父View。所以会出现 java.lang.IllegalStateException: The specified child already has a parent. You must call removeView() on the child’s parent first。
class MainActivity : AppCompatActivity() {override fun onCreate(savedInstanceState: Bundle?) {super.onCreate(savedInstanceState)setContentView(R.layout.activity_main)val clContainer = findViewById<ConstraintLayout>(R.id.cl_container)val view = LayoutInflater.from(this).inflate(R.layout.item_test, clContainer, true)clContainer.addView(view)}
}
源码分析
我们从常见的ListView场景来分析
public class ListAdapter extends ArrayAdapter<String> {private int mrescourceId;public ListAdapter(@NonNull Context context, int resource, @NonNull List<String> objects) {super(context, resource, objects);this.mrescourceId = resource;}@NonNull@Overridepublic View getView(int position, @Nullable View convertView, @NonNull ViewGroup parent) {String item = getItem(position);View view = LayoutInflater.from(getContext()).inflate(mrescourceId, parent, false);TextView textView = view.findViewById(R.id.tv_item_name);textView.setText(item);return view;}
}
布局文件中假设我想让item的宽度是100dp,那我设置根布局ConstraintLayout宽度是100dp
<?xml version="1.0" encoding="utf-8"?>
<androidx.constraintlayout.widget.ConstraintLayout xmlns:android="http://schemas.android.com/apk/res/android"android:layout_width="100dp"android:layout_height="match_parent"xmlns:app="http://schemas.android.com/apk/res-auto"><TextViewandroid:background="@color/colorAccent"app:layout_constraintTop_toTopOf="parent"app:layout_constraintLeft_toLeftOf="parent"android:id="@+id/tv_item_name"android:layout_width="match_parent"android:layout_height="60dp"/>
</androidx.constraintlayout.widget.ConstraintLayout>
布局效果
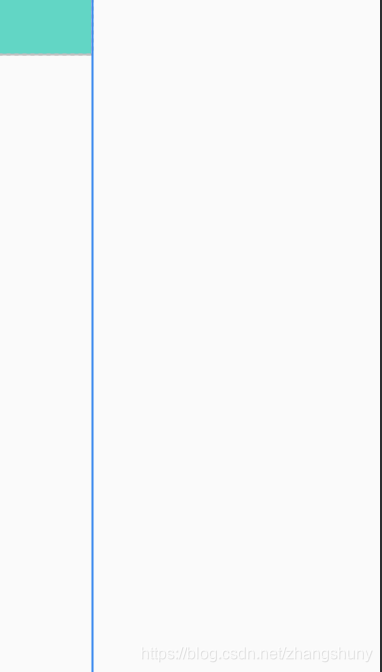
运行效果
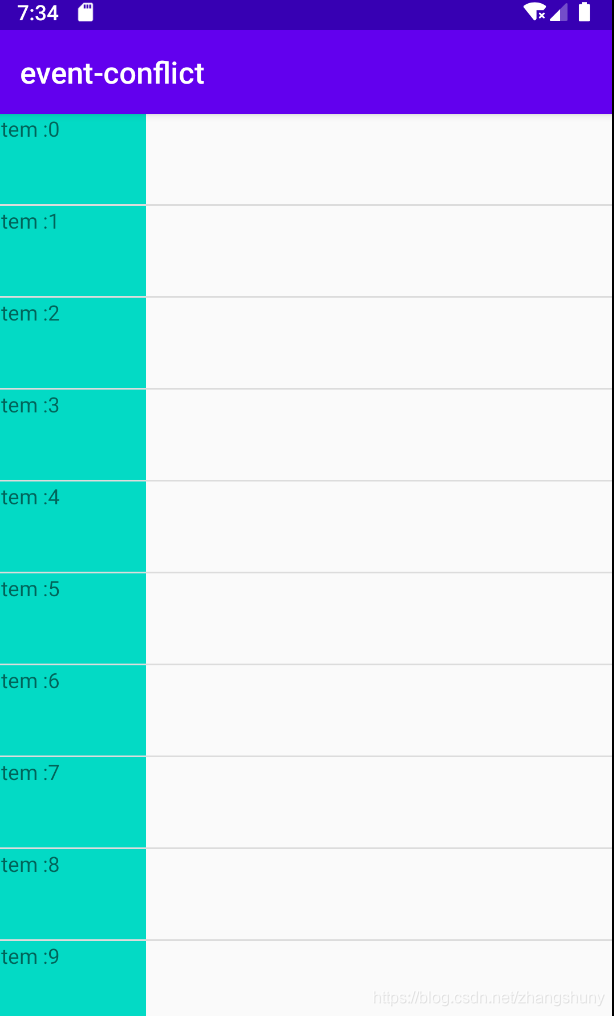
运行效果和我们设置的一样。那如果我将inflate的第二个参数改为null会有什么效果
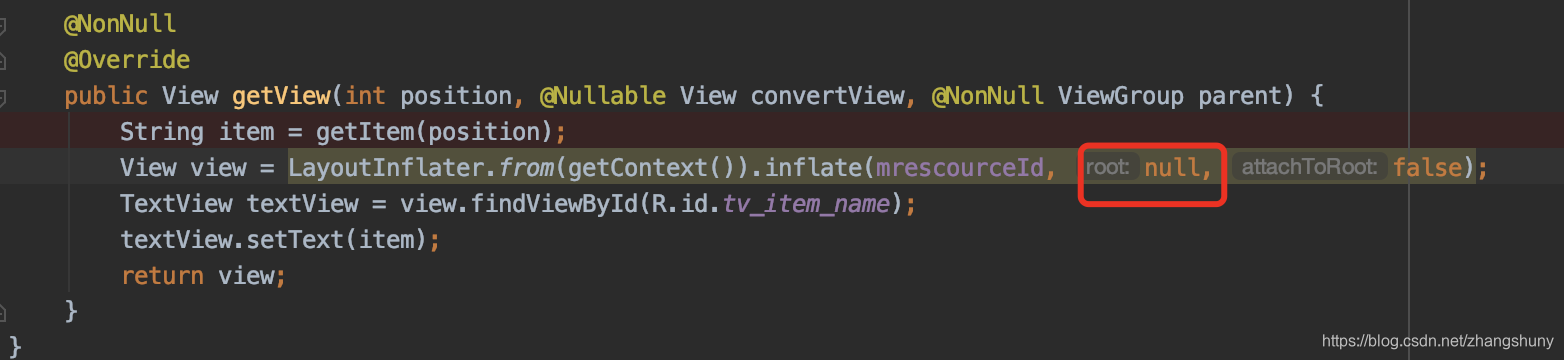
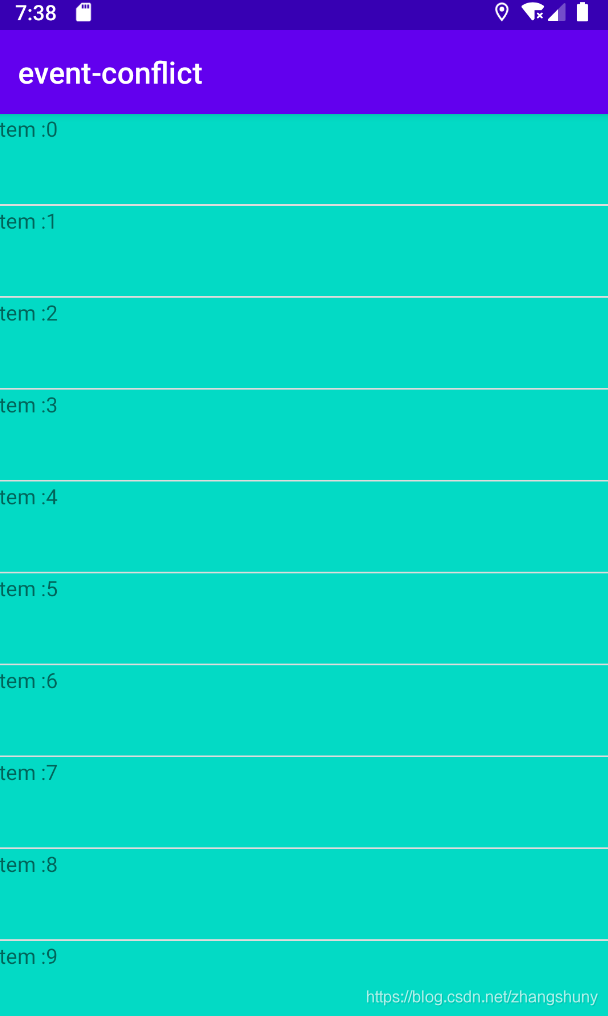
item的高度包裹内容,没问题,宽度竟然占满全屏了?为什么宽度不是包裹内容呢?
来看源码:
public View inflate(XmlPullParser parser, @Nullable ViewGroup root, boolean attachToRoot) {…………synchronized (mConstructorArgs) {…………try {final String name = parser.getName();…………if (TAG_MERGE.equals(name)) {…………} else {// Temp is the root view that was found in the xmlfinal View temp = createViewFromTag(root, name, inflaterContext, attrs);ViewGroup.LayoutParams params = null;if (root != null) {if (DEBUG) {System.out.println("Creating params from root: " +root);}// 当root!=null且attachToRoot=false的时候,//获取了布局文件的布局参数,然后设置给了创建好的Viewparams = root.generateLayoutParams(attrs);if (!attachToRoot) {// Set the layout params for temp if we are not// attaching. (If we are, we use addView, below)temp.setLayoutParams(params);}}// Inflate all children under temp against its context.rInflateChildren(parser, temp, attrs, true);// We are supposed to attach all the views we found (int temp)// to root. Do that now.if (root != null && attachToRoot) {root.addView(temp, params);}// Decide whether to return the root that was passed in or the// top view found in xml.if (root == null || !attachToRoot) {result = temp;}}} catch (XmlPullParserException e) {…………} catch (Exception e) {…………} finally {…………}return result;}}
当我们调用inflate方法后,将会把布局文件传入XmlPullParser,然后调用上面的方法,root和attachToRoot分别是传入的null和false。
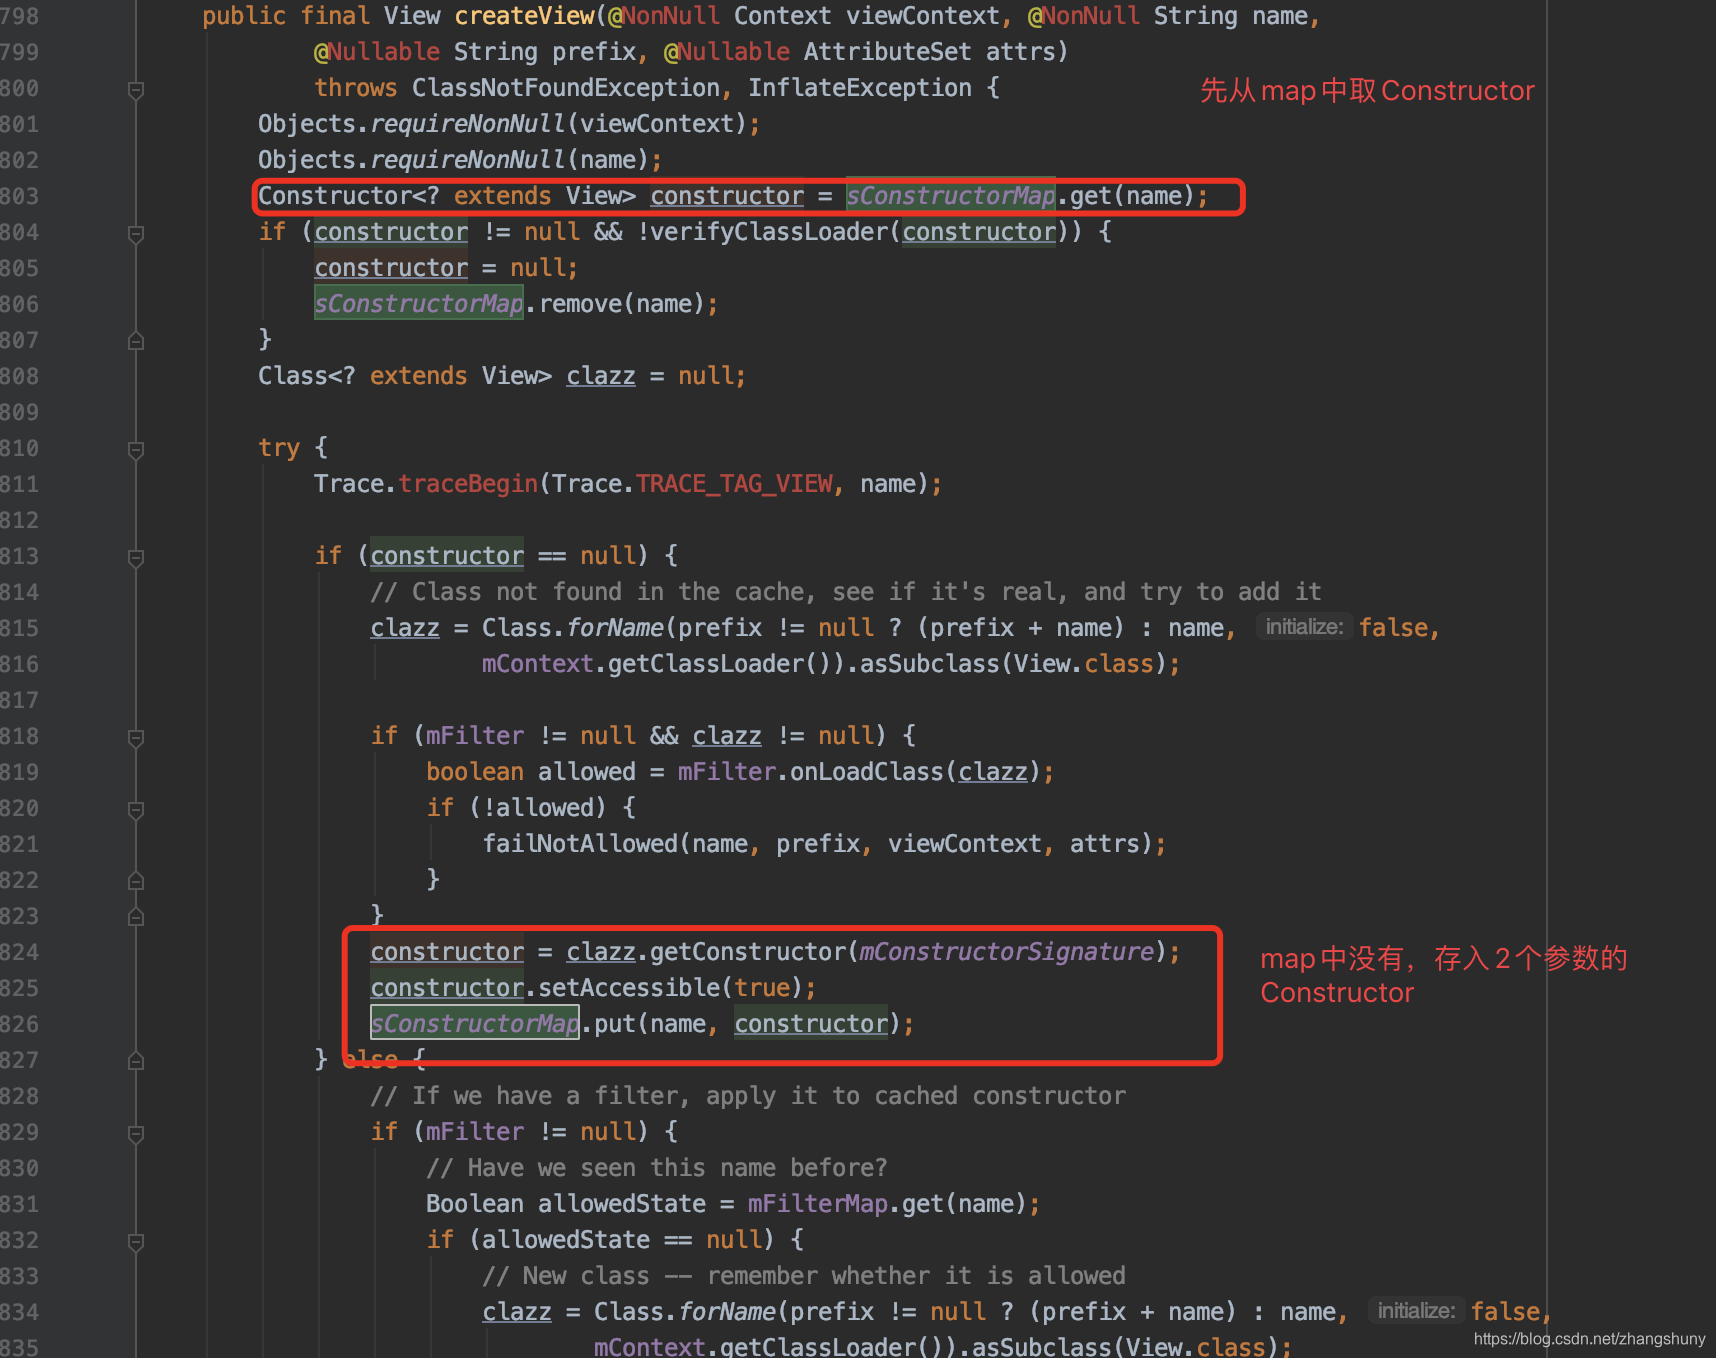
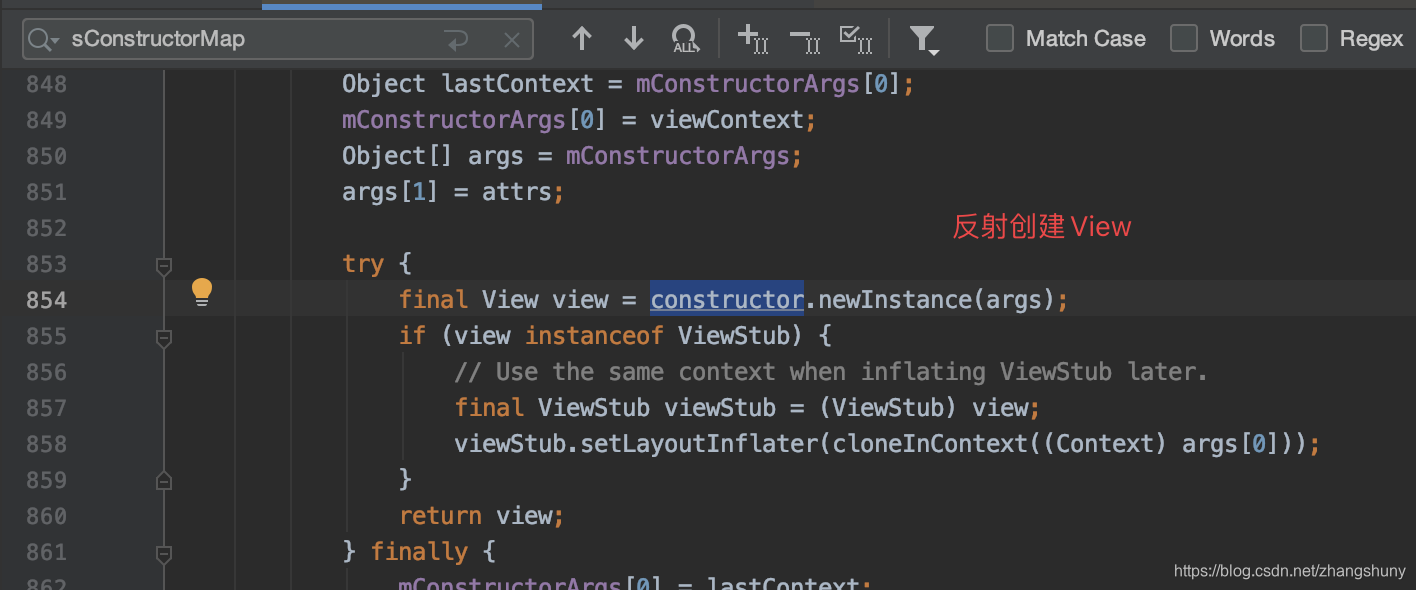
createViewFromTag
首先注意上面方法中的createViewFromTag,它的作用是反射调用根布局View的2个参数的构造方法,来创建View。

root.generateLayoutParams(attrs)
在inflate方法源码中我们看到,当root!=null的时候,获取了布局文件的布局参数,然后设置给了创建好的View
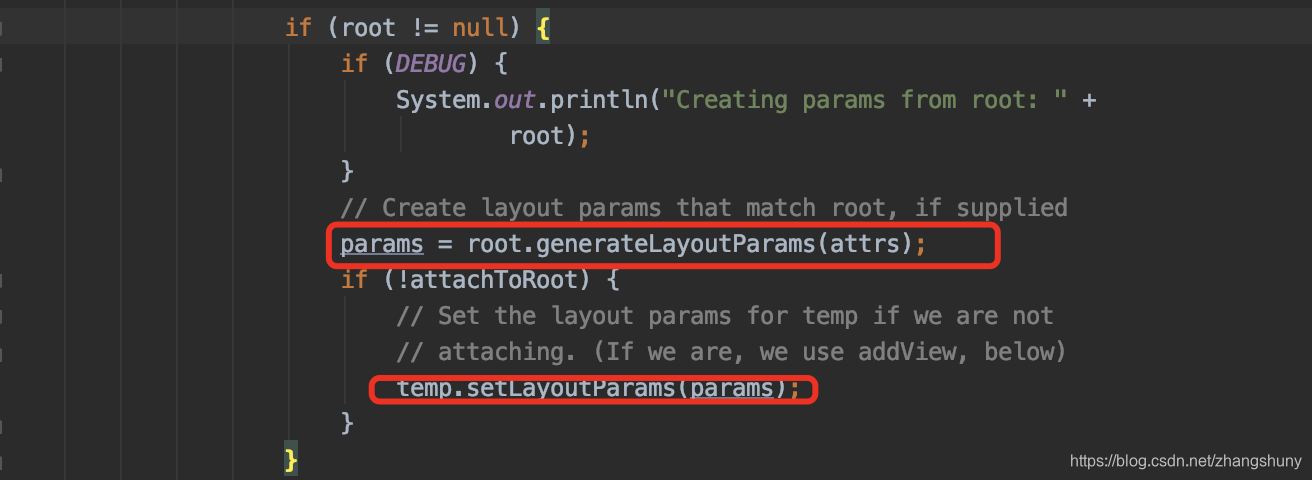
看到这里,基本可以明白为什么第一次root传parent且attachToRoot=false的时候,设置的100dp是有效的了,因为创建完ConstraintLayout之后立即给其设置了布局参数LayoutParams
那为什么root=null且attachToRoot=false的时候,列表的item是充满屏幕的呢?
由于View是在Adapter中创建的,肯定不是创建时造成的,因为上面View的创建过程已经分析了。
那么首先想到的是哪里用到这个View,adapter肯定是在ListView或者RecyclerView中使用,由于我的demo中使用的是ArrayAdapter搭配ListView,那看下ListView的代码
查看ListView中哪里用到getView方法了:
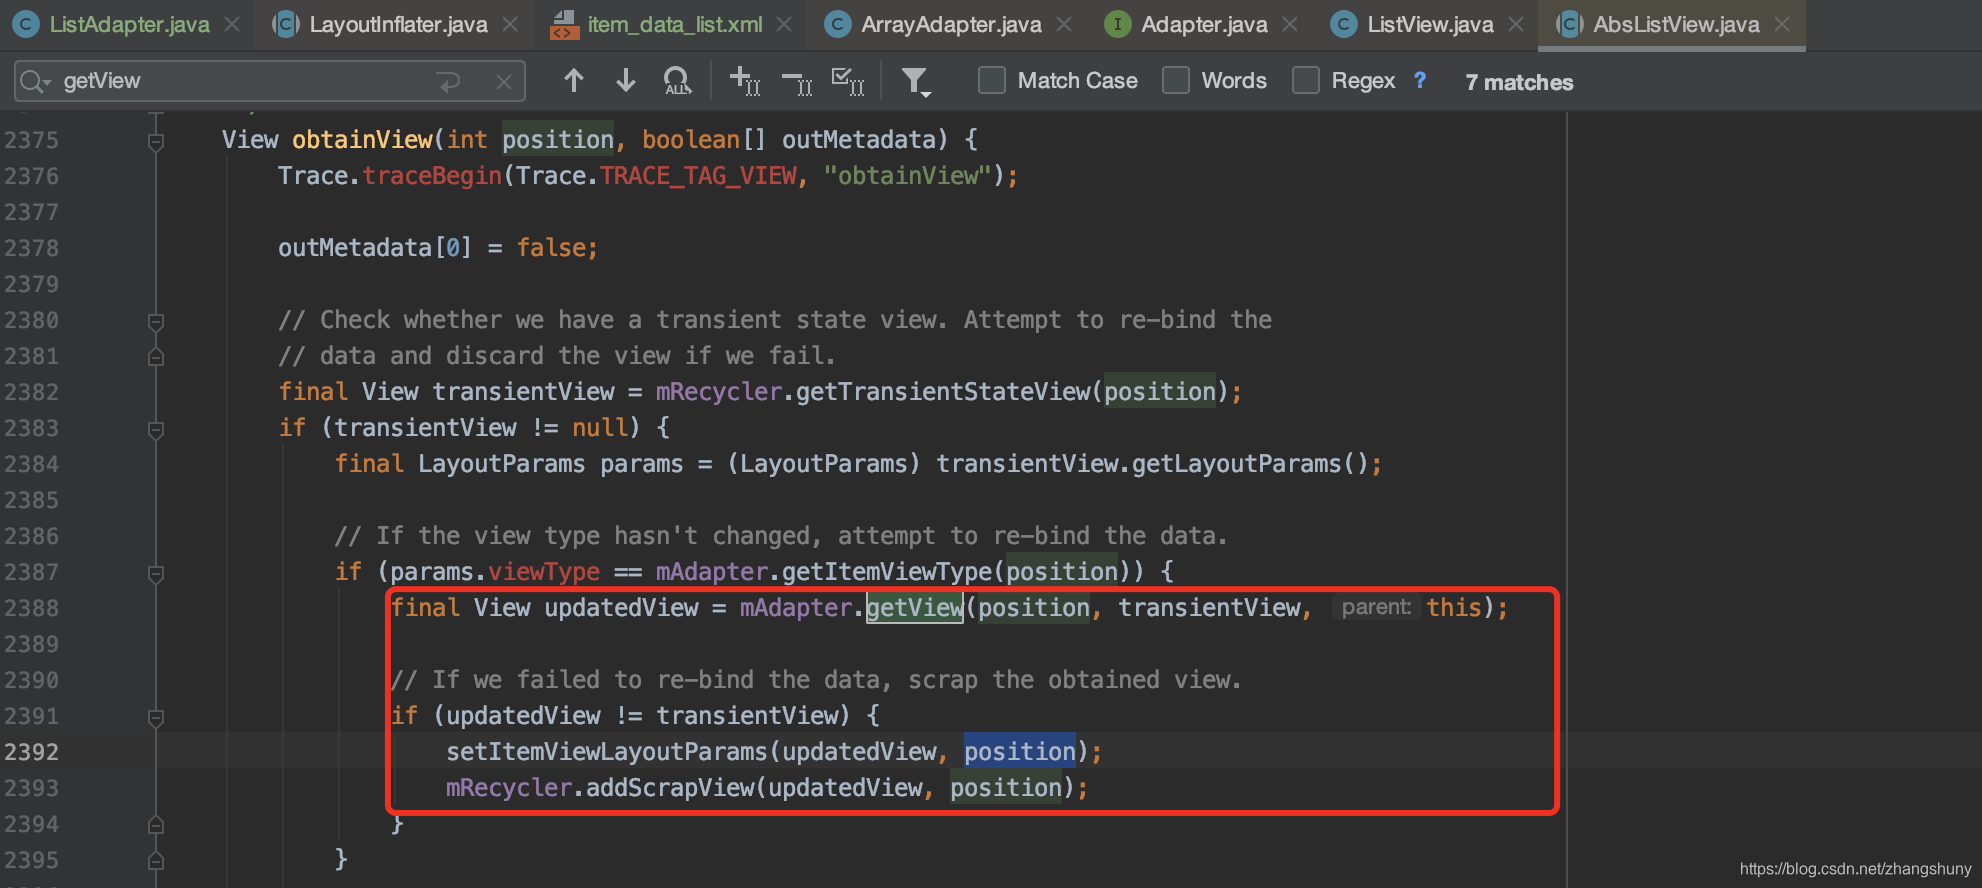
我们查看setItemViewLayoutParams方法

上面方法中,由于adapter在创建view的过程中root = null,所创建的View没有设置布局参数所以走generateDefaultLayoutParams方法
查看generateDefaultLayoutParams方法

创建了一个宽是ViewGroup.LayoutParams.MATCH_PARENT
高是ViewGroup.LayoutParams.WRAP_CONTENT的布局参数。
然后在setItemViewLayoutParams方法中通过child.setLayoutParams(lp);设置给了item的根布局,最终造成了item的宽度不是100dp而是占满全屏。
而且item的高度其实也是包裹内容的,只是我设置了TextView的高度是60dp。
这篇关于LayoutInflater.inflate全面解读的文章就介绍到这儿,希望我们推荐的文章对编程师们有所帮助!


