本文主要是介绍Sadtalker代码详解,希望对大家解决编程问题提供一定的参考价值,需要的开发者们随着小编来一起学习吧!
目录
(一)裁剪以及3DMM(CropAndExtract())
def crop(self, img_np_list, still=False, xsize=512)
(a) get_landmark(self, img_np)
(b) align_face(self, img, lm, output_size=1024)
3DMM
(二)读取逐帧计算的参考系数
API: reference_video
get_data()
(三)计算每一帧参数(Audio2Coeff->generate())
表情、口型以及眨眼Audio2Exp() 返回bs×T×64
头部姿态Audio2Pose() 返回bs×T×6(9)
(四)读取生成器的所需参数(get_facerender_data)
API:full全身 / Still Model无头部姿态
多帧参数维度拼接
提供相机参数
(五)渲染(animate_from_coeff->generate())
make_animation() (以256×256图片为例)
处理首帧(source)
逐帧处理生成帧(target)
OcclusionAwareSPADEGenerator()
细节测试结果
(一)裁剪以及3DMM(CropAndExtract())
该部分代码块位于.\utils\preprocess.py文件中,执行generate()后:
return coeff_path, png_path, crop_info3DMM参数的.mat文件:coeff_path;
Crop后的图片:png_path;
裁剪信息:crop_info;
landmarks_path =  os.path.join(save_dir, pic_name+'_landmarks.txt')
coeff_path =  os.path.join(save_dir, pic_name+'.mat')
png_path =  os.path.join(save_dir, pic_name+'.png')
并且将中间代码生成的用于裁剪的_landmarks.txt文件,3DMM参数.mat文件以及裁剪后的图片.png文件存入first_frame_dir目录下。
-
def crop(self, img_np_list, still=False, xsize=512)
该函数在.\utils\croper.py文件中的Preprocesser类内定义:其中
- crop是参考框的位置坐标(目的是为了将人脸信息全部包围住定义的新的坐标系),(clx, cly) 是裁剪框的左上角坐标,(crx, cry) 是裁剪框的右下角坐标;
- quad是人脸的位置坐标,(lx, ly) 是四边形的左上角坐标,(rx, ry) 是四边形的右下角坐标,这个四边形为人脸关键位置(默认眼睛间距的2倍和眼睛到嘴巴的1.8倍中的较大值,最佳均为2.4倍)相对于参考框的坐标信息。注:quad的坐标是相对于crop坐标系的。
- 此处用到了API:extcrop/extfull。如果选中,still=True,则执行额外裁剪,即使用crop框,否则使用quad框。使用crop框时最终框的大小同时受到quad框以及边界board的影响;使用quad框时则只需要考虑np.hypot(*eye_to_eye)*2.0和np.hypot(*eye_to_mouth)*1.8)即可。
def crop(self, img_np_list, still=False, xsize=512):
# first frame for all video or input imageimg_np = img_np_list[0]lm = self.get_landmark(img_np)if lm is None:raise 'can not detect the landmark from source image'rsize, crop, quad = self.align_face(img=Image.fromarray(img_np), lm=lm, output_size=xsize)print('rsize:', rsize)clx, cly, crx, cry = cropprint('clx:', clx, '  cly:', cly, '  crx:', crx, '  cry:', cry)lx, ly, rx, ry = quadprint('lx:', lx, '  ly:', ly, '  rx:', rx, '  ry:', ry)lx, ly, rx, ry = int(lx), int(ly), int(rx), int(ry)for _i in range(len(img_np_list)):_inp = img_np_list[_i]_inp = cv2.resize(_inp, (rsize[0], rsize[1]))_inp = _inp[cly:cry, clx:crx]
# API:extcrop/extfull=still,该选项选中会进行额外裁剪,即使用参考框作为裁剪框if not still:_inp = _inp[ly:ry, lx:rx]img_np_list[_i] = _inp# print('img_np_list:', img_np_list)
# 返回img_np_list图像矩阵,crop参考框关键点坐标,quad裁剪框关键点坐标return img_np_list, crop, quad
(a) get_landmark(self, img_np)
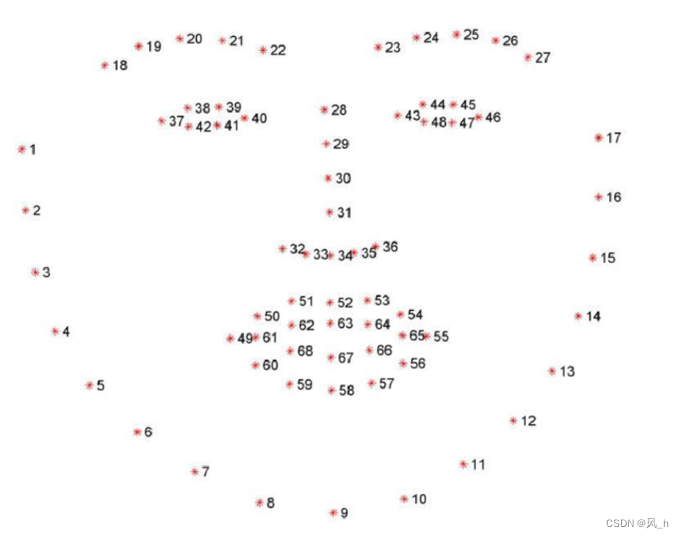
def get_landmark(self, img_np):"""get landmark with dlib:return: np.array shape=(68, 2)"""with torch.no_grad():dets = self.predictor.det_net.detect_faces(img_np, 0.97)if len(dets) == 0:return Nonedet = dets[0] """ det=[left, top, right, bottom], left 是边界框左上角的 x 坐标。top 是边界框左上角的 y 坐标。right 是边界框右下角的 x 坐标。bottom 是边界框右下角的 y 坐标(det[1]):int(det[3])=左上角和下角的 y 坐标(det[0]):int(det[2])= 左上角和右下角的 x 坐标"""img = img_np[int(det[1]):int(det[3]), int(det[0]):int(det[2]), :]lm =landmark_98_to_68(self.predictor.detector.get_landmarks(img)) # [0]#### keypoints to the original locationlm[:,0] += int(det[0])lm[:,1] += int(det[1])return lm(b) align_face(self, img, lm, output_size=1024)
def align_face(self, img, lm, output_size=1024):""":param filepath: str:return: PIL Image这个函数根据输入的关键点和一些参数,执行了一系列数学计算,以确定如何裁剪和变换图像,以便将面 部特征对齐到输出图像中。最后,它返回了新的图像尺寸、裁剪框的坐标以及新的左上角和右下角坐标, 以便后续的处理"""lm_chin = lm[0: 17] # left-right下巴部分的关键点坐标lm_eyebrow_left = lm[17: 22] # left-right左眉毛lm_eyebrow_right = lm[22: 27] # left-right右眉毛lm_nose = lm[27: 31] # top-down鼻子lm_nostrils = lm[31: 36] # top-down鼻孔lm_eye_left = lm[36: 42] # left-clockwise左眼lm_eye_right = lm[42: 48] # left-clockwise右眼lm_mouth_outer = lm[48: 60] # left-clockwise嘴巴外部lm_mouth_inner = lm[60: 68] # left-clockwise嘴巴内部# Calculate auxiliary vectors.eye_left = np.mean(lm_eye_left, axis=0) # 左眼的平均eye_right = np.mean(lm_eye_right, axis=0) # 右眼的平均坐标eye_avg = (eye_left + eye_right) * 0.5 # 两只眼睛的中间坐标eye_to_eye = eye_right - eye_left # 左眼到右眼的向量mouth_left = lm_mouth_outer[0] # 嘴巴左侧的坐标mouth_right = lm_mouth_outer[6] # 嘴巴右侧的坐标mouth_avg = (mouth_left + mouth_right) * 0.5 # 嘴巴的中间坐标eye_to_mouth = mouth_avg - eye_avg # 从眼睛到嘴巴的向量eye_left = np.mean(lm_eye_left, axis=0) # 输入:左眼部分的关键点坐标; # Choose oriented crop rectangle.# Addition of binocular difference and double mouth difference# 选择定向裁剪框,x代表了眼睛间距和眼睛到嘴巴的距离x = eye_to_eye - np.flipud(eye_to_mouth) * [-1, 1] # hypot函数计算直角三角形的斜边长,用斜边长对三角形两条直边做归一化x /= np.hypot(*x) # 归一化的 x 方向向量# 双眼差和眼嘴差,选较大的作为基准尺度 # 这一行将 x 向量的长度扩大,以确保它足够长以包含重要的面部特征。它选择了眼睛间距的2.0倍和眼 睛到嘴巴的1.8倍中的较大值作为长度。x *= max(np.hypot(*eye_to_eye)*2.0,np.hypot(*eye_to_mouth)*1.8) y = np.flipud(x) * [-1, 1] # y 方向上的定向向量# c位于眼睛的平均位置向下偏移了一定的距离。这个点将成为四边形的中心c = eye_avg + eye_to_mouth * 0.1# 定义四边形,以面部基准位置为中心上下左右平移得到四个顶点quad = np.stack([c - x - y, c - x + y, c + x + y, c + x - y]) # 定义四边形的大小(边长),为基准尺度的2倍qsize = np.hypot(*x) * 2 # qsize用来计算后续的边界 print('qsize:', qsize)# Shrink.# 如果计算出的四边形太大了,就按比例缩小它shrink = int(np.floor(qsize / output_size * 0.5)) # 缩小倍数if shrink > 1: # 一般不会超过1rsize = (int(np.rint(float(img.size[0]) / shrink)),int(np.rint(float(img.size[1]) / shrink))) # 新的图像尺寸img = img.resize(rsize, Image.ANTIALIAS)# 缩小后的裁剪框的坐标和边长quad /= shrinkqsize /= shrinkelse:rsize = (int(np.rint(float(img.size[0]))), int(np.rint(float(img.size[1]))))# Crop.#初始的裁剪框(完整包含人脸关键位置)border=max(int(np.rint(qsize * 0.1)), 3)#裁剪边界大小一般为0.1qsizecrop = (int(np.floor(min(quad[:, 0]))), int(np.floor(min(quad[:, 1]))),int(np.ceil(max(quad[:, 0]))),int(np.ceil(max(quad[:, 1]))))# 根据之前计算的边界border计算实际的裁剪框crop = (max(crop[0] - border, 0), max(crop[1] - border, 0), min(crop[2] + border,img.size[0]),min(crop[3] + border, img.size[1]))print('align_face_crop:', crop)if crop[2] - crop[0] < img.size[0] or crop[3] - crop[1] < img.size[1]:# img = img.crop(crop)print('align_face_row_quad:', quad)quad -= crop[0:2]print('align_face_quad:', quad)# Transform.quad = (quad + 0.5).flatten()lx = max(min(quad[0], quad[2]), 0) # 左上角的 x 坐标ly = max(min(quad[1], quad[7]), 0) # 左上角的 y 坐标rx = min(max(quad[4], quad[6]), img.size[0]) # 右下角的 x 坐标ry = min(max(quad[3], quad[5]), img.size[0]) # 右下角的 y 坐标# Save aligned image.# 返回新的图像尺寸、裁剪框的坐标、新的左上角和右下角坐标return rsize, crop, [lx, ly, rx, ry]
-
3DMM
这一步主要是利用face3d提取这样一个参数,并存入full_coeffs变量中:
def split_coeff(coeffs):id_coeffs = coeffs[:, :80] exp_coeffs = coeffs[:, 80: 144]tex_coeffs = coeffs[:, 144: 224]angles = coeffs[:, 224: 227]gammas = coeffs[:, 227: 254]translations = coeffs[:, 254:]return {'id': id_coeffs, # 身份α∈R80'exp': exp_coeffs, # 表情β∈R64'tex': tex_coeffs, # 纹理∈R80'angle': angles, # 旋转角度∈R3'gamma': gammas, # 光照∈R27'trans': translations # 平移∈R3}具体实现代码:
# load 3dmm paramter generator from Deep3DFaceRecon_pytorch
video_coeffs, full_coeffs = [],  []
for idx in tqdm(range(len(frames_pil)), desc='3DMM Extraction In Video:'):frame = frames_pil[idx]W,H = frame.sizelm1 = lm[idx].reshape([-1, 2])if np.mean(lm1) == -1:lm1 = (self.lm3d_std[:, :2]+1)/2.lm1 = np.concatenate([lm1[:, :1]*W, lm1[:, 1:2]*H], 1)else:lm1[:, -1] = H - 1 - lm1[:, -1]trans_params, im1, lm1, _ = align_img(frame, lm1, self.lm3d_std)
for item in np.hsplit(trans_params, 5)]).astype(np.float32)
trans_params = np.array([float(item)im_t = torch.tensor(np.array(im1)/255., dtype=torch.float32).permute(2, 0, 1).to(self.device).unsqueeze(0)with torch.no_grad():full_coeff = self.net_recon(im_t)coeffs = split_coeff(full_coeff)pred_coeff = {key:coeffs[key].cpu().numpy() for key in coeffs}# 筛选出所需的参数并合并向量,这里额外增加了trans_params,作为后续生成全身视频的参考信息pred_coeff = np.concatenate([pred_coeff['exp'], pred_coeff['angle'],pred_coeff['trans'],trans_params[2:][None],], 1)video_coeffs.append(pred_coeff)full_coeffs.append(full_coeff.cpu().numpy())semantic_npy = np.array(video_coeffs)[:,0]
# 将全部3DMM参数以及必要参数存入字典coeff_path
savemat(coeff_path, {'coeff_3dmm': semantic_npy, 'full_3dmm': np.array(full_coeffs)[0]})
(二)读取逐帧计算的参考系数
将对输入图片使用CropAndExtract()提取的参数进行封装,如果提供参考视频,重复CropAndExtract()过程并保存3DMM参数和眨眼系数。
-
API: reference_video
1、coeff_path包括全部的3DMM参数full_3dmm(273维度)以及模型使用的3DMM参数coeff_3dmm(73维度),即表情'exp',旋转角度'angle',平移系数'trans',相对位置。
2、如果提供参考视频,会重复调用CropAndExtract->generate(),返回对应的参数序列ref_video_coeff_path。这里的眨眼和动作均以3DMM字典的形式保存,在后续的生成过程会通过调用0-64维度向量矫正眨眼,64-70维向量矫正头部动作。
if use_ref_video:print('using ref video for genreation')ref_video_videoname = os.path.splitext(os.path.split(ref_video)[-1])[0]ref_video_frame_dir = os.path.join(save_dir, ref_video_videoname)os.makedirs(ref_video_frame_dir, exist_ok=True)print('3DMM Extraction for the reference video providing pose')ref_video_coeff_path, _, _ = self.preprocess_model.generate(ref_video, ref_video_frame_dir, preprocess, source_image_flag=False)else:ref_video_coeff_path = Noneif use_ref_video:if ref_info == 'pose':ref_pose_coeff_path = ref_video_coeff_pathref_eyeblink_coeff_path = Noneelif ref_info == 'blink':ref_pose_coeff_path = Noneref_eyeblink_coeff_path = ref_video_coeff_pathelif ref_info == 'pose+blink':ref_pose_coeff_path = ref_video_coeff_pathref_eyeblink_coeff_path = ref_video_coeff_pathelif ref_info == 'all': ref_pose_coeff_path = Noneref_eyeblink_coeff_path = Noneelse:raise('error in refinfo')else:ref_pose_coeff_path = Noneref_eyeblink_coeff_path = None-
get_data()
打包并返回以下字典:
总帧数 'num_frames': num_frames
音频编码 'indiv_mels': indiv_mels (batch_size, num_frames, 1, 80, 16)
初始面部参数 'ref': ref_coeff
眨眼频率 'ratio_gt': ratio
音频名称 'audio_name': audio_name
图片名称 'pic_name': pic_name
(三)计算每一帧参数(Audio2Coeff->generate())
计算表情以及动作系数,保存mat文件(T×70)T=num_frames
-
表情、口型以及眨眼Audio2Exp() 返回bs×T×64
1、在batch中获取数据:'indiv_mels'(用audiox处理后bs×T x 1 x 80 x 16),'ref':'exp','ratio_gt'(bs×T)
2、使用冻结的预训练wav2lipSimpleWrapperV2(audiox, 'ref', 'ratio_gt') 音频编码模型计算'exp_coeff_pred'
-
头部姿态Audio2Pose() 返回bs×T×6(9)
1、在batch中获取数据:'indiv_mels'(输入AudioEncoder返回'audio_emb' bs×512×1×1),'num_frames'-1 ,'ref'('angle' and 'trans'),'class'(API,46max),'z'=randn(bs, latent_size=64)
2、使用原作者设计的CVAE->DECODER(batch)计算'pose_pred',其中该过程主要由三部分构成:MLP(->bs×32×-1)+, ResUnet(->bs×1×32×6)+, out_Linear(bs×32×6)
3、torch.cat()->coeffs_pred_numpy=bs×T×70, 如果提供参考视频,载入ref_pose_coeff调用using_refpose()对头部动作逐帧矫正。
(四)读取生成器的所需参数(get_facerender_data)
- 打包并返回以下字典:
原图片矩阵 'source_image': source_image_ts = (batch_size×3×256×256)
总帧数 'frame_num': num_frames=T
首帧参数 'source_semantics' : source_semantics_ts(crop=batch_size × 70 × 27;full=batch_size × 73 × 27)
计算的每一帧参数组 'target_semantics_list' : batch_size×num_frames×70×27
生成视频的名称 'video_name'
图片路径 'audio_path'
- 如果提供相机参数,额外返回:
偏航:'yaw_c_seq'
俯仰:'pitch_c_seq'
横滚:'roll_c_seq'
- 提供可修改的内参:semantic_radius=13,用于将每一帧与前后semantic_radius长度帧的信息进行维度拼接(拼后27维度)形成参数组。
-
API:full全身 / Still Model无头部姿态
选择full时会生成全身的视频,此时仅仅只有第一帧截取前 73 维的 3DMM 系数:source_semantics_dict['coeff_3dmm'][:1,:73],在第三章audio->coeff计算生成的 'coeff_3dmm' 保留前70维:generated_dict['coeff_3dmm'][:,:70];如果不勾选该项,首帧和生成帧的参数均截取前 70 维: generated_dict['coeff_3dmm'][:,:70]。
if 'full' not in preprocess.lower():source_semantics = source_semantics_dict['coeff_3dmm'][:1,:70]         generated_3dmm = generated_dict['coeff_3dmm'][:,:70] #T×70
else:source_semantics = source_semantics_dict['coeff_3dmm'][:1,:73]         generated_3dmm = generated_dict['coeff_3dmm'][:,:70] #T×70source_semantics_new = transform_semantic_1(source_semantics, semantic_radius)
source_semantics_ts = torch.FloatTensor(source_semantics_new).unsqueeze(0)
source_semantics_ts = source_semantics_ts.repeat(batch_size, 1, 1)
data['source_semantics'] = source_semantics_tsdef transform_semantic_1(semantic, semantic_radius):semantic_list = [semantic for i in range(0, semantic_radius*2+1)]coeff_3dmm = np.concatenate(semantic_list, 0)return coeff_3dmm.transpose(1,0)- 其次选择full时会添加额外的语义信息np.repeat(source_semantics[:,70:] , generated_3dmm.shape[0], axis=0) 也就是说将首帧参数中的71-73列参数复制num_frames维度,再用np.concatenate拷贝到generated_3dmm 中,这里之所以没复制首帧姿态信息(64:70),是因为会造成空间扭曲。
- 如果使用API:Still Mode,generated_3dmm = generated_dict['coeff_3dmm'][:,:70],然后使用np.repeat(source_semantics[:, 64:], generated_3dmm.shape[0], axis=0)将首帧的姿态信息复制到generated_3dmm 中。
if 'full' in preprocess.lower():generated_3dmm = np.concatenate([generated_3dmm, np.repeat(source_semantics[:,70:], generated_3dmm.shape[0], axis=0)], axis=1)if still_mode: generated_3dmm[:, 64:] = np.repeat(source_semantics[:, 64:], generated_3dmm.shape[0], axis=0)-
多帧参数维度拼接
将生成的generated_3dmm参数使用transform_semantic_target函数按前后semantic_radius帧的视野组合在一起,方便生成过程能充分考虑每一帧与前后semantic_radius帧的相关性,存入'target_semantics_list'中。
with open(txt_path+'.txt', 'w') as f: # 将计算的参数逐帧写入txt文件并保存for coeff in generated_3dmm:for i in coeff: f.write(str(i)[:7]   + '  '+'\t')f.write('\n')target_semantics_list = []
frame_num = generated_3dmm.shape[0]
data['frame_num'] = frame_num
for frame_idx in range(frame_num):target_semantics = transform_semantic_target(generated_3dmm, frame_idx, semantic_radius)target_semantics_list.append(target_semantics)remainder = frame_num%batch_size
if remainder!=0:for _ in range(batch_size-remainder):target_semantics_list.append(target_semantics)target_semantics_np = np.array(target_semantics_list)             #frame_num 70 semantic_radius*2+1
target_semantics_np = target_semantics_np.reshape(batch_size, -1, target_semantics_np.shape[-2], target_semantics_np.shape[-1])
data['target_semantics_list']=torch.FloatTensor(target_semantics_np)def transform_semantic_target(coeff_3dmm, frame_index, semantic_radius):num_frames = coeff_3dmm.shape[0]seq = list(range(frame_index- semantic_radius, frame_index + semantic_radius+1))index = [ min(max(item, 0), num_frames-1) for item in seq ] coeff_3dmm_g = coeff_3dmm[index, :]return coeff_3dmm_g.transpose(1,0)
-
提供相机参数
如果提供相机参数--input_yaw,--input_pitch,--input_roll:
if input_yaw_list is not None:yaw_c_seq = gen_camera_pose(input_yaw_list, frame_num, batch_size)data['yaw_c_seq'] = torch.FloatTensor(yaw_c_seq)
if input_pitch_list is not None:pitch_c_seq = gen_camera_pose(input_pitch_list, frame_num, batch_size)data['pitch_c_seq'] = torch.FloatTensor(pitch_c_seq)
if input_roll_list is not None:roll_c_seq = gen_camera_pose(input_roll_list, frame_num, batch_size) data['roll_c_seq'] = torch.FloatTensor(roll_c_seq)
相机参数转化为姿态信息:
def gen_camera_pose(camera_degree_list, frame_num, batch_size):new_degree_list = [] if len(camera_degree_list) == 1:for _ in range(frame_num):new_degree_list.append(camera_degree_list[0]) remainder = frame_num%batch_sizeif remainder!=0:for _ in range(batch_size-remainder):new_degree_list.append(new_degree_list[-1])new_degree_np = np.array(new_degree_list).reshape(batch_size, -1) return new_degree_npdegree_sum = 0.for i, degree in enumerate(camera_degree_list[1:]):degree_sum += abs(degree-camera_degree_list[i])degree_per_frame = degree_sum/(frame_num-1)for i, degree in enumerate(camera_degree_list[1:]):degree_last = camera_degree_list[i]degree_step = degree_per_frame * abs(degree-degree_last)/(degree-degree_last)new_degree_list = new_degree_list + list(np.arange(degree_last, degree, degree_step))if len(new_degree_list) > frame_num:new_degree_list = new_degree_list[:frame_num]elif len(new_degree_list) < frame_num:for _ in range(frame_num-len(new_degree_list)):new_degree_list.append(new_degree_list[-1])print(len(new_degree_list))print(frame_num)remainder = frame_num%batch_sizeif remainder!=0:for _ in range(batch_size-remainder):new_degree_list.append(new_degree_list[-1])new_degree_np = np.array(new_degree_list).reshape(batch_size, -1) return new_degree_np
(五)渲染(AnimateFromCoeff->generate())
-
make_animation() (以256×256图片为例)
处理首帧(source)
- 对输入rgb图片(source_image)调用.\facerender\modules\keypoint_detector.py文件中的KPDetector类进行无监督关键点检测,输出15个3D点坐标kp_canonical;
- 对输入首帧3DMM参数(source_semantics)调用.\facerender\modules\mapping.py文件下的MappingNet类进行3D运动映射;
- 调用该文件下的keypoint_transformation函数对坐标kp_canonical进行he_source驱动转换,输出运动后的目标点位置(3D)。
kp_canonical = kp_detector(source_image) # 点坐标 3D
he_source = mapping(source_semantics)  # source_semantics->{'yaw': yaw, 'pitch': pitch, 'roll': roll, 't': t, 'exp': exp}
kp_source = keypoint_transformation(kp_canonical, he_source)def keypoint_transformation(kp_canonical, he, wo_exp=False):kp = kp_canonical['value']    # (bs, k, 3) yaw, pitch, roll= he['yaw'], he['pitch'], he['roll']      yaw = headpose_pred_to_degree(yaw) pitch = headpose_pred_to_degree(pitch)roll = headpose_pred_to_degree(roll)if 'yaw_in' in he:yaw = he['yaw_in']if 'pitch_in' in he:pitch = he['pitch_in']if 'roll_in' in he:roll = he['roll_in']rot_mat = get_rotation_matrix(yaw, pitch, roll)    # (bs, 3, 3)t, exp = he['t'], he['exp']if wo_exp:exp =  exp*0  # keypoint rotationkp_rotated = torch.einsum('bmp,bkp->bkm', rot_mat, kp)# keypoint translationt[:, 0] = t[:, 0]*0t[:, 2] = t[:, 2]*0t = t.unsqueeze(1).repeat(1, kp.shape[1], 1)kp_t = kp_rotated + t# add expression deviation exp = exp.view(exp.shape[0], -1, 3)kp_transformed = kp_t + expreturn {'value': kp_transformed}
逐帧处理生成帧(target)
每一帧都会按照mapping-> keypoint_transformation-> generator流程
for frame_idx in tqdm(range(target_semantics.shape[1]), 'Face Renderer:'):# still check the dimensiontarget_semantics_frame = target_semantics[:, frame_idx]print('target_semantics_frame_size:', target_semantics_frame.shape)# 每一帧做一次mappinghe_driving = mapping(target_semantics_frame)if yaw_c_seq is not None:he_driving['yaw_in'] = yaw_c_seq[:, frame_idx]if pitch_c_seq is not None:he_driving['pitch_in'] = pitch_c_seq[:, frame_idx] if roll_c_seq is not None:he_driving['roll_in'] = roll_c_seq[:, frame_idx] # 转换kp_driving = keypoint_transformation(kp_canonical, he_driving)kp_norm = kp_drivingout = generator(source_image, kp_source=kp_source, kp_driving=kp_norm)predictions.append(out['prediction'])
OcclusionAwareSPADEGenerator()
参考First Order Motion Model for Image Animation论文
论文地址:https://arxiv.org/pdf/2003.00196.pdf
项目代码git地址:https://github.com/AliaksandrSiarohin/first-order-model
细节测试结果
- KPDetector('source_image'):使用KPHourglass()对输入图像进行初步特征提取,并用3D卷积映射到三维空间:prediction_feature_map: torch.Size([1, 15, 16, 64, 64]);创建本地归一化坐标系make_coordinate_grid(R3 )获取高斯置信图:未使用雅阁比,此处去掉了相关代码,故直接输出gaussian2kp(heatmap)。
class KPDetector(nn.Module):"""Detecting canonical keypoints. Return keypoint position and jacobian near each keypoint."""def __init__(self, block_expansion, feature_channel, num_kp, image_channel, max_features, reshape_channel, reshape_depth,num_blocks, temperature, estimate_jacobian=False, scale_factor=1, single_jacobian_map=False):super(KPDetector, self).__init__()self.predictor = KPHourglass(block_expansion, in_features=image_channel,max_features=max_features, reshape_features=reshape_channel, reshape_depth=reshape_depth, num_blocks=num_blocks)self.kp = nn.Conv3d(in_channels=self.predictor.out_filters, out_channels=num_kp, kernel_size=3, padding=1)self.temperature = temperatureself.scale_factor = scale_factorif self.scale_factor != 1:self.down = AntiAliasInterpolation2d(image_channel, self.scale_factor)def gaussian2kp(self, heatmap):"""Extract the mean from a heatmap"""shape = heatmap.shapeheatmap = heatmap.unsqueeze(-1)grid = make_coordinate_grid(shape[2:], heatmap.type()).unsqueeze_(0).unsqueeze_(0)value = (heatmap * grid).sum(dim=(2, 3, 4))kp = {'value': value}return kpdef forward(self, x):if self.scale_factor != 1:x = self.down(x)feature_map = self.predictor(x)prediction = self.kp(feature_map)final_shape = prediction.shapeprint('prediction_feature_map:', final_shape)heatmap = prediction.view(final_shape[0], final_shape[1], -1)heatmap = F.softmax(heatmap / self.temperature, dim=2)heatmap = heatmap.view(*final_shape)out = self.gaussian2kp(heatmap)print('gaussian2kp(heatmap)value:', out)return out
测试结果:
prediction_feature_map: torch.Size([1, 15, 16, 64, 64])
gaussian2kp(heatmap): torch.Size([1, 15, 3])
- 对于MappingNet('source_semantics'):对首帧图像的面部参数映射为3D变换参数卷积以及linear得到MappingNet_full_out: torch.Size([1, 1024]);经过多次linear返回不同的参数:yaw: torch.Size([1, 66])、pitch: torch.Size([1, 66])、roll: torch.Size([1, 66]) 、平移参数t: torch.Size([1, 3]) 、表情exp: torch.Size([1, 45])。
class MappingNet(nn.Module):def __init__(self, coeff_nc, descriptor_nc, layer, num_kp, num_bins):super( MappingNet, self).__init__()self.layer = layernonlinearity = nn.LeakyReLU(0.1)self.first = nn.Sequential(torch.nn.Conv1d(coeff_nc, descriptor_nc, kernel_size=7, padding=0, bias=True))for i in range(layer):net = nn.Sequential(nonlinearity,torch.nn.Conv1d(descriptor_nc, descriptor_nc, kernel_size=3, padding=0, dilation=3))setattr(self, 'encoder' + str(i), net) self.pooling = nn.AdaptiveAvgPool1d(1)self.output_nc = descriptor_ncself.fc_roll = nn.Linear(descriptor_nc, num_bins)self.fc_pitch = nn.Linear(descriptor_nc, num_bins)self.fc_yaw = nn.Linear(descriptor_nc, num_bins)self.fc_t = nn.Linear(descriptor_nc, 3)self.fc_exp = nn.Linear(descriptor_nc, 3*num_kp)def forward(self, input_3dmm):out = self.first(input_3dmm)for i in range(self.layer):model = getattr(self, 'encoder' + str(i))out = model(out) + out[:,:,3:-3]out = self.pooling(out)out = out.view(out.shape[0], -1)print('MappingNet_full_out:', out.shape)yaw = self.fc_yaw(out)pitch = self.fc_pitch(out)roll = self.fc_roll(out)t = self.fc_t(out)exp = self.fc_exp(out)# print('yaw:', yaw,' pitch:', pitch,' roll:', roll,' t:', t,' exp:', exp)return {'yaw': yaw, 'pitch': pitch, 'roll': roll, 't': t, 'exp': exp}
测试:yaw: torch.Size([1, 66])
pitch: torch.Size([1, 66])
roll: torch.Size([1, 66])
平移参数t: torch.Size([1, 3])
exp: torch.Size([1, 45])
这篇关于Sadtalker代码详解的文章就介绍到这儿,希望我们推荐的文章对编程师们有所帮助!


