Run Pest Tests Directly from your IDE

2023-12-26 07:15
文章标签 ide tests run directly pest

本文主要是介绍Run Pest Tests Directly from your IDE,希望对大家解决编程问题提供一定的参考价值,需要的开发者们随着小编来一起学习吧!

  Run Pest Tests Directly from your IDE

  PhpStorm 2023.3 helps you write Pest assertions and improves auto-completion in test functions.

  PhpStorm by JetBrains is a sophisticated Integrated Development Environment (IDE) specifically designed for PHP and web development. It offers a range of features to enhance your coding experience, including syntax highlighting, intelligent code completion, on-the-fly error detection, built-in debugging tools, and advanced code refactoring capabilities. Additionally, it supports various web technologies like HTML, CSS, and JavaScript, making it a versatile tool for building complete web applications.

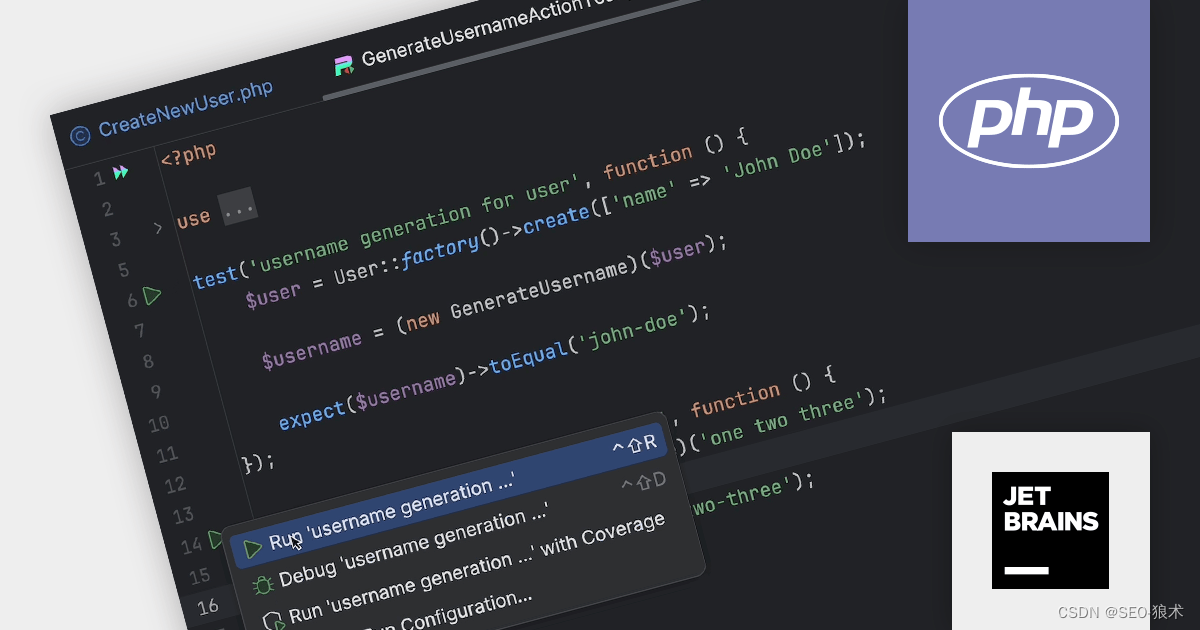
  The PhpStorm 2023.3 release now supports the Pest test framework out of the box. Pest is a testing tool for PHP with a focus on simplicity. It uses familiar concepts from PHPUnit but wraps them in a more readable interface. If offers clear error messages, colorful outputs, and features like coverage reports and parallel testing. Using PhpStorm 2023.3 you can now run Pest tests from inside the IDE. When you position your caret within a test and then run it, the IDE will automatically generate a configuration tailored to that particular test.

这篇关于Run Pest Tests Directly from your IDE的文章就介绍到这儿,希望我们推荐的文章对编程师们有所帮助!


http://www.chinasem.cn/article/538524

相关文章

arduino ide安装详细步骤

​ 大家好,我是程序员小羊! 前言: Arduino IDE 是一个专为编程 Arduino 微控制器设计的集成开发环境,使用起来非常方便。下面将介绍如何在不同平台上安装 Arduino IDE 的详细步骤,包括 Windows、Mac 和 Linux 系统。 一、在 Windows 上安装 Arduino IDE 1. 下载 Arduino IDE 打开 Arduino 官网

Debugging Lua Project created in Cocos Code IDE creates “Waiting for debugger to connect” in Win-7

转自 I Installed Cocos Code IDE and created a new Lua Project. When Debugging the Project(F11) the game window pops up and gives me the message waiting for debugger to connect and then freezes. Also a

兔子--SDK,ADT,AVD,IDE,ADB

a:SDK(Software Development Kit):开发android应用所需要的开发工具的集合,包括库文件及工具。 b:ADT(Android Developer Tools):在Eclipse下开发工具的升级下载工具。adt只是一个eclipse的插件,里面可以设置 sdk路径. c:IDE:集成开发环境。IDE通常包括编程语言编辑器、自动建立工具、通常还包括调试

兔子--Android Studio出现错误:Error:Execution failed for task ':myapp:dexDebug'. com.android.ide.common.pro

重点在:finished with non-zero exit value 2. 这里表明了有重复的内容存在。 由于:Android Studio中引入包的方式有如下2种:    compile 'com.android.support:support-v4:22.0.0'    compile files('libs/support-v

[vue小白]npm run运行以后无法关闭

开启vue任务后,关闭git bash窗口发现端口仍然被占用,程序没有关闭 通过查询资料,大部分都说ctrl+c就可以了,但是经过实践发现并不可行,目测大部分都是复制粘贴的答案。 经过尝试,最终发现可能只能暴力关闭了 1.在cmd中输入netstat -ano查询占用端口号的pid 2. 然后在任务管理器中查询对应的任务并关闭 3. 在linux系统中更简单,直接kill -9 pid即可

飞凌单片机开发IDE环境

飞凌单片机 资料下载选择芯片类型:MCU->GPIO选择芯片型号:FM8PE53B IDE工具安装: 资料下载 飞凌官网 选择芯片类型:MCU->GPIO 选择芯片型号:FM8PE53B IDE工具安装: 运行Generic ICE 0.02-250.03 setup,一直点击“下一步”即可。 双击运行:Generic ICE

Arduino IDE安装

Arduino IDE(集成开发环境)的安装过程是一个相对直观且易于操作的流程,主要步骤包括下载、安装和配置。以下将详细阐述Arduino IDE的安装过程,同时提供一些背景信息和注意事项,确保安装过程顺利进行。 一、Arduino IDE下载 1. 访问Arduino官网 首先,用户需要访问Arduino的官方网站(https://www.arduino.cc),这是获取Arduino I

ubuntu14下Arduino IDE无法打开串口的问题

ubuntu版本是14.04 LTS,arduino版本是1.8.1。使用arduino的串口工具时无法打开串口,串口是USB转的,用的cp2102 。 google了一下,发现可能是权限的问题,执行以下语句,即可解决: sudo chown username /dev/ttyUSB0将username改成自己的用户名就行了。

NXP S32DS IDE设置背景护眼色

NXP的S32DS是基于eclipse开发的,因此可以搜eclipse的一些配置,基本上可以设置。

eclipse里maven debug-tomcat:run注意

eclipse里maven debug-tomcat:run注意: 源码调试需要插件:m2e.sourcelookup 在eclipse上 Help->install new software  https://bjmi.github.io/update-site/