本文主要是介绍[Angular] 笔记 8:list/detail 页面以及@Input,希望对大家解决编程问题提供一定的参考价值,需要的开发者们随着小编来一起学习吧!
1. list 页面
list/detail 是重要的 UI 设计模式。
vscode terminal 运行如下命令生成 detail 组件:
PS D:\Angular\my-app> ng generate component pokemon-base/pokemon-detail --module=pokemon-base/pokemon-base.module.ts
CREATE src/app/pokemon-base/pokemon-detail/pokemon-detail.component.html (29 bytes)
CREATE src/app/pokemon-base/pokemon-detail/pokemon-detail.component.spec.ts (649 bytes)
CREATE src/app/pokemon-base/pokemon-detail/pokemon-detail.component.ts (306 bytes)
CREATE src/app/pokemon-base/pokemon-detail/pokemon-detail.component.css (0 bytes)
UPDATE src/app/pokemon-base/pokemon-base.module.ts (428 bytes)
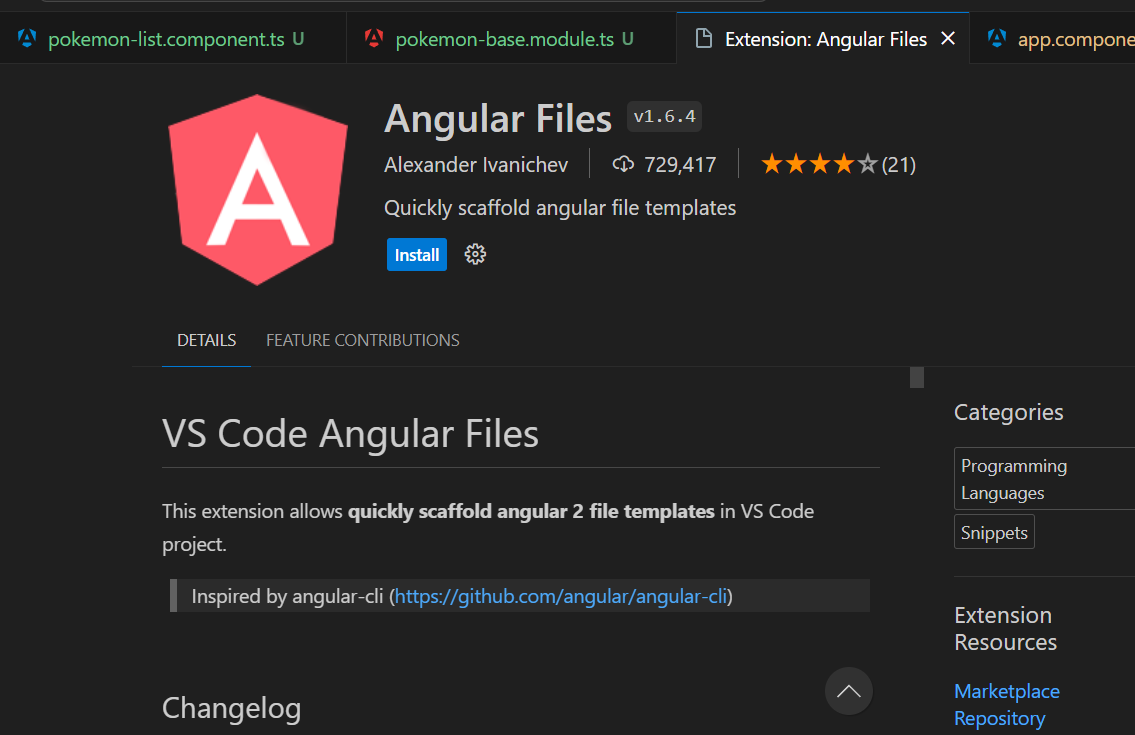
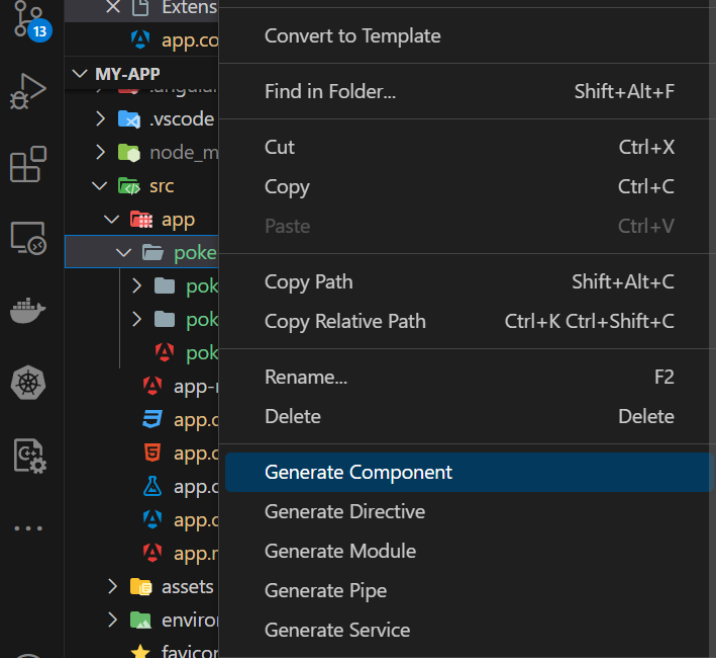
也可以使用通过安装 Angular Files 扩展生成上面的 detail 组件:
安装扩展后可以直接使用右键菜单命令生成组件:
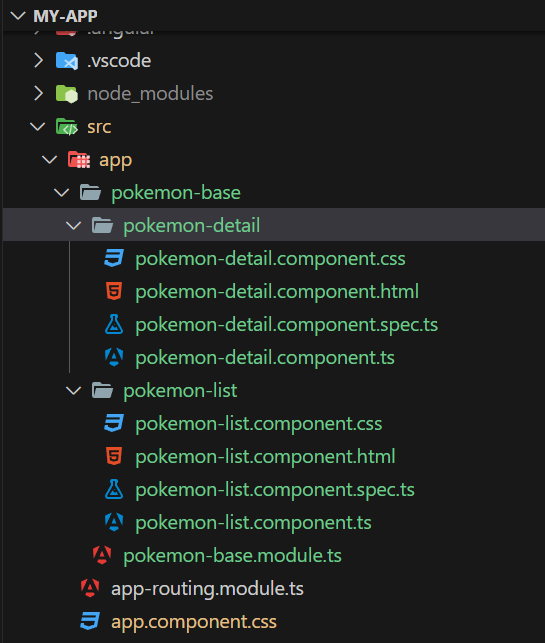
工程文件结构:
然后修改 pokemon-base.module.ts:
@NgModule({declarations: [PokemonListComponent, PokemonDetailComponent],imports: [CommonModule],// 增加 PokemonDetailComponentexports: [PokemonListComponent, PokemonDetailComponent],
})
export class PokemonBaseModule {}
工程中现在有两个新生成的组件,pokemon-list 和 pokemon-detail,其中,pokemon-list 是 smart 组件,pokemon-detail 是 dumm 组件。
smart 组件总是向下传递数据给 dumm 组件,smart 组件之所以称为 smart ,是因为它能从数据库获得数据,相对而言,dumm 组件不会访问数据库,它只能从 smart 组件那里接收数据。
接下来将 app.component.ts 中的数据移至更合适的地方,通常来说,app.component.ts 中直接存放数据不是最佳的设计方式。虽然在某些情况下可能需要在 app 组件中保留关键数据,但一般来说, app 中的其他代码能移则移,移到其他更合适的组件中,以提高代码的可维护性和可扩展性。
app.component.ts:
export class AppComponent {constructor() {}// 删除!!!// pokemons: Pokemon[] = [//   // Pokemon: 精灵宝可梦//   {//     id: 1,//     name: 'pikachu', // 皮卡丘//     type: 'electric',//     isCool: false,//     isStylish: true,//   },//   {//     id: 2,//     name: 'squirtle', // 杰尼龟//     type: 'water',//     isCool: true,//     isStylish: true,//   },//   {//     id: 3,//     name: 'charmander', // 小火龙//     type: 'fire',//     isCool: true,//     isStylish: false,//   },// ];
}
将数据粘贴到 pokemon-list.component.ts,模拟从数据库中获取的数据:
import { Component, OnInit } from '@angular/core';
@Component({selector: 'app-pokemon-list',templateUrl: './pokemon-list.component.html',styleUrls: ['./pokemon-list.component.css'],
})
export class PokemonListComponent implements OnInit {// 从 app.component.ts 里剪切过来的数据pokemons: Pokemon[] = [// pokemon: 精灵宝可梦{id: 1,name: 'pikachu', // 皮卡丘type: 'electric',isCool: false,isStylish: true,},{id: 2,name: 'squirtle', // 杰尼龟type: 'water',isCool: true,isStylish: true,},{id: 3,name: 'charmander', // 小火龙type: 'fire',isCool: true,isStylish: false,},];constructor() {}ngOnInit(): void {}
}
在 app文件夹下新建文件夹models 以及新文件 pokemon.ts, 将用于类型检查的 Pokemon interface 移到此文件中,以后项目中的其他类也可以使用此 interface,这样能够避免代码重复。
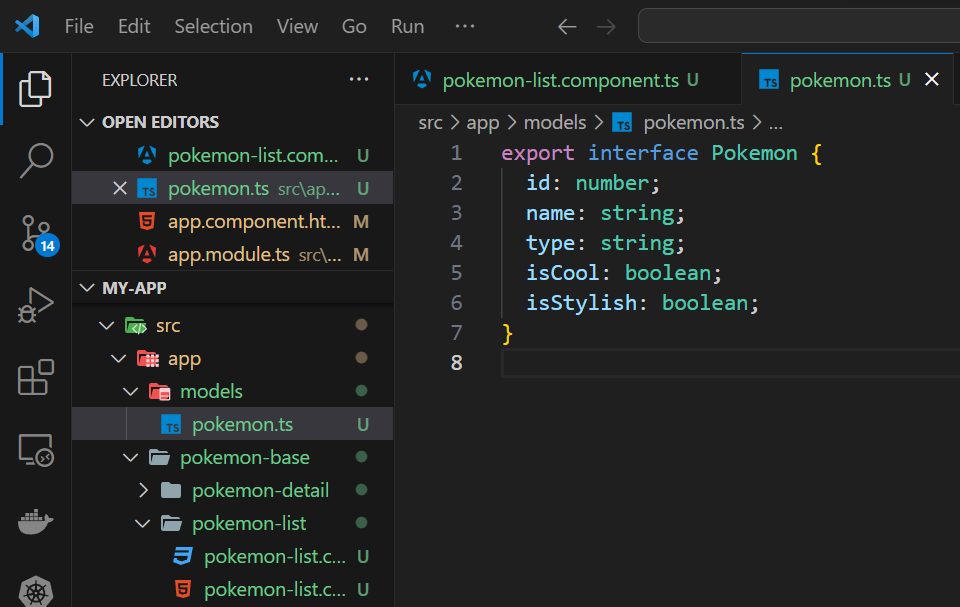
pokemon.ts,
export interface Pokemon {id: number;name: string;type: string;isCool: boolean;isStylish: boolean;
}
相应地,pokemon-list.component.ts 中增加 import { Pokemon } from 'src/app/models/pokemon'; 以使用此 interface.
pokemon-list.component.html:
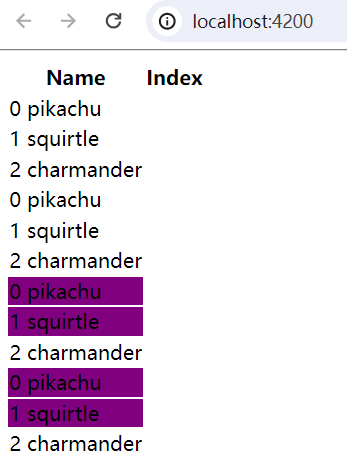
<table><thead><th>Name</th><th>Index</th></thead><tbody><tr *ngFor="let pokemon of pokemons; let i = index"><td class="pokemon-td" [class.cool-bool]="pokemon.isCool">{{ i }} {{ pokemon.name }}</td></tr><tr *ngFor="let pokemon of pokemons; let i = index"><td class="pokemon-td" [ngClass]="{ 'cool-bool': pokemon.isCool }">{{ i }} {{ pokemon.name }}</td></tr><tr *ngFor="let pokemon of pokemons; let i = index"><tdclass="pokemon-td"[style.backgroundColor]="pokemon.isStylish ? '#800080' : ''">{{ i }} {{ pokemon.name }}</td></tr><tr *ngFor="let pokemon of pokemons; let i = index"><tdclass="pokemon-td"[ngStyle]="{ 'backgroundColor': (pokemon.isStylish ? '#800080' : '') }">{{ i }} {{ pokemon.name }}</td></tr></tbody></table>
运行 ng serve, 可看到如下界面:
2. detail 页面:
这一步要做的是迭代 pokemons 数组,将每一个 pokemon 传给 detail:
修改 pokemon-detail.component.ts:
import { Component, Input, OnInit } from '@angular/core';
import { Pokemon } from 'src/app/models/pokemon';@Component({selector: 'app-pokemon-detail',templateUrl: './pokemon-detail.component.html',styleUrls: ['./pokemon-detail.component.css'],
})
export class PokemonDetailComponent implements OnInit {// 增加以下两行代码:@Input()detail!: Pokemon; // add a ! - a bang or null operator or null coalescingconstructor() {}ngOnInit(): void {}
}
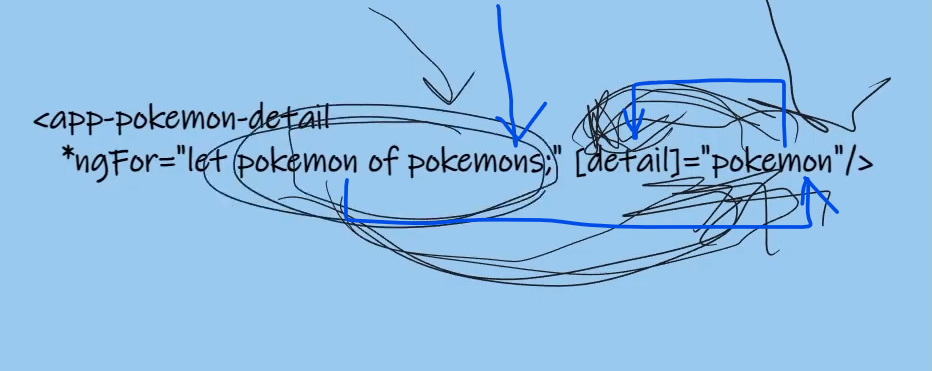
重构 pokemon-list.component.html:
<table><thead><th>Name</th><th>Index</th></thead><tbody><app-pokemon-detail*ngFor="let pokemon of pokemons"[detail]="pokemon"></app-pokemon-detail></tbody>
</table>
pokemon-detail.component.html:
<tr><td class="pokemon-td" [class.cool-bool]="detail.isCool">{{ detail.id }} : {{ detail.name }}{{ detail.isCool == true ? "is COOL" : "is NOT COOL" }}</td>
</tr>
运行 ng serve:

3. Input 装饰器
3.1 Angular doc
Input 装饰器用来标记一个类字段为输入属性,并提供配置元数据。input 属性与模板中的一个DOM属性绑定。在变更检测期间,Angular会自动用DOM属性的值更新数据属性。
(Decorator that marks a class field as an input property and supplies configuration metadata. The input property is bound to a DOM property in the template. During change detection, Angular automatically updates the data property with the DOM property’s value.)
3.2 stack overflow
pokemon-detail 是一个子组件,它被设计用于插入到一个拥有 detail 数据的父组件中。此 detail 数据通过被 @Input 装饰器标记为 input 的 detail实例变量传递到 pokemon-detail 组件中。
用法:使用 input 装饰器标记实例变量,使父组件可以通过此变量传数据下来。
@Input()detail: Pokemon;
父组件接下来将会使用子组件,并传数据给它。
<pokemon-detail [detail]="pokemon"></pokemon-detail>
父组件名为 pokemon 的实例变量含有数据,这些数据将传递到 pokemon-detail 组件中。
Angular For Beginners
这篇关于[Angular] 笔记 8:list/detail 页面以及@Input的文章就介绍到这儿,希望我们推荐的文章对编程师们有所帮助!


