本文主要是介绍在Windows上编译Ripple,希望对大家解决编程问题提供一定的参考价值,需要的开发者们随着小编来一起学习吧!
OS : Windows Server 2012 R2, Windows 10 Home
外部库: Boost library 1.57
笔者编译Boost 1.61未成功,有成功者希望能联络笔者。
笔者编译Boost 1.62成功
OpenSSL Windows
编译环境: Visual Studio Express2015 or Visual Studio Pro 2015
编译步骤 : 以下来自https://wiki.ripple.com/Visual_Studio_2013_Build_Instructions
预先安装包
● Visual Studio 2013 (Update 4 required)
● Git for Windows
● Google Protocol Buffers Compiler
● OpenSSL-Win32 or OpenSS-Win64 Library
● Boost 1.57 library (or later versions. These directions use 1.57)
● Node.js
安装 Git for Windows
推荐安装 Git for Windows
推荐 Git version 1.8.3.2 or later.
安装 Google Protocol Buffers Compiler
推荐 protoc.exe version 2.5.1 or later.
推荐从 Google Protocol Buffers repository下载,
安装 OpenSSL
Download OpenSSL. There will be four variants available:
1. 32-bit. 32-bit windows. "Win32 OpenSSL v1.0.1j".
2. 64-bit. 64-bit windows. "Win64 OpenSSL v1.0.1j".
3. 32-bit light - 不用.
4. 64-bit light - 不用.
编译 Boost
打开 Developer Command Prompt for Visual Studio, 去到boost安装目录, 启动编译工具:
cd C:\lib\boost_1_57_0
bootstrap
bjam --toolset=msvc-12.0 variant=debug,release link=static runtime-link=static address-model=64
上面的命令适用于Visual studio 2013. 由于笔者使用Visual Studio 2015, 所以将命令稍作修改
bjam --toolset=msvc-14.0 variant=debug,release link=static runtime-link=static address-model=64
Clone the rippled repository
git clone git@github.com:ripple/rippled.git
git checkout master
配置库路径
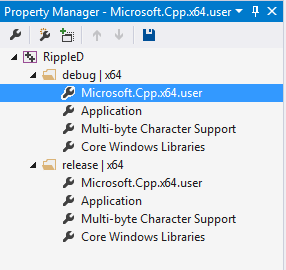
打开 Builds/Visual Studio 2013/ripple.sln, 选择 "View->Property Manager" 运行 the Property Manager. 打开 debug | x64,双击 Microsoft.Cpp.Win32.user 打开属性页
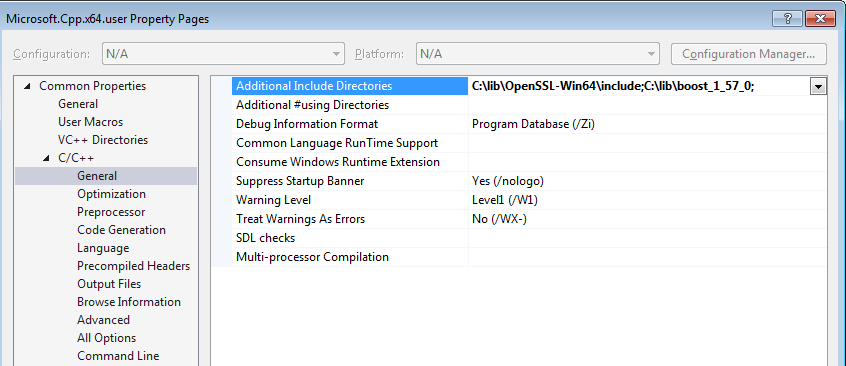
去到 C/C++, General, Additional Include Directories 加入已安装的boost installation工作目录:
去到 Linker, General, Additional Library Directories and 加入编译好的boost 库路径

应用同样的方法将openSSL头文件和库文件加入 Additional Include Directories 和 Additional Library Directories required for OpenSSL. 在我们的例子zhong,目录是C:\lib\OpenSSL-Win64\include 和 C:\lib\OpenSSL-Win64\lib\VC\static.
设置环境
为rippled.cfg创建工作目录
1. 创建配置文件目录.本例中, ripple 配置目录在 "C:\Users\joe\ripple\config".
2. 将在 doc\rippled-example.cfg 的示例配置文件拷贝到新创建的配置文件目录下,并改名"rippled.cfg".
3. 打开rippled.cfg 文件并编辑.
修改 Visual Studio Projects Debugging Properties
1. 打开方案文件 Builds/Visual Studio 2013/Ripple.sln
2. 选择正确的平台 (either x64 or Win32 depending on machine type).
3. 选择 "Project->Properties"
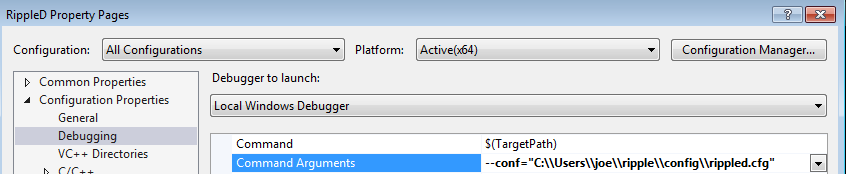
4. 在 "Configuration Properties" 中选择 "Debugging".
5. 选择"All Configurations".
6. 在 "Debugger to Launch"中选择"Local Windows Debugger".
告诉 rippled 配置文件的位置.
例子: 加入 ---conf="C:\\Users\\joe\\ripple\\config\\rippled.cfg" .
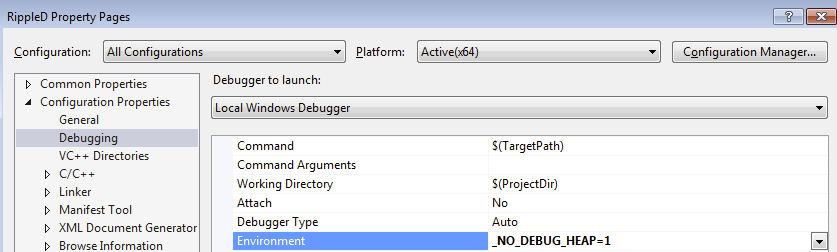
设置 _NO_DEBUG_HEAP 环境变量
编译
完成上述步骤后,右击Visual Studio Solution Explorer, 设置rippled 为起始工程,选择 Set as Startup Project, 然后点击 Build->Build Solution.
博主编译中碰到的问题
- Hash_appended.h - error C2059: syntax error: '<__ATTRIBUTE__ SPECIFIER>
[[noreturn]]似乎不能和varadic template 连用。好在这只是异常处理,不关大局
template <class E, class... Args>
[[noreturn]] inline void Throw (Args&&... args)
Unknown compiler version while compiling Boost with MSVC 14.0 (VS 2015)
此处需修改boost的visual C 配置文件,提高_MSC_FULL_VER 所要求的值。
#if (_MSC_VER > 1800 && _MSC_FULL_VER > 190023506)
参考 Unknown compiler version while compiling Boost with MSVC 14.0 (VS 2015)
参考 BUILDING BOOST 1.58 WITH VISUAL STUDIO 2015
Open up boost_1_58_0\boost\config\compiler\visualc.hpp and go to lines 287-288. Replace those
two lines with
// last known and checked version is 19.00.23026 (VC++ 2015):
#if (_MSC_VER > 1800 && _MSC_FULL_VER > 190023026)
- error C2899: typename cannot be used outside a template declaration
删除 typename
- 1>..\..\src\ripple\rpc\tests\ServerInfo.test.cpp(52): error C2039: 'format': is not a member of 'boost'
1> C:\boost_1_62_0\boost/thread/shared_mutex.hpp(29): note: see declaration of 'boost'
1>..\..\src\ripple\rpc\tests\ServerInfo.test.cpp(52): error C2065: 'format': undeclared identifier
1>..\..\src\ripple\rpc\tests\ServerInfo.test.cpp(52): error C2146: syntax error: missing ';' before identifier 'toLoad'
1>..\..\src\ripple\rpc\tests\ServerInfo.test.cpp(52): error C3861: 'toLoad': identifier not found
1>..\..\src\ripple\rpc\tests\ServerInfo.test.cpp(60): error C2039: 'str': is not a member of 'boost'
1> C:\boost_1_62_0\boost/thread/shared_mutex.hpp(29): note: see declaration of 'boost'
1>..\..\src\ripple\rpc\tests\ServerInfo.test.cpp(61): error C2065: 'toLoad': undeclared identifier
1>..\..\src\ripple\rpc\tests\ServerInfo.test.cpp(60): error C3861: 'str': identifier not found
加入#include <boost/format.hpp> -- 这个错误是使用boost1.62后出现的
参考https://github.com/wisk/medusa/issues/65
Visual Studio: LINK : fatal error LNK1181: cannot open input file libeay32MTd.lib
boost 1.62 问题
去到 Linker, General, Additional Library Directories and 加入如下 库路径,问题解决
C:\OpenSSL-Win64\lib
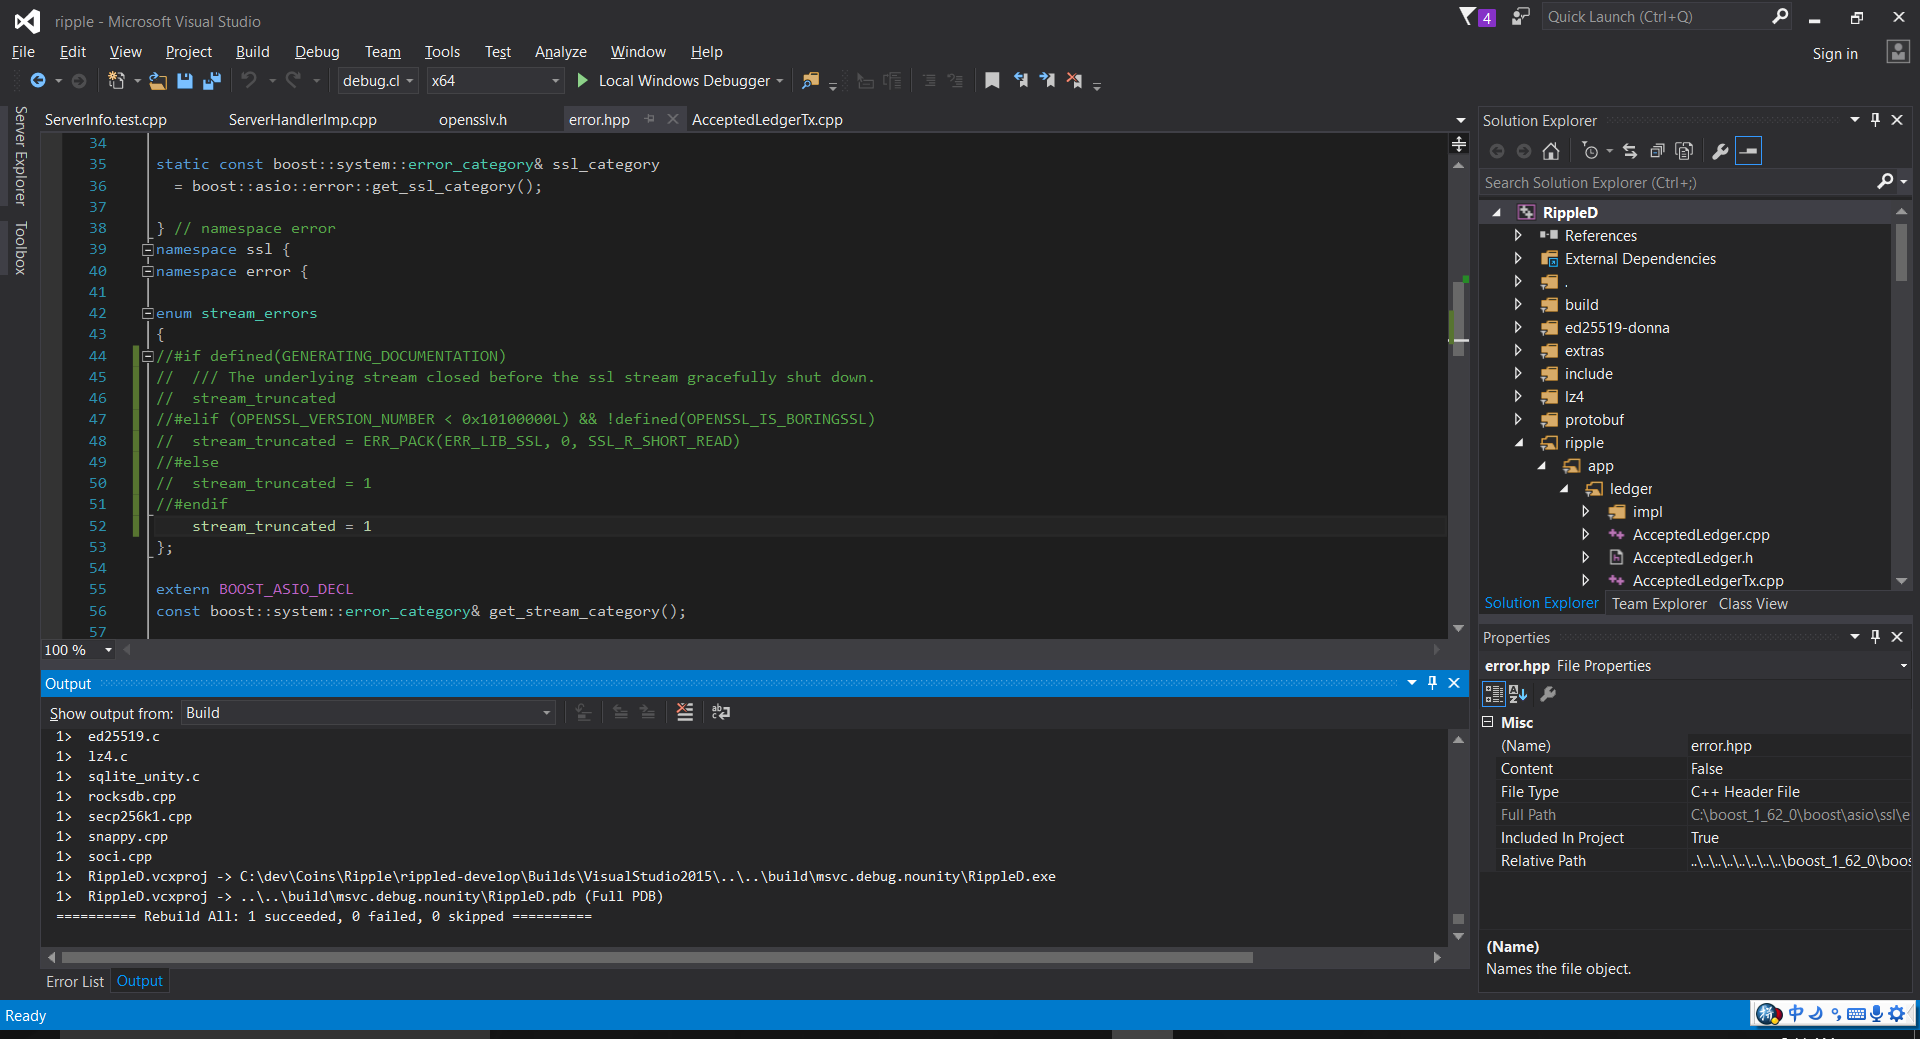
以下是编译成功信息: Visual Studio2015 + Boost1.62 + Windows10
这篇关于在Windows上编译Ripple的文章就介绍到这儿,希望我们推荐的文章对编程师们有所帮助!


