本文主要是介绍原创001 | 搭上SpringBoot自动注入源码分析专车,希望对大家解决编程问题提供一定的参考价值,需要的开发者们随着小编来一起学习吧!
前言
如果这是你第二次看到师长的文章,说明你在觊觎我的美色!O(∩_∩)O哈哈~
点赞+关注再看,养成习惯
没别的意思,就是需要你的窥屏^_^
本系列为SpringBoot深度源码专车系列,第一篇发车!
专车介绍
该趟专车是开往Spring Boot自动注入原理源码分析的专车
专车问题
- Spring Boot何时注入@Autowired标注的属性?
- 如果注入类型的Bean存在多个Spring Boot是如何处理的?
专车示例
- 定义接口
public interface PersonService {String hello(String name);
}- 定义接口的一个实现
@Service(value = "studentService")
public class StudentServiceImpl implements PersonService {@Overridepublic String hello(String name) {return "[student service] hello " + name;}
}- 定义接口的另一个实现
@Service(value = "teacherService")
public class TeacherServiceImpl implements PersonService {@Overridepublic String hello(String name) {return "[teacher service] hello " + name;}
}- 定义控制器
@RestController
public class TestController {@Autowiredprivate PersonService studentService;@Autowiredprivate PersonService teacherService;@GetMapping("/hello")public String hello(@RequestParam(name = "name") String name) {return studentService.hello(name) + "=======>" + teacherService.hello(name);}
}
以上示例代码很简单,创建了一个接口,接口有两个实现类,然后在控制器中注入实现类,从而完成业务方法的调用。接下来我们就开始对源码进行分析
专车分析
在分析代码之前我们先回忆一下操作对象的步骤:
- 首先我们会实例化一个对象
- 然后调用对象的set方法来设置对象的属性
有了上面的基础知识,接下来就开始揭秘旅程
寻找入口
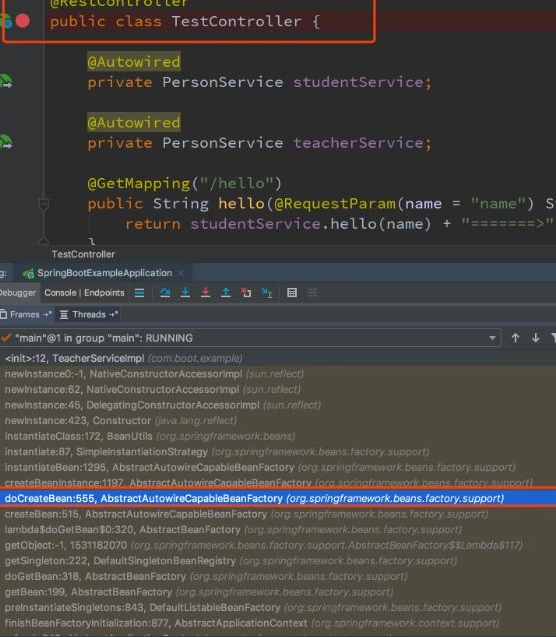
在分析源码的时候最关键的一步就是寻找程序的入口,有了入口我们就成功了一半,那么如何寻找程序的入口?针对此处的源码分析,我们可以在TestController类上打一个断点,然后查看调用链
基于调用链路,我们看到有一个doCreateBean方法,该方法就是用来创建bean的,也就是我们上面提到的实例化对象部分
实例化Bean
AbstractAutowireCapableBeanFactory#doCreateBean
protected Object doCreateBean(final String beanName, final RootBeanDefinition mbd, final @Nullable Object[] args)throws BeanCreationException {// Instantiate the bean.BeanWrapper instanceWrapper = null;if (mbd.isSingleton()) {instanceWrapper = this.factoryBeanInstanceCache.remove(beanName);}if (instanceWrapper == null) {// 创建beaninstanceWrapper = createBeanInstance(beanName, mbd,这篇关于原创001 | 搭上SpringBoot自动注入源码分析专车的文章就介绍到这儿,希望我们推荐的文章对编程师们有所帮助!


