本文主要是介绍跟着官网学 Vue - 插槽,希望对大家解决编程问题提供一定的参考价值,需要的开发者们随着小编来一起学习吧!
Vue 插槽是一种强大的组件通信方式。
插槽内容与出口
在 Vue 中,插槽是一种让父组件向子组件传递内容的方式。子组件使用 <slot> 元素作为插槽出口,父组件可以通过插槽内容填充这些空白区域。
示例:
<!-- MyButton.vue -->
<template><button><slot></slot></button>
</template><!-- ParentComponent.vue -->
<template><MyButton>点我!</MyButton>
</template>
具名插槽
有时,一个组件需要多个插槽。通过给 <slot> 元素添加 name 属性,我们可以为插槽命名,从而在子组件中区分不同的插槽。
示例:
<!-- BaseLayout.vue -->
<template><div><header><slot name="header"></slot></header><main><slot></slot></main><footer><slot name="footer"></slot></footer></div>
</template><!-- ParentComponent.vue -->
<template><BaseLayout><template v-slot:header><h1>页面标题</h1></template><template v-slot:footer><p>联系信息</p></template>主要内容</BaseLayout>
</template>
作用域插槽
作用域插槽是一种高级的插槽类型,允许子组件将数据传递给插槽内容,使得插槽内容可以访问子组件的数据。
示例:
<!-- MyComponent.vue -->
<template><div><slot :text="greetingMessage"></slot></div>
</template><script>
export default {data() {return {greetingMessage: 'Hello from MyComponent!',};},
};
</script><!-- ParentComponent.vue -->
<template><MyComponent v-slot="slotProps">{{ slotProps.text }}</MyComponent>
</template>
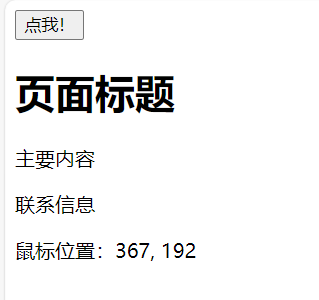
完整的示例
下面是一个完整的使用插槽的示例,演示了默认插槽、具名插槽、作用域插槽等不同用法:
<!-- MyButton.vue -->
<template><button><slot></slot></button>
</template><!-- BaseLayout.vue -->
<template><div><header><slot name="header"></slot></header><main><slot></slot></main><footer><slot name="footer"></slot></footer></div>
</template><!-- MouseTracker.vue -->
<template><div @mousemove="handleMouseMove"><slot :x="mouseX" :y="mouseY"></slot></div>
</template><script>
export default {data() {return {mouseX: 0,mouseY: 0,};},methods: {handleMouseMove(event) {this.mouseX = event.clientX;this.mouseY = event.clientY;},},
};
</script><!-- ParentComponent.vue -->
<template><div><MyButton>点我!</MyButton><BaseLayout><template v-slot:header><h1>页面标题</h1></template>主要内容<template v-slot:footer><p>联系信息</p></template></BaseLayout><MouseTracker v-slot="{ x, y }">鼠标位置:{{ x }}, {{ y }}</MouseTracker></div>
</template>
这篇关于跟着官网学 Vue - 插槽的文章就介绍到这儿,希望我们推荐的文章对编程师们有所帮助!


