本文主要是介绍【CSS3】选择器(属性 结构性伪类)--慕课网【学习总结】,希望对大家解决编程问题提供一定的参考价值,需要的开发者们随着小编来一起学习吧!
1.属性选择器
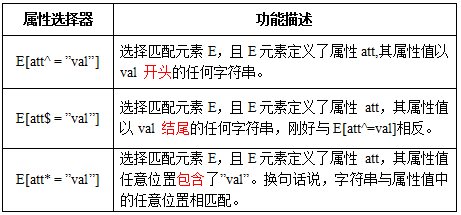
CSS3新增了3个属性选择器,使得属性选择器有了通配符的概念,这三个属性选择器与CSS2的属性选择器共同构成了CSS功能强大的属性选择器。如下表所示:
【例如】
<!--html代码-->
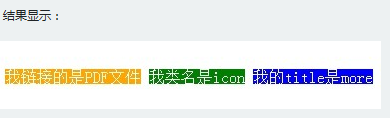
<a href="xxx.pdf">我链接的是PDF文件</a>
<a href="#" class="icon">我类名是icon</a>
<a href="#" title="我的title是more">我的title是more</a>/*css代码*/
a[class^=icon]{background: green;color:#fff;
}
a[href$=pdf]{background: orange;color: #fff;
}
a[title*=more]{background: blue;color: #fff;
}
2.结构性伪类选择器
(1)root & not & empty & target
①root
根选择器:匹配元素E所在文档的根元素。在HTML文档中,根元素始终是<html>。
“:root”选择器等同于 <html> 元素:
:root{background:orange}
html {background:orange;}- 建议使用:root方法。
- 另外在IE9以下还可以借助“:root”实现hack功能。
【例如】
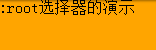
<!--html代码-->
<div>:root选择器的演示</div>/*css代码*/
:root {background:orange;
}
效果:
②not
否定选择器:可以选择除某个元素之外的所有元素。和jQuery中的:not选择器一模一样。
【例如】
给form表单中除submit按钮之外的input元素添加红色边框:
/*css代码*/
form {width: 200px;margin: 20px auto;
}
div {margin-bottom: 20px;
}
input:not([type="submit"]){border:1px solid red;
}
<!--html代码-->
<form action="#"><div><label for="name">Text Input:</label><input type="text" name="name" id="name" placeholder="John Smith" /></div><div><label for="name">Password Input:</label><input type="text" name="name" id="name" placeholder="John Smith" /></div><div><input type="submit" value="Submit" /></div>
</form>效果:

③empty
空选择器。用来选择没有任何内容的元素,这里没有内容指的是一点内容都没有,哪怕是一个空格。
【例如】
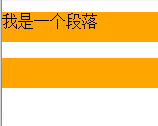
有三个段落p元素,需把没有任何内容的P元素隐藏起来。就可以使用“:empty”选择器来控制:
<!--html代码-->
<p>我是一个段落</p>
<p> </p>
<p></p>/*css代码*/
p{background: orange;min-height: 30px;
}
p:empty {display: none;
}效果:
④target
目标选择器,用来匹配文档(页面)的url的某个标志符的目标元素。
【例如1】
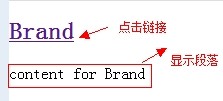
点击链接显示隐藏的段落:
<!--html代码-->
<h2><a href="#brand">Brand</a></h2>
<div class="menuSection" id="brand">content for Brand
</div>
/*css代码*/
.menuSection{display: none;
}
:target{/*这里的:target就是指id="brand"的div对象*/display:block;
}效果:
【分析】
1、具体来说,触发元素的URL中的标志符通常会包含一个#号,后面带有一个标志符名称,上面代码中是:#brand;
2、:target就是用来匹配id为“brand”的元素(id=”brand”的元素),上面代码中是那个div元素。
【例如2】
多个url(多个target)处理:
就像上面的例子,#brand与后面的id=”brand”是对应的,当同一个页面上有很多的url的时候你可以取不同的名字,只要#号后对的名称与id=""中的名称对应就可以了。下面可以对不同的target对象分别设置不的样式:
<!--html代码-->
<h2><a href="#brand">Brand</a></h2>
<div class="menuSection" id="brand">content for Brand
</div>
<h2><a href="#jake">Brand</a></h2>
<div class="menuSection" id="jake">content for jake
</div>
<h2><a href="#aron">Brand</a></h2>
<div class="menuSection" id="aron">content for aron
</div>
/*css代码*/
#brand:target {background: orange;color: #fff;
}
#jake:target {background: blue;color: #fff;
}
#aron:target {background: red;color: #fff;
}(2)first-child & last-child & nth-child(n) & nth-last-child(n)
①first-child
选择其父元素的第一个子元素。简单点理解就是选择元素中的第一个子元素,记住是子元素,而不是后代元素。
【例如】
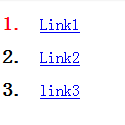
通过“:first-child”选择器定位列表中的第一个列表项,并将序列号颜色变为红色:(指定属于其父元素ol的第一个子元素的 li 元素的颜色)
<!--html代码-->
<ol><li><a href="##">Link1</a></li><li><a href="##">Link2</a></li><li><a href="##">link3</a></li>
</ol>
/*css代码*/
ol > li:first-child{color: red;
}效果:
②last-child
“:last-child”选择器选择的是其父元素的最后一个子元素。
【例如】
指定属于其父元素ul的最后一个子元素的 li 元素的背景色:
ul>li:last-child{background:blue;}③nth-child(n)
“:nth-child(n)”选择器用来定位某个父元素的一个或多个特定的子元素(顺序)。
其中“n”是其参数,而且可以是整数值(1,2,3,4),也可以是表达式(2n+1、-n+5)和关键词(odd、even),但参数n的起始值始终是1,而不是0。也就是说,参数n的值为0时,选择器将选择不到任何匹配的元素。
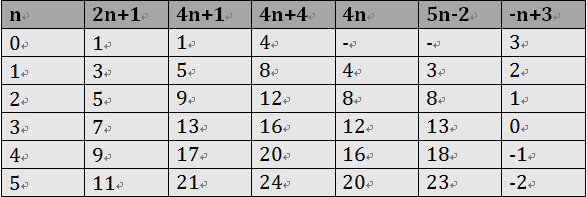
【经验与技巧】
当“:nth-child(n)”选择器中的n为一个表达式时,其中n是从0开始计算,当表达式的值为0或小于0的时候,不选择任何匹配的元素。如下表所示:
【例如】
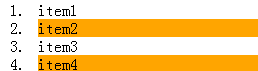
通过“:nth-child(n)”选择器,并且参数使用表达式“2n”,将偶数行列表背景色设置为橙色:
<!--html代码-->
<ol><li>item1</li><li>item2</li><li>item3</li><li>item4</li>
</ol>/*css代码*/
ol > li:nth-child(2n){background: orange;
}效果:
④nth-last-child(n)
从某父元素的最后一个子元素(逆序)开始计算,来选择特定的元素。
- 小tips: p:last-child 等同于 p:nth-last-child(1)。
【例如】
选择列表中倒数第五个列表项,将其背景设置为橙色:
/*css代码*/
ol > li:nth-last-child(5){background: orange;
}
(3)first-of-type & last-of-type & nth-of-type(n) & nth-last-of-type(n)
①first-of-type选择器
“:first-of-type”选择器类似于“:first-child”选择器,不同之处就是指定了元素的类型,其主要用来定位一个父元素下的某个类型的第一个子元素。
【例如】
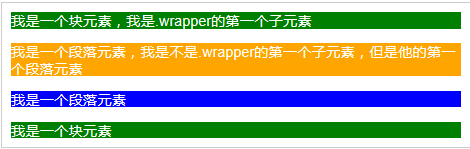
定位div容器中的第一个p元素(p不一定是容器中的第一个子元素),并设置其背景色为橙色:
<!--html代码-->
<div class="wrapper"><div>我是一个块元素,我是.wrapper的第一个子元素</div><p>我是一个段落元素,我是不是.wrapper的第一个子元素,但是他的第一个段落元素</p><p>我是一个段落元素</p><div>我是一个块元素</div>
</div>
.wrapper {width: 500px;margin: 20px auto;padding: 10px;border: 1px solid #ccc;color: #fff;
}
.wrapper > div {background: green;
}
.wrapper > p {background: blue;
}
/*我要改变第一个段落的背景为橙色*/
.wrapper > p:first-of-type {background: orange;
}效果:
②last-of-type选择器
用来定位一个父元素下的某个类型的最后一个子元素。
【例如】
通过“:last-of-type”选择器,将容器“div.wrapper”中最后一个段落元素背景设置为橙色(这个段落不是“div.wrapper”容器的最后一个子元素):
 .wrapper > p:last-of-type{background: orange;
}
③nth-of-type(n)选择器
“:nth-of-type(n)”选择器和“:nth-child(n)”选择器非常类似,不同的是它只计算父元素中指定的某种类型的子元素(顺序)。
- 在
“:nth-of-type(n)”选择器中的“n”和“:nth-child(n)”选择器中的“n”参数也一样,可以是具体的整数,也可以是表达式,还可以是关键词。
【例如】
通过“:nth-of-type(2n)”选择器,将容器“div.wrapper”中偶数段数的背景设置为橙色:
.wrapper > p:nth-of-type(2n){background: orange;
}
④nth-last-of-type(n)选择器
“:nth-last-of-type(n)”选择器和“:nth-of-type(n)”选择器是一样的,选择父元素中指定的某种子元素类型,但它的起始方向是从最后一个子元素开始(逆序)。
【例如】
通过“:nth-last-of-type(n)”选择器将容器“div.wrapper”中的倒数第三个段落背景设置为橙色。:
.wrapper > p:nth-last-of-type(3){background: orange;
}
(4)only-child & only-of-type
①only-child选择器
匹配的元素的父元素中仅有一个子元素,而且是一个唯一的子元素。
【例如】
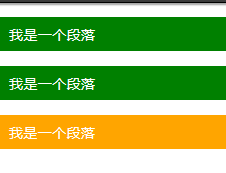
通过“:only-child”选择器,来控制仅有一个子元素的背景样式:
<!--html代码-->
<div class="post"><p>我是一个段落</p><p>我是一个段落</p>
</div>
<div class="post"><p>我是一个段落</p>
</div>
.post p {background: green;color: #fff;padding: 10px;
}
.post p:only-child {background: orange;
}效果:
②only-of-type选择器
“:only-of-type”是表示一个元素他有很多个子元素,而其中只有一种类型的子元素是唯一的,使用“:only-of-type”选择器就可以选中这个元素中的唯一一个类型子元素。
【例如】
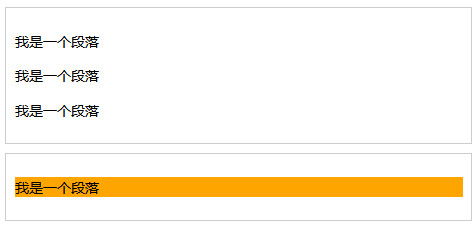
通过“:only-of-type”选择器来修改容器中仅有一个div元素的背景色为橙色:
<!--html代码-->
<div class="wrapper"><p>我是一个段落</p><p>我是一个段落</p><p>我是一个段落</p>
</div><div class="wrapper"><p>我是一个段落</p>
</div>
.wrapper p:only-of-type{background: orange;
}效果:
这篇关于【CSS3】选择器(属性 结构性伪类)--慕课网【学习总结】的文章就介绍到这儿,希望我们推荐的文章对编程师们有所帮助!


