本文主要是介绍实践:Ceres BA(1),希望对大家解决编程问题提供一定的参考价值,需要的开发者们随着小编来一起学习吧!
1.Ceres BA
我们用BAL数据集进行BA,一个场景中的路标和相机位姿由文本给定,具体格式见:http://grail.cs.washington.edu/projects/bal,使用common.h中定义的BALProblem类读入该文件的内容,然后分别用Ceres和g2o求解
我们对要求看完后,对代码的结构进行由框架到内部细节的实现,流程分析过程如下:
int main(int argc, char **argv) {if (argc != 2) {cout << "usage: bundle_adjustment_ceres bal_data.txt" << endl;return 1;}BALProblem bal_problem(argv[1]);  bal_problem.Normalize();  bal_problem.Perturb(0.1, 0.5, 0.5);bal_problem.WriteToPLYFile("initial.ply");SolveBA(bal_problem);bal_problem.WriteToPLYFile("final.ply");return 0;
}
(1)构建BALProblem类,创建类对象从数据集(文件)种读取数据;
(2)通过调用BALProblem类中的函数Normalize()函数对原始数据进行归一化(z轴值为1,将其投影到归一化平面,然后做一个合适的尺度缩放(此处的理解可以参考光流法中的金字塔模型比较好理解),使得优化数值更稳定,防止出现误差大,偏移大的BA约束边;
(3)调用BALProblem类中的Perbturb()函数给数据加上噪声,符合真实情况下采集到的带误差的数据;
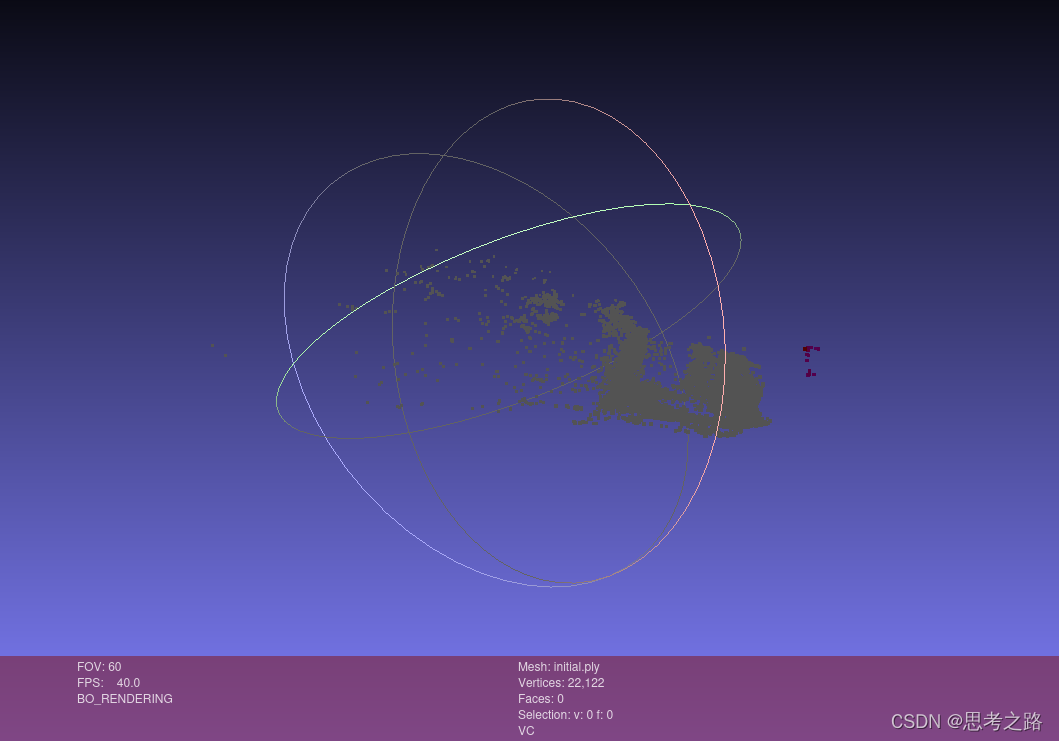
(4)调用BALProblem类内的WriteToPLYFile()函数,将读到的带噪声的文本数据写入以.ply为后缀的点云文件中,然后通过Meshlab软件进行可视化查看;
(5)搭建BA问题,构建SolveBA()函数来求解即对进行文本种给定的数据(相机的内参,外参,路标点)进行优化;
(6)将优化后的数据写入新建的ply点云文件中进行可视化显示;
该实例的大致流程可以分为这5步,现在我们年针对每步骤的实现进行细节性的分析和实现。
1)构建BALProblem类,创建类对象从数据集(文件)种读取数据;BALProblem bal_problem(argv[1]);
- 读取数据前需要先构建BALProblem类
通过构建的BALProblem类的构造函数从文件中读取内容;
//explicit关键字只能用于内部的构造函数声明上。用该关键字修饰的类不能发生隐式类型转换,只能显示的方式进行类型转换。
BALProblem::explicit BALProblem(const std::string &filename, bool use_quaternions = false);
创建一个该类的对象,然后嗲用该构造函数,将文件路径传入即可;
2)通过调用BALProblem类中的函数Normalize()函数对原始数据进行归一化(z轴值为1,将其投影到归一化平面,然后做一个合适的尺度缩放(此处的理解可以参考光流法中的金字塔模型比较好理解),使得优化数值更稳定,防止出现误差大,偏移大的BA约束边;bal_problem.Normalize();
void BALProblem::Normalize() {// Compute the marginal median of the geometrystd::vector<double> tmp(num_points_);Eigen::Vector3d median;double *points = mutable_points();for (int i = 0; i < 3; ++i) {for (int j = 0; j < num_points_; ++j) {tmp[j] = points[3 * j + i];}median(i) = Median(&tmp);}for (int i = 0; i < num_points_; ++i) {VectorRef point(points + 3 * i, 3);tmp[i] = (point - median).lpNorm<1>();}const double median_absolute_deviation = Median(&tmp);// Scale so that the median absolute deviation of the resulting// reconstruction is 100const double scale = 100.0 / median_absolute_deviation;// X = scale * (X - median)for (int i = 0; i < num_points_; ++i) {VectorRef point(points + 3 * i, 3);point = scale * (point - median);}double *cameras = mutable_cameras();double angle_axis[3];double center[3];for (int i = 0; i < num_cameras_; ++i) {double *camera = cameras + camera_block_size() * i;CameraToAngelAxisAndCenter(camera, angle_axis, center);// center = scale * (center - median)VectorRef(center, 3) = scale * (VectorRef(center, 3) - median);AngleAxisAndCenterToCamera(angle_axis, center, camera);}
}
- 进行归一化,首先需要从获取到的内容中找到路标点的3D坐标值;
调用double* BALProblem:: mutable_points() { return parameters_ + camera_block_size() * num_cameras_; }来获取路标点的起始地址;
通过数据集中数据的存储格式:

我们可以知道路标点的起始地址在相机数据的后面,而相机的参数的大小由相机待优化的变量个数和相机的个数有关,通过
parameters_ + camera_block_size() * num_cameras_;就可以得到路标点的起始地址,其中parameters_是相机参数的其是地址const double *BALProblem::cameras() const { return parameters_; }, num_cameras_是相机个数int BALProblem::num_cameras() const { return num_cameras_; }, 其中的camera_block_size()是每个相机中待优化的变量的个数:int camera_block_size() const { return use_quaternions_ ? 10 : 9; },如果是四元数就是10个优化变量,如果为false,就是9个待优化变量(三个维度的旋转,三个维度的平移,焦距f,畸变系数k2,k1)。
定位找到数据中路标点的起始地址后,开始获取对应的坐标值,每个路标点是三维的,所以通过
std::vector<double> tmp(num_points_);
Eigen::Vector3d median;
for (int i = 0; i < 3; ++i) {for (int j = 0; j < num_points_; ++j) {tmp[j] = points[3 * j + i];}median(i) = Median(&tmp);}
获取路标点的坐标值,并作排序,然后将每个路标点进行欧拉范式操作然后进行存储
typedef Eigen::Map<Eigen::VectorXd> VectorRef;
for (int i = 0; i < num_points_; ++i) {VectorRef point(points + 3 * i, 3);tmp[i] = (point - median).lpNorm<1>();}const double median_absolute_deviation = Median(&tmp);
然后通过Scale的缩放,归一化操作
const double scale = 100.0 / median_absolute_deviation;// X = scale * (X - median)for (int i = 0; i < num_points_; ++i) {VectorRef point(points + 3 * i, 3);point = scale * (point - median);}
接下来通过获取到的相机的起始地址来获取像机的参数,然后对相机的平移部分进行对应的缩放操作:
double *cameras = mutable_cameras();double angle_axis[3];double center[3];for (int i = 0; i < num_cameras_; ++i) {double *camera = cameras + camera_block_size() * i;CameraToAngelAxisAndCenter(camera, angle_axis, center);// center = scale * (center - median)VectorRef(center, 3) = scale * (VectorRef(center, 3) - median);AngleAxisAndCenterToCamera(angle_axis, center, camera);}
void BALProblem::CameraToAngelAxisAndCenter(const double *camera,double *angle_axis,double *center) const {VectorRef angle_axis_ref(angle_axis, 3);if (use_quaternions_) {QuaternionToAngleAxis(camera, angle_axis);} else {angle_axis_ref = ConstVectorRef(camera, 3);}// c = -R'tEigen::VectorXd inverse_rotation = -angle_axis_ref;AngleAxisRotatePoint(inverse_rotation.data(),camera + camera_block_size() - 6,center);VectorRef(center, 3) *= -1.0;
}void BALProblem::AngleAxisAndCenterToCamera(const double *angle_axis,const double *center,double *camera) const {ConstVectorRef angle_axis_ref(angle_axis, 3);if (use_quaternions_) {AngleAxisToQuaternion(angle_axis, camera);} else {VectorRef(camera, 3) = angle_axis_ref;}// t = -R * cAngleAxisRotatePoint(angle_axis, center, camera + camera_block_size() - 6);VectorRef(camera + camera_block_size() - 6, 3) *= -1.0;
}
3)调用BALProblem类中的Perbturb()函数给数据加上噪声,符合真实情况下采集到的带误差的数据bal_problem.Perturb(0.1, 0.5, 0.5);
void BALProblem::Perturb(const double rotation_sigma,const double translation_sigma,const double point_sigma) {assert(point_sigma >= 0.0);assert(rotation_sigma >= 0.0);assert(translation_sigma >= 0.0);double *points = mutable_points();if (point_sigma > 0) {for (int i = 0; i < num_points_; ++i) {PerturbPoint3(point_sigma, points + 3 * i);}}for (int i = 0; i < num_cameras_; ++i) {double *camera = mutable_cameras() + camera_block_size() * i;double angle_axis[3];double center[3];// Perturb in the rotation of the camera in the angle-axis// representationCameraToAngelAxisAndCenter(camera, angle_axis, center);if (rotation_sigma > 0.0) {PerturbPoint3(rotation_sigma, angle_axis);}AngleAxisAndCenterToCamera(angle_axis, center, camera);if (translation_sigma > 0.0)PerturbPoint3(translation_sigma, camera + camera_block_size() - 6);}
}
- 分别给路标点,相机的旋转和平移添加噪声数据
4)调用BALProblem类内的WriteToPLYFile()函数,将读到的带噪声的文本数据写入以.ply为后缀的点云文件中,然后通过Meshlab软件进行可视化查看bal_problem.WriteToPLYFile("initial.ply");
向该文件流中导入相机的平移向量和路标点,和通道颜色。
void BALProblem::WriteToPLYFile(const std::string &filename) const {std::ofstream of(filename.c_str());of << "ply"<< '\n' << "format ascii 1.0"<< '\n' << "element vertex " << num_cameras_ + num_points_<< '\n' << "property float x"<< '\n' << "property float y"<< '\n' << "property float z"<< '\n' << "property uchar red"<< '\n' << "property uchar green"<< '\n' << "property uchar blue"<< '\n' << "end_header" << std::endl;// Export extrinsic data (i.e. camera centers) as green points.double angle_axis[3];double center[3];for (int i = 0; i < num_cameras(); ++i) {const double *camera = cameras() + camera_block_size() * i;CameraToAngelAxisAndCenter(camera, angle_axis, center);of << center[0] << ' ' << center[1] << ' ' << center[2]<< "0 255 0" << '\n';}// Export the structure (i.e. 3D Points) as white points.const double *points = parameters_ + camera_block_size() * num_cameras_;for (int i = 0; i < num_points(); ++i) {const double *point = points + i * point_block_size();for (int j = 0; j < point_block_size(); ++j) {of << point[j] << ' ';}of << "255 255 255\n";}of.close();
}
5)搭建BA问题,构建SolveBA()函数来求解即对进行文本种给定的数据(相机的内参,外参,路标点)进行优化SolveBA(bal_problem);
void SolveBA(BALProblem &bal_problem) {const int point_block_size = bal_problem.point_block_size();const int camera_block_size = bal_problem.camera_block_size();double *points = bal_problem.mutable_points();double *cameras = bal_problem.mutable_cameras();// Observations is 2 * num_observations long array observations// [u_1, u_2, ... u_n], where each u_i is two dimensional, the x// and y position of the observation.const double *observations = bal_problem.observations();ceres::Problem problem;for (int i = 0; i < bal_problem.num_observations(); ++i) {ceres::CostFunction *cost_function;// Each Residual block takes a point and a camera as input// and outputs a 2 dimensional Residualcost_function = SnavelyReprojectionError::Create(observations[2 * i + 0], observations[2 * i + 1]);// If enabled use Huber's loss function.ceres::LossFunction *loss_function = new ceres::HuberLoss(1.0);// Each observation corresponds to a pair of a camera and a point// which are identified by camera_index()[i] and point_index()[i]// respectively.double *camera = cameras + camera_block_size * bal_problem.camera_index()[i];double *point = points + point_block_size * bal_problem.point_index()[i];problem.AddResidualBlock(cost_function, loss_function, camera, point);}// show some information here ...std::cout << "bal problem file loaded..." << std::endl;std::cout << "bal problem have " << bal_problem.num_cameras() << " cameras and "<< bal_problem.num_points() << " points. " << std::endl;std::cout << "Forming " << bal_problem.num_observations() << " observations. " << std::endl;std::cout << "Solving ceres BA ... " << endl;ceres::Solver::Options options;options.linear_solver_type = ceres::LinearSolverType::SPARSE_SCHUR;options.minimizer_progress_to_stdout = true;ceres::Solver::Summary summary;ceres::Solve(options, &problem, &summary);std::cout << summary.FullReport() << "\n";
}
BA问题就是从视觉图像中优化路标的3d模型空间位置和相机的内参和外参的过程。首先我们需要构建最小二乘问题ceres::Problem problem其中最主要的步骤就是向问题中添加误差项problem.AddResidualBlock(cost_function, loss_function, camera, point);其中每一个残差都是由一个相机和一个观测点产生的,每一个残差有u,v两个坐标的值描述,cost_function = SnavelyReprojectionError::Create(observations[2 * i + 0], observations[2 * i + 1]);, 然后在对应的误差项中添加核函数ceres::LossFunction *loss_function = new ceres::HuberLoss(1.0);和待估计的变量double *camera = cameras + camera_block_size * bal_problem.camera_index()[i]; double *point = points + point_block_size * bal_problem.point_index()[i];
其中的残差的构建:static ceres::CostFunction *Create(const double observed_x, const double observed_y) { return (new ceres::AutoDiffCostFunction<SnavelyReprojectionError, 2, 9, 3>( new SnavelyReprojectionError(observed_x, observed_y))); }
SnavelyReprojectionError(double observation_x, double observation_y) : observed_x(observation_x),observed_y(observation_y) {}template<typename T>bool operator()(const T *const camera,const T *const point,T *residuals) const {// camera[0,1,2] are the angle-axis rotationT predictions[2];CamProjectionWithDistortion(camera, point, predictions);residuals[0] = predictions[0] - T(observed_x); //预测值-观测值residuals[1] = predictions[1] - T(observed_y);return true;}
// camera : 9 dims array// [0-2] : angle-axis rotation// [3-5] : translateion// [6-8] : camera parameter, [6] focal length, [7-8] second and forth order radial distortion// point : 3D location.// predictions : 2D predictions with center of the image plane.template<typename T>static inline bool CamProjectionWithDistortion(const T *camera, const T *point, T *predictions) {// Rodrigues' formulaT p[3];AngleAxisRotatePoint(camera, point, p);// camera[3,4,5] are the translationp[0] += camera[3];p[1] += camera[4];p[2] += camera[5];// Compute the center fo distortionT xp = -p[0] / p[2];T yp = -p[1] / p[2];// Apply second and fourth order radial distortionconst T &l1 = camera[7];const T &l2 = camera[8];T r2 = xp * xp + yp * yp;T distortion = T(1.0) + r2 * (l1 + l2 * r2);const T &focal = camera[6];predictions[0] = focal * distortion * xp;predictions[1] = focal * distortion * yp;return true;}
最后通过配置求解器ceres::Solver::Options options; 选择有优化选项options.linear_solver_type = ceres::LinearSolverType::SPARSE_SCHUR;选择增量方程求解方式,使用SPARSE_SCHUR会让Ceres实际求解过程和我们书本中描述的一致,即先对路标部分进行Schur边缘化,以加速的方式求解此问题,不过,在Ceres中我们不能确定先对哪部分变量边缘化,由Ceres求解器自动寻找并计算。然后输出到cout options.minimizer_progress_to_stdout = true;,最后开始优化 ceres::Solve(options, &problem, &summary); 其中ceres::Solver::Summary summary;是优化信息。
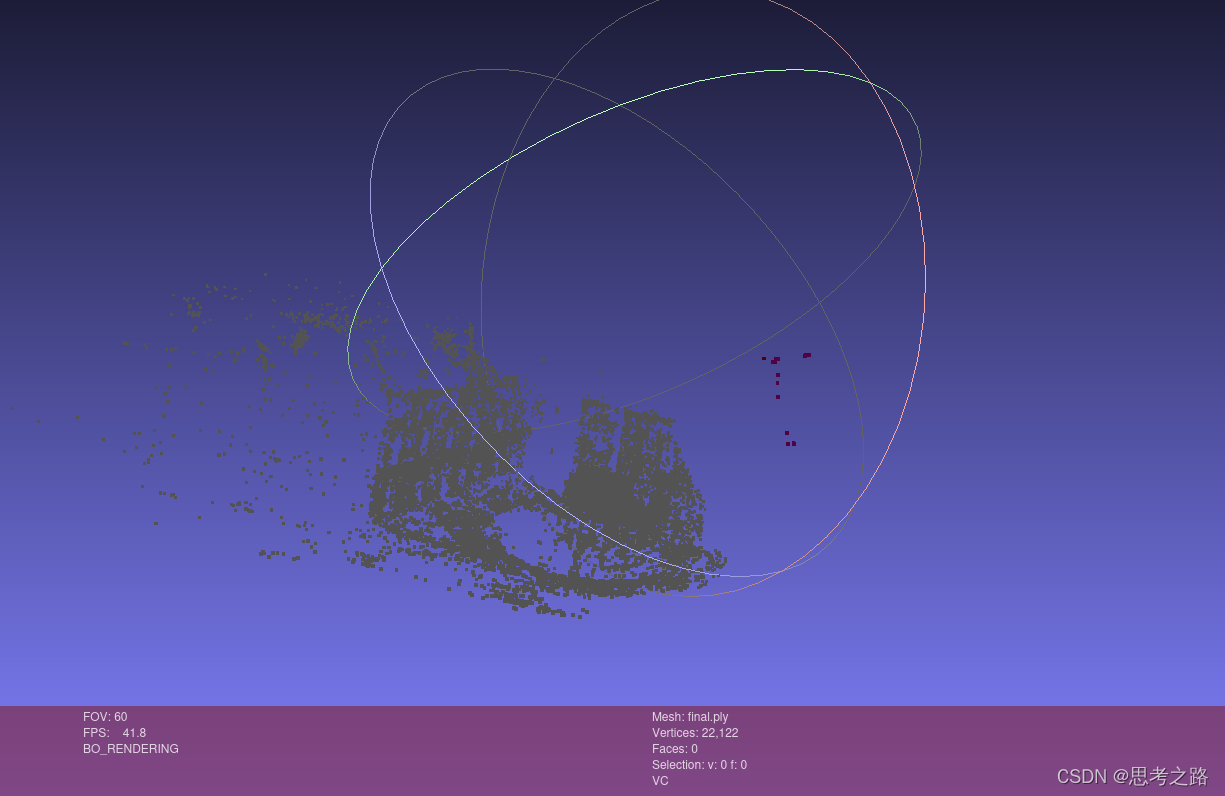
6)将优化后的数据写入新建的ply点云文件中进行可视化显示bal_problem.WriteToPLYFile("final.ply");
最后将优化后的数据写入对应的点云文件中,通过可视化工具看优化结果。
实验的运行结果:
initial.ply
final.ply
这篇关于实践:Ceres BA(1)的文章就介绍到这儿,希望我们推荐的文章对编程师们有所帮助!


