本文主要是介绍如何检测人的脸部特征_自动面部特征检测,希望对大家解决编程问题提供一定的参考价值,需要的开发者们随着小编来一起学习吧!
如何检测人的脸部特征
Identify faces and extract up to 6 facial features with few lines of code!
只需几行代码即可识别面部并提取多达6个面部特征!
Detection of facial landmarks and their feature points plays an important role in many facial image-related applications such as face recognition or verification, facial expression analysis, pose normalization, and 3D face reconstruction.
面部界标及其特征点的检测在许多与面部图像相关的应用程序中扮演重要角色,例如面部识别或验证,面部表情分析,姿势归一化和3D面部重构。
Detection of facial features is easy for persons; however, for machines it is not an easy task at all. The difficulty comes from high inter-personal variation (e.g., gender, race), intra-personal changes (e.g., pose, expression), and from acquisition conditions (e.g., lighting, image resolution). As a beginner in computer vision, I am sure all of us would have faced a similar challenge of detecting features. To cover variety of facial landmarks needs endless lines of codes.
人的面部特征检测很容易; 但是,对于机器而言,这绝非易事。 困难来自人际间的高度差异(例如性别,种族),人际内部的变化(例如姿势,表情)以及获取条件(例如照明,图像分辨率)。 作为计算机视觉的初学者,我相信我们每个人都会面临类似的特征检测挑战。 要覆盖各种面部标志,需要无休止的代码行。
This motivated me to write a python module called AutoFacialFeatures for performing an automated facial features detection on virtually any image. I am sharing this module so that you can customize and add additional functions as per your choice.
这促使我编写了一个名为AutoFacialFeatures的python模块,用于对几乎所有图像执行自动面部特征检测。 我正在共享此模块,以便您可以根据需要自定义和添加其他功能。
For the source code please visit the following link:
有关源代码,请访问以下链接:
AutoFacialFeatures可以做什么? (What AutoFacialFeatures can do?)
This customizable automated facial features detection module allows the user to detect facial features real-time using webcam, capture a selfie using webcam and detect its facial features, detect for stored face images while taking care of face alignment, image sharpening, image resizing and facial features extraction.
该可自定义的自动面部特征检测模块允许用户使用网络摄像头实时检测面部特征,使用网络摄像头捕获自拍并检测其面部特征,检测存储的面部图像,同时注意面部对齐,图像锐化,图像调整大小和面部特征提取。
I will demonstrate the working of AutoFacialFeatures using real-time and strored images.
我将使用实时图像和强化图像演示AutoFacialFeatures的工作。
先决条件 (Prerequisites)
There are a few packages that must be installed before we can proceed any further. You must install Anaconda distribution which includes most of the packages . You can read this article for a guide to install Anaconda.
在继续进行下一步之前,必须先安装一些软件包。 您必须安装包含大多数软件包的Anaconda发行版 。 您可以阅读该文章的指南,安装Python。
Other packages need to be installed separately by following these steps:
其他套餐 需要按照以下步骤单独安装:
Make sure that you have Python 3.6 or greater installed.
确保您已安装Python 3.6或更高版本。
Install imutils, cmake, cv2 and dlib using PIP command either in Command Prompt or Anaconda Prompt:
在命令提示符或Anaconda提示符中使用PIP命令安装imutils,cmake,cv2和dlib :
$
$ pip install cmake
$ pip install opencv-python
$ pip install dlib
Without further ado, let us use the face detection module!
事不宜迟,让我们使用人脸检测模块!
导入模块 (Importing Module)
Download AutoFacialFeatures.py and shape_predictor_68_face_landmarks.dat (The pre-trained facial landmark predictor model file) files from the links shared above and store them in your working directory (the location where all your other python files and datasets are stored).
从上面共享的链接下载AutoFacialFeatures.py和shape_predictor_68_face_landmarks.dat (预先训练的面部界标预测器模型文件)文件,并将它们存储在您的工作目录中(所有其他python文件和数据集的存储位置)。
Create a new python file where you want to work and import the module in that file.
在要工作的地方创建一个新的python文件,然后将该模块导入该文件中。
# import the autoFacialFeatures module
from AutoFacialFeatures import *
In the above program, all the functions defined in AutoFacialFeatures.py file are imported .
在以上程序中,将导入AutoFacialFeatures.py文件中定义的所有功能。
autoFacialFeatures参数 (autoFacialFeatures Parameters)
Once the module is imported, you can call autoFacialFeatures function in your python file which will automatically do all the required face detection and feature extraction on your image. Before calling the function we must understand the function parameters:
导入模块后,您可以在python文件中调用autoFacialFeatures函数,该函数将自动对图像进行所有必需的面部检测和特征提取。 在调用函数之前,我们必须了解函数参数:
autoFacialFeatures(realtime,img_format,
                   capture_img,image_name,
                   face_align, radius,
                   sharpen,sharp_filter,
                   n_sharp,sigma,strength,
                   sharpen_resize,sharpen_resize_dim,
extract_roi,img_width)realtime: boolean. (True if you want to detect real-time facial features using your webcam), default: False
实时 :布尔值。 (如果要使用网络摄像头检测实时面部特征,则为True),默认值:False
img_format: variable of str. (The name of the format in which you want to save your captured image like ‘jpg’ or ‘png’), default: None
img_format :str的变量 (您要保存捕获的图像的格式名称,例如“ jpg”或“ png”),默认值:无
capture_img: boolean. (True if you want to detect facial features on your selfie taken using your webcam), default: True
capture_img :布尔值。 (如果要检测使用网络摄像头拍摄的自拍照的面部特征,则为True),默认值为:True
image_name: variable of str. (The name you wish to give to the duplicate of the image for which you want to detect facial features), default: None
image_name :str的变量。 (要为要检测其面部特征的图像副本指定的名称),默认值:无
face_align: boolean. (True if you want to align the face in the image before detecting facial features), default: True
face_align :布尔值 (如果要在检测面部特征之前将图像中的面部对齐,则为True),默认值为:True
radius: int. (The size of the dots outlining the facial features), default: 3
半径 :整数。 (概述面部特征的点的大小),默认值:3
sharpen: boolean. (True if you want to sharpen the blurred image before detecting facial features), default: False
锐化:布尔值。 (如果要在检测面部特征之前对模糊的图像进行锐化,则为真),默认值:False
sharp_filter: variable of str. (The name of the filter you want to use for sharpening the image, ‘gaussian’ or ‘median’- for more info regarding these filters refer to the source code), default: ‘gaussian’
sharp_filter: str的变量。 (要用于锐化图像的滤镜名称为“ gaussian”或“ median”,有关这些滤镜的更多信息,请参见源代码),默认值为:“ gaussian”
n_sharp: int. (The number of times you want to apply the sharpening filter), default: None
n_sharp:整数。 (您要应用锐化滤镜的次数),默认值:无
sigma: int. (the value of sigma governs the degree of smoothing), default: 1
sigma:整数 (sigma的值决定平滑程度),默认值:1
strength: float. (the value of strength governs the intensity of the sharpening filter), default: 1.0
强度 :浮动。 (强度值控制锐化滤镜的强度),默认值:1.0
sharpen_resize: boolean. (True if you want to resize the sharpened image before detecting facial features), default: False
sharpen_resize :布尔值。 (如果要在检测面部特征之前调整锐化图像的大小,则为True),默认值:False
sharpen_resize_dim: tuple. (The dimensions to which you want to resize the sharpened image), default: (500,500)
sharpen_resize_dim :元组。 (您想要将锐化后的图像调整为的尺寸),默认值:(500,500)
extract_roi: boolean. (True if you want to extract the different facial regions of interest like jaw, eyebrows, nose etc.), default: True
extract_roi :布尔值。 (如果要提取下巴,眉毛,鼻子等不同的面部感兴趣区域,则为True,默认为:True
img_width: int. (defines the desired face width in pixels.), default: 500
img_width :整数 (以像素为单位定义所需的脸部宽度。)默认值:500
使用网络摄像头实时检测面部特征 (Detect facial features real-time using webcam)
We will set the values of autoFacialFeatures function parameters and then run the program.
我们将设置autoFacialFeatures函数参数的值,然后运行该程序。
autoFacialFeatures(realtime=True)Voila! It automatically does the facial features detection real-time
瞧! 自动实时进行面部特征检测

To exit the webcam window press ESC
要退出网络摄像头窗口,请按ESC键。
使用网络摄像头捕获自拍照并检测其面部特征 (Capturing a selfie using webcam and detecting its facial features)
We will set the values of autoFacialFeatures function parameters and then run the program.
我们将设置autoFacialFeatures函数参数的值,然后运行该程序。
sigma=1
strength=0.8
sharp_filter='gaussian'
n_sharp=2
img_format='png'
img_width=500
sharpen_resize_dim=(400,500)
radius=2pic = cv2.imread(name)
clone = pic.copy()
img_name='face_copy.jpg'
cv2.imwrite(img_name, clone)autoFacialFeatures(img_format=img_format,
             capture_img=True,image_name=img_name,
             face_align=True, radius=radius,
             sharpen=True,sharp_filter=sharp_filter,
             n_sharp=n_sharp,sigma=sigma,strength=strength,
             sharpen_resize=True,
             sharpen_resize_dim=sharpen_resize_dim,
             extract_roi=True,img_width=img_width)
When you run the program, a webcam window will appear. To capture a selfie press Space and the press ESC to close the webcam window. Afterwards continue pressing Space to move to the next steps.
运行该程序时,将显示一个网络摄像头窗口。 要捕获自拍,请按Space,然后按ESC以关闭网络摄像头窗口。 然后,继续按空格键以进行下一步。


检测面部特征以存储图像 (Detect facial features for stored images)
For multiple faces
对于多张脸

name='people.jpg'
radius=1pic = cv2.imread(name)
clone = pic.copy()
img_name='face_copy.jpg'
cv2.imwrite(img_name, clone)autoFacialFeatures(capture_img=False,image_name=img_name,
                   face_align=False, radius=radius,
                   extract_roi=False)
For a single face
单脸

name='female face.jpg'sigma=1
strength=0.8
sharp_filter='gaussian'
n_sharp=1
img_width=500
radius=2pic = cv2.imread(name)
clone = pic.copy()
img_name='face_copy.jpg'
cv2.imwrite(img_name, clone)autoFacialFeatures(realtime=False,
             capture_img=False,image_name=img_name,
             face_align=True, radius=radius,
             sharpen=True,sharp_filter=sharp_filter,
             n_sharp=n_sharp,sigma=sigma,strength=strength,
             sharpen_resize=False,
             extract_roi=True,img_width=img_width)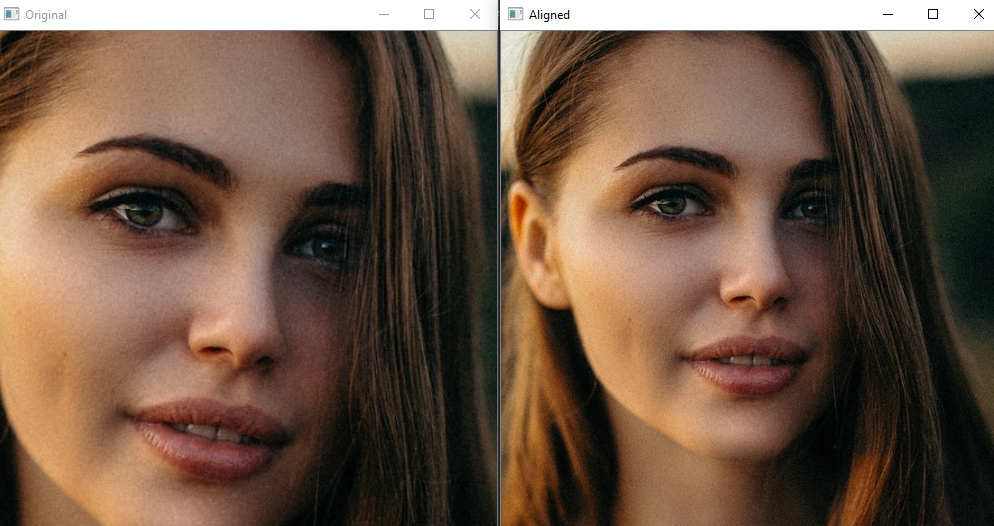


你走之前 (Before You Go)
Thanks for reading! Feel free to use this autoFacialFeatures module for your face detection projects. If you have any difficulty or any doubts kindly comment below. Your support is always highly appreciated. If you want to get in touch with me, reach me on jatin.kataria94@gmail.com.
感谢您 的阅读! 随时使用此 autoFacialFeatures 模块进行面部检测项目。 如果您有任何困难或疑问,请在下面评论。 您的支持始终受到高度赞赏。 如果您想与我联系,请通过jatin.kataria94@gmail.com与我联系。
翻译自: https://medium.com/analytics-vidhya/automated-facial-features-detection-baedbf06a43b
如何检测人的脸部特征
相关文章:
这篇关于如何检测人的脸部特征_自动面部特征检测的文章就介绍到这儿,希望我们推荐的文章对编程师们有所帮助!


