本文主要是介绍vue向ifarm传值_Vue倔强青铜-入门和组件化通信,希望对大家解决编程问题提供一定的参考价值,需要的开发者们随着小编来一起学习吧!

入门
作为前端最容易上手的框架,Vue入门其实没啥说的,我放一段清单的代码,大家能看懂就说明能上手了

<template><div id="app"><h1>{{title}}</h1><div><input type="text" v-model="val"><button @click="add">添加</button><button @click="clear">清空</button></div><ul><li v-for="todo in todos" :key="todo.title" :class="{done:todo.done}"><input type="checkbox" v-model="todo.done">{{todo.title}}</li></ul><p>{{active}} / {{all}}</p></div></template><script>export default {name: "app",data() {return {title: "蜗牛老湿很骚气",val: "",todos: []};},mounted() {const todos = localStorage.getItem("todos");if (todos) {this.todos = JSON.parse(todos);} else {this.todos = [{ title: "吃饭", done: true },{ title: "睡觉", done: false },{ title: "写代码", done: false }];}},computed: {active() {return this.todos.filter(v => !v.done).length;},all() {return this.todos.length;}},watch: {todos: {deep: true,handler(todos) {localStorage.setItem("todos", JSON.stringify(todos));}}},methods: {clear() {this.todos = this.todos.filter(v => !v.done);},add() {if (this.val) {this.todos.push({ title: this.val, done: false });this.val = "";}}}};</script><style>li.done {color: red;text-decoration: line-through;}</style>
大概包含的内容如下,对这个例子熟悉后,才是我们的正文,如果上面代码有没看懂的地方,快去Vuejs官网回顾一下吧
- 变量渲染
- 循环渲染
- class渲染
- 计算属性
- 监听器
- 绑定事件
- 生命周期
组件化
Vue单文件组件。Vue的单文件组件相信大家都体验过,通过vue-cli初始化的项目自动就支持了,新建Child1.vue
<template><div>Child1</div></template><script>export default {}</script>
App中使用
<template><div id="app"><Child1></Child1></div></template><script>import Child1 from '@/components/Child1'export default {name: "app",components:{Child1}}</script>
下面就迎来了第一个常见问题, 如果组件多了,他们之间如何通信唠嗑呢,不要小看这个问题,骚气的面试官,比如我,就经常喜欢问,下面我们来演示一下Vue组件之间常用的通信收件
1. 父传子组件
父子组件传值,最简单的就是通过props传递,话不多说看代码
// App<template><div id="app"><Child1 :title="title1"></Child1></div></template><script>import Child1 from '@/components/Child1'export default {name: "app",data(){return {title1:'我是你爸爸'}},components:{Child1}}</script>// Child1<template><div><h2>Child2</h2><div>{{title}}</div></div></template><script>export default {props:['title']}</script>
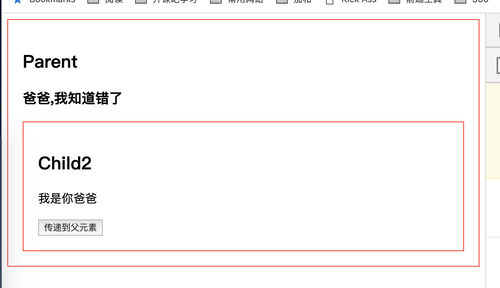
2. 子传父
Vue更推荐单向数据流,所以子组件像修改传递的数据,需要通知父组件来修改,使用$emit触发父元素传递的事件
<template><div id="app"><h2>Parent</h2><h3>{{msg}}</h3><Child1 :title="title1" @getmsg="getmsg"></Child1></div></template><script>import Child1 from '@/components/Child1'export default {name: "app",data(){return {msg:'',title1:'我是你爸爸'}},methods:{getmsg(msg){console.log(msg)this.msg = msg }},components:{Child1}}</script><style>div{border:1px red solid;padding:20px;}</style>// child1<template><div><h2>Child2</h2><p>{{title}}</p><button @click="toParent">传递到父元素</button></div></template><script>export default {props:['title'],methods:{toParent(){this.$emit('getmsg','爸爸,我知道错了')}}}</script>
3. 兄弟组件
兄弟组件不能直接通信,只需要父元素搭个桥即可,大家自己体验即可
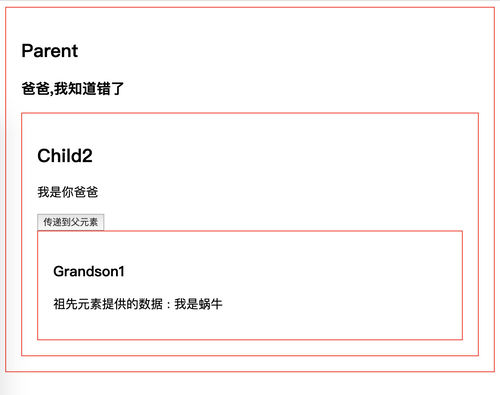
4. 祖先后代 provide & inject
props一层层传递,爷爷给孙子还好,如果嵌套了五六层还这么写,感觉自己就是一个沙雕,所以这里介绍一个 稍微冷门的API, provice/inject,类似React中的上下文,专门用来跨层级提供数据
现在很多开源库都使用这个api来做跨层级的数据共享,比如element-ui的tabs 和 select
<script>import Child1 from '@/components/Child1'export default {name: "app",provide:{woniu:'我是蜗牛'},components:{Child1}}</script><style>// 子孙元素<template><div><h3>Grandson1</h3><p>祖先元素提供的数据 : {{woniu}} </p></div></template><script>export default {inject:['woniu']}</script>
但是provider和inject不是响应式的,如果子孙元素想通知祖先,就需要hack一下,Vue1中有dispatch和boardcast两个方法,但是vue2中被干掉了,我们自己可以模拟一下
原理就是可以通过this.KaTeX parse error: Expected 'EOF', got '和' at position 7: parent和̲this.children来获取父组件和子组件,我们递归一下就可以了
5. dispatch
递归获取$parent即可 比较简单
<button @click="dispatch('dispatch','哈喽 我是GrandGrandChild1')">dispatch</button>methods: {dispatch(eventName, data) {let parent = this.$parent // 查找父元素while (parent ) {if (parent) {// 父元素用$emit触发parent.$emit(eventName,data)// 递归查找父元素parent = parent.$parent }else{break}}}}
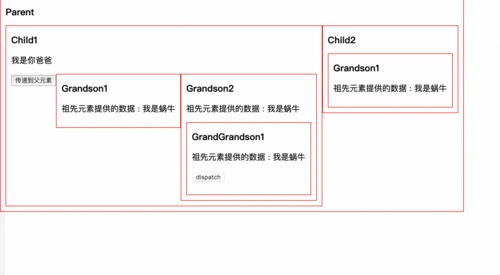
注意只向上传递了,并没有影响别的元素
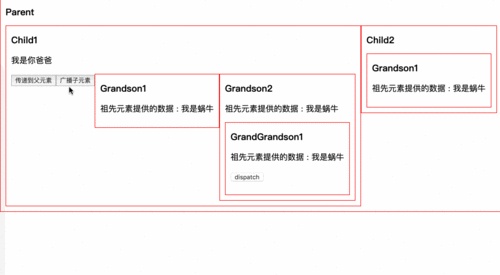
6. boardcast
和dispatch类似,递归获取$children 来向所有子元素广播
<button @click="$boardcast('boardcast','我是Child1')">广播子元素</button>function boardcast(eventName, data){this.$children.forEach(child => {// 子元素触发$emitchild.$emit(eventName, data)if(child.$children.length){// 递归调用,通过call修改this指向 childboardcast.call(child, eventName, data)}});}{methods: {$boardcast(eventName, data) {boardcast.call(this,eventName,data)}}}
7. 全局挂载dispatch和boardcast
想用的时候,需要自己组件内部定理dispatch和boardcast太烦了,我们挂载到Vue的原型链上,岂不是很high,找到main.js
Vue.prototype.$dispatch = function(eventName, data) {let parent = this.$parent // 查找父元素while (parent ) {if (parent) {// 父元素用$emit触发parent.$emit(eventName,data)// 递归查找父元素parent = parent.$parent }else{break}}}Vue.prototype.$boardcast = function(eventName, data){boardcast.call(this,eventName,data)}function boardcast(eventName, data){this.$children.forEach(child => {// 子元素触发$emitchild.$emit(eventName, data)if(child.$children.length){// 递归调用,通过call修改this指向 childboardcast.call(child, eventName, data)}});}
这样组件里直接就可以用了 无压力
8. 没啥关系的组件:event-bus
如果俩组件没啥关系呢,我们只能使用订阅发布模式来做,并且挂载到Vue.protytype之上,我们来试试,我们称呼这种机制为总线机制,也就是喜闻乐见的 event-bus
class Bus{constructor(){// {// eventName1:[fn1,fn2],// eventName2:[fn3,fn4],// }this.callbacks = {}}$on(name,fn){this.callbacks[name] = this.callbacks[name] || []this.callbacks[name].push(fn)}$emit(name,args){if(this.callbacks[name]){// 存在 遍历所有callbackthis.callbacks[name].forEach(cb=> cb(args))}}}Vue.prototype.$bus = new Bus()
使用
// 使用eventBus(){this.$bus.$emit('event-bus','测试eventBus')}// 监听this.$bus.$on("event-bus",msg=>{this.msg = '接收event-bus消息:'+ msg})

9. vuex
总结了那么多,其实最佳实践就是vuex,这个后面再专门写文章学习吧
看完这个文章,Vue组件化通信应该就难不住你了,也恭喜你度过青铜,正式迈入Vue秩序白银级别
文章代码都在 https://github.com/shengxinjing/my_blog/tree/master/vue-communicate
···············································
欢迎关注我的课程:
专门为前端工程师设计 Nodejs+React 实战开发区块链“慕课”Dapp
全网首发mpvue课程 小程序全栈开发
Redux+React Router+Node.js全栈开发
作者:蜗牛老湿
来源:慕课网
本文原创发布于慕课网 ,转载请注明出处,谢谢合作
这篇关于vue向ifarm传值_Vue倔强青铜-入门和组件化通信的文章就介绍到这儿,希望我们推荐的文章对编程师们有所帮助!


