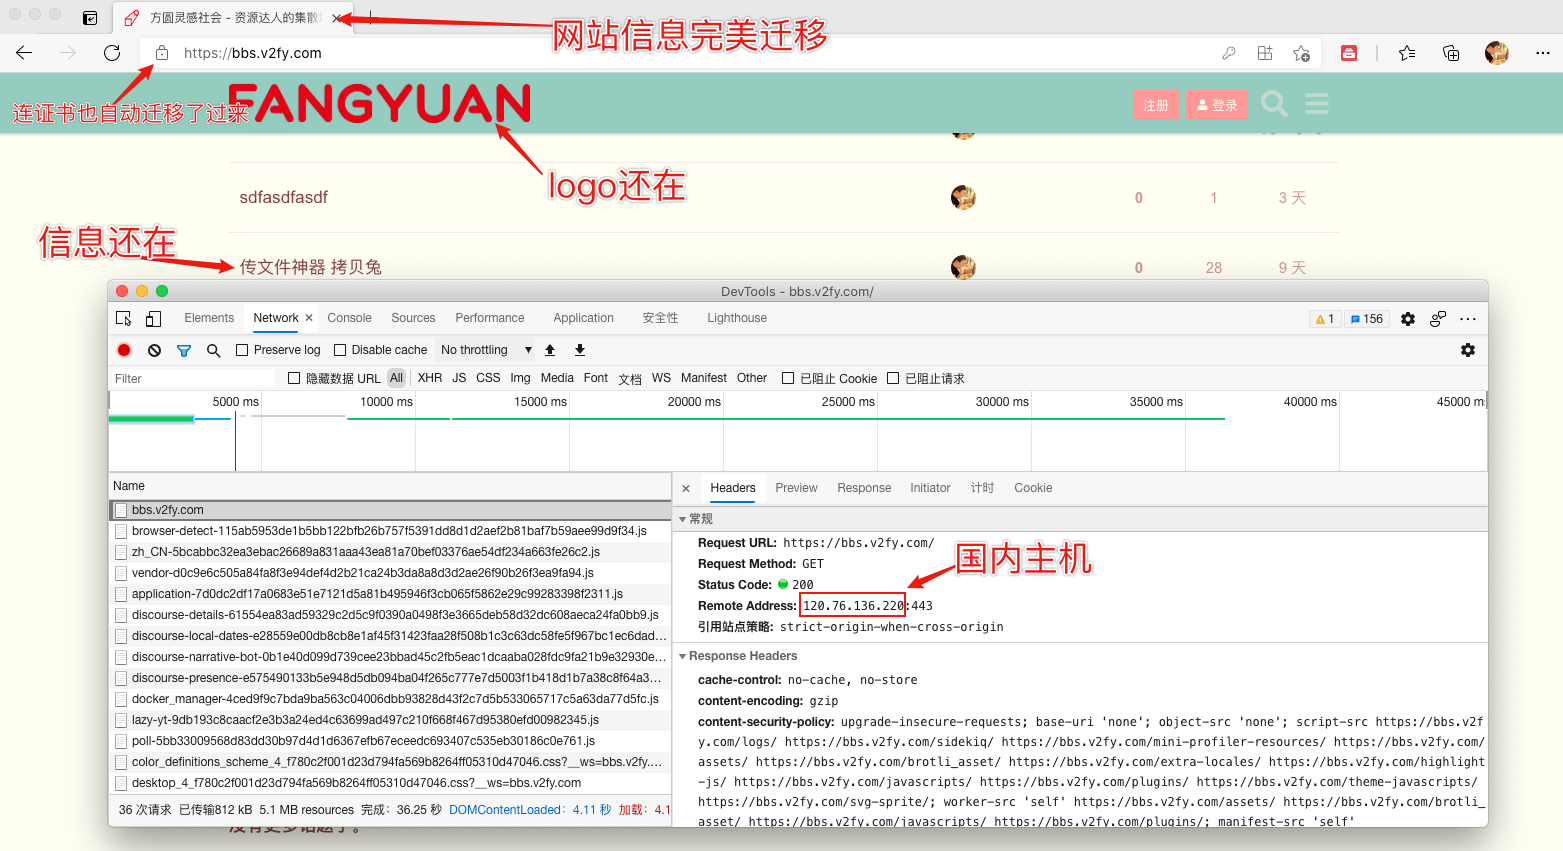
本文主要是介绍将BBS网站Discourse从海外主机完美迁移到国内云服务器, 国内主机同时运行WordPress和Discourse服务...,希望对大家解决编程问题提供一定的参考价值,需要的开发者们随着小编来一起学习吧!
我前两天把 Discourse这个论坛服务部署到了一个轻量云服务器上, 详情 给热心老哥搭个窝,2021年30分钟用Discourse搭建新一代BBS论坛站全攻略
海外的云服务在国内访问很慢, 于是我开始了将Discourse往国内云迁移的探索.
遇到的问题
- Discourse依赖包极多, 官方推荐Docker部署, 但启动Docker的容器默认绑定了80 和 443 端口
- Discourse 强依赖Github, 无论是安装还是构建都需要Github, 而国内云访问Github极其不稳定, 经常失败
- Discourse官方没有给出数据迁移的详细教程, 2021年的Discourse中文网完全打不开, 要完成完美的迁移过程, 全靠自己猜
解决Docker部署默认绑定80 和 443 端口的问题
在 containers/app.yml 中添加以下几行参数可以解决端口映射的问题
expose:- "20080:80" # http- "20443:443" # https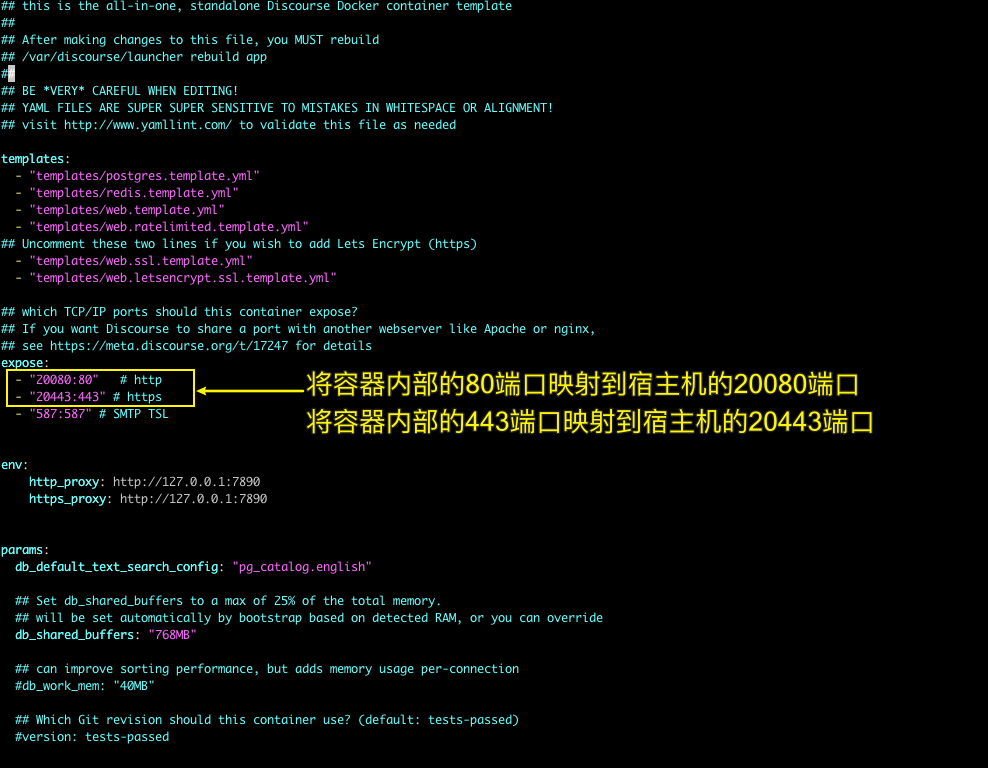
解决Discourse安装和构建期间, 访问Github失败的问题
首先按照 为国内WordPress主机配置代理,解决从插件商店下载插件失败,无法验证Google官方插件Site Kit的问题 中提供的步骤, 在国内云服务器端开启魔法上网服务
在 containers/app.yml 中添加以下几行参数可以解决Discourse安装和构建期间, 访问Github失败的问题
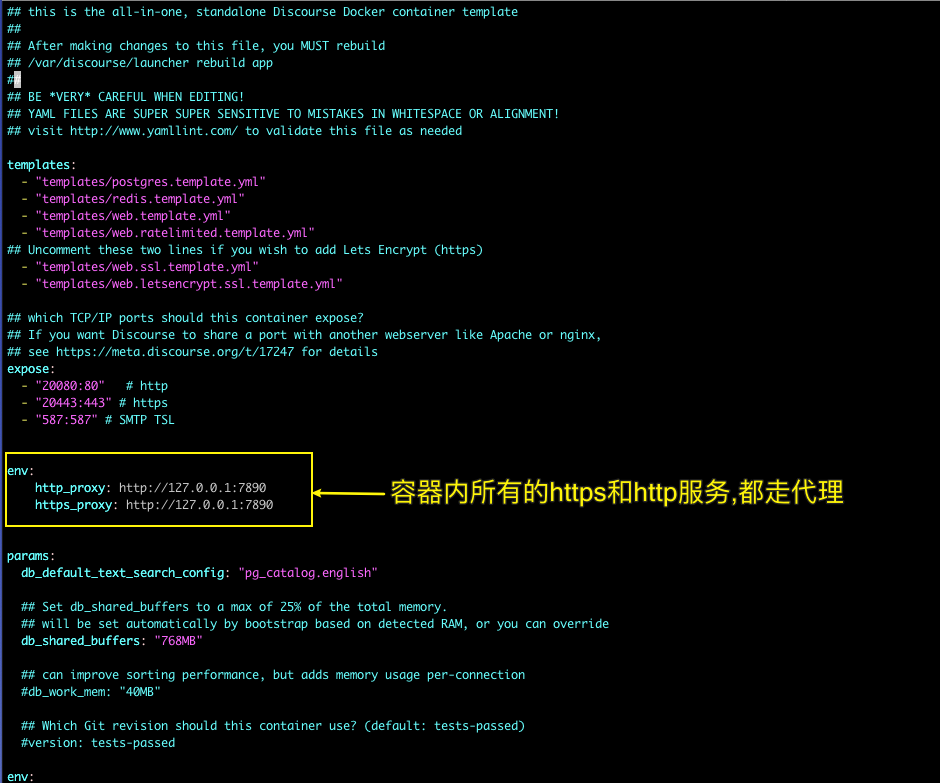
env:http_proxy: http://127.0.0.1:7890https_proxy: http://127.0.0.1:7890另外docker 拉取基础镜像也需要走海外代理, 需要在 ~/.docker/config.json 中添加走代理服务的设置
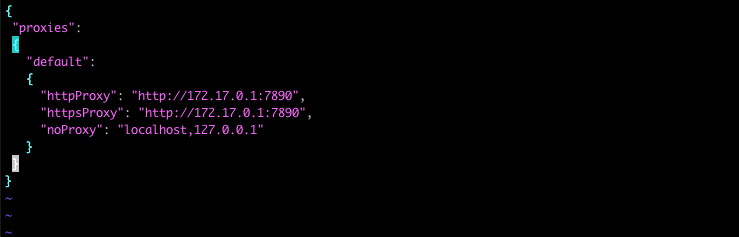
{"proxies":{"default":{"httpProxy": "http://172.17.0.1:7890","httpsProxy": "http://172.17.0.1:7890","noProxy": "localhost,127.0.0.1"}}
}
另外, 在国内执行 ./launcher rebuild app 前, 最好在当前终端先执行以下语句
export https_proxy=http://127.0.0.1:7890 http_proxy=http://127.0.0.1:7890(以上均为国内云服务器, 无法魔法上网, 导致我被坑的血泪史...)
解决Discourse从海外迁移到国内的问题
首先进入已经可以提供服务的服务器, 进入默认项目目录
/var/discourse
运行 ./launcher enter app 进入容器

运行discourse 可以看的命令提示

输入 discourse backup, 回车获取备份包

备份包的位置为
/var/www/discourse/public/backups/default/discourse-2021-06-21-100849-v20210617202227.tar.gz通过scp 将 /var/www/discourse/public/backups/default/discourse-2021-06-21-100849-v20210617202227.tar.gz 传送到国内新云服务器的/opt/ 目录
scp /var/www/discourse/public/backups/default/discourse-2021-06-21-100849-v20210617202227.tar.gz root@国内云服务器IP:/opt/(scp这个命令真的超实用, 在容器内部也能用!建议仔细记一下scp的使用方法)

按 Control+D 退出容器, 回到海外宿主机

将app.yml的内容改好,我这里放一个实例文件
## this is the all-in-one, standalone Discourse Docker container template
##
## After making changes to this file, you MUST rebuild
## /var/discourse/launcher rebuild app
##
## BE *VERY* CAREFUL WHEN EDITING!
## YAML FILES ARE SUPER SUPER SENSITIVE TO MISTAKES IN WHITESPACE OR ALIGNMENT!
## visit http://www.yamllint.com/ to validate this file as neededtemplates:- "templates/postgres.template.yml"- "templates/redis.template.yml"- "templates/web.template.yml"- "templates/web.ratelimited.template.yml"
## Uncomment these two lines if you wish to add Lets Encrypt (https)- "templates/web.ssl.template.yml"- "templates/web.letsencrypt.ssl.template.yml"## which TCP/IP ports should this container expose?
## If you want Discourse to share a port with another webserver like Apache or nginx,
## see https://meta.discourse.org/t/17247 for details
expose:- "20080:80"   # http- "20443:443" # https- "587:587" # SMTP TSLparams:db_default_text_search_config: "pg_catalog.english"## Set db_shared_buffers to a max of 25% of the total memory.## will be set automatically by bootstrap based on detected RAM, or you can overridedb_shared_buffers: "128MB"## can improve sorting performance, but adds memory usage per-connection#db_work_mem: "40MB"## Which Git revision should this container use? (default: tests-passed)#version: tests-passedenv:LC_ALL: en_US.UTF-8LANG: en_US.UTF-8LANGUAGE: en_US.UTF-8# DISCOURSE_DEFAULT_LOCALE: en## How many concurrent web requests are supported? Depends on memory and CPU cores.## will be set automatically by bootstrap based on detected CPUs, or you can overrideUNICORN_WORKERS: 2## TODO: The domain name this Discourse instance will respond to## Required. Discourse will not work with a bare IP number.DISCOURSE_HOSTNAME: bbs.v2fy.com## Uncomment if you want the container to be started with the same## hostname (-h option) as specified above (default "$hostname-$config")#DOCKER_USE_HOSTNAME: true## TODO: List of comma delimited emails that will be made admin and developer## on initial signup example 'user1@example.com,user2@example.com'DISCOURSE_DEVELOPER_EMAILS: 'zhaoolee@gmail.com'## TODO: The SMTP mail server used to validate new accounts and send notifications# SMTP ADDRESS, username, and password are required# WARNING the char '#' in SMTP password can cause problems!DISCOURSE_SMTP_ADDRESS: smtp.exmail.qq.comDISCOURSE_SMTP_PORT: 587DISCOURSE_SMTP_USER_NAME: zhaoolee@v2fy.comDISCOURSE_SMTP_PASSWORD: "**********"#DISCOURSE_SMTP_ENABLE_START_TLS: true           # (optional, default true)DISCOURSE_SMTP_DOMAIN: v2fy.comDISCOURSE_NOTIFICATION_EMAIL: zhaoolee@v2fy.com## If you added the Lets Encrypt template, uncomment below to get a free SSL certificateLETSENCRYPT_ACCOUNT_EMAIL: zhaoolee@v2fy.com## The http or https CDN address for this Discourse instance (configured to pull)## see https://meta.discourse.org/t/14857 for details#DISCOURSE_CDN_URL: https://discourse-cdn.example.com## The maxmind geolocation IP address key for IP address lookup## see https://meta.discourse.org/t/-/137387/23 for details#DISCOURSE_MAXMIND_LICENSE_KEY: 1234567890123456DISCOURSE_SMTP_AUTHENTICATION: login## The Docker container is stateless; all data is stored in /shared
volumes:- volume:host: /var/discourse/shared/standaloneguest: /shared- volume:host: /var/discourse/shared/standalone/log/var-logguest: /var/log## Plugins go here
## see https://meta.discourse.org/t/19157 for details
hooks:after_code:- exec:cd: $home/pluginscmd:- git clone https://github.com/discourse/docker_manager.git## Any custom commands to run after building
run:- exec: echo "Beginning of custom commands"## If you want to set the 'From' email address for your first registration, uncomment and change:## After getting the first signup email, re-comment the line. It only needs to run once.- exec: rails r "SiteSetting.notification_email='zhaoolee@v2fy.com'"- exec: echo "End of custom commands"
将海外主机内的app.yml也传送到国内新云服务器的/opt/ 目录
scp /var/discourse/containers/app.yml root@120.76.136.220:/opt/
至此!在海外主机的操作完成!
登陆国内云服务器
ssh 用户名@国内云服务器ip国内云服务器设置好魔法上网, 仔细阅读本文前方解决Discourse安装和构建期间, 访问Github失败的问题相关内容。
如果国内云主机没有安装最新版docker, 请通过以下命令安装(以CentOS7为例)
yum install -y yum-utils
yum-config-manager \--add-repo \https://download.docker.com/linux/centos/docker-ce.repoyum install docker-ce docker-ce-cli containerd.io -y
# 启动docker
systemctl start docker
为了便于区分,我把国内云服务器的discourse目录放到 /usr/share/nginx/bbs.v2fy.com 目录下
cd  /usr/share/nginx/bbs.v2fy.com
git clone https://github.com/discourse/discourse_docker.git  /usr/share/nginx/bbs.v2fy.com
将/opt/app.yml放入 /usr/share/nginx/bbs.v2fy.com/containers
cp /opt/app.yml /usr/share/nginx/bbs.v2fy.com/containers/运行discourse服务
cd /usr/share/nginx/bbs.v2fy.com/
./launcher rebuild app
查看新容器的id
docker ps
将备份包拷贝到新容器中
docker cp /opt/discourse-2021-06-21-100849-v20210617202227.tar.gz 983dca831620:/var/www/discourse/public/backups/default/discourse-2021-06-21-100849-v20210617202227.tar.gz进入新容器,恢复数据
cd /usr/share/nginx/bbs.v2fy.com/
./launcher enter app
discourse restore discourse-2021-06-21-100849-v20210617202227.tar.gz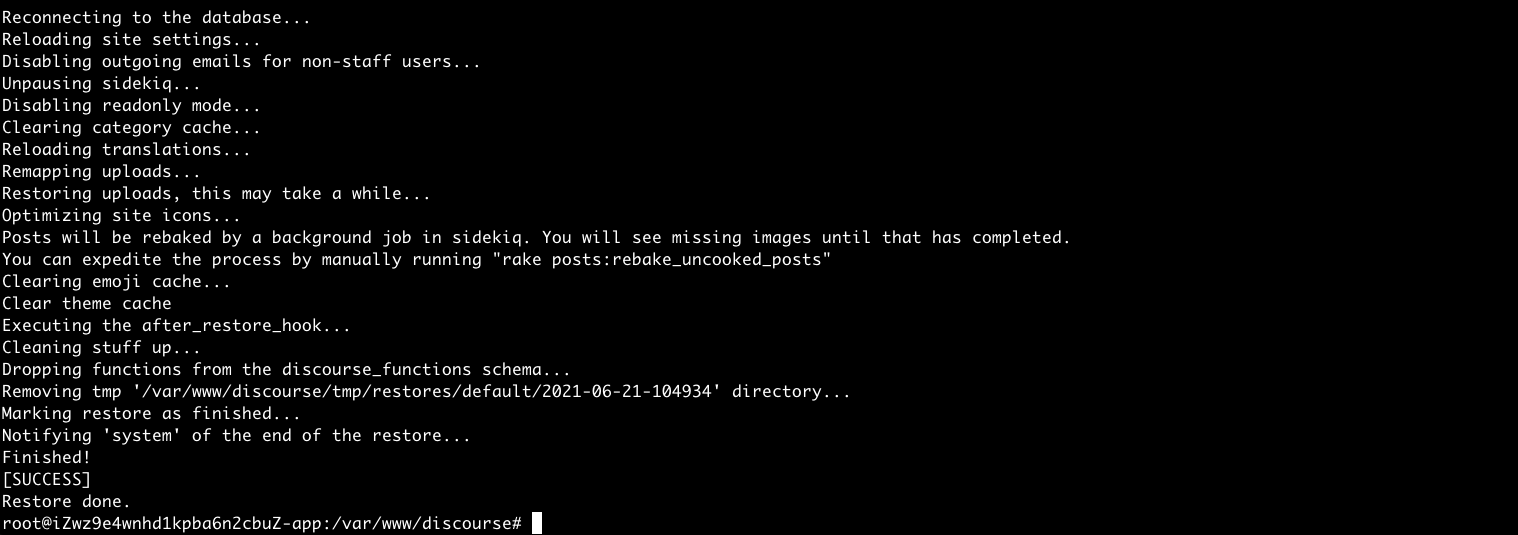
退出容器, rebuild容器
按 Control+D 退出容器
cd /usr/share/nginx/bbs.v2fy.com/
./launcher rebuild app
现在, 我们已经将discourse的80端口映射到 20080端口, 443端口映射到20443端口
我们需要对国内云服务器的Nginx进行配置, 将请求域名bbs.v2fy.com 80端口的服务, 指向20080端口,请求域名bbs.v2fy.com 的443端口的服务, 指向20443端口
有趣的是,
安装模块
yum update -y
yum install nginx-mod-stream -y
以CentOS7 为例,安装 nginx-mod-stream 完成后, 可以在
/usr/lib64/nginx/modules/ngx_stream_module.so
找到
最终的 /etc/nginx/nginx.conf 配置为
#user  nginx;
worker_processes  1;
load_module /usr/lib64/nginx/modules/ngx_stream_module.so;error_log  /var/log/nginx/error.log warn;
pid        /var/run/nginx.pid;stream {map $ssl_preread_server_name $backend_name {bbs.v2fy.com  bbs;v2fy.com web;fangyuanxiaozhan web;default web;}upstream bbs {server 127.0.0.1:20443;}upstream web {server 127.0.0.1:30443;}server {listen       443 reuseport;listen  [::]:443 reuseport;proxy_pass   $backend_name;ssl_preread  on;}
}events {worker_connections  1024;
}http {include       /etc/nginx/mime.types;default_type  application/octet-stream;charset utf-8,gbk;client_max_body_size 20m;log_format  main  '$remote_addr - $remote_user [$time_local] "$request" ''$status $body_bytes_sent "$http_referer" ''"$http_user_agent" "$http_x_forwarded_for"';access_log  /var/log/nginx/access.log  main;sendfile        on;#tcp_nopush     on;keepalive_timeout  65;gzip  on;server {listen 80;server_name bbs.v2fy.com;location / {proxy_pass http://127.0.0.1:20080;proxy_set_header Host $proxy_host; # 修改转发请求头,让8080端口的应用可以受到真实的请求proxy_set_header X-Real-IP $remote_addr;proxy_set_header X-Forwarded-For $proxy_add_x_forwarded_for;}
}include /etc/nginx/conf.d/*.conf;
}
这个配置文件很奇妙, 有一些冗余信息, 比如其中的
upstream web {server 127.0.0.1:30443;}是留给WordPress关联的php服务用的, 处理v2fy.com和fangyuanxiaozhan.com这两个WordPress站,原理是在30443端口开启了监听, 用于处理v2fy.com和fangyuanxiaozhan.com的请求, 这里放一个v2fy.com的配置 /etc/nginx/conf.d/v2fy.com.conf
server {listen 30080;server_name v2fy.com  www.v2fy.com;charset  utf-8;root /usr/share/nginx/v2fy.com;index index.php index.html index.htm;rewrite ^(.*)$ https://$host$1 permanent;location / {try_files $uri $uri/ /index.php$query_string =404;}error_page 404 /404.html;error_page 500 502 503 504 /50x.html;location = /50x.htm {root /usr/share/nginx/v2fy.com;}location ~ \.php$ {try_files $uri =404;fastcgi_pass unix:/var/run/php73-fpm/php73-fpm.sock;fastcgi_index index.php;fastcgi_param SCRIPT_FILENAME $document_root$fastcgi_script_name;include fastcgi_params;}}server {listen 30443 ssl;   #SSL协议访问端口号为443。此处如未添加ssl,可能会造成Nginx无法启动。server_name v2fy.com  www.v2fy.com;  #将localhost修改为您证书绑定的域名,例如:www.example.com。charset  utf-8;root /usr/share/nginx/v2fy.com;index index.php index.html index.htm;ssl_certificate /etc/nginx/cert/v2fy.com.pem;   #将domain name.pem替换成您证书的文件名。ssl_certificate_key /etc/nginx/cert/v2fy.com.key;   #将domain name.key替换成您证书的密钥文件名。ssl_session_timeout 5m;ssl_ciphers  *****;  #使用此加密套件。ssl_protocols TLSv1 TLSv1.1 TLSv1.2;   #使用该协议进行配置。ssl_prefer_server_ciphers on;gzip on;gzip_min_length 1k;gzip_buffers 4 16k;#gzip_http_version 1.0;gzip_comp_level 8;gzip_types text/plain application/javascript application/x-javascript text/css application/xml text/javascript application/x-httpd-php image/jpeg image/gif image/png;gzip_vary off;gzip_disable "MSIE [1-6]\.";location = /favicon.ico {log_not_found off;access_log off;}location = /robots.txt {allow all;log_not_found off;access_log off;}location / {# This is cool because no php is touched for static content.# include the "?$args" part so non-default permalinks doesn't break when using query stringtry_files $uri $uri/ /index.php?$args;}location ~ \.php$ {try_files $uri =404;fastcgi_pass unix:/var/run/php73-fpm/php73-fpm.sock;fastcgi_index index.php;fastcgi_param SCRIPT_FILENAME $document_root$fastcgi_script_name;include fastcgi_params;}location ~* \.(js|css|png|jpg|jpeg|gif|ico)$ {expires max;log_not_found off;}location ~* .(json)$ {add_header  Content-Type 'application/json;charset=utf-8';}
}
最终进入域名服务商后台, 将bbs.v2fy.com的解析换到国内云服务器ip, 齐活!
小结
这篇文章前后耗费我一周时间, 查了大量的资料, 国内的网络条件也真是不友好, 没有魔法上网工具, 请勿尝试本文的操作, 你会秃头的... 如果你的云服务器内存不足2GB, 请做好主机被卡死的心理准备(我4GB主机, 都被卡掉重启一次)
希望这篇文章能帮到, 同样对Discourse感兴趣的你~
本文永久更新地址(欢迎来读留言,写评论):
https://www.v2fy.com/p/2021-06-21-discourse-1624274883000
相关文章:
这篇关于将BBS网站Discourse从海外主机完美迁移到国内云服务器, 国内主机同时运行WordPress和Discourse服务...的文章就介绍到这儿,希望我们推荐的文章对编程师们有所帮助!


