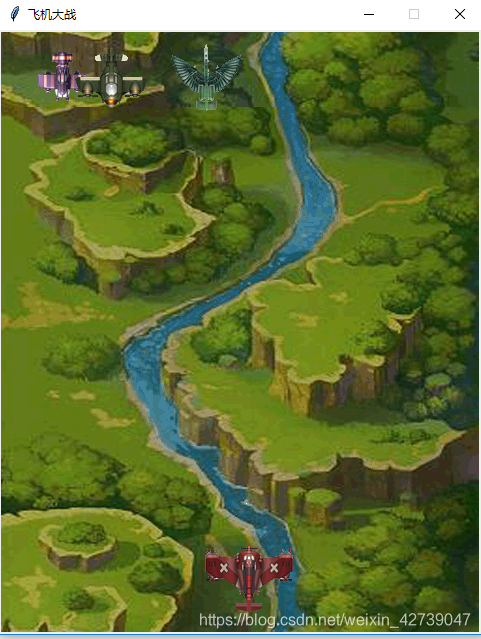
本文主要是介绍python项目--飞机大战(第一阶段--未加子弹版),希望对大家解决编程问题提供一定的参考价值,需要的开发者们随着小编来一起学习吧!
import tkinter
import time
import random as rd
class plane1():#移动量#px代表图像的锚点,height代表图像的高度def __init__(self, px, py, height, width):self.pl1x = 0self.pl1y = 0self.px = pxself.py = pyself.height = heightself.width = width#定义小飞机的图像self.imgpy1 = tkinter.PhotoImage(file="../img/飞机1.gif")# 小飞机移动def pl1_move(self):window_canvas.move("hero", self.pl1x, self.pl1y)self.pl1x = 0self.pl1y = 0window_canvas.after(100, self.pl1_move)
#飞机2的类
class plane2():#移动量#px代表图像的锚点,height代表图像的高度def __init__(self, px, py, height, width):self.pl2x = 0self.pl2y = 1self.px = pxself.py = pyself.height = heightself.width = width#定义小飞机的图像self.imgpy2 = tkinter.PhotoImage(file="../img/飞机2.gif")#小飞机移动def pl2_move(self):window_canvas.move("feiji2", self.pl2x, self.pl2y)# self.pl2y +=1window_canvas.after(100, self.pl2_move)#飞机3的类
class plane3():#移动量def __init__(self, px, py, height, width):self.pl3x = 0self.pl3y = 1self.px = pxself.py = pyself.height = heightself.width = width#定义小飞机的图像self.imgpy3 = tkinter.PhotoImage(file="../img/飞机3.gif")#小飞机移动def pl3_move(self):window_canvas.move("feiji3", self.pl3x, self.pl3y)# self.pl3y +=1window_canvas.after(100, self.pl3_move)#飞机4的类
class plane4():#移动量def __init__(self, px, py, height, width):self.pl4x = 1self.pl4y = 1self.px = pxself.py = pyself.height = heightself.width = width#定义飞机4的图像self.imgpy4 = tkinter.PhotoImage(file="../img/飞机4.gif")#飞机4移动def pl4_move(self):self.px +=self.pl4xself.py +=self.pl4y#进行碰壁检测if self.px >= 450:self.pl4x = -self.pl4x# print(self.pl4x)elif self.px <= 35:self.pl4x = -self.pl4x# print(self.pl4x)window_canvas.move("feiji4", self.pl4x, self.pl4y)# self.pl4y +=1window_canvas.after(100, self.pl4_move)
#天空类
class sky1():#移动量def __init__(self, px, py, height, width):self.skyx = 0self.skyy = 1self.px = pxself.py = pyself.height = heightself.width = width#定义天空的图像self.imgsky = tkinter.PhotoImage(file="../img/beijing.gif")#天空移动def sky1_move(self):self.py += self.skyyif self.py - 300 >= 600:self.py = -300window_canvas.move('bg', 0, -1197)print("123")else:window_canvas.move("bg", self.skyx, self.skyy)# self.skyy +=1window_canvas.after(100, self.sky1_move)
#天空类
class sky2():#移动量def __init__(self, px, py, height, width):self.sky2x = 0self.sky2y = 1self.px = pxself.py = pyself.height = heightself.width = width#定义天空的图像self.imgsky2 = tkinter.PhotoImage(file="../img/beijing.gif")#天空移动def sky2_move(self):self.py += self.sky2yif self.py - 300 >= 600:self.py = -300window_canvas.move('bg2', 0, -1197)print("345")else:window_canvas.move("bg2", self.sky2x, self.sky2y)# self.sky2y +=1window_canvas.after(100, self.sky2_move)
#子弹类
class Bullet():def __init__(self, px, py, height, width):self.bulletx = 0self.bullety = -1self.px = pxself.py = pyself.height = heightself.width = width#bullet_list.append(self)# self.hero_x = hero_x# self.hero_y = hero_yself.img_bullet = tkinter.PhotoImage(file="../img/zidan.gif")def Bullet_move(self):window_canvas.move("zidan", self.bulletx, self.bullety)# self.pl2y +=1window_canvas.after(100, self.Bullet_move)if __name__ == '__main__':root_window = tkinter.Tk()#设置窗口不可拉伸root_window.resizable(width=False, height=False)#创建画布window_canvas = tkinter.Canvas(root_window,width=480, height=600)window_canvas.pack()root_window.title('飞机大战')#在画布上画一个图片#要注意,photoimage只支持GIF格式的图片#画出背景# bg_img = tkinter.PhotoImage(file="../img/beijing.gif")# window_canvas.create_image(240, 300, anchor=tkinter.CENTER, image=bg_img, tags='bg')#天空实例化def sky_ss():sky_s = sky1(240, 300, 600, 480)window_canvas.create_image(sky_s.px, sky_s.py, anchor=tkinter.CENTER, image=sky_s.imgsky,tags='bg')sky_s.sky1_move()#天空实例化def sky2_ss():sky2_s = sky2(240, -300, 600, 480)window_canvas.create_image(sky2_s.px, sky2_s.py, anchor=tkinter.CENTER, image=sky2_s.imgsky2,tags='bg2')sky2_s.sky2_move()# 画出主飞机hero = plane1(250, 550, 30, 30)# 移动量def set_right(e):hero.pl1x += 5def set_left(e):hero.pl1x -= 5def set_up(e):hero.pl1y -= 5def set_down(e):hero.pl1y += 5#按键绑定root_window.bind('<Key-Left>',set_left)root_window.bind('<Key-Right>',set_right)root_window.bind('<Key-Up>',set_up)root_window.bind('<Key-Down>',set_down)def hero_s():window_canvas.create_image(hero.px, hero.py, anchor=tkinter.CENTER, image=hero.imgpy1,tags='hero')hero.pl1_move()#小飞机实例化def smallplane_s():smallplane = plane2(rd.randint(20,500),-30,20,20)window_canvas.create_image(smallplane.px, smallplane.py, anchor=tkinter.CENTER, image=smallplane.imgpy2, tags='feiji2')smallplane.pl2_move()#大飞机实例化def bigplane_s():bigplane = plane3(rd.randint(20,500), -30, 20, 20)window_canvas.create_image(bigplane.px, bigplane.py, anchor=tkinter.CENTER, image=bigplane.imgpy3,tags='feiji3')bigplane.pl3_move()#奖励飞机实例化def goodplane_s():goodplane = plane4(rd.randint(20,500), -30, 20, 20)window_canvas.create_image(goodplane.px, goodplane.py, anchor=tkinter.CENTER, image=goodplane.imgpy4,tags='feiji4')goodplane.pl4_move()#子弹实例化bullet = Bullet(240, 270, 10, 10)window_canvas.create_image(bullet.px, bullet.py, anchor=tkinter.CENTER, image=bullet.img_bullet,tags='zidan')bullet.Bullet_move()#定义列表#子弹l_bullet = []for i in range(0,30):a = 'bullet'+str(i)b = Bullet(240, 270, 10, 10)l_bullet.append(b)def bullet_s():for i in l_bullet:#time.sleep(1)window_canvas.create_image(i.px, i.py, anchor=tkinter.CENTER, image=bullet.img_bullet,tags='zidan')i.Bullet_move()## def photo():#     ##     # #画蜜蜂#     # bg_img_feiji4 = tkinter.PhotoImage(file="../img/飞机4.gif")#     # window_canvas.create_image(50, 50, anchor=tkinter.CENTER, image=bg_img_feiji4, tags='feiji4')##     #让蜜蜂动起来#     ap_move()#     root_window.mainloop()# photo()#函数调用部分sky2_ss()sky_ss()smallplane_s()bigplane_s()goodplane_s()hero_s()bullet_s()root_window.mainloop()
部分素材图片:


这篇关于python项目--飞机大战(第一阶段--未加子弹版)的文章就介绍到这儿,希望我们推荐的文章对编程师们有所帮助!


