本文主要是介绍利用Vue2实现印章徽章组件,希望对大家解决编程问题提供一定的参考价值,需要的开发者们随着小编来一起学习吧!
需要实现的组件效果:
该组件有设置颜色、大小、旋转度数和文本内容功能。
一、组件实现代码
<template><divclass="first-ring"v-bind="getBindValue":class="getStampBadgeClass":style="{ transform: `rotate(${rotate}deg)` }"><div class="second-ring" :class="getStampBadgeClass"><div class="third-ring" :class="getStampBadgeClass"><div class="forth-ring" :class="getStampBadgeClass"><div class="content-rectangle ellipsis" :class="getStampBadgeClass"><span class="">{{ content }}</span></div></div></div></div></div>
</template><script>export default {name: "StampBadge",// inheritAttrs: false,props: {color: {type: String,default: "primary",validator: (v) =>["primary", "error", "warning", "success", "info"].includes(v),},/*** stamp badge size.* @default: middle*/size: {type: String,default: "middle",validator: (v) => ["large", "middle", "small"].includes(v),},/*** stamp badge rotate deg.* @default: 0*/rotate: { type: Number, default: 0 },content: { type: String, default: "Unknown" },},computed: {getStampBadgeClass() {const { color, size } = this.$props;return [{[`stamp-badge-${color}`]: !!color,[`stamp-badge-${size}`]: !!size,},];},getBindValue() {return { ...this.$attrs, ...this.$props };},},methods: {},};
</script><style lang="less" scoped>.first-ring {border-radius: 100px;display: flex;justify-content: center;align-items: center;}.second-ring {background: #fff;border-radius: 100px;display: flex;justify-content: center;align-items: center;}.third-ring {border-radius: 100px;display: flex;justify-content: center;align-items: center;}.forth-ring {background: #fff;border-radius: 100px;display: flex;justify-content: center;align-items: center;position: relative;}.content-rectangle {background: #fff;font-weight: bold;text-align: center;position: absolute;}.ellipsis {overflow: hidden;white-space: nowrap;text-overflow: ellipsis;}// primary.stamp-badge-primary.first-ring {background: #1890ff;}.stamp-badge-primary.third-ring {background: #1890ff;}.stamp-badge-primary.content-rectangle {border: 1px solid #1890ff;color: #1890ff;}// success.stamp-badge-success.first-ring {background: #52c41a;}.stamp-badge-success.third-ring {background: #52c41a;}.stamp-badge-success.content-rectangle {border: 1px solid #52c41a;color: #52c41a;}// error.stamp-badge-error.first-ring {background: #ff4d4f;}.stamp-badge-error.third-ring {background: #ff4d4f;}.stamp-badge-error.content-rectangle {border: 1px solid #ff4d4f;color: #ff4d4f;}// warning.stamp-badge-warning.first-ring {background: #faad14;}.stamp-badge-warning.third-ring {background: #faad14;}.stamp-badge-warning.content-rectangle {border: 1px solid #faad14;color: #faad14;}// info.stamp-badge-info.first-ring {background: #ccc;}.stamp-badge-info.third-ring {background: #ccc;}.stamp-badge-info.content-rectangle {border: 1px solid #ccc;color: #ccc;}// large.stamp-badge-large.first-ring {width: 84px;height: 84px;}.stamp-badge-large.second-ring {width: 80px;height: 80px;}.stamp-badge-large.third-ring {width: 74px;height: 74px;}.stamp-badge-large.forth-ring {width: 64px;height: 64px;}.stamp-badge-large.content-rectangle {width: 90px;font-size: 1.2rem;}// middle.stamp-badge-middle.first-ring {width: 64px;height: 64px;}.stamp-badge-middle.second-ring {width: 60px;height: 60px;}.stamp-badge-middle.third-ring {width: 56px;height: 56px;}.stamp-badge-middle.forth-ring {width: 48px;height: 48px;}.stamp-badge-middle.content-rectangle {width: 70px;font-size: 1rem;}// small.stamp-badge-small.first-ring {width: 54px;height: 54px;}.stamp-badge-small.second-ring {width: 50px;height: 50px;}.stamp-badge-small.third-ring {width: 46px;height: 46px;}.stamp-badge-small.forth-ring {width: 38px;height: 38px;}.stamp-badge-small.content-rectangle {width: 60px;font-size: 0.8rem;}
</style>
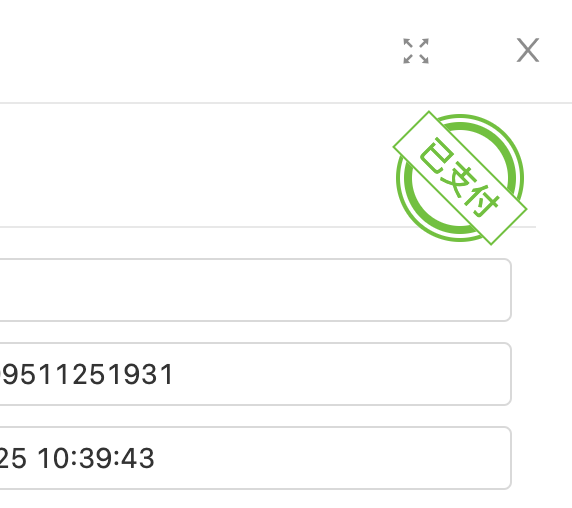
二、组件应用代码:
<div style="width: 500px; height: 100px; position: relative"><StampBadgestyle="position: absolute; top: 0; right: 0"size="middle"color="success"content="已支付":rotate="45"/>
</div>
这篇关于利用Vue2实现印章徽章组件的文章就介绍到这儿,希望我们推荐的文章对编程师们有所帮助!


