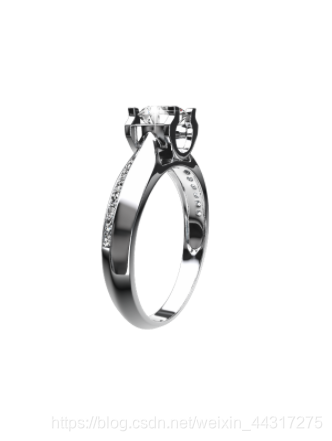
本文主要是介绍使用js加产品图片实现3D效果,希望对大家解决编程问题提供一定的参考价值,需要的开发者们随着小编来一起学习吧!
使用js加产品图片实现3D效果
先看效果图

实现思路:
通过对不同的产品图的显示隐藏来控制3d效果,通过定时器控制产品图的显示隐藏实现产品的自动旋转
实现步骤
1.第一步先加载所有的图片,iImgCount代表图片的数量,this.imgName代表图片的目录和图片名字。图片加载完毕之后自动旋转3d的效果,当手滑动屏幕或者是鼠标点击时通过计算滑动的距离比例来计算3d显示的位置!废话不多说,䁖䁖代码!!!
// 图片生成createImg() {for (let i = 0; i <= this.iImgCount; i++) {var S = '00000'var picname = '' + i * 2var v = picname.lengthvar ss = S.substr(0, 5 - v)this.imgList.push(require('@/assets/images/3D/' +this.imgName +'/' +this.imgName +'/jz_' +ss +'' +picname +'.png'))}this.loadImages(this.imgList)},// 生成图片标签loadImages(urlArr) {//参数 图片地址数组// eslint-disable-next-line no-unused-varsvar pro = new Promise((resolve, reject) => {if (urlArr.length <= 0) returnlet i = 0,// timer = null,len = urlArr.length,load = url => {if (i < len) {const image = new Image()image.src = urlimage.style.display = 'none'document.getElementById('imgBox').appendChild(image)this.timer = setInterval(() => {if (image.complete) {// console.log('complete')clearInterval(this.timer)load(urlArr[i++])}}, 0)} else {this.showLoading = false // 所有图片加载完后的操作resolve('200')}}load(urlArr[i])})pro.then(value => {if (value == 200) {this.auto()//图片加载完毕后自动旋转3Dthis.changeImg()}})},// 自动旋转3D图auto() {this.timers = setInterval(() => {$('.imgBox img').css('display', 'none')$('.imgBox img').eq(parseInt(this.lastImg)).css('display', 'block')this.lastImg++if (this.lastImg >= this.iImgCount) {this.lastImg = 0}}, 100)},// 清除定时器stopMove() {clearInterval(this.timers)this.timers = null},// 当手滑动时对应的3d动效changeImg() {var that = thisif (isTouchDevice()) {$('#imgBox')[0].ontouchstart = function(ev) {var oEvent = ev || eventthat.startX = oEvent.changedTouches[0].clientXthat.lastX = that.startX$('#imgBox')[0].ontouchmove = onMove$('#imgBox')[0].ontouchend = onUpfunction onMove(ev) {var oEvent = ev || eventvar i =-(oEvent.changedTouches[0].clientX - that.startX) / that.SCALEthat.num =(that.lastImg +i +Math.abs(Math.floor(i / that.iImgCount)) * that.iImgCount) %that.iImgCount$('.imgBox img').css('display', 'none')$('.imgBox img').eq(parseInt(that.num)).css('display', 'block')// speed=-(oEvent.changedTouches[0].clientX-lastX)/this.SCALE;that.lastX = oEvent.changedTouches[0].clientXreturn false}function onUp() {this.onmousemove = nullthis.onmouseup = nullthat.lastImg = that.numthat.auto()}that.stopMove()return false}} else {$('#imgBox')[0].onmousedown = function(ev) {var oEvent = ev || eventthat.startX = oEvent.clientXthat.lastX = that.startX$('#imgBox')[0].onmousemove = onMove$('#imgBox')[0].onmouseup = onUpfunction onMove(ev) {var oEvent = ev || eventvar i = -(oEvent.clientX - that.startX) / that.SCALEthat.num =(that.lastImg +i +Math.abs(Math.floor(i / that.iImgCount)) * that.iImgCount) %that.iImgCount$('.imgBox img').css('display', 'none')$('.imgBox img').eq(parseInt(that.num)).css('display', 'block')that.lastX = oEvent.clientXreturn false}function onUp() {this.onmousemove = nullthis.onmouseup = nullthat.lastImg = that.numthat.auto()}that.stopMove()return false}}},
这篇关于使用js加产品图片实现3D效果的文章就介绍到这儿,希望我们推荐的文章对编程师们有所帮助!


