本文主要是介绍Qwt QwtLegend和QwtPlotLegendItem图例类详解,希望对大家解决编程问题提供一定的参考价值,需要的开发者们随着小编来一起学习吧!
1.概述
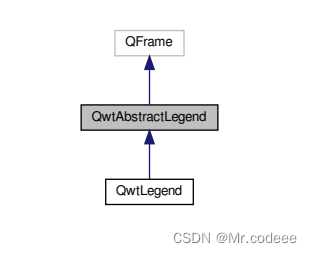
QwtLegend类是Qwt绘图库中用于显示图例的类。图例用于标识不同曲线、绘图元素或数据的意义,以便用户能够更好地理解图表中的数据。通过QwtLegend类,可以方便地在图表中添加、删除和设置图例的位置、方向和样式等属性。
QwtPlotLegendItem类是Qwt绘图库中用于在绘图中添加图例项的类。与QwtLegend类不同,QwtPlotLegendItem类是将图例项直接添加到绘图中,而不是作为独立的图例显示。可以将QwtPlotLegendItem对象与绘图对象相关联,以便在绘图中显示图例项。

2. 常用方法
QwtPlotLegendItem常用方法介绍
设置最大列数
void setMaxColumns (uint)
设置对齐方式
void setAlignmentInCanvas (Qt::Alignment)
设置背景模式
void setBackgroundMode (BackgroundMode)设置边框圆角
void setBorderRadius (double)
设置字体
void setFont (const QFont &)
设置外边距
void setItemMargin (int)void setMargin (int)设置距离
void setItemSpacing (int)void setSpacing (int)3.示例
源码:
//LegendWidget.h
#ifndef LEGENDWIDGET_H
#define LEGENDWIDGET_H#include <QWidget>namespace Ui {
class LegendWidget;
}class QwtLegend;
class QwtPlotLegendItem;class Settings
{public:Settings(){legend.isEnabled = false;legend.position = 0;legendItem.isEnabled = false;legendItem.numColumns = 0;legendItem.alignment = 0;legendItem.backgroundMode = 0;legendItem.size = 12;curve.numCurves = 0;curve.title = "Curve";}struct{bool isEnabled;int position;} legend;struct{bool isEnabled;int numColumns;int alignment;int backgroundMode;int size;} legendItem;struct{int numCurves;QString title;} curve;
};class LegendWidget : public QWidget
{Q_OBJECTpublic:explicit LegendWidget(QWidget *parent = 0);~LegendWidget();private:Settings settings() const;void applySettings( const Settings& );void insertCurve();private slots:void on_cboxLegendEnabled_stateChanged(int arg1);void on_cbxPos_currentIndexChanged(int index);void on_cboxLegendItemEnabled_stateChanged(int arg1);void on_cbxHorizontal_currentIndexChanged(int index);void on_cbxVertical_currentIndexChanged(int index);void on_cbxBackGround_currentIndexChanged(int index);void on_spinBoxSize_valueChanged(int arg1);void on_spinBoxNum_valueChanged(int arg1);void on_leTitle_textEdited(const QString &arg1);private Q_SLOTS:void edited();void on_spinBoxColumns_valueChanged(int arg1);private:QwtLegend* m_externalLegend = nullptr;QwtPlotLegendItem* m_legendItem = nullptr;bool m_isDirty = false;private:Ui::LegendWidget *ui;
};#endif // LEGENDWIDGET_H#include "LegendWidget.h"
#include "ui_LegendWidget.h"
#include "qwt_plot.h"
#include "qwt_plot_curve.h"
#include "qwt_text.h"
#include "qwt_legend.h"
#include "qwt_symbol.h"
#include "qwt_plot_marker.h"
#include "qwt_plot_grid.h"
#include "qwt_scale_div.h"
#include "qwt_plot_canvas.h"
#include "qwt_plot_legenditem.h"
#include "qwt_math.h"
#include "qwt_plot_layout.h"class Curve : public QwtPlotCurve
{public:Curve( int index ):m_index( index ){setRenderHint( QwtPlotItem::RenderAntialiased );initData();}void setCurveTitle( const QString& title ){QString txt("%1 %2");setTitle( QString( "%1 %2" ).arg( title ).arg( m_index ) );}void initData(){QVector< QPointF > points;double y = qwtRand() % 1000;for ( double x = 0.0; x <= 1000.0; x += 100.0 ){double off = qwtRand() % 200 - 100;if ( y + off > 980.0 || y + off < 20.0 )off = -off;y += off;points += QPointF( x, y );}setSamples( points );}private:const int m_index;
};class LegendItem : public QwtPlotLegendItem
{public:LegendItem(){setRenderHint( QwtPlotItem::RenderAntialiased );const QColor c1( Qt::white );setTextPen( c1 );setBorderPen( c1 );QColor c2( Qt::gray );c2.setAlpha( 200 );setBackgroundBrush( c2 );}
};QwtPlot *g_plot = nullptr;LegendWidget::LegendWidget(QWidget *parent) :QWidget(parent),ui(new Ui::LegendWidget)
{ui->setupUi(this);QwtPlotCanvas* canvas = new QwtPlotCanvas();canvas->setFocusIndicator( QwtPlotCanvas::CanvasFocusIndicator );canvas->setFocusPolicy( Qt::StrongFocus );canvas->setPalette( Qt::black );//创建plotg_plot = new QwtPlot(QwtText("图列示例"),this);g_plot->setFooter( "Footer" );g_plot->setAutoReplot( false );g_plot->setCanvas( canvas );//创建一个网格QwtPlotGrid* grid = new QwtPlotGrid;grid->enableXMin( true );grid->setMajorPen( Qt::gray, 0, Qt::DotLine );grid->setMinorPen( Qt::darkGray, 0, Qt::DotLine );grid->attach( g_plot );//设置坐标轴范围g_plot->setAxisScale( QwtAxis::YLeft, 0.0, 1000.0 );g_plot->setAxisScale( QwtAxis::XBottom, 0.0, 1000.0 );ui->hLayout->addWidget(g_plot);//初始化属性Settings settings;settings.legend.isEnabled = true;settings.legend.position = QwtPlot::BottomLegend;settings.legendItem.isEnabled = false;settings.legendItem.numColumns = 1;settings.legendItem.alignment = Qt::AlignRight | Qt::AlignVCenter;settings.legendItem.backgroundMode = 0;settings.legendItem.size = g_plot->canvas()->font().pointSize();settings.curve.numCurves = 4;settings.curve.title = "曲线";applySettings(settings);
}LegendWidget::~LegendWidget()
{delete ui;
}Settings LegendWidget::settings() const
{Settings s;s.legend.isEnabled =ui->cboxLegendEnabled->checkState() == Qt::Checked;s.legend.position = ui->cbxPos->currentIndex();s.legendItem.isEnabled =ui->cboxLegendItemEnabled->checkState() == Qt::Checked;s.legendItem.numColumns = ui->spinBoxColumns->value();int align = 0;int hIndex = ui->cbxHorizontal->currentIndex();if ( hIndex == 0 )align |= Qt::AlignLeft;else if ( hIndex == 2 )align |= Qt::AlignRight;elsealign |= Qt::AlignHCenter;int vIndex = ui->cbxVertical->currentIndex();if ( vIndex == 0 )align |= Qt::AlignTop;else if ( vIndex == 2 )align |= Qt::AlignBottom;elsealign |= Qt::AlignVCenter;s.legendItem.alignment = align;s.legendItem.backgroundMode =ui->cbxBackGround->currentIndex();s.legendItem.size = ui->spinBoxSize->value();s.curve.numCurves = ui->spinBoxNum->value();s.curve.title = ui->leTitle->text();return s;
}void LegendWidget::applySettings(const Settings &settings)
{m_isDirty = false;g_plot->setAutoReplot( true );//判断图列是否启用if ( settings.legend.isEnabled ){//设置图列位置if ( settings.legend.position > QwtPlot::TopLegend ){//如果有,就先删除if ( g_plot->legend() ){// remove legend controlled by the plotg_plot->insertLegend( NULL );}//弹出的图列if ( m_externalLegend == NULL ){m_externalLegend = new QwtLegend();m_externalLegend->setWindowTitle("Plot Legend");connect(g_plot,SIGNAL(legendDataChanged(const QVariant&,const QList<QwtLegendData>&)),m_externalLegend,SLOT(updateLegend(const QVariant&,const QList<QwtLegendData>&)) );m_externalLegend->show();// populate the new legendg_plot->updateLegend();}}else{delete m_externalLegend;m_externalLegend = NULL;if ( g_plot->legend() == NULL ||g_plot->plotLayout()->legendPosition() != settings.legend.position ){g_plot->insertLegend( new QwtLegend(),QwtPlot::LegendPosition( settings.legend.position ) );}}}else{g_plot->insertLegend( NULL );delete m_externalLegend;m_externalLegend = NULL;}//判断图例子项是否启用if ( settings.legendItem.isEnabled ){if ( m_legendItem == NULL ){m_legendItem = new LegendItem();m_legendItem->attach( g_plot );}//设置最大列数m_legendItem->setMaxColumns( settings.legendItem.numColumns );//设置对齐方式m_legendItem->setAlignmentInCanvas( Qt::Alignment( settings.legendItem.alignment ) );//设置背景模式m_legendItem->setBackgroundMode(QwtPlotLegendItem::BackgroundMode( settings.legendItem.backgroundMode ) );if ( settings.legendItem.backgroundMode ==QwtPlotLegendItem::ItemBackground ){m_legendItem->setBorderRadius( 4 );m_legendItem->setMargin( 0 );m_legendItem->setSpacing( 4 );m_legendItem->setItemMargin( 2 );}else{m_legendItem->setBorderRadius( 8 );m_legendItem->setMargin( 4 );m_legendItem->setSpacing( 2 );m_legendItem->setItemMargin( 0 );}//设置字体大小QFont font = m_legendItem->font();font.setPointSize( settings.legendItem.size );m_legendItem->setFont( font );}else{delete m_legendItem;m_legendItem = NULL;}//画曲线QwtPlotItemList curveList = g_plot->itemList( QwtPlotItem::Rtti_PlotCurve );if ( curveList.size() != settings.curve.numCurves ){while ( curveList.size() > settings.curve.numCurves ){QwtPlotItem* curve = curveList.takeFirst();delete curve;}for ( int i = curveList.size(); i < settings.curve.numCurves; i++ )insertCurve();}curveList = g_plot->itemList( QwtPlotItem::Rtti_PlotCurve );for ( int i = 0; i < curveList.count(); i++ ){Curve* curve = static_cast< Curve* >( curveList[i] );curve->setCurveTitle( settings.curve.title );int sz = 0.5 * settings.legendItem.size;curve->setLegendIconSize( QSize( sz, sz ) );}g_plot->setAutoReplot( false );if ( m_isDirty ){m_isDirty = false;g_plot->replot();}
}void LegendWidget::insertCurve()
{static int counter = 1;const char* colors[] ={"LightSalmon","SteelBlue","Yellow","Fuchsia","PaleGreen","PaleTurquoise","Cornsilk","HotPink","Peru","Maroon"};const int numColors = sizeof( colors ) / sizeof( colors[0] );QwtPlotCurve* curve = new Curve( counter++ );curve->setPen( QColor( colors[ counter % numColors ] ), 2 );curve->attach( g_plot );
}void LegendWidget::on_cboxLegendEnabled_stateChanged(int arg1)
{edited();
}void LegendWidget::on_cbxPos_currentIndexChanged(int index)
{edited();
}void LegendWidget::on_cboxLegendItemEnabled_stateChanged(int arg1)
{edited();
}void LegendWidget::on_cbxHorizontal_currentIndexChanged(int index)
{edited();
}void LegendWidget::on_cbxVertical_currentIndexChanged(int index)
{edited();
}void LegendWidget::on_cbxBackGround_currentIndexChanged(int index)
{edited();
}void LegendWidget::on_spinBoxSize_valueChanged(int arg1)
{edited();
}void LegendWidget::on_spinBoxNum_valueChanged(int arg1)
{edited();
}void LegendWidget::on_leTitle_textEdited(const QString &arg1)
{edited();
}void LegendWidget::edited()
{const Settings s = settings();applySettings( s);
}void LegendWidget::on_spinBoxColumns_valueChanged(int arg1)
{edited();
}
4.完整工程
https://download.csdn.net/download/wzz953200463/88479580
此工程不包含qwt的库,需自行编译。
这篇关于Qwt QwtLegend和QwtPlotLegendItem图例类详解的文章就介绍到这儿,希望我们推荐的文章对编程师们有所帮助!


