本文主要是介绍mysql8主主,希望对大家解决编程问题提供一定的参考价值,需要的开发者们随着小编来一起学习吧!
文章目录
- 一、下载安装MySQL
- 二、修改密码删除库表
- 三、修改数据存储目录
- 四、配置MySQL主主
- 1)配置MySQL-主-1
- 2)配置MySQL-主-2
- 3)导出MySQL-1-主的数据
- 4)登录MySQL-2-主
- 5)导入114的数据到115
- 6)MySQL2上配置从MySQL1来的复制
- 7)MySQL1上配置从MySQL2来的复制
- 五、远程登录
一、下载安装MySQL
#下载
wget https://dev.mysql.com/get/Downloads/MySQL-8.0/mysql-8.0.28-1.el7.x86_64.rpm-bundle.tar
#解压
tar xvf  mysql-8.0.28-1.el7.x86_64.rpm-bundle.tar#安装依赖
yum install openssl-devel.x86_64 openssl.x86_64 -y
rpm -ivh mysql-community-client-plugins-8.0.28-1.el7.x86_64.rpm
rpm -ivh mysql-community-icu-data-files-8.0.28-1.el7.x86_64.rpm
yum install perl-Test-*.noarch -y
yum remove mysql-libs -y
yum -y install net-tools#安装
【必须安装】
rpm -ivh mysql-community-common-8.0.28-1.el7.x86_64.rpm
rpm -ivh mysql-community-libs-8.0.28-1.el7.x86_64.rpm
rpm -ivh mysql-community-client-8.0.28-1.el7.x86_64.rpm
rpm -ivh mysql-community-server-8.0.28-1.el7.x86_64.rpm【非必须安装】
rpm -ivh mysql-community-libs-compat-8.0.28-1.el7.x86_64.rpm
rpm -ivh mysql-community-embedded-compat-8.0.28-1.el7.x86_64.rpm
rpm -ivh mysql-community-devel-8.0.28-1.el7.x86_64.rpm
rpm -ivh mysql-community-test-8.0.28-1.el7.x86_64.rpm
【MySQL报错详解】https://www.jianshu.com/p/eb29593ffeb2
#验证
[root@localhost ~]# rpm -qa|grep mysql
mysql-community-libs-compat-8.0.28-1.el7.x86_64
mysql-community-libs-8.0.28-1.el7.x86_64
mysql-community-embedded-compat-8.0.28-1.el7.x86_64
mysql-community-client-8.0.28-1.el7.x86_64
mysql-community-devel-8.0.28-1.el7.x86_64
mysql-community-client-plugins-8.0.28-1.el7.x86_64
mysql-community-server-8.0.28-1.el7.x86_64
mysql-community-icu-data-files-8.0.28-1.el7.x86_64
mysql-community-test-8.0.28-1.el7.x86_64
mysql-community-common-8.0.28-1.el7.x86_64
#启动mysql服务并打开自动启动
systemctl start mysqld.service
systemctl enable mysqld;
二、修改密码删除库表
#修改密码
cat /var/log/mysqld.log | grep password #命令查看数据库的密码并验证登录
:j5dtkwoYMr.
#修改密码:
/usr/bin/mysql_secure_installation
#问密码是,前边输一次老密码。后边四次新密码。其他y
[root@localhost ~]# /usr/bin/mysql_secure_installationSecuring the MySQL server deployment.Enter password for user root: #输入老密码
The 'validate_password' component is installed on the server.
The subsequent steps will run with the existing configuration
of the component.
Using existing password for root.Estimated strength of the password: 100
Change the password for root ? ((Press y|Y for Yes, any other key for No) : yNew password:    #输入新密码maba521@chaoARe-enter new password:  #输入新密码maba521@chaoA
Sorry, passwords do not match.New password:  #输入新密码maba521@chaoARe-enter new password:  #输入新密码maba521@chaoAEstimated strength of the password: 100
Do you wish to continue with the password provided?(Press y|Y for Yes, any other key for No) : y
By default, a MySQL installation has an anonymous user,
allowing anyone to log into MySQL without having to have
a user account created for them. This is intended only for
testing, and to make the installation go a bit smoother.
You should remove them before moving into a production
environment.Remove anonymous users? (Press y|Y for Yes, any other key for No) : y
Success.Normally, root should only be allowed to connect from
'localhost'. This ensures that someone cannot guess at
the root password from the network.Disallow root login remotely? (Press y|Y for Yes, any other key for No) : y
Success.By default, MySQL comes with a database named 'test' that
anyone can access. This is also intended only for testing,
and should be removed before moving into a production
environment.Remove test database and access to it? (Press y|Y for Yes, any other key for No) : y- Dropping test database...
Success.- Removing privileges on test database...
Success.Reloading the privilege tables will ensure that all changes
made so far will take effect immediately.Reload privilege tables now? (Press y|Y for Yes, any other key for No) : y
Success.All done!
#登录MySQL
mysql -u root -pmaba521@chaoA
mysql> show databases;
+--------------------+
| Database |
+--------------------+
| information_schema |
| mysql |
| performance_schema |
| sys |
+--------------------+mysql> select version();
+-----------+
| version() |
+-----------+
| 8.0.28 |
+-----------+
#验证字符集:
MySQL 8.0默认的utf8mb4字符集(等价于java utf8/unicode),解决了MySQL5.7的不能显示表情符号的问题。mysql> show variables like '%server%';
+---------------------------------+--------------------------------------+
| Variable_name | Value |
+---------------------------------+--------------------------------------+
| character_set_server | utf8mb4 |
| collation_server | utf8mb4_0900_ai_ci |
| immediate_server_version | 999999 |
| innodb_dedicated_server | OFF |
| innodb_ft_server_stopword_table | |
| original_server_version | 999999 |
| server_id | 1 |
| server_id_bits | 32 |
| server_uuid | 70c9d74c-ac4d-11ec-8376-000c29ec1e42 |
+---------------------------------+--------------------------------------+mysql> show variables like '%char%';
+--------------------------------------+--------------------------------+
| Variable_name | Value |
+--------------------------------------+--------------------------------+
| character_set_client | utf8mb4 |
| character_set_connection | utf8mb4 |
| character_set_database | utf8mb4 |
| character_set_filesystem | binary |
| character_set_results | utf8mb4 |
| character_set_server | utf8mb4 |
| character_set_system | utf8mb3 |
| character_sets_dir | /usr/share/mysql-8.0/charsets/ |
| validate_password.special_char_count | 1 |
+--------------------------------------+--------------------------------+
三、修改数据存储目录
#修改数据目录
原来的目录/var/lib/mysql,新的数据目录,在存储上/data/mysql
[root@localhost ~]# df -vh|grep data
/dev/mapper/centos-data   20G   33M   20G    1% /data#关闭防火墙
setenforce 0
#永久关闭,重启生效
sed -i  's#SELINUX=enforcing#SELINUX=Disabled#'g /etc/selinux/config
systemctl stop mysqld
mv /var/lib/mysql/ /data/
ln -s /data/mysql /var/lib/
ls -la /var/lib/mysqlsystemctl start mysqld.service
systemctl status mysqld.service
四、配置MySQL主主
1)配置MySQL-主-1
#修改MySQL—1——主/etc/my.cnf
#注意如果启动报错,需要修改虚拟机内存4以上
[root@localhost ~]# cat /etc/my.cnf
# For advice on how to change settings please see
# http://dev.mysql.com/doc/refman/8.0/en/server-configuration-defaults.html[mysqld]
#
# Remove leading # and set to the amount of RAM for the most important data
# cache in MySQL. Start at 70% of total RAM for dedicated server, else 10%.
innodb_buffer_pool_size = 64M
#
# Remove the leading "# " to disable binary logging
# Binary logging captures changes between backups and is enabled by
# default. It's default setting is log_bin=binlog
# disable_log_bin
#
# Remove leading # to set options mainly useful for reporting servers.
# The server defaults are faster for transactions and fast SELECTs.
# Adjust sizes as needed, experiment to find the optimal values.
# join_buffer_size = 128M
# sort_buffer_size = 2M
# read_rnd_buffer_size = 2M
#
# Remove leading # to revert to previous value for default_authentication_plugin,
# this will increase compatibility with older clients. For background, see:
# https://dev.mysql.com/doc/refman/8.0/en/server-system-variables.html#sysvar_default_authentication_plugin
# default-authentication-plugin=mysql_native_password[client]
port = 3306
[mysqld]
default_authentication_plugin=mysql_native_password
datadir=/var/lib/mysql
socket=/var/lib/mysql/mysql.socklog-error=/var/log/mysqld.log
pid-file=/var/run/mysqld/mysqld.pid# 服务端口号 默认3306
port = 3306# 用户
user = mysql# 允许访问的IP网段
bind-address = 0.0.0.0# 跳过密码登录
#skip-grant-tables# 主要用于MyISAM存储引擎,如果多台服务器连接一个数据库则建议注释下面内容
#skip-external-locking# 只能用IP地址检查客户端的登录,不用主机名
skip_name_resolve = 1# 数据库默认字符集,主流字符集支持一些特殊表情符号(特殊表情符占用4个字节)
character-set-server = utf8mb4# 数据库字符集对应一些排序等规则,注意要和character-set-server对应
collation-server = utf8mb4_general_ci# 设置client连接mysql时的字符集,防止乱码
init_connect='SET NAMES utf8mb4'# 最大连接数
max_connections = 2000# 最大错误连接数
max_connect_errors = 1000# TIMESTAMP如果没有显示声明NOT NULL,允许NULL值
explicit_defaults_for_timestamp = true# SQL数据包发送的大小,如果有BLOB对象建议修改成1G
max_allowed_packet = 128M# MySQL连接闲置超过一定时间后(单位:秒)将会被强行关闭
# MySQL默认的wait_timeout  值为8个小时, interactive_timeout参数需要同时配置才能生效
interactive_timeout = 1800
wait_timeout = 1800# 内部内存临时表的最大值 ,设置成128M。
# 比如大数据量的group by ,order by时可能用到临时表,
# 超过了这个值将写入磁盘,系统IO压力增大
tmp_table_size = 134217728
max_heap_table_size = 134217728# 慢查询sql日志设置
slow_query_log = 1
slow_query_log_file = /var/lib/mysql/slow.log# 检查未使用到索引的sql
log_queries_not_using_indexes = 1# 针对log_queries_not_using_indexes开启后,记录慢sql的频次、每分钟记录的条数
log_throttle_queries_not_using_indexes = 5# 作为从库时生效,从库复制中如何有慢sql也将被记录
log_slow_replica_statements = 1# 慢查询执行的秒数,必须达到此值可被记录
long_query_time = 8# 检索的行数必须达到此值才可被记为慢查询
min_examined_row_limit = 100# mysql binlog日志文件保存的过期时间,过期后自动删除
binlog_expire_logs_seconds = 432000
##MySQL 数据区内存
############# INNODB ##############
innodb_flush_method                = O_DIRECT
innodb_buffer_pool_size            = 32G
innodb_log_file_size               = 256M
innodb_log_files_in_group          = 2
innodb_flush_log_at_trx_commit     = 1innodb_strict_mode                 = ON
#innodb_data_file_path              = ibdata1:12M;ibdata2:128M:autoextend
innodb_checksum_algorithm          = crc32# 事务隔离级别,默认为可重复读,mysql默认可重复读级别(此级别下可能参数很多间隙锁,影响性能)
transaction_isolation = READ-COMMITTED
autocommit                         = ON
log_timestamps=SYSTEM# for replications
replica-skip-errors=1032,1062
server_id=1 ##test节点 server_id=1
log-bin=mysql-bin
binlog_format=ROW
slow_query_log='ON' #调试时打开,生产可关闭,也可打开跟踪慢sql. 修改完需要重启mysql服务
general_log='OFF' #调试时打开,生产关闭,修改完需要重启mysql服务#由于两个服务器都可以写数据,为了防止自增的key冲突,需要设置下面两个,increment是每次增长数,两台服务器设为2即可,offset是起始偏移,一个服务器设置为1,另一个设置为2,这样自增id在服务器A上是1、3、5这样,在服务器B上就是2、4、6不会产生冲突
auto_increment_increment           = 4
auto_increment_offset              = 1#解决No connection. Trying to reconnect...
[mysqldump]
quick
max_allowed_packet = 10M
#重启生效
service mysqld restart
2)配置MySQL-主-2
#mysql-2-主修改my.cnf
[mysqld]
#
# Remove leading # and set to the amount of RAM for the most important data
# cache in MySQL. Start at 70% of total RAM for dedicated server, else 10%.
# innodb_buffer_pool_size = 128M
#
# Remove the leading "# " to disable binary logging
# Binary logging captures changes between backups and is enabled by
# default. It's default setting is log_bin=binlog
# disable_log_bin
#
# Remove leading # to set options mainly useful for reporting servers.
# The server defaults are faster for transactions and fast SELECTs.
# Adjust sizes as needed, experiment to find the optimal values.
# join_buffer_size = 128M
# sort_buffer_size = 2M
# read_rnd_buffer_size = 2M
#
# Remove leading # to revert to previous value for default_authentication_plugin,
# this will increase compatibility with older clients. For background, see:
# https://dev.mysql.com/doc/refman/8.0/en/server-system-variables.html#sysvar_default_authentication_plugin
# default-authentication-plugin=mysql_native_password[client]
port = 3306
[mysqld]
default_authentication_plugin=mysql_native_password
datadir=/var/lib/mysql
socket=/var/lib/mysql/mysql.socklog-error=/var/log/mysqld.log
pid-file=/var/run/mysqld/mysqld.pid# 服务端口号 默认3306
port = 3306# 用户
user = mysql# 允许访问的IP网段
bind-address = 0.0.0.0# 跳过密码登录
#skip-grant-tables# 主要用于MyISAM存储引擎,如果多台服务器连接一个数据库则建议注释下面内容
#skip-external-locking# 只能用IP地址检查客户端的登录,不用主机名
skip_name_resolve = 1# 数据库默认字符集,主流字符集支持一些特殊表情符号(特殊表情符占用4个字节)
character-set-server = utf8mb4# 数据库字符集对应一些排序等规则,注意要和character-set-server对应
collation-server = utf8mb4_general_ci# 设置client连接mysql时的字符集,防止乱码
init_connect='SET NAMES utf8mb4'# 最大连接数
max_connections = 2000# 最大错误连接数
max_connect_errors = 1000# TIMESTAMP如果没有显示声明NOT NULL,允许NULL值
explicit_defaults_for_timestamp = true# SQL数据包发送的大小,如果有BLOB对象建议修改成1G
max_allowed_packet = 128M# MySQL连接闲置超过一定时间后(单位:秒)将会被强行关闭
# MySQL默认的wait_timeout 值为8个小时, interactive_timeout参数需要同时配置才能生效
interactive_timeout = 1800
wait_timeout = 1800# 内部内存临时表的最大值 ,设置成128M。
# 比如大数据量的group by ,order by时可能用到临时表,
# 超过了这个值将写入磁盘,系统IO压力增大
tmp_table_size = 134217728
max_heap_table_size = 134217728# 慢查询sql日志设置
slow_query_log = 1
slow_query_log_file = /var/lib/mysql/slow.log# 检查未使用到索引的sql
log_queries_not_using_indexes = 1# 针对log_queries_not_using_indexes开启后,记录慢sql的频次、每分钟记录的条数
log_throttle_queries_not_using_indexes = 5# 作为从库时生效,从库复制中如何有慢sql也将被记录
log_slow_replica_statements = 1# 慢查询执行的秒数,必须达到此值可被记录
long_query_time = 8# 检索的行数必须达到此值才可被记为慢查询
min_examined_row_limit = 100# mysql binlog日志文件保存的过期时间,过期后自动删除
binlog_expire_logs_seconds = 432000
##MySQL 数据区内存
############# INNODB ##############
innodb_flush_method = O_DIRECT
innodb_buffer_pool_size = 32G
innodb_log_file_size = 256M
innodb_log_files_in_group = 2
innodb_flush_log_at_trx_commit = 1innodb_strict_mode = ON
#innodb_data_file_path = ibdata1:12M;ibdata2:128M:autoextend
innodb_checksum_algorithm = crc32# 事务隔离级别,默认为可重复读,mysql默认可重复读级别(此级别下可能参数很多间隙锁,影响性能)
transaction_isolation = READ-COMMITTED
autocommit = ON
log_timestamps=SYSTEM# for replications
replica-skip-errors=1032,1062
server_id=2 ##test节点 server_id=1
log-bin=mysql-bin
binlog_format=ROW
slow_query_log='ON' #调试时打开,生产可关闭,也可打开跟踪慢sql. 修改完需要重启mysql服务
general_log='OFF' #调试时打开,生产关闭,修改完需要重启mysql服务##由于两个服务器都可以写数据,为了防止自增的key冲突,需要设置下面两个,increment是每次增长数,两台服务器设为2即可,offset是起始偏移,一个服务器设置为1,另一个设置为2,这样自增id在服务器A上是1、3、5这样,在服务器B上就是2、4、6不会产生冲突
auto_increment_increment = 2
auto_increment_offset = 2#解决No connection. Trying to reconnect...
[mysqldump]
quick
max_allowed_packet = 10M
#重启生效
service mysqld restart
#建立复制用户
mysql -u root -pmaba521@chaoA
#创建普通用户repl连接远程工具
CREATE USER 'repl'@'192.168.4.%' identified WITH mysql_native_password by '123456A@a';
#给主机192.168.4.%权限
CREATE USER 'root'@'192.168.4.%' identified by 'maba521@chaoA';
GRANT REPLICATION SLAVE on *.* to 'repl'@'192.168.4.%';
GRANT ALL ON *.* TO 'root'@'192.168.4.%';
flush privileges;
##经测试8.0不再必须flush privileges了
select user,host from mysql.user;
3)导出MySQL-1-主的数据
#加全局的读锁,避免在导数据时有写操作
FLUSH TABLES WITH READ LOCK;#导出114的数据
mysqldump -h 192.168.4.114 --port=3306 --single-transaction --master-data=2  -uroot -p --all-databases --triggers --routines --events > /root/hchen/dump_for_slave.sql#导出完毕解除
UNLOCK TABLES;#把主库上导出的sql文件复制到从库上(这一步是在主库上执行)
scp  dump_for_slave.sql  root@192.168.4.115:/root/
4)登录MySQL-2-主
mysql -u root -pmaba521@chaoA
#检查repl@'172.16%', root@'172.16%'用户有没有,没有的话,参考节点
mysql> select user,host from mysql.user;
+------------------+-----------+
| user             | host      |
+------------------+-----------+
| mysql.infoschema | localhost |
| mysql.session    | localhost |
| mysql.sys        | localhost |
| root             | localhost |
+------------------+-----------+#创建
CREATE USER 'repl'@'192.168.4.%' identified WITH mysql_native_password by '123456A@a';
CREATE USER 'root'@'192.168.4.%' identified by 'maba521@chaoA';
GRANT REPLICATION SLAVE on *.* to 'repl'@'192.168.4.%';
GRANT ALL ON *.* TO 'root'@'192.168.4.%';
flush privileges;
select user,host from mysql.user;#确认存在用户
mysql> select user,host from mysql.user;
+------------------+-------------+
| user             | host        |
+------------------+-------------+
| repl             | 192.168.4.% |
| root             | 192.168.4.% |
| mysql.infoschema | localhost   |
| mysql.session    | localhost   |
| mysql.sys        | localhost   |
| root             | localhost   |
+------------------+-------------+
5)导入114的数据到115
source /root/dump_for_slave.sql;
【报错】
ERROR 1231 (42000): Variable 'character_set_client' can't be set to the value of 'NULL'【解决】
#删除dump_for_slave.sql中
WARNING: --master-data is deprecated and will be removed in a future version. Use --source-data instead.
6)MySQL2上配置从MySQL1来的复制
#查看同步点
[root@localhost ~]# head -100 /root/dump_for_slave.sql|grep MASTER_LOG_FILE
-- CHANGE MASTER TO MASTER_LOG_FILE='mysql-bin.000002', MASTER_LOG_POS=2694;
#登录115
mysql -uroot -pmaba521@chaoA -h 192.168.4.115
#停止之前同步点
stop slave for channel 'channel-master1-to-master2';
reset slave all;
#同步114
change master to master_host='192.168.4.114', master_user='repl',master_password='123456A@a',master_log_file='mysql-bin.000002',master_log_pos=2694 for channel 'channel-master1-to-master2';
#开启同步
start slave for channel 'channel-master1-to-master2';
#查看同步是否成功
show slave status for channel 'channel-master1-to-master2' \G;
#同步成功
mysql> show slave status  for channel 'channel-master1-to-master2' \G;
*************************** 1. row ***************************Slave_IO_State: Waiting for source to send eventMaster_Host: 192.168.4.114Master_User: replMaster_Port: 3306Connect_Retry: 60Master_Log_File: mysql-bin.000002Read_Master_Log_Pos: 2694Relay_Log_File: localhost-relay-bin-channel@002dmaster1@002dto@002dmaster2.000002Relay_Log_Pos: 326Relay_Master_Log_File: mysql-bin.000002Slave_IO_Running: YesSlave_SQL_Running: Yes
7)MySQL1上配置从MySQL2来的复制
#查看同步点
mysql> show master status\G;
*************************** 1. row ***************************File: mysql-bin.000005Position: 1211711Binlog_Do_DB:Binlog_Ignore_DB:
Executed_Gtid_Set:#同步115
change master to master_host='192.168.4.115', master_user='repl',master_password='123456A@a',master_log_file='mysql-bin.000005',master_log_pos=1211711 for channel 'channel-master2-to-master1';
#开启同步
start slave for channel 'channel-master2-to-master1';
#显示同步结果
show slave status  for channel 'channel-master2-to-master1' \G;
#同步成功
mysql> show slave status for channel 'channel-master2-to-master1' \G;
*************************** 1. row ***************************Slave_IO_State: Waiting for source to send eventMaster_Host: 192.168.4.115Master_User: replMaster_Port: 3306Connect_Retry: 60Master_Log_File: mysql-bin.000005Read_Master_Log_Pos: 1211711Relay_Log_File: localhost-relay-bin-channel@002dmaster2@002dto@002dmaster1.000002Relay_Log_Pos: 326Relay_Master_Log_File: mysql-bin.000005Slave_IO_Running: YesSlave_SQL_Running: Yes
五、远程登录
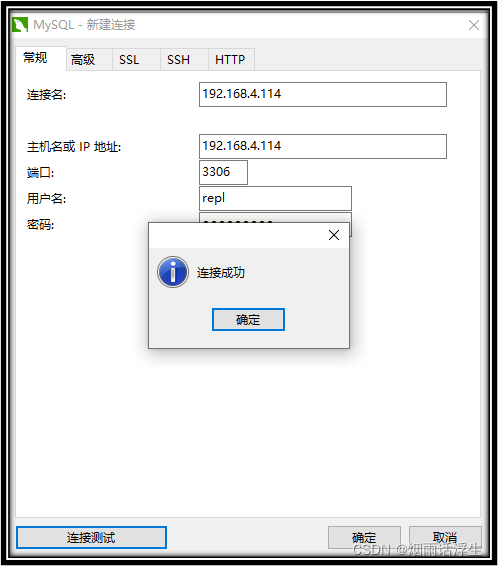
用户名:repl
密码:123456A@a
#查看

这篇关于mysql8主主的文章就介绍到这儿,希望我们推荐的文章对编程师们有所帮助!


