本文主要是介绍cx_Freeze,希望对大家解决编程问题提供一定的参考价值,需要的开发者们随着小编来一起学习吧!
文章目录
- cx_Freeze
- cx_Freeze原生直接打包
- 使用pipenv作为虚拟环境(减少不必要的打包)
- 创建虚拟环境
- 激活虚拟环境
- 安装依赖
- 运行
- 打包程序
- 删除/清空环境的依赖
- 退出环境
- 删除环境
- 使用pycharm的项目环境打包
- pycharm版本信息
- 创建虚拟环境
- 安装依赖
- pyinstaller
- 版本信息
cx_Freeze
cx_Freeze原生直接打包
原文连接:https://stackoverflow.com/questions/41570359/how-can-i-convert-a-py-to-exe-for-python
原文连接:https://cx-freeze.readthedocs.io/en/latest/setup_script.html
原文连接:https://wiki.wxpython.org/cx_freeze
在参考上述原文后,自己根据实际需求调整
python版本:3.7
cx_Freeze信息
- cx-Freeze : 6.14.7
cx_Freeze是一个把python文件转成exe文件的程序。
使用方法:
在工程根目录下建立setup.py文件,然后运行python setup.py build
setup.py
# -*- coding:utf-8 -*-
# author: cyz
# time: 2021/9/22 9:35
import os, sys# sys.path.append(os.path.join(os.path.dirname(os.path.abspath(__file__)), '..'))
# os.chdir(os.path.dirname(os.path.abspath(__file__)))# https://stackoverflow.com/questions/41570359/how-can-i-convert-a-py-to-exe-for-python
# https://cx-freeze.readthedocs.io/en/latest/setup_script.html
from cx_Freeze import setup, Executablebase = None
# if sys.platform == 'win32':
#     base = 'Win32GUI'# 主运行程序
executables = [Executable("main_1.py", base=base), Executable("main_2.py", base=base)] # 2哥
# 需要引用的第三方包
packages = ["configparser","pandas","os","sys","sqlalchemy","datetime","dateutil","concurrent","urllib","re"]# 排除不压缩进去
excludes =["tools","internal.pkg.login.sql_login"]  # 自己写的自定义包
# 需要额外的数据文件
include_files = ["config_function.xlsx","config_sql.ini","pkg","source","result"] + ["tools.py","internal"]  # 把自定义包作为外部数据文件options = {'build_exe': {'packages':packages,'include_files':include_files,'excludes':excludes},
}setup(name = "1",  # 应用名称options = options,version = "5",  # 版本号description = '',  # 描述executables = executables
)
20220301:这个打包程序有严重的问题,它会把整个py的安装的所有package都打包进去,而不是按照实际使用的package来打包。api官网给的代码无效。下面基本上把整个py的库都打包了。
它把我的pytorch跟tf都打包进去了,然而我并没有使用。
使用pipenv作为虚拟环境(减少不必要的打包)
参考文章:https://zhuanlan.zhihu.com/p/37581807
参考文章:https://blog.csdn.net/qq_42951560/article/details/124224972#:~:text=pipenv%201%20%E5%88%9B%E5%BB%BA%E7%8E%AF%E5%A2%83%EF%BC%9A%20pipenv%20install%202%20%E6%BF%80%E6%B4%BB%E7%8E%AF%E5%A2%83%EF%BC%9A%20pipenv,shell%203%20%E9%80%80%E5%87%BA%E7%8E%AF%E5%A2%83%EF%BC%9A%20exit%204%20%E5%88%A0%E9%99%A4%E7%8E%AF%E5%A2%83%EF%BC%9A%20pipenv%20–rm
参考文章:https://www2.jianshu.com/p/786913f3ab89#:~:text=%E6%9C%89%E4%B8%A4%E7%A7%8D%E6%96%B9%E5%BC%8F%E8%BF%90%E8%A1%8C%E7%A8%8B%E5%BA%8F%201%E3%80%81%E7%9B%B4%E6%8E%A5%E8%BF%90%E8%A1%8C%20%24pipenv%20run%20python3%20project1.py%202%E3%80%81%E5%90%AF%E5%8A%A8%E8%99%9A%E6%8B%9F%E7%8E%AF%E5%A2%83%E8%BF%90%E8%A1%8C,%24pipenv%20shell%20%23%E5%90%AF%E5%8A%A8%E8%99%9A%E6%8B%9F%E7%8E%AF%E5%A2%83%20%24python3%20project1.py%20%24exit%20%23%E9%80%80%E5%87%BA%E8%99%9A%E6%8B%9F%E7%8E%AF%E5%A2%83
参考文章:https://blog.csdn.net/g11023225/article/details/106106096
官网:https://pipenv.pypa.io/en/latest/index.html
pipenv信息:
- distlib : 0.3.6
- filelock : 3.10.7
- pipenv : 2023.3.20
- platformdirs : 3.2.0
- virtualenv : 20.21.0
- virtualenv-clone : 0.5.7
常用指令
- 创建环境:
pipenv install - 激活环境:
pipenv shell - 退出环境:
exit - 删除环境:
pipenv --rm
创建虚拟环境
首先,使用 pipenv install创建一个虚拟的环境。
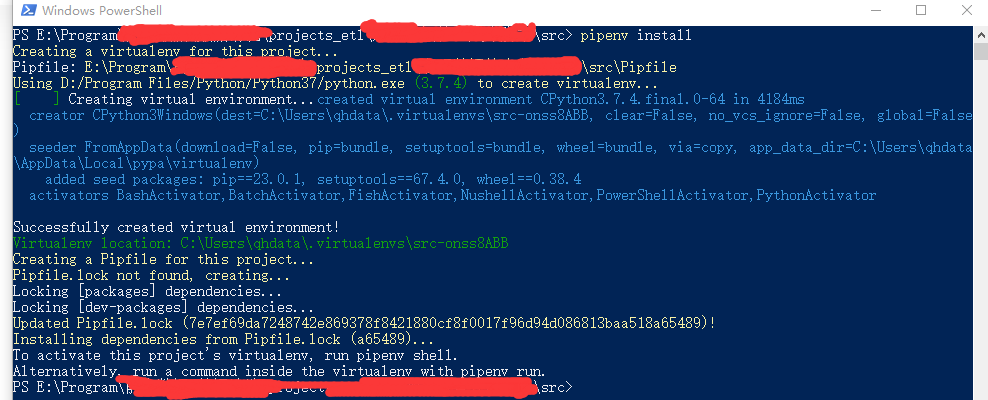
激活虚拟环境
激活虚拟环境pipenv shell

激活后文件夹下面会产生两个文件Pipfile与Pipfile.lock,其中Pipfile记录虚拟环境的信息,可以使用记事本打开。
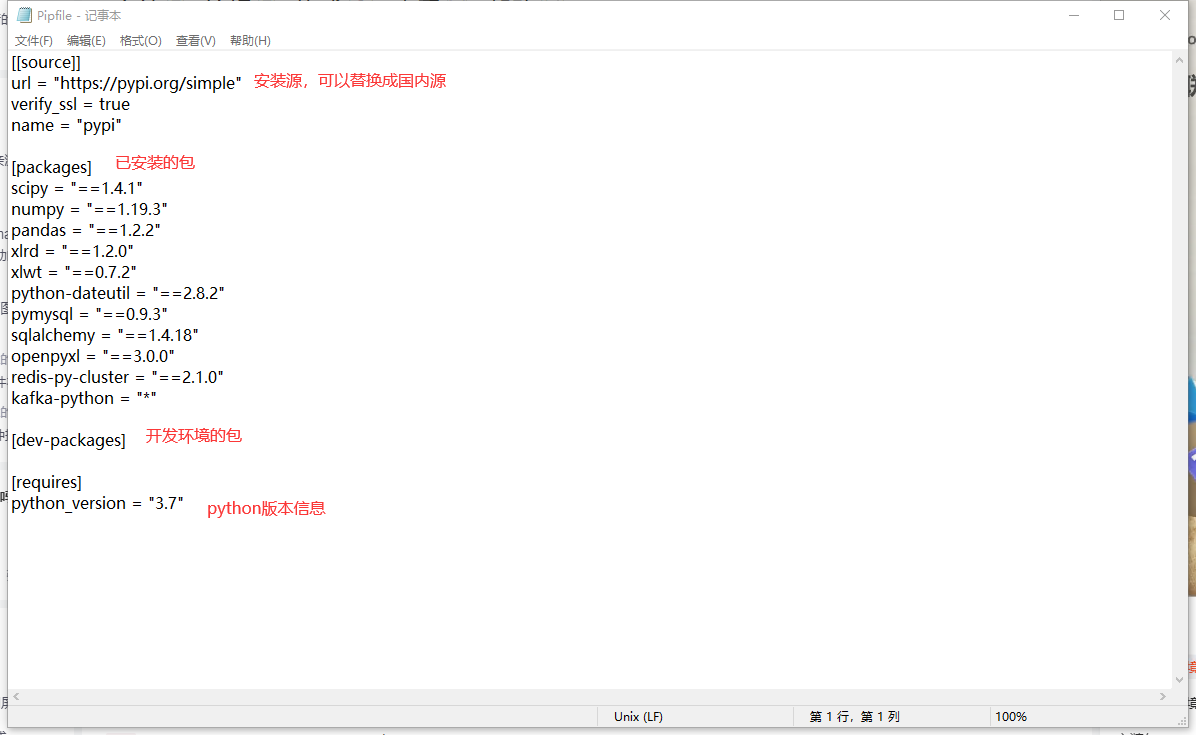
安装依赖
安装依赖到虚拟环境pipenv install [package]或者pip install -r requirements.txt

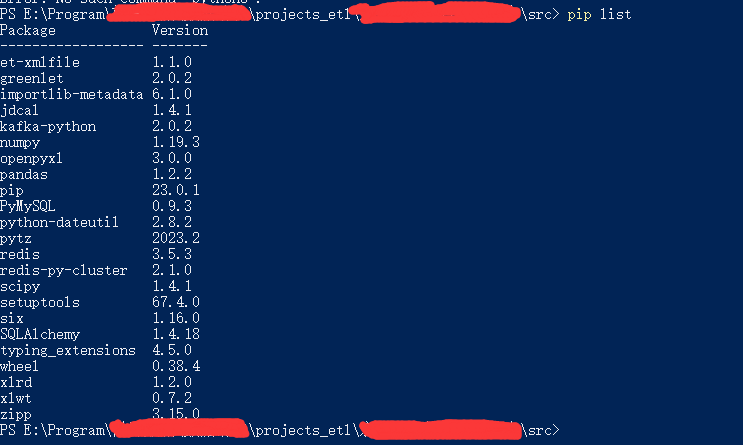
查看虚拟环境中的所有安装的包
如果没有进入虚拟环境中,则需要先使用pipenv shell进入虚拟环境。然后使用pip list查看,或者使用pip freeze > requirements.txt导出所有安装的包。
运行
在虚拟环境中运行。有两种方法:
1.直接运行 : pipenv run python3 main_1.py
2.启动虚拟环境后再运行
pipenv shell
pyhton main_1.py

测试运行会不会缺少运行包,缺少则按照上方重新下载到虚拟环境即可。
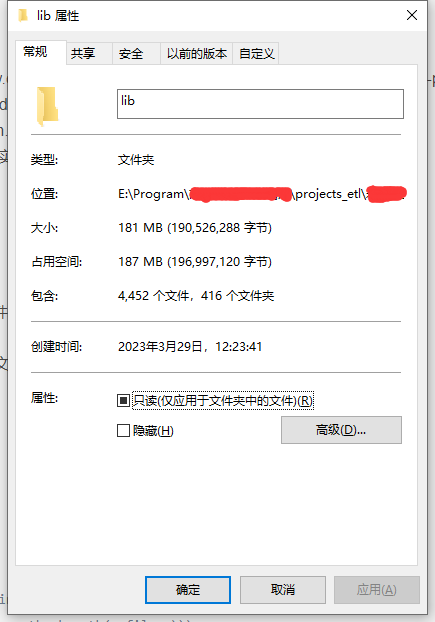
打包程序
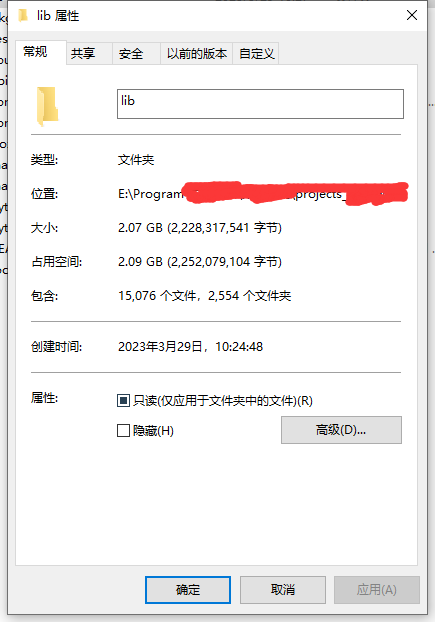
在虚拟环境中运行python setup.py build进行打包,打包后的大小。
删除/清空环境的依赖
删除指定的包:pipenv uninstall [package]
清空:pipenv uninstall --all或pipenv uninstall --all-dev
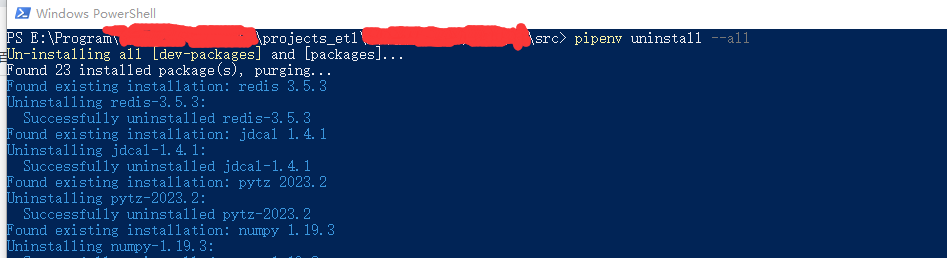
这时候在环境中查询

里面的依赖包已经完全清空
退出环境
退出环境: exit
删除环境
删除环境: pipenv --rm

使用pycharm的项目环境打包
pycharm版本信息
创建虚拟环境
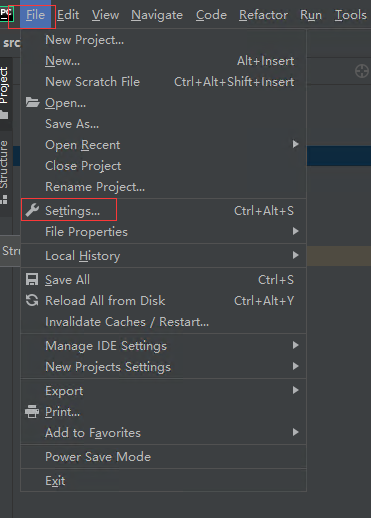
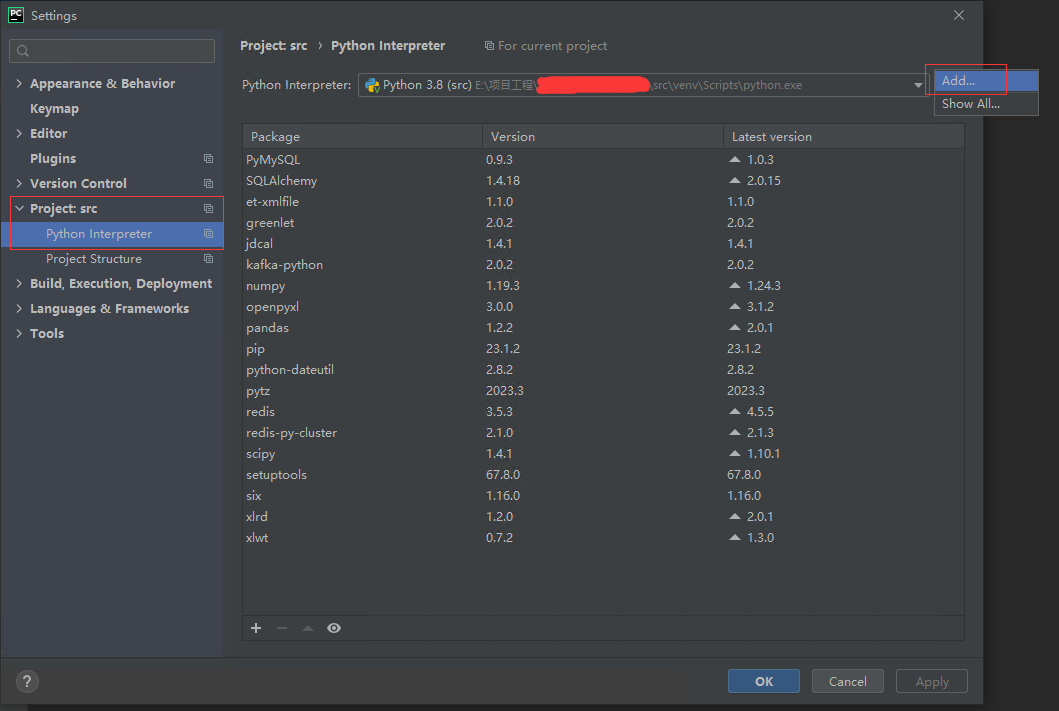
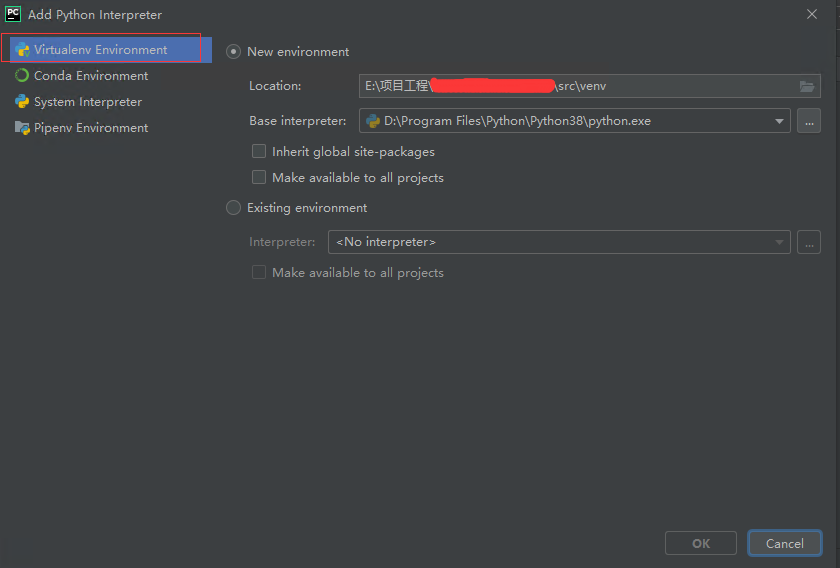
使用pycharm打开一个没有pycharm配置信息的项目,直接选择创建一个当前项目环境,选择如下:
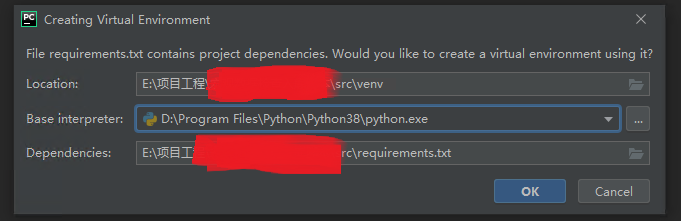
Denpendencies可以不填写依赖文件版本,等后续自己安装也行。
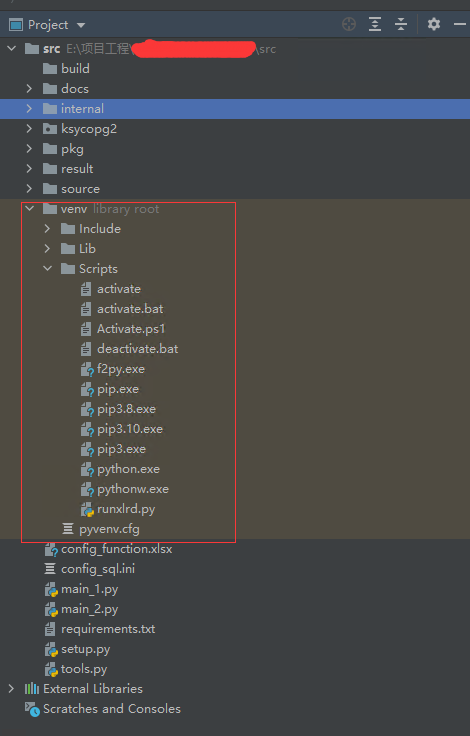
或者在项目中手动创建也行
创建好后可以看到文件夹下有py的项目环境。
安装依赖
直接使用路径的python安装即可,跟普通的安装方法一样。

后面就正常的压缩即可。
pyinstaller
版本信息
官网:https://pipenv.pypa.io/en/latest/index.html
官网:https://pyinstaller.org/en/stable/
python版本:3.7
pyinstaller信息
- altgraph : 0.17.3
- pefile : 2023.2.7
- pyinstaller : 5.9.0
- pyinstaller-hooks-contrib : 2023.1
pipenv信息:
- distlib : 0.3.6
- filelock : 3.10.7
- pipenv : 2023.3.20
- platformdirs : 3.2.0
- virtualenv : 20.21.0
- virtualenv-clone : 0.5.7
这篇关于cx_Freeze的文章就介绍到这儿,希望我们推荐的文章对编程师们有所帮助!