本文主要是介绍es8的windows安装,希望对大家解决编程问题提供一定的参考价值,需要的开发者们随着小编来一起学习吧!
原文链接:https://www.javacui.com/tool/669.html
Elasticsearch Windows上安装
Elasticsearch是一个基于Lucene的搜索服务器。它提供了一个分布式多用户能力的全文搜索引擎,基于RESTful web接口。Elasticsearch是用Java语言开发的,并作为Apache许可条款下的开放源码发布,是一种流行的企业级搜索引擎。Elasticsearch用于云计算中,能够达到实时搜索,稳定,可靠,快速,安装使用方便。官方客户端在Java、.NET(C#)、PHP、Python、Apache Groovy、Ruby和许多其他语言中都是可用的。根据DB-Engines的排名显示,Elasticsearch是最受欢迎的企业搜索引擎,其次是Apache Solr,也是基于Lucene。

Download Elasticsearch
https://www.elastic.co/cn/downloads/elasticsearch
因为这里本机已经安装运行,为了演示从零开始,我们在Windows沙盒中演示,Win10操作系统的沙盒http://www.javacui.com/tool/660.html 。
因为沙盒开始是一个纯净的系统,所以需要安装ZIP工具,安装文本编辑工具方便修改配置文件。
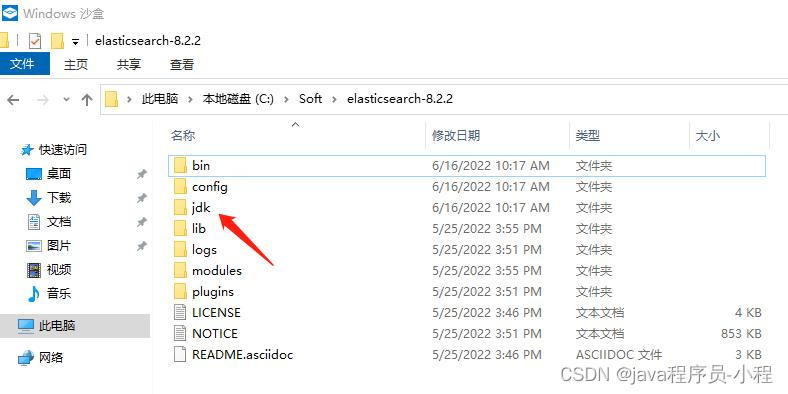
这里下载了elasticsearch-8.2.2-windows-x86_64,可以根据网站提示下载最新版本,虽然ES依赖JDK,但是ES安装文件内置了JDK,因为纯净的系统上无需安装再次安装JDK,直接运行bin下elasticsearch.bat即可。

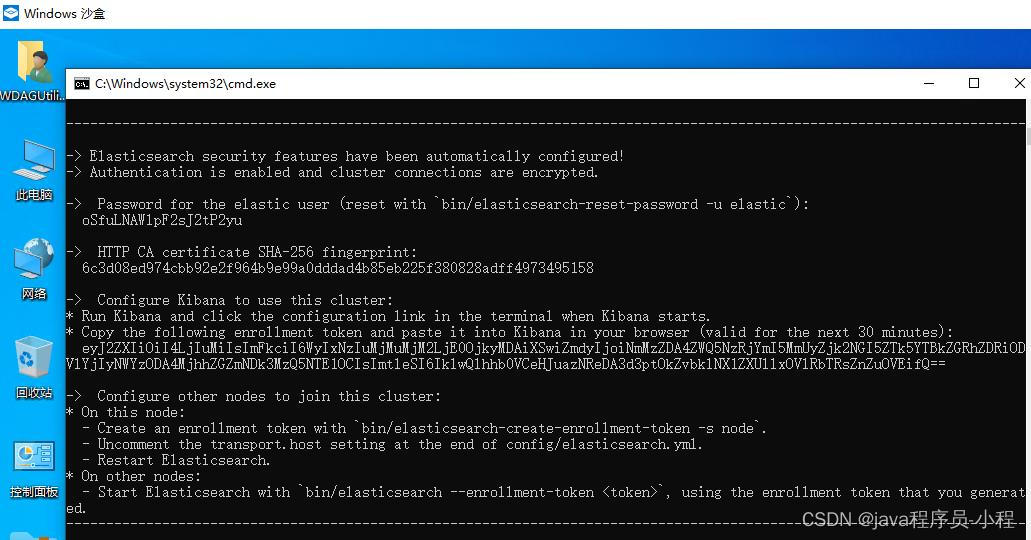
初次启动,显示的配置信息,一定要保存下来,以备使用。
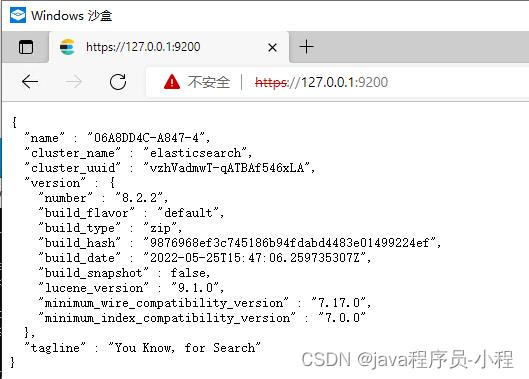
访问https://127.0.0.1:9200,注意是HTTPS不是HTTP,用户名密码刚才控制台已经打印出来了。

证明安装成功。
问题1:内存直接占满
此时你打开任务管理器,发现一个问题,ES启动后,占据了沙盒的全部内存。我的本机是32G的,启动也是直接打满,导致系统卡爆。
因此我们需要配置启动内存,配置文件conf/jvm.options
################################################################
## IMPORTANT: JVM heap size
################################################################
##
## The heap size is automatically configured by Elasticsearch
## based on the available memory in your system and the roles
## each node is configured to fulfill. If specifying heap is
## required, it should be done through a file in jvm.options.d,
## which should be named with .options suffix, and the min and
## max should be set to the same value. For example, to set the
## heap to 4 GB, create a new file in the jvm.options.d
## directory containing these lines:
##
-Xms1g
-Xmx1g
在这里修改为合适的内存,这里修改为1G,沙盒全部内存是4G,合理配置即可。
问题2:二次启动报错
修改配置文件后,再次启动,这时不会再次打印第一次启动时的配置信息了。但是报错了
[2022-06-16T10:40:55,562][ERROR][o.e.i.g.GeoIpDownloader  ] [06A8DD4C-A847-4] exception during geoip databases update
org.elasticsearch.ElasticsearchException: not all primary shards of [.geoip_databases] index are activeat org.elasticsearch.ingest.geoip.GeoIpDownloader.updateDatabases(GeoIpDownloader.java:135) ~[ingest-geoip-8.2.2.jar:8.2.2]at org.elasticsearch.ingest.geoip.GeoIpDownloader.runDownloader(GeoIpDownloader.java:275) [ingest-geoip-8.2.2.jar:8.2.2]at org.elasticsearch.ingest.geoip.GeoIpDownloaderTaskExecutor.nodeOperation(GeoIpDownloaderTaskExecutor.java:102) [ingest-geoip-8.2.2.jar:8.2.2]at org.elasticsearch.ingest.geoip.GeoIpDownloaderTaskExecutor.nodeOperation(GeoIpDownloaderTaskExecutor.java:48) [ingest-geoip-8.2.2.jar:8.2.2]at org.elasticsearch.persistent.NodePersistentTasksExecutor$1.doRun(NodePersistentTasksExecutor.java:42) [elasticsearch-8.2.2.jar:8.2.2]at org.elasticsearch.common.util.concurrent.ThreadContext$ContextPreservingAbstractRunnable.doRun(ThreadContext.java:773) [elasticsearch-8.2.2.jar:8.2.2]at org.elasticsearch.common.util.concurrent.AbstractRunnable.run(AbstractRunnable.java:26) [elasticsearch-8.2.2.jar:8.2.2]at java.util.concurrent.ThreadPoolExecutor.runWorker(ThreadPoolExecutor.java:1136) [?:?]at java.util.concurrent.ThreadPoolExecutor$Worker.run(ThreadPoolExecutor.java:635) [?:?]at java.lang.Thread.run(Thread.java:833) [?:?]
因为他启动时会去更新地图的一些数据库,这里直接禁掉即可,用到时再说,配置文件conf/elasticsearch.yml,增加配置
ingest.geoip.downloader.enabled: false
问题3:本地测试不想用用户密码和SSL
本身ES服务器也不会对外开放,增加用户密码和SSL对于初学来说,徒增不必要的麻烦,这里直接干掉,还是那句话,用到再说。
配置文件conf/elasticsearch.yml,修改配置
# Enable security features
xpack.security.enabled: falsexpack.security.enrollment.enabled: false# Enable encryption for HTTP API client connections, such as Kibana, Logstash, and Agents
xpack.security.http.ssl:enabled: falsekeystore.path: certs/http.p12# Enable encryption and mutual authentication between cluster nodes
xpack.security.transport.ssl:enabled: falseverification_mode: certificatekeystore.path: certs/transport.p12truststore.path: certs/transport.p12
# Create a new cluster with the current node only
# Additional nodes can still join the cluster later
cluster.initial_master_nodes: ["06A8DD4C-A847-4"]# Allow HTTP API connections from anywhere
# Connections are encrypted and require user authentication
http.host: 0.0.0.0# Allow other nodes to join the cluster from anywhere
# Connections are encrypted and mutually authenticated
#transport.host: 0.0.0.0
原来都是true,这里都改成了false,前面是要求用户登录的,后面是要求SSL的,没必要,干掉。
再次启动访问http://127.0.0.1:9200 ,可以直接打开使用。
这篇关于es8的windows安装的文章就介绍到这儿,希望我们推荐的文章对编程师们有所帮助!


