本文主要是介绍centos7安装在两块硬盘上_【linux实操1】华硕笔记本安装centos7实战,希望对大家解决编程问题提供一定的参考价值,需要的开发者们随着小编来一起学习吧!
把自己的闲置笔记本用来做centos7服务器了,同时也出一期教程,记录自己同时也帮助需要的人;安排如下
1、【linux实操1】华硕笔记本安装centos7实战
2、【linux实操2】使用yum在命令行安装常用工具
3、【linux实操3】安装漂亮的桌面xfce桌面
4、【linux实操4】centos7安装vnc、teamviewer远程工具及防火墙配置
5、【linux实操5】centos7安装chrome、搜狗输入法、7-zip
6、【linux实操6】oracle走起
7、【linux实操6】centos7下内网穿透
环境准备(没有就去买,不行的就虚拟机vm里跑呗):
1、古董笔记本一台,买来7年了,型号:华硕x550vb 128SSD+1T机械 8GB内存 i5-3230hq
2、centos7的 iso安装镜像:CentOS-7-x86_64-Everything-1511.iso
3、软碟通 写镜像到U盘的工具
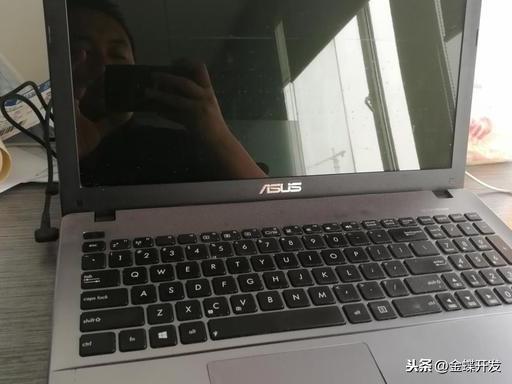
尘封的笔记本
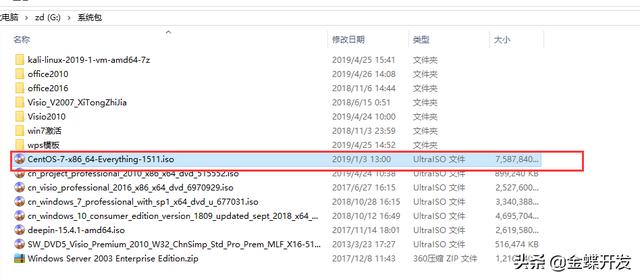
偷偷下载的镜像
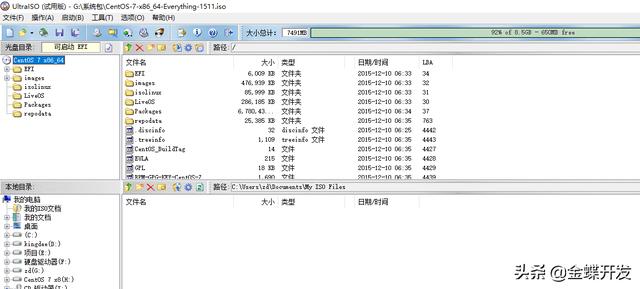
捡来的软件
写入硬盘
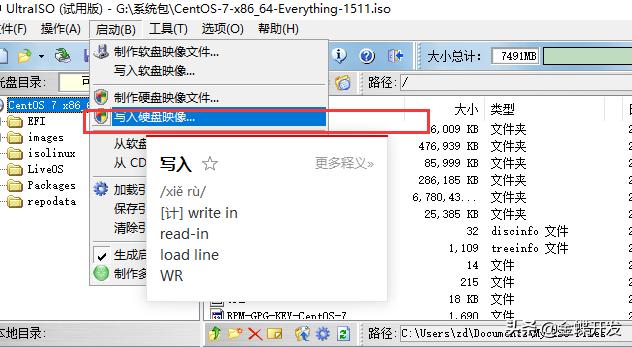
选择自己的U盘,点击写入

开工:
1、 开始安装 首先进行笔记本的bios模式,进行引导设置,centos7默认是支持uefi的;
所以不需要设置兼容模式
开机F2一直按,别手抖
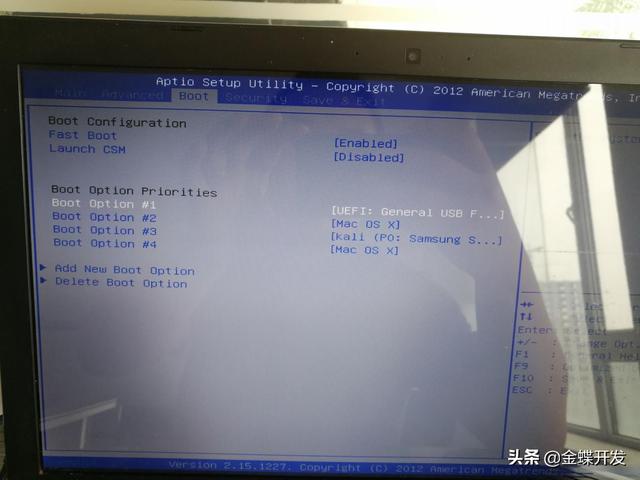
神奇的bios界面
BOOt option #1 选择自己的U盘,F10保存-重启
2、 开始加载系统,选择install centos7
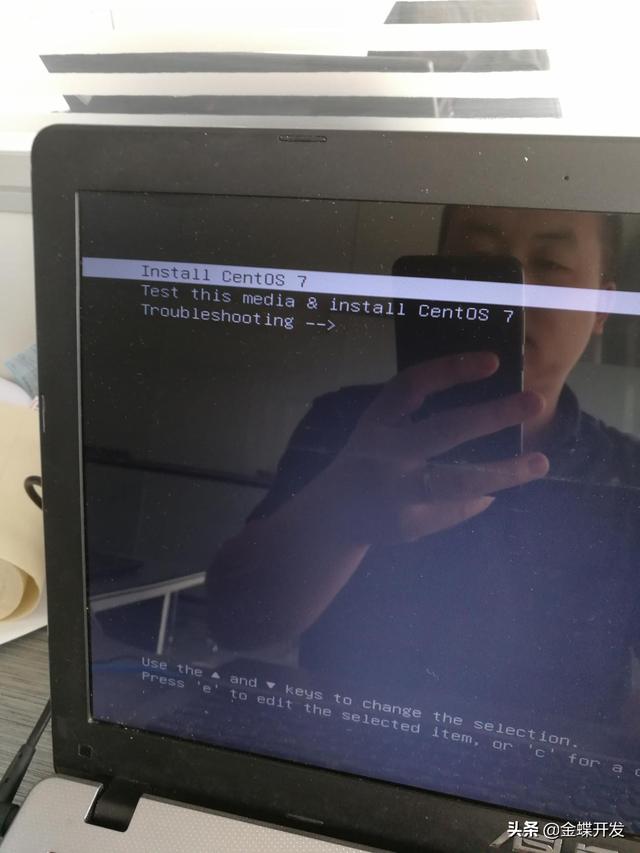
然后一直显示这样,管你信不信反正报错了; U盘中centos的文件没有被是被识别到,报这个错误
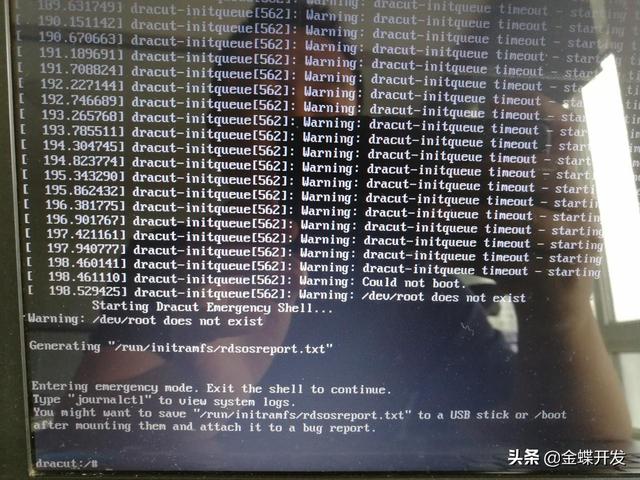
3、解决方法如下:
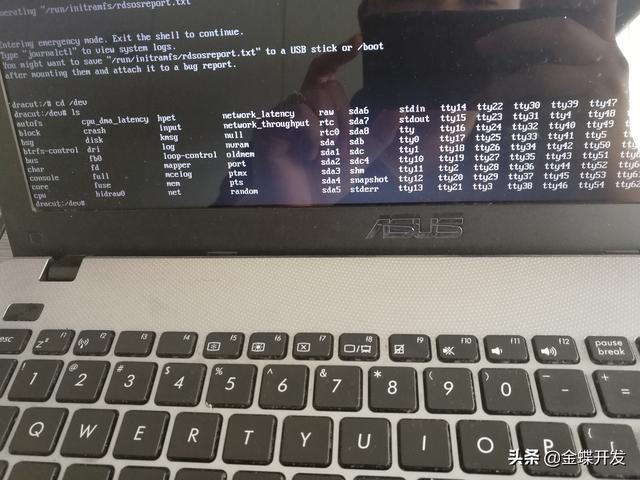
确认我们的U盘是哪一个:
dracut:/# cd /dev
dracut:/dev# ls
选择第一项,按 e 进入编辑界面
如图
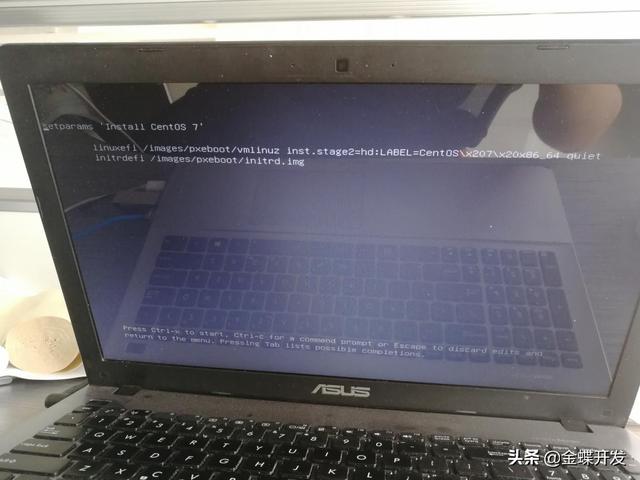
修改为
vmlinuz initrd=initrd.img inst.stage2=hd:LABEL=CentOSx207x20x86_64 rd.live.check quiet
此时就需要改为(经过尝试,我的是sdc4,请根据自己的电脑进行设置,每个都不同)
vmlinuz initrd=initrd.img inst.stage2=hd:/dev/sdc4 quiet
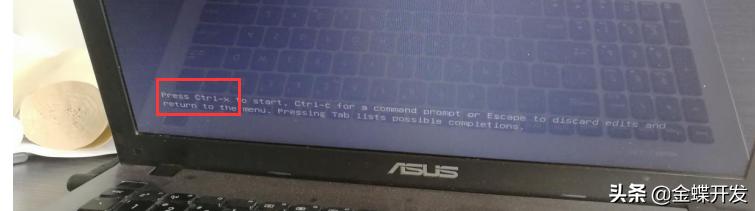
修改完成后,ctrl +x进行开始
然后就是各种加载..........................
4、 进入到下面界面

下一步这个界面
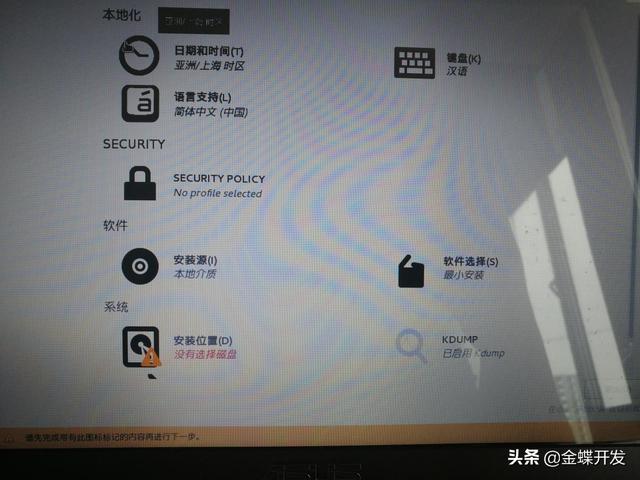
5、配置下软件选择,可以选择默认的,我还是习惯打开看下
首先打开 软件选择,大家可以选择带桌面,后面课程会安装xfce桌面,所有选择最小安装就不浪费了,选择其他的也可以
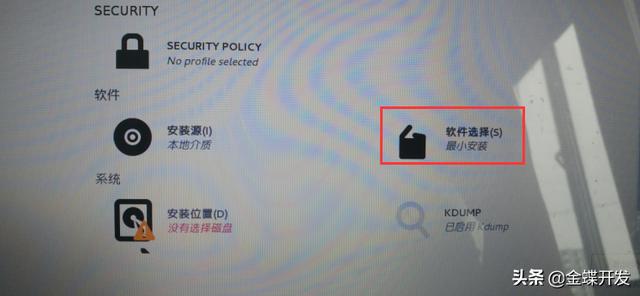
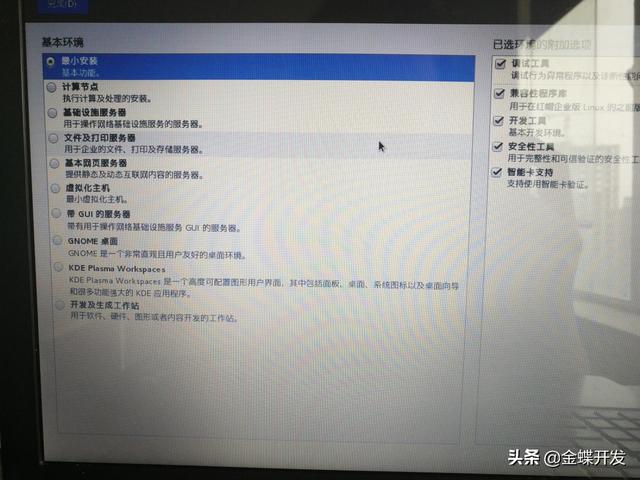
选择最小安装,我不要桌面,我只要命令行
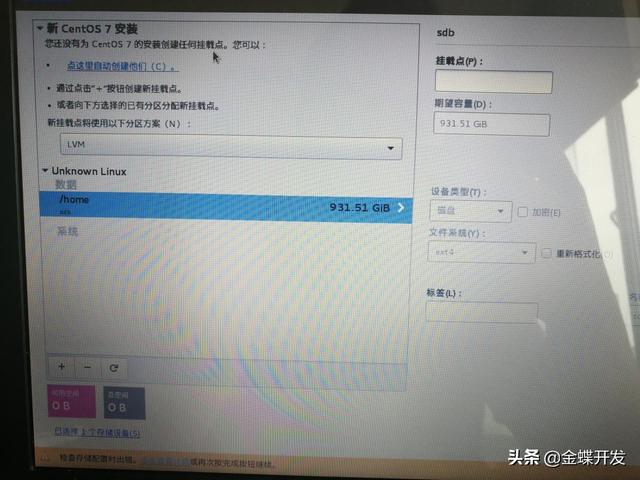
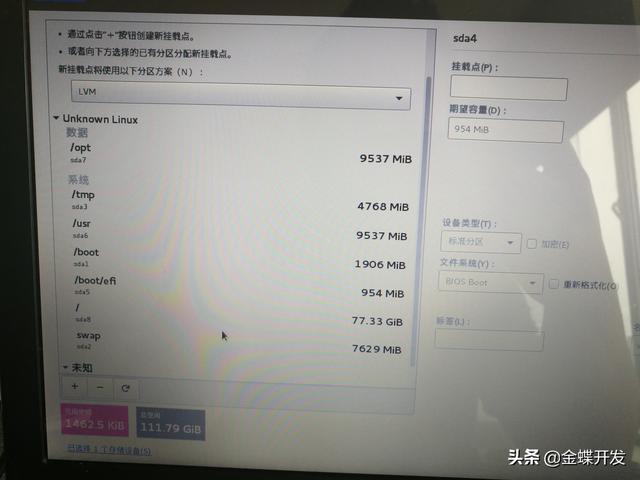
6、选择安装位置进行自动分区(选择自动分区就可以别瞎折腾,下面我还是瞎折腾了自己分区了)
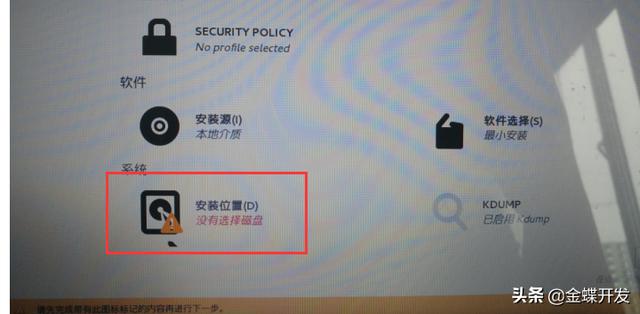
7、(忽略这个折腾的过程)目前的情况,准备128g的这个作为主分区,1t的机械挂载到home分区
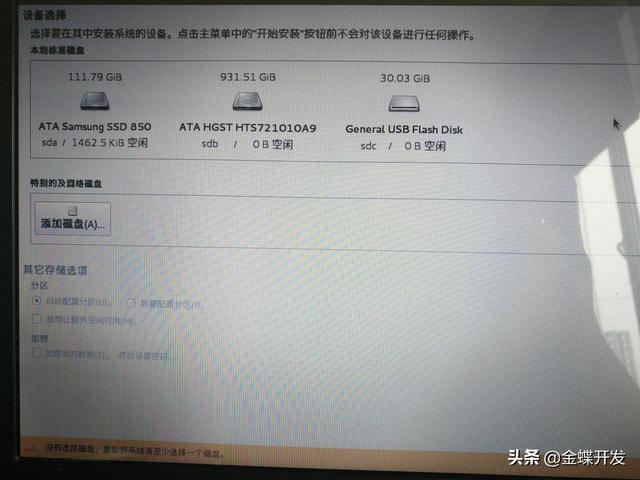
直接上分好的图了,手机拍照然后插入到word里,最后再搞到头条,真的很麻烦
8、下一步 创建 设置root密码和创建用户(可以不创建)

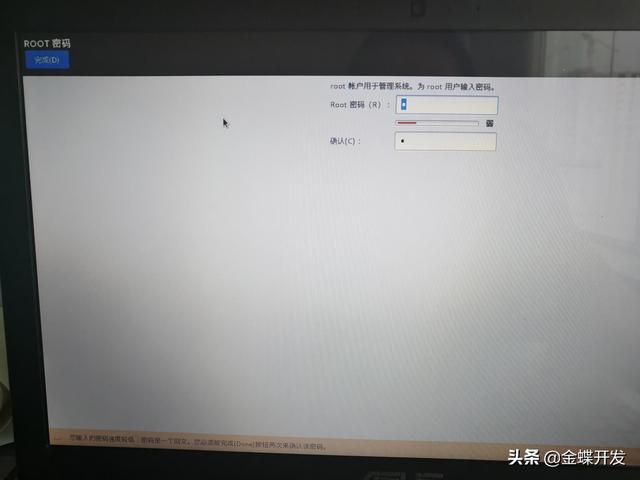
设置root密码
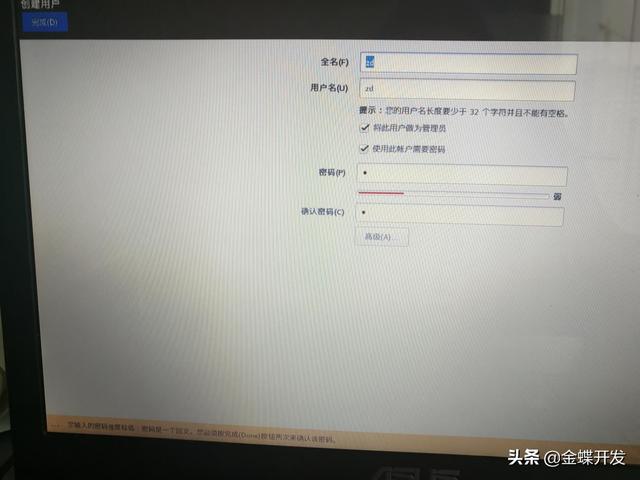
添加用户,可以不添加
等待...重启安装完成
就是这个样子,安装完了,重启后进来的就是命令行,现在啥都没有,下面的教程继续配置
这篇关于centos7安装在两块硬盘上_【linux实操1】华硕笔记本安装centos7实战的文章就介绍到这儿,希望我们推荐的文章对编程师们有所帮助!


