本文主要是介绍深度桌面20社区版上部署咖啡壶IT资产管理软件,希望对大家解决编程问题提供一定的参考价值,需要的开发者们随着小编来一起学习吧!
一、咖啡壶介绍
咖啡壶(Chemex)是一个轻量的、现代设计风格的 ICT 资产管理系统。得益于 Laravel 框架以及 Dcat Admin 开发平台,使其具备了优雅、简洁的优秀体验。 咖啡壶(Chemex) 是完全免费且开源的,任何人都可以无限制的修改代码以及部署服务,这对于很多想要对ICT资产做信息化管理的中小型企业来说,是一个很好的选择:低廉的成本换回的是高效的管理方案,同时又有健康的生态提供支持。
项目地址:https://gitee.com/celaraze/chemex
二、环境要求
git,用于管理版本,部署和升级必要工具。
PHP 8+ ,仅支持 PHP8。
MySQL 5.7+,数据库引擎,理论上 MariaDB 10.2 + 兼容支持。
ext-zip 扩展。
ext-json 扩展。
ext-fileinfo 扩展。
ext-ldap 扩展。
ext-bcmath 扩展。
ext-mysqli 扩展。
ext-xml 扩展。
ext-xmlrpc 扩展。
以上扩展安装过程注意版本必须与 PHP 版本一致。
三、部署步骤
1. 安装php8
深度的软件仓库没有php8,所以我们要编译安装php。
到php官方网站下载源代码,源代码拷贝到/opt目录并加压,然后编译安装,如下编译选项:
./configure --prefix=/opt/php8 --with-config-file-path=/opt/php8/etc \
--enable-fpm --enable-mysqlnd --enable-opcache --enable-pcntl \
--enable-mbstring --enable-soap --with-zip --enable-calendar \
--enable-bcmath --enable-exif --enable-ftp --enable-intl --with-mysqli\
--with-pdo-mysql --with-openssl --with-curl --enable-gd --with-gettext \
--with-mhash --with-openssl --with-tidy \
--with-zlib --with-ldap
如果有些支持库没有满足,需要手动安装
apt-get install -y autoconf libxml2-dev libsqlite3-dev \
libcurl4-openssl-dev libssl-dev libonig-dev libtidy-dev zlib1g-devai libldap2-dev libzip-dev
xml-rpc这个扩展没有这个编译选项,跳过。
编译和拷贝配置文件
make
make install
cp php.ini-production /opt/php/etc/php.ini
cd /opt/php8/etc
cp php-fpm.conf.default php-fpm.conf
cp ./php-fpm.d/www.conf.default ./php-fpm.d/www.conf
php可执行程序软链接
ln -s /opt/php8/bin/php /usr/bin/php
验证php
php -v
PHP 8.0.8 (cli) (built: Jul 24 2021 20:03:16) ( NTS )
Copyright (c) The PHP Group
Zend Engine v4.0.8, Copyright (c) Zend Technologieswith Zend OPcache v8.0.8, Copyright (c), by Zend Technologies
php -m
[PHP Modules]
bcmath
calendar
Core
ctype
curl
date
dom
exif
fileinfo
filter
ftp
gd
gettext
hash
iconv
intl
json
ldap
libxml
mbstring
mysqli
mysqlnd
openssl
pcntl
pcre
PDO
pdo_mysql
pdo_sqlite
Phar
posix
Reflection
session
SimpleXML
soap
SPL
sqlite3
standard
tidy
tokenizer
xml
xmlreader
xmlwriter
Zend OPcache
zip
zlib[Zend Modules]
Zend OPcache
设置php-fpm服务
vim /lib/systemd/system/php-fpm.service
内容如下:
[Unit]
Description=The PHP 8.0 FastCGI Process Manager
Documentation=man:php-fpm8.0(8)
After=network.target[Service]
Type=simple
PIDFile=/var/run/php-fpm.pid
ExecStart=/opt/php8/sbin/php-fpm --nodaemonize --fpm-config /opt/php8/etc/php-fpm.conf
ExecReload=/bin/kill -USR2 $MAINPID[Install]
WantedBy=multi-user.target
现在php-fpm服务还无法启动,我们还要修改对应的配置文件,修改php执行的用户和组。为什么是这个用户和组,因为apache2是使用这个用户运行的。涉及后面网站的权限。
sudo vim www.conf; Unix user/group of processes
; Note: The user is mandatory. If the group is not set, the default user's group
;       will be used.user = www-datagroup = www-data
这时候php能够正常运行了。9000端口开启了。
State             Recv-Q            Send-Q                       Local Address:Port                        Peer Address:Port
LISTEN            0                 511                              127.0.0.1:9000                             0.0.0.0:*
LISTEN            0                 50                                 0.0.0.0:139                              0.0.0.0:*
2.安装apache2和mariadb
深度软件仓库中的这两个软件满足要求。不需要编译安装了。
3.下载网站源码部署网站
到项目中下载网站,然后拷贝到/opt目录并解压。
# jlee @ jlee-PC in /opt/chemex [13:57:30]
$ ls
app      bootstrap      config    LICENSE       phpunit.xml  README.md  routes  server.php  tests   webpack.mix.js
artisan  composer.json  database  package.json  public       resources  rr      storage     vendor
在项目根目录中,复制 .env.example 文件为一份新的,并重命名为 .env
sudo vim .env1 # 欢迎使用 chemex,在您开始之前,请按照指引完成配置2 3 # 基础配置:4 5 ### 第一步:数据库配置6 DB_CONNECTION=mysql #数据库类型,不需要修改(兼容mariadb)7 DB_HOST=127.0.0.1 # 数据库地址8 DB_PORT=3306 # 数据库端口号9 DB_DATABASE=chemex_alone # 数据库名称10 DB_USERNAME=test # 数据库用户名11 DB_PASSWORD=test # 数据库密码
进入mysql,创建数据库和用户名
create database chemex_alone;
grant all on chemex_alone.* to test@'%' identified by 'test';
不要修改字符集,默认就是utf8
MariaDB [(none)]> show variables like 'character%';
+--------------------------+----------------------------+
| Variable_name            | Value                      |
+--------------------------+----------------------------+
| character_set_client     | utf8mb4                    |
| character_set_connection | utf8mb4                    |
| character_set_database   | utf8mb4                    |
| character_set_filesystem | binary                     |
| character_set_results    | utf8mb4                    |
| character_set_server     | utf8mb4                    |
| character_set_system     | utf8                       |
| character_sets_dir       | /usr/share/mysql/charsets/ |
+--------------------------+----------------------------+
8 rows in set (0.001 sec)
进入网站根目录安装chemex
php artisan chemex:install
配置httpd
主配置文件
sudo vim apache2.conf176 <Directory /opt/chemex>
177 ▸   Options FollowSymLinks
178 ▸   AllowOverride All
179 ▸   Require all granted
180 </Directory>
模块增加
cd /etc/apache2/mods-enabled/
sudo ln -s ../mods-available/proxy.conf proxy.conf
sudo ln -s ../mods-available/proxy.load proxy.load
sudo ln -s ../mods-available/rewrite.load rewrite.load
sudo ln -s ../mods-available/proxy_fcgi.load proxy_fcgi.load
主机配置
cd /etc/apache2/sites-enabled/
sudo vim 000-default.conf
修改内容
<VirtualHost *:80># The ServerName directive sets the request scheme, hostname and port that# the server uses to identify itself. This is used when creating# redirection URLs. In the context of virtual hosts, the ServerName# specifies what hostname must appear in the request's Host: header to# match this virtual host. For the default virtual host (this file) this# value is not decisive as it is used as a last resort host regardless.# However, you must set it for any further virtual host explicitly.#ServerName www.example.comServerAdmin webmaster@localhostDocumentRoot /opt/chemex/public/AddType application/x-httpd-php .phpAddType application/x-httpd-php-source .phpsProxyRequests offProxyPassMatch ^/(.*\.php)$ fcgi://127.0.0.1:9000/opt/chemex/public/$1# Available loglevels: trace8, ..., trace1, debug, info, notice, warn,# error, crit, alert, emerg.# It is also possible to configure the loglevel for particular# modules, e.g.#LogLevel info ssl:warnErrorLog ${APACHE_LOG_DIR}/error.logCustomLog ${APACHE_LOG_DIR}/access.log combined# For most configuration files from conf-available/, which are# enabled or disabled at a global level, it is possible to# include a line for only one particular virtual host. For example the# following line enables the CGI configuration for this host only# after it has been globally disabled with "a2disconf".#Include conf-available/serve-cgi-bin.conf
</VirtualHost># vim: syntax=apache ts=4 sw=4 sts=4 sr noet
修改服务器的伪静态规则,apache的方法是:
- 开启 rewrite 模块
- 文件夹开启 AllowOverride All
最后修改网站目录的所有者和所属组为www-data,并且设置755权限。其中/storage 目录设置为 777 权限。
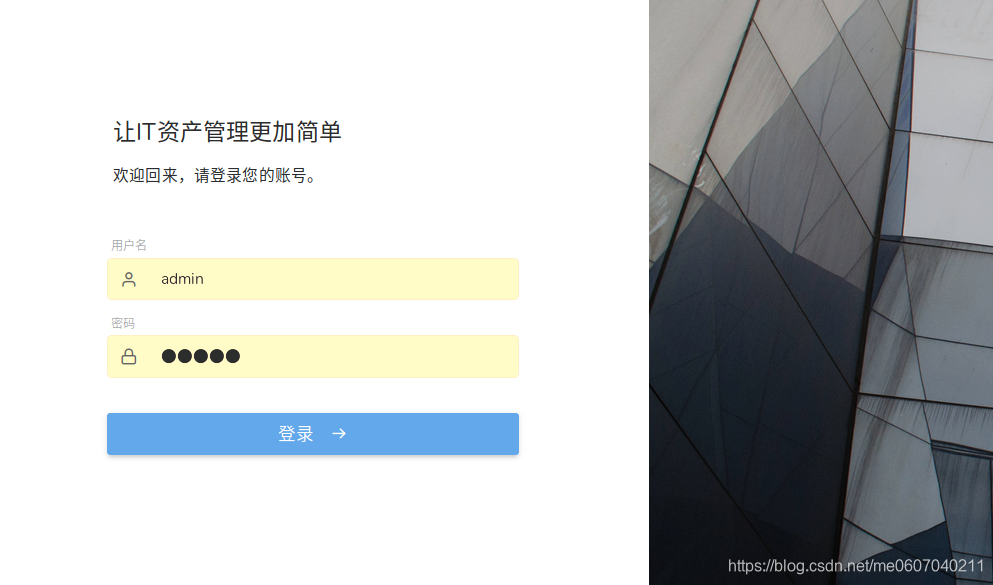
这样网站就能够打开了

这篇关于深度桌面20社区版上部署咖啡壶IT资产管理软件的文章就介绍到这儿,希望我们推荐的文章对编程师们有所帮助!


