本文主要是介绍WebSocket+xterm+springboot+vue 实现 xshell 操作linux终端功能,希望对大家解决编程问题提供一定的参考价值,需要的开发者们随着小编来一起学习吧!
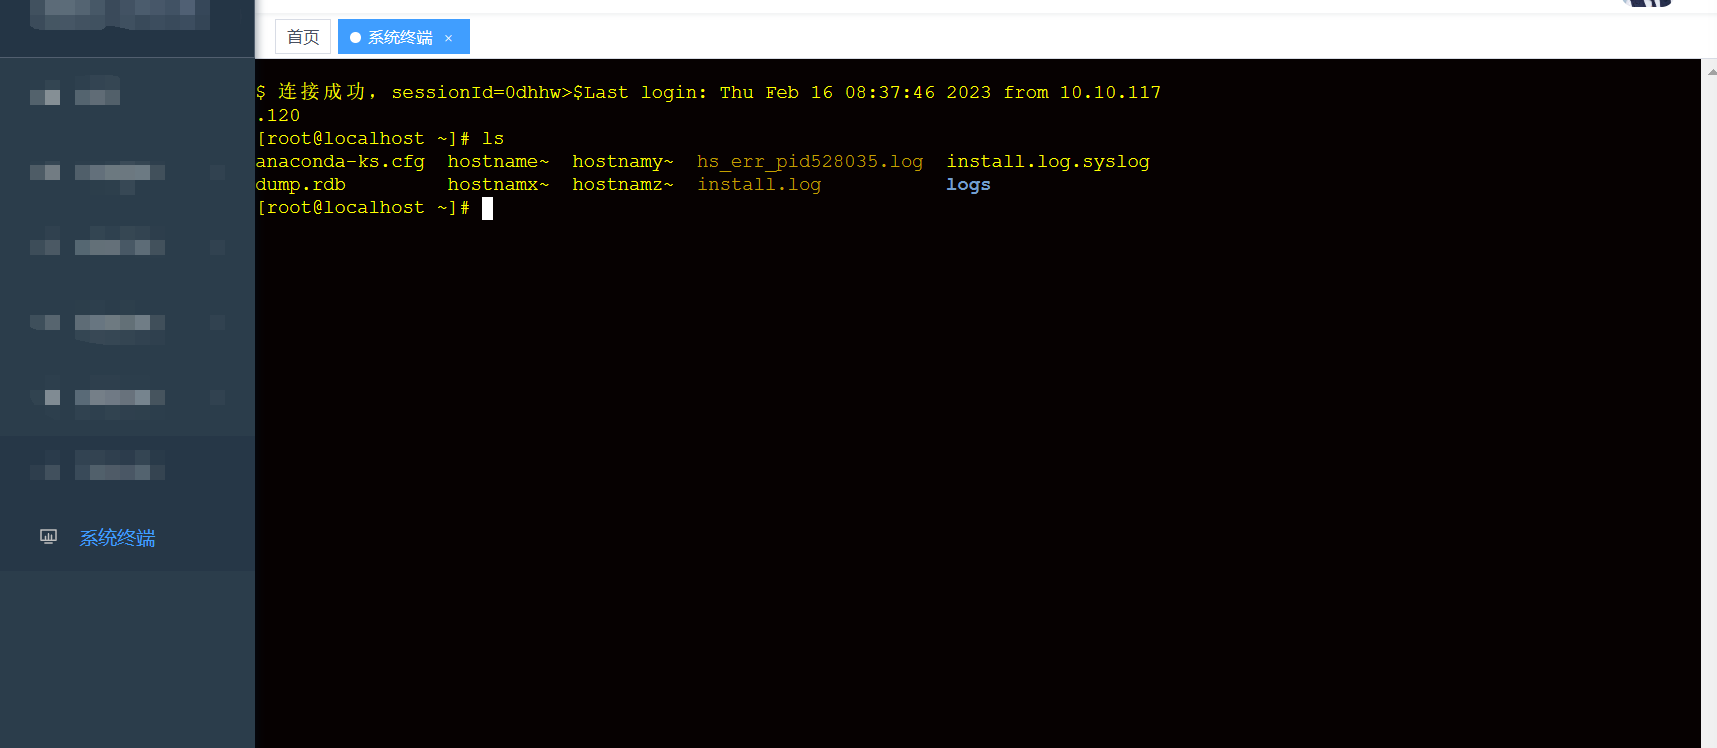
效果图

1.工具介绍与安装
1.1 xterm.js
xterm 是一个使用 TypeScript 编写的前端终端组件,可以直接在浏览器中实现一个命令行终端应用。Xterm.js 适用于大多数终端应用程序,如 bash,vim 和 tmux,这包括对基于curses的应用程序和鼠标事件的支持。
1.2 安装
// 1、安装 xterm
npm install --save xterm// 2、安装xterm-addon-fit
// xterm.js的插件,使终端的尺寸适合包含元素。
npm install --save xterm-addon-fit// 3、安装xterm-addon-attach(这个你不用就可以不装)
// xterm.js的附加组件,用于附加到Web Socket
npm install --save xterm-addon-attach
安装完之后可以在package.json看到依赖

1.3 websocket
websocket主要用于将前端的指令传递到后端,后端做出响应在传回前端显示。
springboot中安装依赖
<!-- WebSocket 支持 --><dependency><groupId>org.springframework.boot</groupId><artifactId>spring-boot-starter-websocket</artifactId></dependency>
2.前端实现
2.1 模板部分
//菜单中
<template><div class="console" id="terminal" style="min-height: cala(100vh)"></div>
</template>
//这种是直接vue里面
<template><section><div id="log" style="margin:10px auto;"><div class="console" id="terminal"></div></div></section>
</template>
2.2 逻辑部分
这一部分是填写你后端连接的地址,注意不要弄错
const WebSocketUrl = "wss://localhost:8080/ws/ssh";
<script>
import "xterm/css/xterm.css";
import { Terminal } from "xterm";
import { FitAddon } from "xterm-addon-fit";
import { AttachAddon } from "xterm-addon-attach";export default {name: "Xterm",props: {socketURI: {type: String,default: ""}},data () {return {term: null,socket: null,rows: 32,cols: 20,SetOut: false,isKey: false,};},mounted () {this.initSocket();},beforeDestroy () {this.socket.close();// this.term.dispose();},methods: {//Xterm主题initTerm () {const term = new Terminal({rendererType: "canvas", //渲染类型rows: this.rows, //行数// cols: this.cols,// 设置之后会输入多行之后覆盖现象convertEol: true, //启用时,光标将设置为下一行的开头// scrollback: 10,//终端中的回滚量fontSize: 14, //字体大小disableStdin: false, //是否应禁用输入。cursorStyle: "block", //光标样式// cursorBlink: true, //光标闪烁scrollback: 30,tabStopWidth: 4,theme: {foreground: "yellow", //字体background: "#060101", //背景色cursor: "help" //设置光标}});const attachAddon = new AttachAddon(this.socket);const fitAddon = new FitAddon();term.loadAddon(attachAddon);term.loadAddon(fitAddon);term.open(document.getElementById("terminal"));term.focus();let _this = this;//限制和后端交互,只有输入回车键才显示结果term.prompt = () => {term.write("\r\n$ ");};term.prompt();function runFakeTerminal (_this) {if (term._initialized) {return;}// 初始化term._initialized = true;term.writeln();//控制台初始化报错处term.prompt();// / **//     *添加事件监听器,用于按下键时的事件。事件值包含//     *将在data事件以及DOM事件中发送的字符串//     *触发了它。//     * @返回一个IDisposable停止监听。//  * ///   / ** 更新:xterm 4.x(新增)//  *为数据事件触发时添加事件侦听器。发生这种情况//  *用户输入或粘贴到终端时的示例。事件值//  *是`string`结果的结果,在典型的设置中,应该通过//  *到支持pty。//  * @返回一个IDisposable停止监听。//  * /// 支持输入与粘贴方法term.onData(function (key) {let order = {Data: key,Op: "stdin"};_this.onSend(order);});_this.term = term;}runFakeTerminal(_this);},//webShell主题initSocket () {// const WebSocketUrl = "ws://localhost:8080/ws/ssh";const WebSocketUrl = "wss://localhost:8080/ws/ssh";this.socket = new WebSocket(WebSocketUrl);this.socketOnClose(); //关闭this.socketOnOpen(); //this.socketOnError();},//webshell链接成功之后操作socketOnOpen () {this.socket.onopen = () => {// 链接成功后this.initTerm();};},//webshell关闭之后操作socketOnClose () {this.socket.onclose = () => {console.log("close socket");};},//webshell错误信息socketOnError () {this.socket.onerror = () => {console.log("socket 链接失败");};},//特殊处理onSend (data) {data = this.base.isObject(data) ? JSON.stringify(data) : data;data = this.base.isArray(data) ? data.toString() : data;data = data.replace(/\\\\/, "\\");this.shellWs.onSend(data);},//删除左右两端的空格trim (str) {return str.replace(/(^\s*)|(\s*$)/g, "");}}
};
</script>
2.3 样式 以及自适应屏幕大小
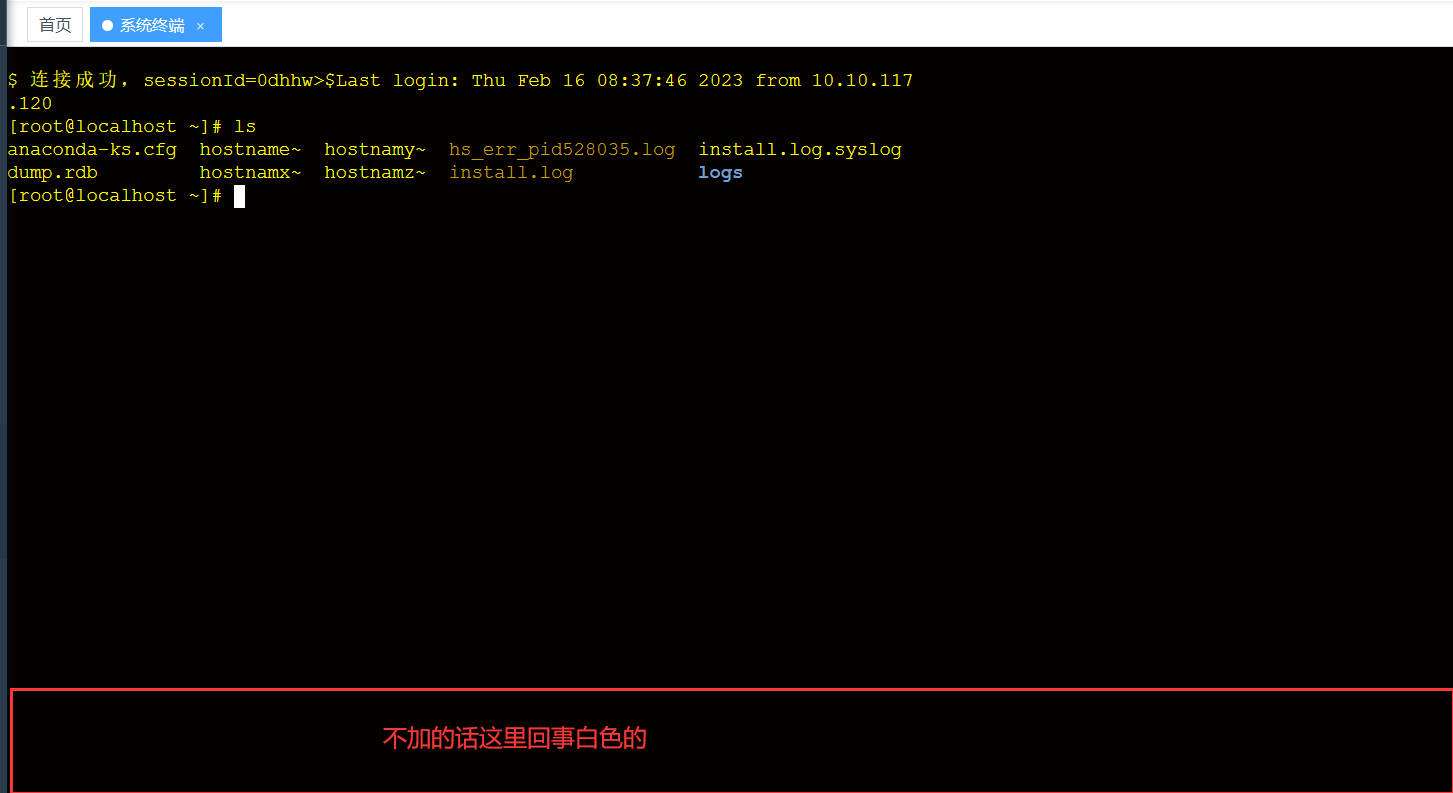
这一部分是因为xterm.js的FitAddon 只会横向的去适应屏幕大小,纵向他会有留白。这里是覆盖了xterm的一个原来的样式,下面的scope里面的是对字体的一些修饰
<style>
.xterm-screen{min-height: calc(100vh);
}
</style>

<!-- Add "scoped" attribute to limit CSS to this component only -->
<style>
.xterm-screen{min-height: calc(100vh);
}
</style>
<style scoped>h1, h2 {font-weight: normal;
}
ul {list-style-type: none;padding: 0;
}
li {display: inline-block;margin: 0 10px;
}
a {color: #42b983;
}
</style>
3.后端实现
3.1 实体类部分
/**** @Description SshModel实体类*/public class SshModel {private String name;private String host;private Integer port;private String user;private String password;/*** 编码格式*/private String charset;/*** 文件目录*/private String fileDirs;/*** ssh 私钥*/private String privateKey;private String connectType;/*** 不允许执行的命令*/private String notAllowedCommand;/*** 允许编辑的后缀文件*/private String allowEditSuffix;public String getName() {return name;}public void setName(String name) {this.name = name;}public String getNotAllowedCommand() {return notAllowedCommand;}public void setNotAllowedCommand(String notAllowedCommand) {this.notAllowedCommand = notAllowedCommand;}public ConnectType connectType() {return EnumUtil.fromString(ConnectType.class, this.connectType, ConnectType.PASS);}public String getConnectType() {return connectType;}public void setConnectType(String connectType) {this.connectType = connectType;}public String getPrivateKey() {return privateKey;}public void setPrivateKey(String privateKey) {this.privateKey = privateKey;}public String getFileDirs() {return fileDirs;}public void setFileDirs(String fileDirs) {this.fileDirs = fileDirs;}public List<String> fileDirs() {return StringUtil.jsonConvertArray(this.fileDirs, String.class);}public void fileDirs(List<String> fileDirs) {if (fileDirs != null) {for (int i = fileDirs.size() - 1; i >= 0; i--) {String s = fileDirs.get(i);fileDirs.set(i, FileUtil.normalize(s));}this.fileDirs = JSONArray.toJSONString(fileDirs);} else {this.fileDirs = null;}}public String getHost() {return host;}public void setHost(String host) {this.host = host;}public Integer getPort() {return port;}public void setPort(Integer port) {this.port = port;}public String getUser() {return user;}public void setUser(String user) {this.user = user;}public String getPassword() {return password;}public void setPassword(String password) {this.password = password;}public String getCharset() {return charset;}public void setCharset(String charset) {this.charset = charset;}public Charset getCharsetT() {Charset charset;try {charset = Charset.forName(this.getCharset());} catch (Exception e) {charset = CharsetUtil.CHARSET_UTF_8;}return charset;}public List<String> allowEditSuffix() {return StringUtil.jsonConvertArray(this.allowEditSuffix, String.class);}public void allowEditSuffix(List<String> allowEditSuffix) {if (allowEditSuffix == null) {this.allowEditSuffix = null;} else {this.allowEditSuffix = JSONArray.toJSONString(allowEditSuffix);}}public String getAllowEditSuffix() {return allowEditSuffix;}public void setAllowEditSuffix(String allowEditSuffix) {this.allowEditSuffix = allowEditSuffix;}/*** 检查是否包含禁止命令** @param sshItem 实体* @param inputItem 输入的命令* @return false 存在禁止输入的命令*/public static boolean checkInputItem(SshModel sshItem, String inputItem) {// 检查禁止执行的命令String notAllowedCommand = StrUtil.emptyToDefault(sshItem.getNotAllowedCommand(), StrUtil.EMPTY).toLowerCase();if (StrUtil.isEmpty(notAllowedCommand)) {return true;}List<String> split = Arrays.asList(StrUtil.split(notAllowedCommand, StrUtil.COMMA));inputItem = inputItem.toLowerCase();List<String> commands = Arrays.asList(StrUtil.split(inputItem, StrUtil.CR));commands.addAll(Arrays.asList(StrUtil.split(inputItem, "&")));for (String s : split) {//boolean anyMatch = commands.stream().anyMatch(item -> StrUtil.startWithAny(item, s + StrUtil.SPACE, ("&" + s + StrUtil.SPACE), StrUtil.SPACE + s + StrUtil.SPACE));if (anyMatch) {return false;}//anyMatch = commands.stream().anyMatch(item -> StrUtil.equals(item, s));if (anyMatch) {return false;}}return true;}public enum ConnectType {/*** 账号密码*/PASS,/*** 密钥*/PUBKEY}}
3.1.1 先配置一个WebSocketConfig类
@Configuration
@ComponentScan
@EnableAutoConfiguration
public class WebSocketConfig implements ServletContextInitializer {/*** 给spring容器注入这个ServerEndpointExporter对象* 相当于xml:* <beans>* <bean id="serverEndpointExporter" class="org.springframework.web.socket.server.standard.ServerEndpointExporter"/>* </beans>* <p>* 检测所有带有@serverEndpoint注解的bean并注册他们。** @return*/@Beanpublic ServerEndpointExporter serverEndpointExporter() {return new ServerEndpointExporter();}@Overridepublic void onStartup(ServletContext servletContext) throws ServletException {servletContext.addListener(WebAppRootListener.class);servletContext.setInitParameter("org.apache.tomcat.websocket.textBufferSize","52428800");servletContext.setInitParameter("org.apache.tomcat.websocket.binaryBufferSize","52428800");}
}
3.2 SshHander类
主要的实现是这两个核心类,这里是通过ssh去连接服务器的。
这里填写你的服务器用户名,密码等
@OnOpenpublic void onOpen(javax.websocket.Session session) throws Exception {SessionSet.add(session);SshModel sshItem = new SshModel();sshItem.setHost("xxxx");sshItem.setPort(xxxx);sshItem.setUser("xxxx");sshItem.setPassword("xxxxx");int cnt = OnlineCount.incrementAndGet(); // 在线数加1log.info("有连接加入,当前连接数为:{},sessionId={}", cnt,session.getId());SendMessage(session, "连接成功,sessionId="+session.getId());HandlerItem handlerItem = new HandlerItem(session, sshItem);handlerItem.startRead();HANDLER_ITEM_CONCURRENT_HASH_MAP.put(session.getId(), handlerItem);}
@ServerEndpoint("/ws/ssh")
@Component
public class SshHandler {private static final ConcurrentHashMap<String, HandlerItem> HANDLER_ITEM_CONCURRENT_HASH_MAP = new ConcurrentHashMap<>();@PostConstructpublic void init() {System.out.println("websocket 加载");}private static Logger log = LoggerFactory.getLogger(SshHandler.class);private static final AtomicInteger OnlineCount = new AtomicInteger(0);// concurrent包的线程安全Set,用来存放每个客户端对应的Session对象。private static CopyOnWriteArraySet<javax.websocket.Session> SessionSet = new CopyOnWriteArraySet<javax.websocket.Session>();/*** 连接建立成功调用的方法*/@OnOpenpublic void onOpen(javax.websocket.Session session) throws Exception {SessionSet.add(session);SshModel sshItem = new SshModel();sshItem.setHost("xxxx");sshItem.setPort(xxxx);sshItem.setUser("xxxx");sshItem.setPassword("xxxxx");int cnt = OnlineCount.incrementAndGet(); // 在线数加1log.info("有连接加入,当前连接数为:{},sessionId={}", cnt,session.getId());SendMessage(session, "连接成功,sessionId="+session.getId());HandlerItem handlerItem = new HandlerItem(session, sshItem);handlerItem.startRead();HANDLER_ITEM_CONCURRENT_HASH_MAP.put(session.getId(), handlerItem);}/*** 连接关闭调用的方法*/@OnClosepublic void onClose(javax.websocket.Session session) {SessionSet.remove(session);int cnt = OnlineCount.decrementAndGet();log.info("有连接关闭,当前连接数为:{}", cnt);}/*** 收到客户端消息后调用的方法* @param message* 客户端发送过来的消息*/@OnMessagepublic void onMessage(String message, javax.websocket.Session session) throws Exception {log.info("来自客户端的消息:{}",message);//        SendMessage(session, "收到消息,消息内容:"+message);HandlerItem handlerItem = HANDLER_ITEM_CONCURRENT_HASH_MAP.get(session.getId());this.sendCommand(handlerItem, message);}/*** 出现错误* @param session* @param error*/@OnErrorpublic void onError(javax.websocket.Session session, Throwable error) {log.error("发生错误:{},Session ID: {}",error.getMessage(),session.getId());error.printStackTrace();}private void sendCommand(HandlerItem handlerItem, String data) throws Exception {if (handlerItem.checkInput(data)) {handlerItem.outputStream.write(data.getBytes());} else {handlerItem.outputStream.write("没有执行相关命令权限".getBytes());handlerItem.outputStream.flush();handlerItem.outputStream.write(new byte[]{3});}handlerItem.outputStream.flush();}/*** 发送消息,实践表明,每次浏览器刷新,session会发生变化。* @param session* @param message*/public static void SendMessage(javax.websocket.Session session, String message) {try {//            session.getBasicRemote().sendText(String.format("%s (From Server,Session ID=%s)",message,session.getId()));session.getBasicRemote().sendText(message);session.getBasicRemote().sendText("dhhw>$");} catch (IOException e) {log.error("发送消息出错:{}", e.getMessage());e.printStackTrace();}}private class HandlerItem implements Runnable {private final javax.websocket.Session session;private final InputStream inputStream;private final OutputStream outputStream;private final Session openSession;private final ChannelShell channel;private final SshModel sshItem;private final StringBuilder nowLineInput = new StringBuilder();HandlerItem(javax.websocket.Session session, SshModel sshItem) throws IOException {this.session = session;this.sshItem = sshItem;this.openSession = JschUtil.openSession(sshItem.getHost(), sshItem.getPort(), sshItem.getUser(), sshItem.getPassword());this.channel = (ChannelShell) JschUtil.createChannel(openSession, ChannelType.SHELL);this.inputStream = channel.getInputStream();this.outputStream = channel.getOutputStream();}void startRead() throws JSchException {this.channel.connect();ThreadUtil.execute(this);}/*** 添加到命令队列** @param msg 输入* @return 当前待确认待所有命令*/private String append(String msg) {char[] x = msg.toCharArray();if (x.length == 1 && x[0] == 127) {// 退格键int length = nowLineInput.length();if (length > 0) {nowLineInput.delete(length - 1, length);}} else {nowLineInput.append(msg);}return nowLineInput.toString();}public boolean checkInput(String msg) {String allCommand = this.append(msg);boolean refuse;if (StrUtil.equalsAny(msg, StrUtil.CR, StrUtil.TAB)) {String join = nowLineInput.toString();if (StrUtil.equals(msg, StrUtil.CR)) {nowLineInput.setLength(0);}refuse = SshModel.checkInputItem(sshItem, join);} else {// 复制输出refuse = SshModel.checkInputItem(sshItem, msg);}return refuse;}@Overridepublic void run() {try {byte[] buffer = new byte[1024];int i;//如果没有数据来,线程会一直阻塞在这个地方等待数据。while ((i = inputStream.read(buffer)) != -1) {sendBinary(session, new String(Arrays.copyOfRange(buffer, 0, i), sshItem.getCharsetT()));}} catch (Exception e) {if (!this.openSession.isConnected()) {return;}SshHandler.this.destroy(this.session);}}}public void destroy(javax.websocket.Session session) {HandlerItem handlerItem = HANDLER_ITEM_CONCURRENT_HASH_MAP.get(session.getId());if (handlerItem != null) {IoUtil.close(handlerItem.inputStream);IoUtil.close(handlerItem.outputStream);JschUtil.close(handlerItem.channel);JschUtil.close(handlerItem.openSession);}IoUtil.close(session);HANDLER_ITEM_CONCURRENT_HASH_MAP.remove(session.getId());}private static void sendBinary(javax.websocket.Session session, String msg) {//		if (!session.isOpen()) {//			// 会话关闭不能发送消息//			return;//		}//		synchronized (session.getId()) {//			BinaryMessage byteBuffer = new BinaryMessage(msg.getBytes());try {//  System.out.println("#####:"+msg);session.getBasicRemote().sendText(msg);} catch (IOException e) {}//		}}}
3.3 StringUtil工具类
import cn.hutool.core.date.DateField;
import cn.hutool.core.date.DateTime;
import cn.hutool.core.date.DateUtil;
import cn.hutool.core.io.FileUtil;
import cn.hutool.core.lang.Validator;
import cn.hutool.core.util.StrUtil;
import cn.hutool.system.SystemUtil;
import com.alibaba.fastjson.JSON;import java.io.File;
import java.util.List;/*** @Description 方法运行参数工具**/
public class StringUtil {/*** 支持的压缩包格式*/public static final String[] PACKAGE_EXT = new String[]{"tar.bz2", "tar.gz", "tar", "bz2", "zip", "gz"};/*** 获取启动参数* @param args 所有参数* @param name 参数名* @return 值*/public static String getArgsValue(String[] args, String name) {if (args == null) {return null;}for (String item : args) {item = StrUtil.trim(item);if (item.startsWith("--" + name + "=")) {return item.substring(name.length() + 3);}}return null;}/*** id输入规则** @param value 值* @param min   最短* @param max   最长* @return true*/public static boolean isGeneral(CharSequence value, int min, int max) {String reg = "^[a-zA-Z0-9_-]{" + min + StrUtil.COMMA + max + "}$";return Validator.isMatchRegex(reg, value);}/*** 删除文件开始的路径** @param file      要删除的文件* @param startPath 开始的路径* @param inName    是否返回文件名* @return /test/a.txt /test/  a.txt*/public static String delStartPath(File file, String startPath, boolean inName) {String newWhitePath;if (inName) {newWhitePath = FileUtil.getAbsolutePath(file.getAbsolutePath());} else {newWhitePath = FileUtil.getAbsolutePath(file.getParentFile());}String itemAbsPath = FileUtil.getAbsolutePath(new File(startPath));itemAbsPath = FileUtil.normalize(itemAbsPath);newWhitePath = FileUtil.normalize(newWhitePath);String path = StrUtil.removePrefix(newWhitePath, itemAbsPath);//newWhitePath.substring(newWhitePath.indexOf(itemAbsPath) + itemAbsPath.length());path = FileUtil.normalize(path);if (path.startsWith(StrUtil.SLASH)) {path = path.substring(1);}return path;}/*** 获取jdk 中的tools jar文件路径** @return file*/public static File getToolsJar() {File file = new File(SystemUtil.getJavaRuntimeInfo().getHomeDir());return new File(file.getParentFile(), "lib/tools.jar");}/*** 指定时间的下一个刻度** @return String*/public static String getNextScaleTime(String time, Long millis) {DateTime dateTime = DateUtil.parse(time);if (millis == null) {millis = 30 * 1000L;}DateTime newTime = dateTime.offsetNew(DateField.SECOND, (int) (millis / 1000));return DateUtil.formatTime(newTime);}//	/**
//	 * 删除 yml 文件内容注释
//	 *
//	 * @param content 配置内容
//	 * @return 移除后的内容
//	 */
//	public static String deleteComment(String content) {
//		List<String> split = StrUtil.split(content, StrUtil.LF);
//		split = split.stream().filter(s -> {
//			if (StrUtil.isEmpty(s)) {
//				return false;
//			}
//			s = StrUtil.trim(s);
//			return !StrUtil.startWith(s, "#");
//		}).collect(Collectors.toList());
//		return CollUtil.join(split, StrUtil.LF);
//	}/*** json 字符串转 bean,兼容普通json和字符串包裹情况** @param jsonStr json 字符串* @param cls     要转为bean的类* @param <T>     泛型* @return data*/public static <T> T jsonConvert(String jsonStr, Class<T> cls) {if (StrUtil.isEmpty(jsonStr)) {return null;}try {return JSON.parseObject(jsonStr, cls);} catch (Exception e) {return JSON.parseObject(JSON.parse(jsonStr).toString(), cls);}}/*** json 字符串转 bean,兼容普通json和字符串包裹情况** @param jsonStr json 字符串* @param cls     要转为bean的类* @param <T>     泛型* @return data*/public static <T> List<T> jsonConvertArray(String jsonStr, Class<T> cls) {try {if (StrUtil.isEmpty(jsonStr)) {return null;}return JSON.parseArray(jsonStr, cls);} catch (Exception e) {Object parse = JSON.parse(jsonStr);return JSON.parseArray(parse.toString(), cls);}}
}以上就是终端的实现了,(有问题可以私信我)希望能帮助到大家。
这篇关于WebSocket+xterm+springboot+vue 实现 xshell 操作linux终端功能的文章就介绍到这儿,希望我们推荐的文章对编程师们有所帮助!


