本文主要是介绍github | html纯小白也可以创建静态个人主页,希望对大家解决编程问题提供一定的参考价值,需要的开发者们随着小编来一起学习吧!
写在前面
本作者无任何网页创作知识背景,如果有哪里写得不太合适还请见谅。
昨天交了阶段工作汇报于是最近可以休息几天,为了不至于每天无所事事,决定创建自己的个人主页(其实已经想做很久了)。
昨天找了一天,看编辑html的页面也像乱码一样...还一时冲动冲了CSDN的会员(当事人十分后悔)。今天主页终于有了初步的样子,事实证明搜索信息还是需要有耐心多找找...
放图
1 创建个人网站
参考这篇文章 📡使用Github做一个完全免费的个人网站(步骤很细) - 知乎 (zhihu.com)
2 编辑内容
我选择使用adobe的Dreamweaver,有7天免费试用期,够用了,主要是可以看到实时视图,一边编辑一边看效果,对新手小白十分友好。
2-1 下载Dreamweaver
链接:网站设计软件 | Adobe Dreamweaver
没有什么奇怪的选项,放心大胆下就好了
2-2 开始在dw中编辑内容
首先,打开Dreamweaver,选择起始模板——响应式 关于页面模板(有简历的模板但是我不太喜欢那个格式于是就用这个了)
点开后会显示初始代码,我直接把我的代码放在这里来写注释了,可以两边一起看着对比修改
<!doctype html>
<html>
<head>
<meta charset="utf-8">
<meta name="viewport" content="width=device-width, initial-scale=1">
<title>某人 - Homepage</title>
<link href="AboutPageAssets/styles/aboutPageStyle.css" rel="stylesheet" type="text/css">
<link rel="Shortcut Icon" href="图标.ico" type="image/x-icon" /><!--The following script tag downloads a font from the Adobe Edge Web Fonts server for use within the web page. We recommend that you do not modify it.-->
<script>var __adobewebfontsappname__="dreamweaver"</script><script src="http://use.edgefonts.net/montserrat:n4:default;source-sans-pro:n2:default.js" type="text/javascript"></script>
</head><body>
<!-- Header content -->
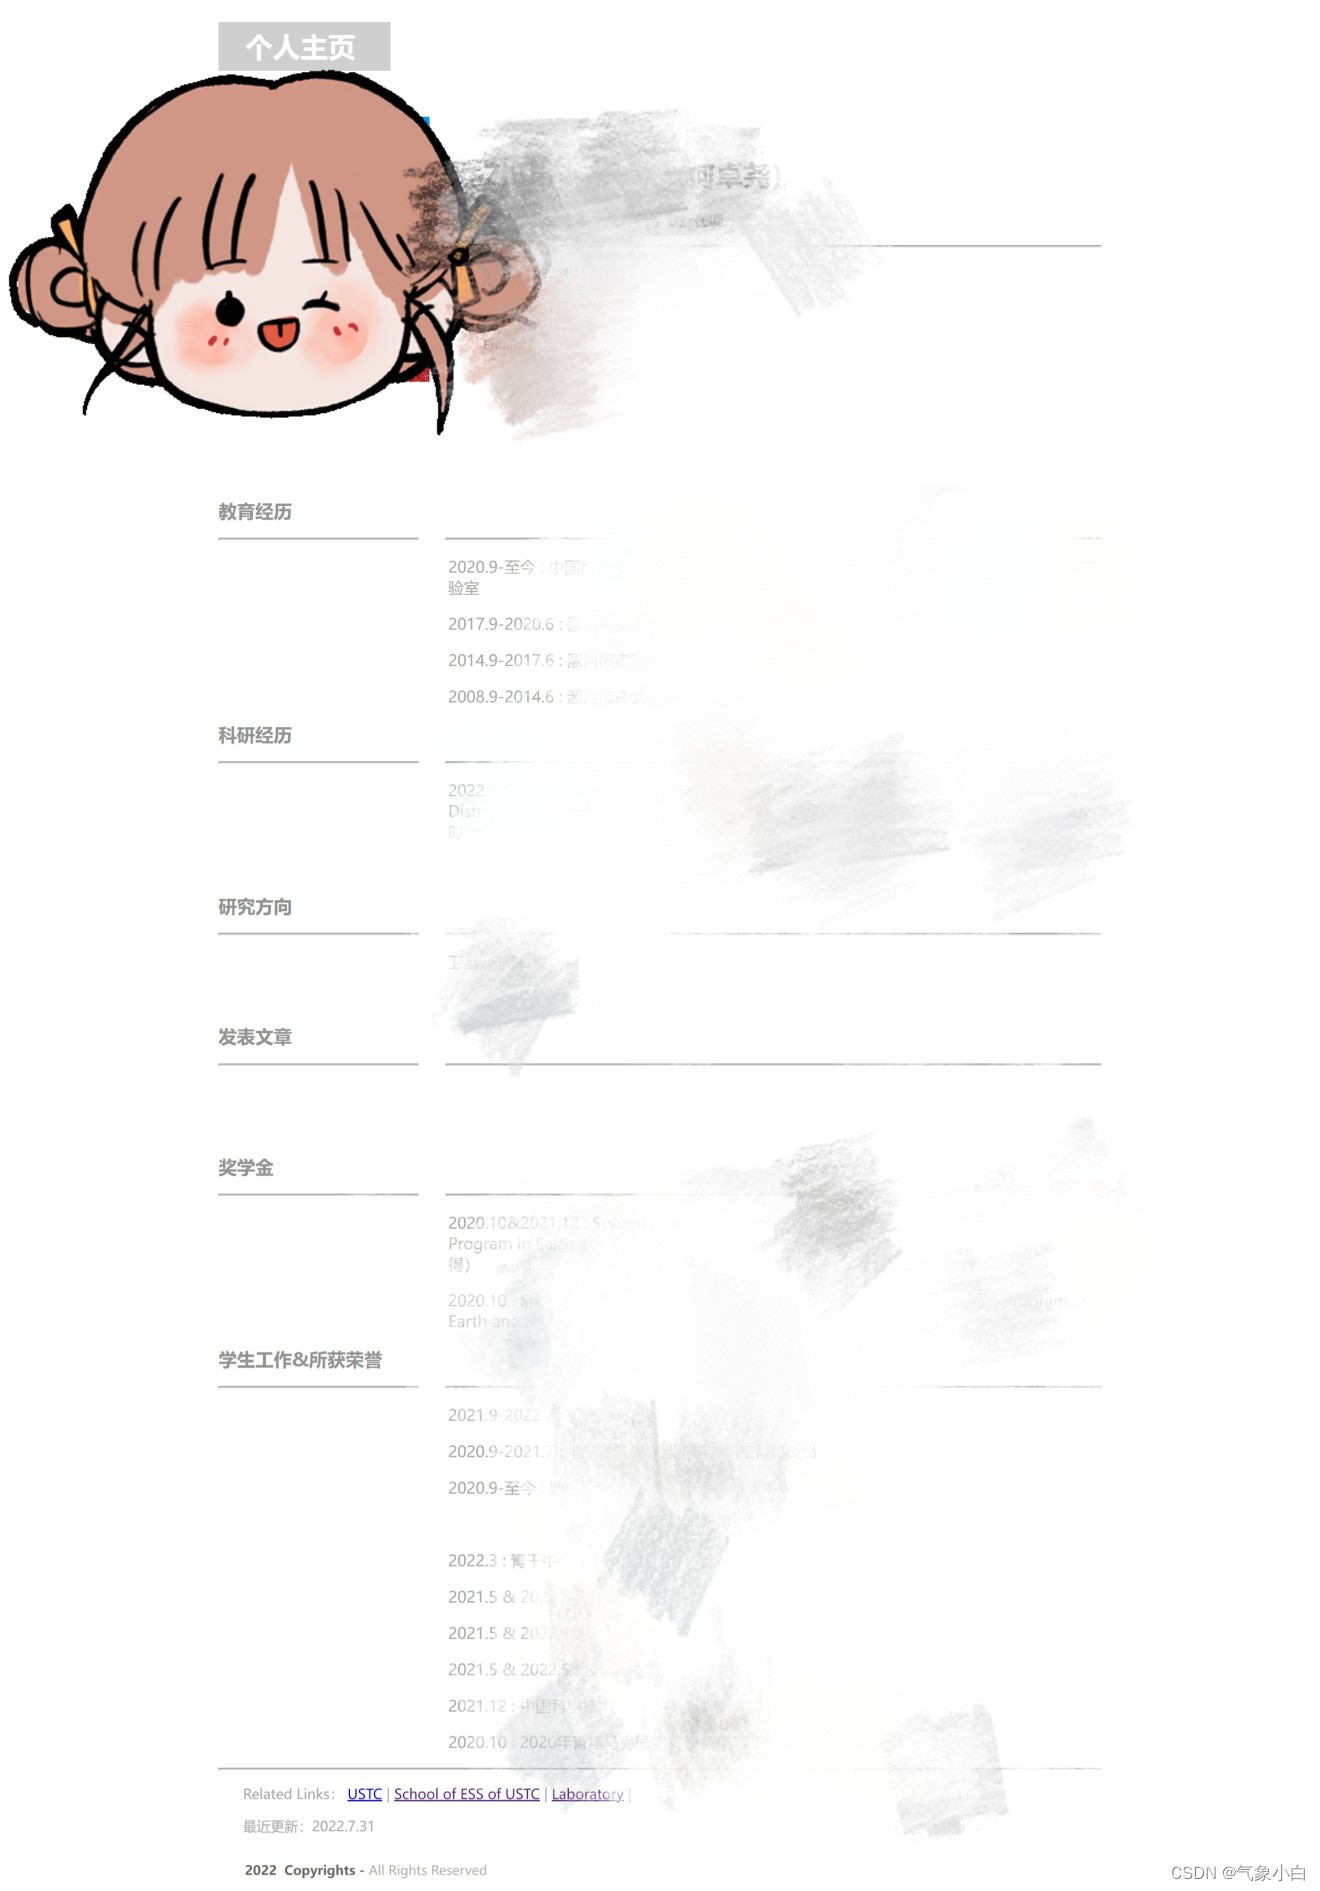
<header><div class="profileLogo"> <!-- Profile logo. Add a img tag in place of <span>. --><p class="logoPlaceholder"><!-- <img src="logoImage.png" alt="sample logo"> --><span>个人主页 </span></p></div><div class="profilePhoto"> <!-- Profile photo --> <img src="证件照.jpg" width="200"> </div><!-- Identity details --><section class="profileHeader"><h1> </h1><h1>姓名</h1>
<h3>文字</h3><hr><p>文字</p><p>QQ: </p><p>Email: </p></section><!-- Links to Social network accounts --><aside class="socialNetworkNavBar"><div class="socialNetworkNav"> <!-- Add a Anchor tag with nested img tag here --> </div><div class="socialNetworkNav"> <!-- Add a Anchor tag with nested img tag here --> </div><div class="socialNetworkNav"> <!-- Add a Anchor tag with nested img tag here --> </div><div class="socialNetworkNav"> <!-- Add a Anchor tag with nested img tag here --> </div></aside>
</header>
<!-- content -->
<section class="mainContent"> <!-- Contact details --></section><section class="section2"><h2 class="sectionTitle" style="font-size: 20px">教育经历 </h2><hr class="sectionTitleRule"><hr class="sectionTitleRule2"><div class="section2Content"><p style="font-size: 17px;color: darkgray;font-family: 微软雅黑"><span>2020.9-至今 :</span> 大学</p><p style="font-size: 17px;color: darkgray;font-family: 微软雅黑"><span>2017.9-2020.6 :</span> 高级中学</p><p style="font-size: 17px;color: darkgray;font-family: 微软雅黑"><span>2014.9-2017.6 :</span> 中学</p><p style="font-size: 17px;color: darkgray;font-family: 微软雅黑"><span>2008.9-2014.6 :</span> 小学</p></div></section><!-- Previous experience details --><section class="section2"><h2 class="sectionTitle" style="font-size: 20px">科研经历 </h2><hr class="sectionTitleRule"><hr class="sectionTitleRule2"><div class="section2Content"><p style="font-size: 17px;color: darkgray;font-family: 微软雅黑"><span>2022.5-至今 :</span> 文字</p><p style="font-size: 17px;color: darkgray;font-family: 微软雅黑"> </p></div></section><section class="section2"><h2 class="sectionTitle" style="font-size: 20px">研究方向 </h2><hr class="sectionTitleRule"><hr class="sectionTitleRule2"><div class="section2Content"><p style="font-size: 17px;color: darkgray;font-family: 微软雅黑">文字</p><p style="font-size: 17px;color: darkgray;font-family: 微软雅黑"> </p></div></section></section><section class="section2"><h2 class="sectionTitle" style="font-size: 20px">发表文章 </h2><hr class="sectionTitleRule"><hr class="sectionTitleRule2"><div class="section2Content"><p style="font-size: 17px;color: darkgray;font-family: 微软雅黑"> </p><p style="font-size: 17px;color: darkgray;font-family: 微软雅黑"> </p></div></section><section class="section2"><h2 class="sectionTitle" style="font-size: 20px">奖学金 </h2><hr class="sectionTitleRule"><hr class="sectionTitleRule2"><div class="section2Content"><p style="font-size: 17px;color: darkgray;font-family: 微软雅黑"><span>2020.10&2021.12 :</span> 文字</p><p style="font-size: 17px;color: darkgray;font-family: 微软雅黑"><span>2020.10 :</span> 文字</p></div></section></section><section class="section2"><h2 class="sectionTitle" style="font-size: 20px">学生工作&所获荣誉 </h2><hr class="sectionTitleRule"><hr class="sectionTitleRule2"><div class="section2Content"><p style="font-size: 17px;color: darkgray;font-family: 微软雅黑"><span>2021.9-2022.7 :</span> 文字</p><p style="font-size: 17px;color: darkgray;font-family: 微软雅黑"><span>2020.9-2021.7 :</span> 文字</p><p style="font-size: 17px;color: darkgray;font-family: 微软雅黑"><span>2020.9-至今 :</span> 文字</p><p style="font-size: 17px;color: darkgray;font-family: 微软雅黑"> </p><p style="font-size: 17px;color: darkgray;font-family: 微软雅黑"><span> 2022.3 :</span> 文字</p><p style="font-size: 17px;color: darkgray;font-family: 微软雅黑"><span> 2021.5 & 2022.5 :</span> 文字</p><p style="font-size: 17px;color: darkgray;font-family: 微软雅黑"><span> 2021.5 & 2022.5 :</span> 文字</p><p style="font-size: 17px;color: darkgray;font-family: 微软雅黑"><span> 2021.5 & 2022.5 :</span> 文字</p><p style="font-size: 17px;color: darkgray;font-family: 微软雅黑"><span> 2021.12 :</span> 文字</p><p style="font-size: 17px;color: darkgray;font-family: 微软雅黑"><span> 2020.10 :</span> 文字</p></div></section><!-- Replicate the above Div block to add more title and company details --> <footer><hr><p style="font-size: 15px;color: darkgray;font-family: 微软雅黑"> <span id="context"> Related Links: <a href="链接" target="_blank" id="node">USTC</a> | <a href="链接" target="_blank" id="node">School of ESS of USTC</a> | <a href="链接" target="_blank" id="node">Laboratory</a> | </span></p><p style="font-size: 15px;color: darkgray;font-family: 微软雅黑"> 最近更新:2022.7.31<p class="footerDisclaimer">2022 Copyrights - <span>All Rights Reserved</span></p></footer>
</body>
</html>简单理解:
<p>后面的都是可以修改的文字
<p>里面fontsize是字体大小,color为颜色,fontfamily是文字样式
里面涉及的icon和证件照在dreamweaver里显示的话需要用电脑中的文件地址
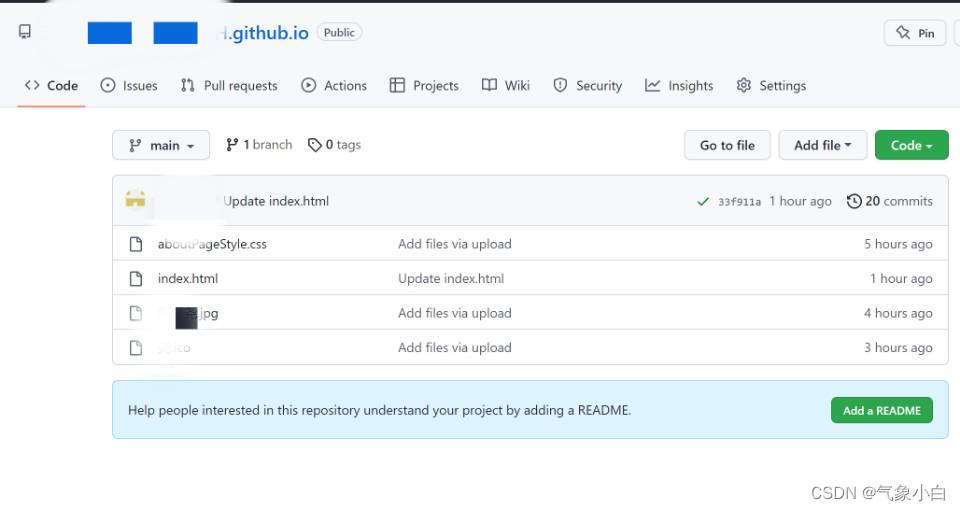
2-3 将在dw中写好的代码放到index.html中,并稍作修改
修改:
①将上面用到的aboutPageStyle.css,icon和证件照上载到上图页面(通过点击Add file)
②将代码中的文件地址(即上述三个文件的地址)改为在上图页面中的 文件名.格式
4 一些参考
jpg格式转icon:免费在线ico转换器, 在线free 在线ico convert转换器 - Office-Converter.com
(7 封私信 / 36 条消息) 如何制作个人学术主页? - 知乎 (zhihu.com)
熟练之后也可以参考这个来改academicpages is a ready-to-fork GitHub Pages template for academic personal websites - Your Name / Site Title
这篇关于github | html纯小白也可以创建静态个人主页的文章就介绍到这儿,希望我们推荐的文章对编程师们有所帮助!


