本文主要是介绍github私有仓库通过action部署hexo到公开仓库,希望对大家解决编程问题提供一定的参考价值,需要的开发者们随着小编来一起学习吧!
github私有仓库通过action部署hexo到公开仓库
有一段时间一直将博客md文件直接放到公开仓库然后通过工作流action创建一个gh-page分支,来实现部署
但是这样做有一个问题,如果你的源文件,或者配置文件中有涉及变量,或者密钥key,那么就会泄露,严重的可能导致私库被暴露
最近发现,原来私有仓库也可以使用action,为了安全起见,故此将源文件搬迁到私有仓库,通过私有仓库action构建,然后push到公开仓库中
记录以下过程:
以下是公开仓库xxx-github.io修改之前的action 工作流文件
说明:xxx.github.io作为仓库名称(xxx是你的github用户名),可以直接使用github作为域名访问,如果你有域名且会自定义域名,可以其他写其他仓库名
.github/workflows/page.yml
name: Build Pageson:push:branches:- main # hexo源文件所在分支jobs:pages:runs-on: ubuntu-latestpermissions:contents: writesteps:- uses: actions/checkout@v2- name: Use Node.js 16.xuses: actions/setup-node@v2with:node-version: "16"- name: Cache NPM dependenciesuses: actions/cache@v2with:path: node_moduleskey: ${{ runner.OS }}-npm-cacherestore-keys: |${{ runner.OS }}-npm-cache- name: Install Dependenciesrun: npm install- name: Buildrun: npm run build- name: Deployuses: peaceiris/actions-gh-pages@v3with:github_token: ${{ secrets.GITHUB_TOKEN }}publish_dir: ./public
迁移步骤
1. 创建私有仓库,此处用hexo作为案例
2. 在hexo仓库中创建工作流文件
.github/workflows/pageAndPush.yml
name: hexo page build and pushon:push:branches:- main # hexo仓库存放源文件(md)的分支jobs:build:runs-on: ubuntu-lateststeps:- uses: actions/checkout@v2with:ref: main- name: Install dependenciesrun: |npm install -g hexo-cli # 给虚拟机装上hexo运行环境npm install # 安装依赖- name: Generate Hexo siterun: |hexo cleanhexo generate- name: Deploy to public repouses: peaceiris/actions-gh-pages@v3with:personal_token: ${{ secrets.GITHUB_TOKEN }} # Personal access token,直接代替external_repository: yourName/yourRepo # 发布的仓库地址 格式:github名称/需要发布的仓库(如:xxx.github.io)PUBLISH_BRANCH: gh-page #仓库的分支PUBLISH_DIR: ./public
3.在公开仓库中setttings/github-gapes选择gh-page分支作为网站

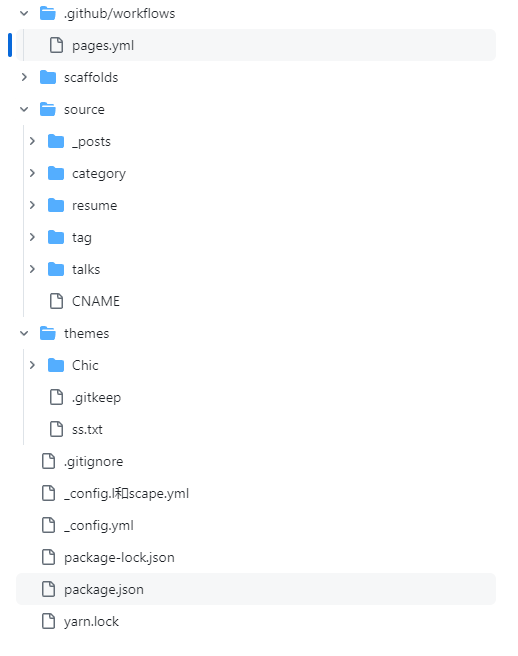
hexo仓库中的结构如下

公开仓库生成的文件目录如下:

这篇关于github私有仓库通过action部署hexo到公开仓库的文章就介绍到这儿,希望我们推荐的文章对编程师们有所帮助!


