本文主要是介绍【SpringCloud深入浅出系列】SpringCloud组件之集成Config实现分布式配置,希望对大家解决编程问题提供一定的参考价值,需要的开发者们随着小编来一起学习吧!
SpringCloud 组件之集成 Config 实现分布式配置
- 一、Config 是什么?
- 二、创建项目实现分布式配置
- 1.项目说明
- 2.创建 Gitee 仓库并新建三个配置文件
- (1).创建 Gitee 仓库 springcloud-config
- (2).新建三个配置文件
- 3.创建 Maven 空项目 config
- 4.创建模块 eureka-server
- (1).添加依赖
- (2).添加配置
- (3).启动类添加注解
- (4).启动服务
- 5.创建模块 config-server
- (1).添加依赖
- (2).添加配置
- (3).启动类添加注解
- (4).启动服务
- 6.创建模块 config-client
- (1).添加依赖
- (2).添加配置
- (3).启动类添加注解
- (4).新建控制类
- (5).启动服务
一、Config 是什么?
Spring Cloud Config 为分布式系统中的外部化配置提供服务器和客户端支持。它包含 Server 和 Client 两个部分,Server 提供配置文件的存储、以接口的形式将配置文件的内容提供出去,Client 通过接口获取数据、并依据此数据初始化自己的应用。
通过 Config 组件我们可以快速创建一个配置中心。配置中心读取配置文件通常有两种:一是从 git 仓库读取,一是从本地物理路径读取。
二、创建项目实现分布式配置
1.项目说明
新建项目 config,项目下新建3个module:eureka-server、config-server、config-client。
eureka-server:服务注册中心,config-server 和 config-client 均注册至该中心。
config-server:config 服务端。
config-client:config 客户端。
项目目录结构:

2.创建 Gitee 仓库并新建三个配置文件
(1).创建 Gitee 仓库 springcloud-config

(2).新建三个配置文件
新建3个配置文件:config-dev.yml、config-uat.yml、config-prod.yml

3.创建 Maven 空项目 config
由于src目录不再用到,创建后将src目录删除。

4.创建模块 eureka-server


(1).添加依赖
添加依赖,如果已按截图操作,pom.xml 的内容会自动生成:
<?xml version="1.0" encoding="UTF-8"?>
<project xmlns="http://maven.apache.org/POM/4.0.0" xmlns:xsi="http://www.w3.org/2001/XMLSchema-instance"xsi:schemaLocation="http://maven.apache.org/POM/4.0.0 https://maven.apache.org/xsd/maven-4.0.0.xsd"><modelVersion>4.0.0</modelVersion><parent><groupId>org.springframework.boot</groupId><artifactId>spring-boot-starter-parent</artifactId><version>2.6.3</version><relativePath/> <!-- lookup parent from repository --></parent><groupId>com.chaoyue</groupId><artifactId>eureka-server</artifactId><version>0.0.1-SNAPSHOT</version><name>eureka-server</name><description>Demo project for Spring Boot</description><properties><java.version>1.8</java.version><spring-cloud.version>2021.0.0</spring-cloud.version></properties><dependencies><dependency><groupId>org.springframework.cloud</groupId><artifactId>spring-cloud-starter-netflix-eureka-server</artifactId></dependency><dependency><groupId>org.springframework.boot</groupId><artifactId>spring-boot-starter-test</artifactId><scope>test</scope></dependency></dependencies><dependencyManagement><dependencies><dependency><groupId>org.springframework.cloud</groupId><artifactId>spring-cloud-dependencies</artifactId><version>${spring-cloud.version}</version><type>pom</type><scope>import</scope></dependency></dependencies></dependencyManagement><build><plugins><plugin><groupId>org.springframework.boot</groupId><artifactId>spring-boot-maven-plugin</artifactId></plugin></plugins></build></project>
(2).添加配置
application.yml 文件中添加如下配置:
server:port: 8080 #服务注册中心端口
eureka:instance:hostname: 127.0.0.1 #服务注册中心IP地址client:registerWithEureka: false #是否向服务注册中心注册自己fetchRegistry: false #是否检索服务serviceUrl: #服务注册中心链接,指定服务注册中心的位置defaultZone: http://${eureka.instance.hostname}:${server.port}/eureka/
(3).启动类添加注解
启动类添加注解 @EnableEurekaServer
package com.chaoyue.eurekaserver;import org.springframework.boot.SpringApplication;
import org.springframework.boot.autoconfigure.SpringBootApplication;
import org.springframework.cloud.netflix.eureka.server.EnableEurekaServer;@SpringBootApplication
@EnableEurekaServer
public class EurekaServerApplication {public static void main(String[] args) {SpringApplication.run(EurekaServerApplication.class, args);}}
(4).启动服务
运行服务后,浏览器输入:http://localhost:8080/
5.创建模块 config-server

(1).添加依赖
添加依赖,如果已按截图操作,pom.xml 的内容会自动生成:
<?xml version="1.0" encoding="UTF-8"?>
<project xmlns="http://maven.apache.org/POM/4.0.0" xmlns:xsi="http://www.w3.org/2001/XMLSchema-instance"xsi:schemaLocation="http://maven.apache.org/POM/4.0.0 https://maven.apache.org/xsd/maven-4.0.0.xsd"><modelVersion>4.0.0</modelVersion><parent><groupId>org.springframework.boot</groupId><artifactId>spring-boot-starter-parent</artifactId><version>2.6.3</version><relativePath/> <!-- lookup parent from repository --></parent><groupId>com.chaoyue</groupId><artifactId>config-server</artifactId><version>0.0.1-SNAPSHOT</version><name>config-server</name><description>Demo project for Spring Boot</description><properties><java.version>1.8</java.version><spring-cloud.version>2021.0.0</spring-cloud.version></properties><dependencies><dependency><groupId>org.springframework.boot</groupId><artifactId>spring-boot-starter-web</artifactId></dependency><dependency><groupId>org.springframework.cloud</groupId><artifactId>spring-cloud-starter-netflix-eureka-client</artifactId></dependency><dependency><groupId>org.springframework.cloud</groupId><artifactId>spring-cloud-config-server</artifactId></dependency><dependency><groupId>org.springframework.boot</groupId><artifactId>spring-boot-starter-test</artifactId><scope>test</scope></dependency></dependencies><dependencyManagement><dependencies><dependency><groupId>org.springframework.cloud</groupId><artifactId>spring-cloud-dependencies</artifactId><version>${spring-cloud.version}</version><type>pom</type><scope>import</scope></dependency></dependencies></dependencyManagement><build><plugins><plugin><groupId>org.springframework.boot</groupId><artifactId>spring-boot-maven-plugin</artifactId></plugin></plugins></build></project>
(2).添加配置
application.yml 文件中添加如下配置:
server:port: 8081spring:application:name: config-servercloud:config:server:git:uri: https://gitee.com/*****/springcloud-config.git # 仓库链接search-paths:- springcloud-configusername: ***********password: ***********default-label: masterlabel: mastereureka:client:serviceUrl: #注册中心注册地址defaultZone: http://127.0.0.1:8080/eureka/
(3).启动类添加注解
启动类添加注解 @EnableConfigServer
package com.chaoyue.configserver;import org.springframework.boot.SpringApplication;
import org.springframework.boot.autoconfigure.SpringBootApplication;
import org.springframework.cloud.config.server.EnableConfigServer;@SpringBootApplication
@EnableConfigServer
public class ConfigServerApplication {public static void main(String[] args) {SpringApplication.run(ConfigServerApplication.class, args);}}
(4).启动服务
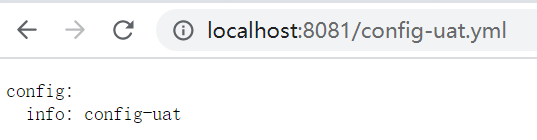
启动服务,浏览器输入:http://localhost:8081/config-uat.yml,出现以下信息说明配置成功。
6.创建模块 config-client

(1).添加依赖
添加依赖,如果已按截图操作,pom.xml 的内容会自动生成,同时需要添加 spring-cloud-starter-bootstrap 依赖:
<?xml version="1.0" encoding="UTF-8"?>
<project xmlns="http://maven.apache.org/POM/4.0.0" xmlns:xsi="http://www.w3.org/2001/XMLSchema-instance"xsi:schemaLocation="http://maven.apache.org/POM/4.0.0 https://maven.apache.org/xsd/maven-4.0.0.xsd"><modelVersion>4.0.0</modelVersion><parent><groupId>org.springframework.boot</groupId><artifactId>spring-boot-starter-parent</artifactId><version>2.6.3</version><relativePath/> <!-- lookup parent from repository --></parent><groupId>com.chaoyue</groupId><artifactId>config-client</artifactId><version>0.0.1-SNAPSHOT</version><name>config-client</name><description>Demo project for Spring Boot</description><properties><java.version>1.8</java.version><spring-cloud.version>2021.0.0</spring-cloud.version></properties><dependencies><dependency><groupId>org.springframework.boot</groupId><artifactId>spring-boot-starter-web</artifactId></dependency><dependency><groupId>org.springframework.cloud</groupId><artifactId>spring-cloud-starter-config</artifactId></dependency><dependency><groupId>org.springframework.cloud</groupId><artifactId>spring-cloud-starter-netflix-eureka-client</artifactId></dependency><dependency><groupId>org.springframework.cloud</groupId><artifactId>spring-cloud-starter-bootstrap</artifactId></dependency><dependency><groupId>org.springframework.boot</groupId><artifactId>spring-boot-starter-test</artifactId><scope>test</scope></dependency></dependencies><dependencyManagement><dependencies><dependency><groupId>org.springframework.cloud</groupId><artifactId>spring-cloud-dependencies</artifactId><version>${spring-cloud.version}</version><type>pom</type><scope>import</scope></dependency></dependencies></dependencyManagement><build><plugins><plugin><groupId>org.springframework.boot</groupId><artifactId>spring-boot-maven-plugin</artifactId></plugin></plugins></build></project>
(2).添加配置
Config 客户端需要有两个配置文件:application.yml 和 bootstrap.yml
application.yml:用户级配置项
bootstrap.yml:系统级配置项,优先级高于 application.yml,默认情况下不会被本地配置覆盖
创建 bootstrap.yml 文件,添加如下配置:
server:port: 8082  #服务端口
eureka:client:serviceUrl: #注册中心注册地址defaultZone: http://127.0.0.1:8080/eureka/
spring:application:name: config-client #服务名称cloud:config:name: config  #配置文件名称profile: uat  #后缀名称discovery:enabled: trueservice-id: config-server
(3).启动类添加注解
启动类添加注解 @EnableEurekaClient
package com.chaoyue.configclient;import org.springframework.boot.SpringApplication;
import org.springframework.boot.autoconfigure.SpringBootApplication;
import org.springframework.cloud.netflix.eureka.EnableEurekaClient;@SpringBootApplication
@EnableEurekaClient
public class ConfigClientApplication {public static void main(String[] args) {SpringApplication.run(ConfigClientApplication.class, args);}}
(4).新建控制类
package com.chaoyue.configclient.controller;import org.springframework.beans.factory.annotation.Value;
import org.springframework.web.bind.annotation.GetMapping;
import org.springframework.web.bind.annotation.RestController;@RestController
public class ConfigClientController {@Value("${config.info}")private String configInfo;@GetMapping("/configInfo")private String getConfigInfo() {return configInfo;}
}
(5).启动服务
启动服务后,浏览器输入:http://localhost:8082/configInfo,出现以下信息说明配置成功。

这篇关于【SpringCloud深入浅出系列】SpringCloud组件之集成Config实现分布式配置的文章就介绍到这儿,希望我们推荐的文章对编程师们有所帮助!