本文主要是介绍开源!在goview中实现cesium的低代码可视化编辑,希望对大家解决编程问题提供一定的参考价值,需要的开发者们随着小编来一起学习吧!
大家好,我是日拱一卒的攻城师不浪,专注可视化、数字孪生、前端、nodejs、AI学习、GIS等学习沉淀,这是2024年输出的第19/100篇文章;
前言
前阵子写了一篇goview二开的文章教程,很多小伙伴留言对goview嵌套cesium并实现cesium的低代码可视化编辑很感兴趣,今天我就来将我的实现和思路分享给大家,希望能够对大家有帮助。
对goview二开还不怎么了解的朋友可以先看我上篇文章:理解了GoView低代码平台(可视化大屏)的开发原理,基于它进行了二开,因为二开需要对goview的整个框架有一个基础的了解才可。
goview嵌套cesium
安装cesium相关npm包
npm i cesium
npm i vite-plugin-cesium
vite-plugin-cesium:一个能够快速初始化cesium的vite插件,帮你省去cesium的繁琐配置;
在vite.config.js中使用:
import cesium from 'vite-plugin-cesium';plugins: [vue(),//...cesium(),],
构建cesium组件基础文件配置
首先,在goview中,如果想新增一个cesium可视化组件,需要先在src/packages/components/Cesium/Base/CesiumBase目录下新建4个基础文件。
index.ts
cesium的可视化的配置文件。
import { ConfigType, PackagesCategoryEnum, ChartFrameEnum } from '@/packages/index.d'
import { CesiumCategoryEnum, CesiumCategoryEnumName } from '../../index.d'export const CesiumBaseConfig: ConfigType = {key: 'CesiumBase',chartKey: 'VCesiumBase',conKey: 'VCCesiumBase',title: 'Cesium地球',category: CesiumCategoryEnum.CESIUM_BASE,categoryName: CesiumCategoryEnumName.CESIUM_BASE,package: PackagesCategoryEnum.CESIUM,chartFrame: ChartFrameEnum.COMMON,image: 'global.png',redirectComponent: `Cesium/Base/CesiumBase` // 跳转组件路径规则
}
index.vue
渲染cesium的vue文件。
<template><div id="cesiumContainer"></div>
</template>
<script setup>
import * as Cesium from "cesium";
import { useChartDataFetch } from '@/hooks'
import { useChartEditStore } from '@/store/modules/chartEditStore/chartEditStore'
import { ref, onMounted, toRefs, watch } from 'vue';
import { LocationEnum } from "./config"
import { getImg, resolveGeojson } from '@/api/path'//token
Cesium.Ion.defaultAccessToken ="xxx";const props = defineProps({chartConfig: {type: Object,required: true}
})
let {center,locationMode,markImgUrl,markGeojsonData
} = toRefs(props.chartConfig.option.viewOptions)
onMounted(() => {init();
});
let viewer = null
const stopWatch = watch(() => props.chartConfig.option.viewOptions,options => {init(options)},{deep: true}
)const init = async (opts) => {if (opts) {// 当配置属性发生变化时触发当前分支const watchCenter = opts.centerconst {center: watch_center,locationMode: watch_locationMode,markImgUrl: watch_markImgUrl,geojsonFileName: watch_geojsonFileName,} = opts// 中心坐标const centerArr = watch_center?.split(",")if (centerArr?.length) {const arr = centerArr.map(Number)cameraLocation(watch_locationMode, arr)}// 若geojson文件存在if (watch_geojsonFileName) {try {const res = await resolveGeojson({fileName: watch_geojsonFileName})if (res?.data?.features?.length) {renderMarks(res.data.features, watch_markImgUrl)}} catch (err) {console.error(JSON.stringify(err))}}} else {// 初始化viewer = new Cesium.Viewer("cesiumContainer", {infoBox: false,timeline: false, // 是否显示时间线控件});// 去除logoviewer.cesiumWidget.creditContainer.style.display = "none";// 显示帧率viewer.scene.debugShowFramesPerSecond = true;viewer.scene.globe.depthTestAgainstTerrain = true;const centerArr = center.value?.split(",")if (centerArr?.length && locationMode.value) {const arr = centerArr.map(Number)cameraLocation(locationMode.value, arr)}// 调试使用window.viewer = viewer// 监听点击事件,拾取坐标const handler = new Cesium.ScreenSpaceEventHandler(viewer.scene.canvas);handler.setInputAction((e) => {const clickPosition = viewer.scene.camera.pickEllipsoid(e.position);const randiansPos = Cesium.Cartographic.fromCartesian(clickPosition);console.log("经度:" +Cesium.Math.toDegrees(randiansPos.longitude) +", 纬度:" +Cesium.Math.toDegrees(randiansPos.latitude));}, Cesium.ScreenSpaceEventType.LEFT_CLICK);}
};const fly = (option) => {const lntlon = option.lntlonviewer.camera.flyTo({// 从以度为单位的经度和纬度值返回笛卡尔3位置。destination: Cesium.Cartesian3.fromDegrees(...lntlon, 40000),orientation: {// heading:默认方向为正北,正角度为向东旋转,即水平旋转,也叫偏航角。// pitch:默认角度为-90,即朝向地面,正角度在平面之上,负角度为平面下,即上下旋转,也叫俯仰角。// roll:默认旋转角度为0,左右旋转,正角度向右,负角度向左,也叫翻滚角heading: Cesium.Math.toRadians(0.0), // 正东,默认北pitch: Cesium.Math.toRadians(-90), // 向正下方看roll: 0.0, // 左右},duration: 3, // 飞行时间(s)})
}
const setView = (option) => {const lntlon = option.lntlonviewer.camera.setView({destination: Cesium.Cartesian3.fromDegrees(...lntlon, 40000),})
}
// 相机飞行代码
const cameraLocation = (locationMode = LocationEnum.FLY, lntlon) => {if (locationMode === LocationEnum.FLY) {fly({lntlon})} else if (locationMode === LocationEnum.SET_VIEW) {setView({ lntlon })}
}const renderMarks = async (json, imgName) => {const imgRes = await getImg({fileName: imgName})let imgUrl = ""if (imgRes.data) {imgUrl = imgRes.data.imgUrl}if (json?.length) {formatJsonData(json, imgUrl)}
}
// 打点代码
const formatJsonData = (features, img) => {const billboardsCollection = viewer.scene.primitives.add(new Cesium.BillboardCollection());for (let i = 0; i < features.length; i++) {const feature = features[i];const coordinates = feature.geometry.coordinates;const position = Cesium.Cartesian3.fromDegrees(coordinates[0],coordinates[1],100);const name = feature.properties.name;// 带图片的点billboardsCollection.add({image: img,width: 32,height: 32,position,});}
}
</script>
<style lang='scss' scoped>
#cesiumContainer {position: absolute;top: 0;bottom: 0;left: 0;right: 0;
}
</style>
config.ts
这个文件是cesium的配置项文件,也就是这个模块的内容;

import { PublicConfigClass } from '@/packages/public'
import { CreateComponentType } from '@/packages/index.d'
import { CesiumBaseConfig } from './index'
import { chartInitConfig } from '@/settings/designSetting'
import cloneDeep from 'lodash/cloneDeep'
import dataJson from "./data.json"
import type { UploadFileInfo } from 'naive-ui'// 定位模式
export enum LocationEnum {FLY = "fly", // 飞行SET_VIEW = "setView" // 直接定位
}export const option = {dataset: dataJson,viewOptions: {center: "", // 中心点坐标locationMode: LocationEnum.FLY, // 定位模式markImgUrl: "",markImgList: [] as UploadFileInfo[],geojsonFileName: "", // geojson文件名geojsonFileList: [] as UploadFileInfo[], // json列表// markGeojsonData: {}, // mark geojson},
}export default class Config extends PublicConfigClass implements CreateComponentType {public key = CesiumBaseConfig.keypublic attr = { ...chartInitConfig, w: 1000, h: 800, zIndex: -1 }public chartConfig = cloneDeep(CesiumBaseConfig)public option = cloneDeep(option)
}
config.vue
OK,配置项准备好之后,我们再继续画这个配置模块的vue页面。
<template><collapse-item name="基础配置" :expanded="true" key="baseSetting"><setting-item-box name="中心坐标" :alone="true"><setting-item><n-input placeholder="例如 120.36, 36.09" v-model:value="optionState.center" size="small"></n-input></setting-item></setting-item-box><setting-item-box name="定位模式" :alone="true"><setting-item><n-select v-model:value="optionState.locationMode" :options="locationOpts" /></setting-item></setting-item-box><setting-item-box><n-button type="primary" @click="handleSave">保存</n-button></setting-item-box></collapse-item>
</template><script setup lang="ts">
import { PropType, reactive, nextTick, ref, computed } from 'vue'
import { option, LocationEnum } from './config'
import { CollapseItem, SettingItemBox, SettingItem } from '@/components/Pages/ChartItemSetting'
import cloneDeep from 'lodash/cloneDeep'const props = defineProps({optionData: {type: Object as PropType<typeof option>,required: true}
})
const locationOpts = [{label: "飞行定位",value: LocationEnum.FLY,},{label: "直接定位",value: LocationEnum.SET_VIEW,}
]// 此处深拷贝是为了当viewOptions是一个深层次的对象时,深层次的引用改变能够不直接影响props.optionData.viewOptions
const cloneViewOpts = cloneDeep(props.optionData.viewOptions)
const optionState = reactive(cloneViewOpts)const handleSave = () => {props.optionData.viewOptions = Object.assign(props.optionData.viewOptions, optionState)
}
</script>
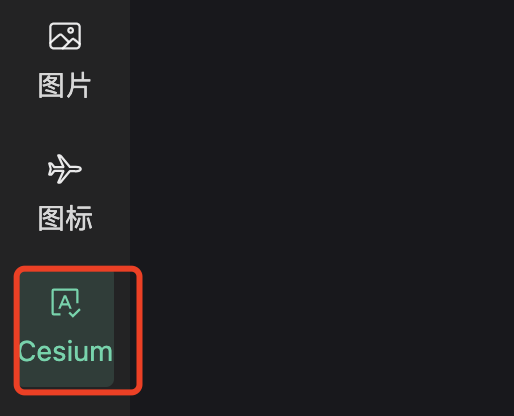
组件大类新增Cesium选项卡
也就是这里。
在src/packages/index.ts中在大类组件列表中配置cesium模块:
// * 所有图表
export let packagesList: PackagesType = {//...[PackagesCategoryEnum.CESIUM]: CesiumList,
}
接着在src/views/chart/ContentCharts/hooks/useAside.hook.ts侧边栏渲染的hooks文件中配置cesium名称和图标:
const packagesListObj = {//...[PackagesCategoryEnum.CESIUM]: {icon: renderIcon(SpellCheckIcon),label: PackagesCategoryName.CESIUM}
}
OK,经过以上配置,我们其实就已经完成了cesium在goview中的嵌套,只不过还有一个问题是,当我点击页面预览的时候,在预览界面cesium没有渲染成功,报错:cesiumContainer这个dom元素找不到。
cesium组件预览
玩过cesium的应该都知道,cesium在技术上的渲染底层是基于canvas,canvas的渲染需要基于基础元素,由于低代码平台的原理,所有组件渲染都是基于全局组件动态渲染去完成的。
而goview的预览是新开一个浏览器标签页,因此会导致cesium初始化渲染的时候无法找到cesiumContainer这个dom元素。
因此,我们需要重点修改一下预览界面文件的动态组件component的配置,当检测到是cesium组件时,需要提前定义好元素id为cesiumContainer。
src/views/preview/components/PreviewRenderList/index.vue
<!-- 此处chartkey为VCesiumBase时可以区分是因为在预览页面找不到对应container --><component v-else :is="item.chartConfig.chartKey":id="item.chartConfig.chartKey === 'VCesiumBase' ? 'cesiumContainer' : item.id" :chartConfig="item":svgEl="item.props?.svgEl" :themeSetting="themeSetting" :themeColor="themeColor":style="{ ...getSizeStyle(item.attr) }" v-on="useLifeHandler(item)"></component>
这样,问题就迎刃而解。
总结
如果想对goview进行二开,首先得必须了解整个项目架构,这个开源整体的代码质量还是不错的,文件分布比较合理清晰,对于二开的小伙伴来说非常友好,其实跟平常自己新封装一个组件的难度基本无差。
我把二开的代码已上传到github,有需要的小伙伴自取,如果觉得有帮助请star,以鼓励和支持我持续开源下去。
【开源地址】:https://github.com/tingyuxuan2302/goview-fe
有需要进技术产品开发交流群(可视化&GIS)可以加我:brown_7778,也欢迎
数字孪生可视化领域的交流合作。
最后,如果觉得文章对你有帮助,也希望可以一键三连👏👏👏,支持我持续开源和分享~
这篇关于开源!在goview中实现cesium的低代码可视化编辑的文章就介绍到这儿,希望我们推荐的文章对编程师们有所帮助!


