本文主要是介绍JavaFX 下拉框,希望对大家解决编程问题提供一定的参考价值,需要的开发者们随着小编来一起学习吧!
组合框允许用户选择几个选项之一。用户可以滚动到下拉列表。组合框可以是可编辑和不可编辑的。
创建组合框
以下代码将选项列表包装到ObservableList中,然后使用observable列表实例化ComboBox类。
ObservableList<String> options = FXCollections.observableArrayList("1","2","3"
);
ComboBox comboBox = new ComboBox(options);
我们还可以使用空构造函数创建一个组合框,并调用其setItems方法设置数据。
ComboBox comboBox = new ComboBox(options);
comboBox.setItems(options);
向具有新值的项目的组合框中添加更多项目。
comboBox.getItems().addAll("4","5","6"
);
setValue 方法设置在组合框中选择的项目。在调用setValue方法时,即使值不在组合框项目列表中,selectionModel属性的选定项也会更改为此值。
getValue方法返回所选的值。
要限制下拉列表中可见行的数量,请使用以下代码。
comboBox.setVisibleRowCount(3) 可编辑的组合框
setEditable(true)方法使组合框可编辑。使用setPromptText方法,当不执行选择时,我们可以指定显示在组合框编辑区域中的文本。
ComboBox myComboBox = new ComboBox();
myComboBox.getItems().addAll("s@example.com","i@example.com","e@example.com","m@example.com"
);
myComboBox.setPromptText("Email address");
myComboBox.setEditable(true);
myComboBox.setOnAction((Event ev) -> {address = myComboBox.getSelectionModel().getSelectedItem().toString();
});
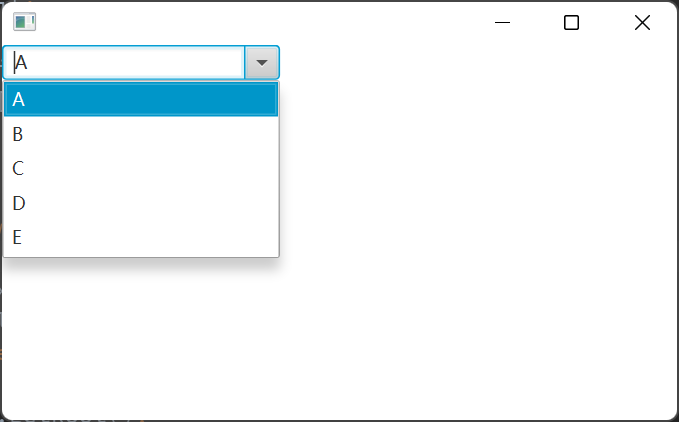
myComboBox.setValue("s@example.com"); 以下代码创建一个简单的可编辑组合框
import javafx.application.Application;
import javafx.scene.Group;
import javafx.scene.Scene;
import javafx.scene.control.ComboBox;
import javafx.stage.Stage;public class Main extends Application {public static void main(String[] args) {launch(args);}@Overridepublic void start(Stage stage) {Scene scene = new Scene(new Group(), 450, 250);ComboBox<String> myComboBox = new ComboBox<String>();myComboBox.getItems().addAll("A","B","C","D","E");myComboBox.setEditable(true);        Group root = (Group) scene.getRoot();root.getChildren().add(myComboBox);stage.setScene(scene);stage.show();}
}
组合框单元格
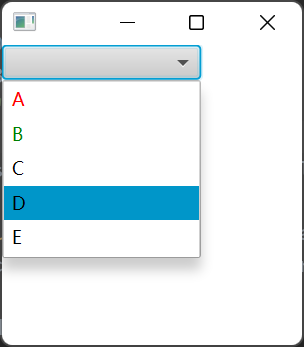
我们可以使用单元格工厂来改变组合框的默认行为或外观。
以下代码创建一个单元格工厂,并将其应用到组合框。
单元格工厂生成ListCell对象。 每个单元格与一个组合框项目相关联。
import javafx.application.Application;
import javafx.scene.Group;
import javafx.scene.Scene;
import javafx.scene.control.ComboBox;
import javafx.scene.control.ListCell;
import javafx.scene.control.ListView;
import javafx.scene.paint.Color;
import javafx.stage.Stage;
import javafx.util.Callback;public class Main extends Application {public static void main(String[] args) {launch(args);}@Overridepublic void start(Stage stage) {Scene scene = new Scene(new Group(), 200, 200);ComboBox<String> myComboBox = new ComboBox<String>();myComboBox.getItems().addAll("A", "B", "C", "D", "E");myComboBox.setCellFactory(new Callback<ListView<String>, ListCell<String>>() {@Overridepublic ListCell<String> call(ListView<String> param) {final ListCell<String> cell = new ListCell<String>() {{super.setPrefWidth(100);}@Overridepublic void updateItem(String item, boolean empty) {super.updateItem(item, empty);if (item != null) {setText(item);if (item.contains("A")) {setTextFill(Color.RED);} else if (item.contains("B")) {setTextFill(Color.GREEN);} else {setTextFill(Color.BLACK);}} else {setText(null);}}};return cell;}});Group root = (Group) scene.getRoot();root.getChildren().add(myComboBox);stage.setScene(scene);stage.show();}
}
例1
将值设置为null以清除ComboBox
import javafx.application.Application;
import javafx.scene.Group;
import javafx.scene.Scene;
import javafx.scene.control.ComboBox;
import javafx.stage.Stage;public class Main extends Application {public static void main(String[] args) {launch(args);}@Overridepublic void start(Stage stage) {Scene scene = new Scene(new Group(), 450, 250);ComboBox<String> myComboBox = new ComboBox<String>();myComboBox.getItems().addAll("A","B","C","D","E");myComboBox.setValue("A");System.out.println(myComboBox.getValue());myComboBox.setValue(null);Group root = (Group) scene.getRoot();root.getChildren().add(myComboBox);stage.setScene(scene);stage.show();}
}
例2
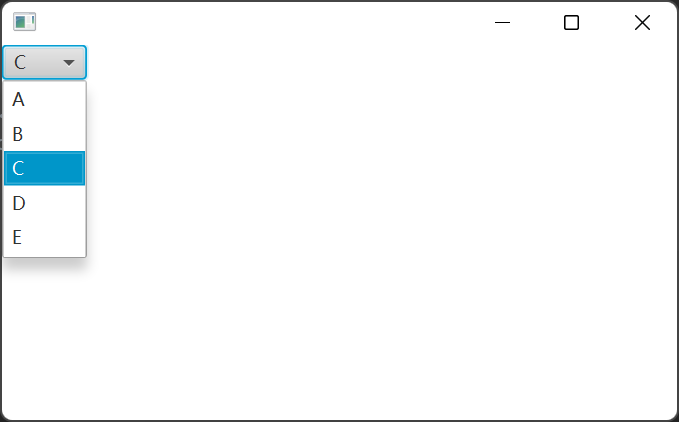
设置和获取ComboBox的值
import javafx.application.Application;
import javafx.scene.Group;
import javafx.scene.Scene;
import javafx.scene.control.ComboBox;
import javafx.stage.Stage;public class Main extends Application {public static void main(String[] args) {launch(args);}@Overridepublic void start(Stage stage) {Scene scene = new Scene(new Group(), 450, 250);ComboBox<String> myComboBox = new ComboBox<String>();myComboBox.getItems().addAll("A","B","C","D","E");myComboBox.setValue("A");System.out.println(myComboBox.getValue());Group root = (Group) scene.getRoot();root.getChildren().add(myComboBox);stage.setScene(scene);stage.show();}
}
例3
将更改监听器添加到ComboBox valueProperty
import javafx.application.Application;
import javafx.beans.value.ChangeListener;
import javafx.beans.value.ObservableValue;
import javafx.scene.Group;
import javafx.scene.Scene;
import javafx.scene.control.ComboBox;
import javafx.stage.Stage;public class Main extends Application {public static void main(String[] args) {launch(args);}@Overridepublic void start(Stage stage) {Scene scene = new Scene(new Group(), 450, 250);ComboBox<String> myComboBox = new ComboBox<String>();myComboBox.getItems().addAll("A","B","C","D","E");myComboBox.setValue("A");System.out.println(myComboBox.getValue());myComboBox.valueProperty().addListener(new ChangeListener<String>() {@Override public void changed(ObservableValue ov, String t, String t1) {System.out.println(ov);System.out.println(t);System.out.println(t1);}    });Group root = (Group) scene.getRoot();root.getChildren().add(myComboBox);stage.setScene(scene);stage.show();}
}
例4
import javafx.application.Application;
import javafx.scene.Group;
import javafx.scene.Scene;
import javafx.scene.control.ComboBox;
import javafx.stage.Stage;public class Main extends Application {public static void main(String[] args) {launch(args);}@Overridepublic void start(Stage stage) {Scene scene = new Scene(new Group(), 450, 250);ComboBox<String> myComboBox = new ComboBox<String>();myComboBox.getItems().addAll("A","B","C","D","E");myComboBox.setEditable(true);myComboBox.setPromptText("Email address");Group root = (Group) scene.getRoot();root.getChildren().add(myComboBox);stage.setScene(scene);stage.show();}
}
例5
在ComboBox中显示矩形
import javafx.application.Application;
import javafx.scene.Group;
import javafx.scene.Scene;
import javafx.scene.control.ComboBox;
import javafx.scene.layout.GridPane;
import javafx.scene.paint.Color;
import javafx.scene.shape.Rectangle;
import javafx.stage.Stage;public class Main extends Application {public static void main(String[] args) {Application.launch(args);}@Overridepublic void start(final Stage primaryStage) {Group root = new Group();Scene scene = new Scene(root, 400, 300, Color.WHITE);GridPane gridpane = new GridPane();ComboBox<Rectangle> cmb = new ComboBox<Rectangle>();cmb.getItems().addAll(new Rectangle(10, 10, Color.RED), new Rectangle(10, 10, Color.GREEN), new Rectangle(10, 10, Color.BLUE));gridpane.add(cmb, 2, 0);root.getChildren().add(gridpane);   primaryStage.setScene(scene);primaryStage.show();}}
例6
以下代码显示了如何使用CellFactory显示组合框值。
import javafx.application.Application;
import javafx.scene.Group;
import javafx.scene.Scene;
import javafx.scene.control.ComboBox;
import javafx.scene.control.ContentDisplay;
import javafx.scene.control.ListCell;
import javafx.scene.control.ListView;
import javafx.scene.layout.GridPane;
import javafx.scene.paint.Color;
import javafx.scene.shape.Rectangle;
import javafx.stage.Stage;
import javafx.util.Callback;public class Main extends Application {public static void main(String[] args) {Application.launch(args);}@Overridepublic void start(final Stage primaryStage) {Group root = new Group();Scene scene = new Scene(root, 400, 300, Color.WHITE);GridPane gridpane = new GridPane();ComboBox<Color> cmb = new ComboBox<Color>();cmb.getItems().addAll(Color.RED, Color.GREEN, Color.BLUE);cmb.setCellFactory(new Callback<ListView<Color>, ListCell<Color>>() {@Overridepublic ListCell<Color> call(ListView<Color> p) {return new ListCell<Color>() {private final Rectangle rectangle;{setContentDisplay(ContentDisplay.GRAPHIC_ONLY);rectangle = new Rectangle(10, 10);}@Overrideprotected void updateItem(Color item, boolean empty) {super.updateItem(item, empty);if (item == null || empty) {setGraphic(null);} else {rectangle.setFill(item);setGraphic(rectangle);}}};}});gridpane.add(cmb, 2, 0);root.getChildren().add(gridpane);primaryStage.setScene(scene);primaryStage.show();}}
这篇关于JavaFX 下拉框的文章就介绍到这儿,希望我们推荐的文章对编程师们有所帮助!


