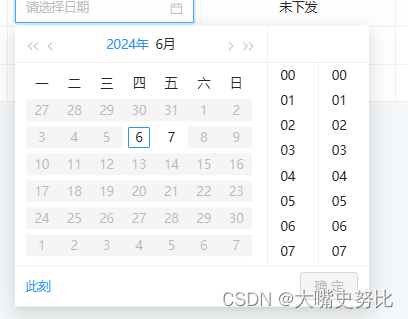
本文主要是介绍前端-a-date-picker如何设置禁选时间段,希望对大家解决编程问题提供一定的参考价值,需要的开发者们随着小编来一起学习吧!


想要做到如图所示的效果,代码如下:
第一个是只能选择某一天,第二个是只能选择某一个时间段
<a-date-pickerv-model:value="record.onTimeStr":show-time="{ format: 'HH:mm' }"valueFormat="YYYY-MM-DD HH:mm:ss":disabled="record.onTimeStatus === 'delivered'":disabled-date="disableDate"/>disableDate(current) {// console.log('time', this.where.workDateStr, current);const res = dayjs(this.where.workDateStr).toISOString();const date = dayjs();const day = date.date();const year = date.year();const month = date.month();return current.isBefore(res, 'day') || current.isAfter(res, 'day');// return current.date() !== day || current.year() !== year || current.month() !== month;},<template #time2="{ record }"><a-space><a-date-pickerv-model:value="record.offTimeStr":show-time="{ format: 'HH:mm' }"valueFormat="YYYY-MM-DD HH:mm:ss":disabled="record.offTimeStatus === 'delivered'":disabled-date="current => disableDate2(current, record)"/></a-space></template>disableDate2(current) {// const today = dayjs();// const tomorrow = today.add(1, 'day');// return current.isBefore(today, 'day') || current.isAfter(tomorrow, 'day');const res = dayjs(this.where.workDateStr);const tomorrow = res.add(1, 'day');return current.isBefore(res, 'day') || current.isAfter(tomorrow, 'day');},这篇关于前端-a-date-picker如何设置禁选时间段的文章就介绍到这儿,希望我们推荐的文章对编程师们有所帮助!


