本文主要是介绍Liunx安装Flume和生产环境配置,希望对大家解决编程问题提供一定的参考价值,需要的开发者们随着小编来一起学习吧!
一、简介
Flume是Cloudera提供的一个高可用的,高可靠的,分布式的海量日志采集、聚合和传输的系统,Flume支持在日志系统中定制各类数据发送方,用于收集数据;同时,Flume提供对数据进行简单处理,并写到各种数据接受方(可定制)的能力。
二、Flume下载
官网:http://flume.apache.org
下载:http://www.apache.org/dist/flume
#远程下载 版本1.8
wget http://www.apache.org/dist/flume/1.8.0/apache-flume-1.8.0-bin.tar.gz
三、Flume安装
1、解压压缩包
tar -zxvf apache-flume-1.8.0-bin.tar.gz2、配置环境变量
#配置当前用户环境变量
vi ~/.bash_profile#在文件中添加如下命令,记得切换自己文件路径
export FLUME_HOME=/home/app/apache-flume-1.8.0
export PATH=$FLUME_HOME/bin:$PATH#立即生效
source ~/.bash_profile
四、侦听网络端口数据
1、新增flume-port.conf文件
vi flume-port.conf2、编辑flume-port.conf文件
######################################################################定义了当前agent的名字叫做a1
##定了该agent中的sources组件叫做r1
a1.sources = r1##定了该agent中的sinks组件叫做k1
a1.sinks = k1##定了该agent中的channels组件叫做c1
a1.channels = c1###################################################################### 监听数据源的方式,这里采用监听网络端口
#source的类型为网络字节流
a1.sources.r1.type = netcat#source监听的网络的hostname
a1.sources.r1.bind = woniu2#source监听的网络的port
a1.sources.r1.port = 9527###################################################################### 采集的数据的下沉(落地)方式 通过日志
#sink的类型为logger日志方式,log4j的级别有INFO、Console、file
a1.sinks.k1.type = logger###################################################################### 描述channel的部分,使用内存做数据的临时存储
#channel的类型使用内存进行数据缓存,这是最常见的一种channel
a1.channels.c1.type = memory#定义了channel对的容量
a1.channels.c1.capacity = 1000#定义channel的最大的事务容量
a1.channels.c1.transactionCapacity = 100 ###################################################################### 使用channel将source和sink连接起来
# 需要将source和sink使用channel连接起来,组成一个类似流水管道
a1.sources.r1.channels = c1
a1.sinks.k1.channel = c1
3、启动flume
./flume-ng agent -c /home/app/apache-flume-1.8.0/conf -n a1 \
-f /home/app/apache-flume-1.8.0/conf/flume-port.conf -Dflume.root.logger=INFO,console
4、安装telnet
#安装telnet-server
yum install -y telnet-server.x86_64#安装telnet
yum install -y telnet.x86_64
5、发送数据
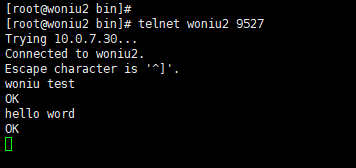
#连接
telnet woniu2 9527
6、测试案例

五、侦听新增文件
1、新增flume-file.conf文件
vi flume-file.conf2、编辑flume-file.conf文件
######################################################################定义了当前agent的名字叫做a1
##定了该agent中的sources组件叫做r1
a1.sources = r1##定了该agent中的sinks组件叫做k1
a1.sinks = k1##定了该agent中的channels组件叫做c1
a1.channels = c1###################################################################### 监听数据源的方式,这里采用监听目录中的新增文件
a1.sources.r1.type = spooldir
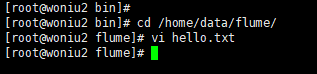
a1.sources.r1.spoolDir = /home/data/flume
a1.sources.r1.fileSuffix = .woniu
# a1.sources.r1.deletePolicy = immediate
a1.sources.r1.deletePolicy = never
a1.sources.r1.fileHeader = true###################################################################### 采集的数据的下沉(落地)方式 通过日志
#sink的类型为logger日志方式,log4j的级别有INFO、Console、file
a1.sinks.k1.type = logger###################################################################### 描述channel的部分,使用内存做数据的临时存储#channel的类型使用内存进行数据缓存,这是最常见的一种channel
a1.channels.c1.type = memory#定义了channel对的容量
a1.channels.c1.capacity = 1000#定义channel的最大的事务容量
a1.channels.c1.transactionCapacity = 100###################################################################### 使用channel将source和sink连接起来
a1.sources.r1.channels = c1
a1.sinks.k1.channel = c13、启动flume
./flume-ng agent -c /home/app/apache-flume-1.8.0/conf -n a1 \
-f /home/app/apache-flume-1.8.0/conf/flume-file.conf -Dflume.root.logger=INFO,console
4、测试案例

六、监听文件中的新增数据
1、创建目录
存放检查点数据:/home/data/flume/checkpoint
存放channel的数据:/home/data/flume/data
2、新增flume-content.conf文件
vi flume-content.conf3、编辑flume-file.conf文件
######################################################################定义了当前agent的名字叫做a1
##定了该agent中的sources组件叫做r1
a1.sources = r1##定了该agent中的sinks组件叫做k1
a1.sinks = k1##定了该agent中的channels组件叫做c1
a1.channels = c1###################################################################### 监听数据源的方式,这里监听文件中的新增数据
a1.sources.r1.type = execa1.sources.r1.command = tail -F /home/data/flume/woniu.log###################################################################### 采集的数据的下沉(落地)方式 通过日志
#sink的类型为logger日志方式,log4j的级别有INFO、Console、file
a1.sinks.k1.type = logger###################################################################### 描述channel的部分,使用内存做数据的临时存储
a1.channels.c1.type = file# 存放检查点数据
a1.channels.c1.checkpointDir = /home/data/flume/checkpoint#定义channel的最大的事务容量
a1.channels.c1.transactionCapacity = 1000000# 存放channel的数据
a1.channels.c1.dataDirs = /home/data/flume/data###################################################################### 使用channel将source和sink连接起来
# 需要将source和sink使用channel连接起来,组成一个类似流水管道
a1.sources.r1.channels = c1
a1.sinks.k1.channel = c1
4、启动flume
./flume-ng agent -c /home/app/apache-flume-1.8.0/conf -n a1 \
-f /home/app/apache-flume-1.8.0/conf/flume-content.conf -Dflume.root.logger=INFO,console
5、写数据
echo hello woniu >> woniu.log6、测试案例

七、flume数据保存到HDFS
1、安装hadoop
https://blog.csdn.net/u011374856/article/details/103310627
2、创建目录
存放检查点数据:/home/data/flume/checkpoint
存放channel的数据:/home/data/flume/data
3、新增flume-hdfs.conf文件
vi flume-hdfs.conf4、编辑flume-hdfs.conf文件
######################################################################定义了当前agent的名字叫做a1
##定了该agent中的sources组件叫做r1
a1.sources = r1##定了该agent中的sinks组件叫做k1
a1.sinks = k1##定了该agent中的channels组件叫做c1
a1.channels = c1###################################################################### 监听数据源的方式,这里监听文件中的新增数据
a1.sources.r1.type = execa1.sources.r1.command = tail -F /home/data/flume/woniu.log###################################################################### 采集的数据的下沉(落地)方式 存储到hdfs
a1.sinks.k1.type = hdfs#存储路径
a1.sinks.k1.hdfs.path = hdfs://10.0.7.62:6001/flume/%Y%m%d# 文件生成后的前缀
a1.sinks.k1.hdfs.filePrefix = ttpark# 文件生成后的后缀
a1.sinks.k1.hdfs.fileSuffix = .log# 文件使用时的前缀
a1.sinks.k1.hdfs.inUsePrefix = woniu.# 文件使用时的后缀
a1.sinks.k1.hdfs.inUseSuffix = .txta1.sinks.k1.hdfs.rollInterval = 60a1.sinks.k1.hdfs.rollSize = 0a1.sinks.k1.hdfs.rollCount = 0a1.sinks.k1.hdfs.useLocalTimeStamp = true# 默认为SequenceFile,查看hdfs上的文件时为序列化的
a1.sinks.k1.hdfs.fileType = DataStream# 上面的要配置,这个也要配置,写入的数据格式为文本内容
a1.sinks.k1.hdfs.writeFormat = Text# 下面这个配置选项不加,那么rollInterval rollSize rollCount是不会生效的
a1.sinks.k1.hdfs.minBlockReplicas = 1###################################################################### 描述channel的部分,使用内存做数据的临时存储
a1.channels.c1.type = file# 存放检查点数据
a1.channels.c1.checkpointDir = /home/data/flume/checkpoint#定义channel的最大的事务容量
a1.channels.c1.transactionCapacity = 1000000# 存放channel的数据
a1.channels.c1.dataDirs = /home/data/flume/data###################################################################### 使用channel将source和sink连接起来
# 需要将source和sink使用channel连接起来,组成一个类似流水管道
a1.sources.r1.channels = c1
a1.sinks.k1.channel = c1
5、拷贝hadoop的jar包
#hadoop-common
cp /home/app/hadoop-2.6.0-cdh5.15.1/share/hadoop/common/hadoop-common-2.6.0-cdh5.15.1.jar $FLUME_HOME/lib/#woodstox-core#stax2-api
cp /home/app/hadoop-2.6.0-cdh5.15.1/share/hadoop/common/lib/stax-api-1.0-2.jar $FLUME_HOME/lib/#commons-configuration
cp /home/app/hadoop-2.6.0-cdh5.15.1/share/hadoop/common/lib/commons-configuration-1.6.jar $FLUME_HOME/lib/#hadoop-auth
cp /home/app/hadoop-2.6.0-cdh5.15.1/share/hadoop/common/lib/hadoop-auth-2.6.0-cdh5.15.1.jar $FLUME_HOME/lib/#htrace-core4
cp /home/app/hadoop-2.6.0-cdh5.15.1/share/hadoop/common/lib/htrace-core4-4.0.1-incubating.jar $FLUME_HOME/lib/#hadoop-hdfs
cp /home/app/hadoop-2.6.0-cdh5.15.1/share/hadoop/hdfs/hadoop-hdfs-2.6.0-cdh5.15.1.jar $FLUME_HOME/lib/
6、启动flume
./flume-ng agent -c /home/app/apache-flume-1.8.0/conf -n a1 \
-f /home/app/apache-flume-1.8.0/conf/flume-hdfs.conf -Dflume.root.logger=INFO,console
7、写数据
echo hello woniu >> woniu.log八、flume数据发送到Kafka
1、安装kafka
https://blog.csdn.net/u011374856/article/details/103471001
2、新增flume-kafka.conf文件
vi flume-kafka.conf3、编辑flume-kafka.conf文件
######################################################################定义了当前agent的名字叫做a1
##定了该agent中的sources组件叫做r1
a1.sources = r1##定了该agent中的sinks组件叫做k1
a1.sinks = k1##定了该agent中的channels组件叫做c1
a1.channels = c1###################################################################### 监听数据源的方式,这里监听文件中的新增数据
a1.sources.r1.type = execa1.sources.r1.command = tail -F /home/data/flume/woniu.log###################################################################### 采集的数据的下沉(落地)方式 存储到hdfs
a1.sinks.k1.type = org.apache.flume.sink.kafka.KafkaSink#kafka server的地址
a1.sinks.k1.brokerList = 10.0.7.62:9092#topic
a1.sinks.k1.topic = woniu_topic_yaoa1.sinks.k1.batchSize = 5a1.sinks.k1.requiredAcks = 1###################################################################### 描述channel的部分,使用内存做数据的临时存储
a1.channels.c1.type = file# 存放检查点数据
a1.channels.c1.checkpointDir = /home/data/flume/checkpoint#定义channel的最大的事务容量
a1.channels.c1.transactionCapacity = 1000000# 存放channel的数据
a1.channels.c1.dataDirs = /home/data/flume/data###################################################################### 使用channel将source和sink连接起来
# 需要将source和sink使用channel连接起来,组成一个类似流水管道
a1.sources.r1.channels = c1
a1.sinks.k1.channel = c1
4、启动flume
./flume-ng agent -c /home/app/apache-flume-1.8.0/conf -n a1 \
-f /home/app/apache-flume-1.8.0/conf/flume-kafka.conf -Dflume.root.logger=INFO,console
5、写数据
echo hello woniu >> woniu.log
这篇关于Liunx安装Flume和生产环境配置的文章就介绍到这儿,希望我们推荐的文章对编程师们有所帮助!


