本文主要是介绍实战:Zig 编写高性能 Web 服务(2),希望对大家解决编程问题提供一定的参考价值,需要的开发者们随着小编来一起学习吧!
1.1 编写 HTTP server

我们从python -m http.server 8000启动得到灵感,先确定好目标:
- 编写一个HTTP/1.1 http server
- zig version 0.12.0
使用zig init搭建项目的前置工作你先自行搭建好,不会的翻看前面铺垫的章节熟悉zig的项目结构。
关键文件build.zig:
const std = @import("std");// Although this function looks imperative, note that its job is to
// declaratively construct a build graph that will be executed by an external
// runner.
pub fn build(b: *std.Build) void {// Standard target options allows the person running `zig build` to choose// what target to build for. Here we do not override the defaults, which// means any target is allowed, and the default is native. Other options// for restricting supported target set are available.const target = b.standardTargetOptions(.{});// Standard optimization options allow the person running `zig build` to select// between Debug, ReleaseSafe, ReleaseFast, and ReleaseSmall. Here we do not// set a preferred release mode, allowing the user to decide how to optimize.const optimize = b.standardOptimizeOption(.{});const exe = b.addExecutable(.{.name = "zig-http-server",.root_source_file = .{ .path = "src/main.zig" },.target = target,.optimize = optimize,// .use_llvm = false,// .use_lld = false,});const xev = b.dependency("libxev", .{ .target = target, .optimize = optimize });exe.root_module.addImport("xev", xev.module("xev"));// This declares intent for the executable to be installed into the// standard location when the user invokes the "install" step (the default// step when running `zig build`).b.installArtifact(exe);// This *creates* a Run step in the build graph, to be executed when another// step is evaluated that depends on it. The next line below will establish// such a dependency.const run_cmd = b.addRunArtifact(exe);// By making the run step depend on the install step, it will be run from the// installation directory rather than directly from within the cache directory.// This is not necessary, however, if the application depends on other installed// files, this ensures they will be present and in the expected location.run_cmd.step.dependOn(b.getInstallStep());// This allows the user to pass arguments to the application in the build// command itself, like this: `zig build run -- arg1 arg2 etc`if (b.args) |args| {run_cmd.addArgs(args);}// This creates a build step. It will be visible in the `zig build --help` menu,// and can be selected like this: `zig build run`// This will evaluate the `run` step rather than the default, which is "install".const run_step = b.step("run", "Run the app");run_step.dependOn(&run_cmd.step);
}
build.zig.zon文件:
.{.name = "zig-http-server",.version = "0.0.0",.dependencies = .{.libxev = .{.url = "https://codeload.github.com/mitchellh/libxev/tar.gz/b3f9918776b8700b337b7ebe769060328fe246b0",.hash = "122044caf67c7833c7110dc93531031899e459a6818ed125a0bcfdb0b5243bd7700b",},},.paths = .{"",},
}
马上开始我们的编程之旅,打开src/main.zig文件:
const std = @import("std");
const xev = @import("xev");const net = std.net;
const Allocator = std.mem.Allocator;const CompletionPool = std.heap.MemoryPoolExtra(xev.Completion, .{});
const ClientPool = std.heap.MemoryPoolExtra(Client, .{});
const xev = @import("xev");
我们采用了第三方的类库:mitchellh/libxev,libxev 是一个跨平台、高性能的事件循环库,提供了非阻塞 IO、定时器、事件等的抽象,并且能够在 Linux(io_uring 或 epoll)、macOS(kqueue)以及 Wasm + WASI 上运行。它既可以作为 Zig 语言的 API,也可以作为 C 语言的 API 使用。
我们需要建一个Client的结构体,代表一个网络客户端。这个客户端结构体包含了几个字段,如id(客户端ID)、socket(网络套接字)、loop(事件循环)、arena(内存分配器)、client_pool(客户端内存池)和completion_pool(完成操作内存池)。此外,它还有一个用于读取数据的缓冲区read_buf。
Client结构体还定义以下方法:
- work:这个方法启动客户端的工作流程,它创建了一个Completion对象,并使用socket.read方法开始读取数据。
- readCallback:这个回调函数在数据读取完成后被调用。它处理读取的结果,如果成功,则打印出读取的数据,并准备一个HTTP响应。然后,它使用socket.write方法发送响应。
- writeCallback:这个回调函数在响应发送完成后被调用。它关闭套接字连接。
- shutdownCallback:这个回调函数在套接字关闭后被调用。它调用socket.close方法来关闭套接字。
- closeCallback:这个回调函数在套接字关闭完成后被调用。它清理资源,包括销毁Completion对象和Client对象本身。
- destroy:这个方法用于手动销毁客户端资源。
这个Client结构体实现了一个简单的HTTP服务器,它能够读取客户端的请求,并返回一个包含"Hello, World!"消息的HTTP响应。每个客户端都有自己的内存分配器和内存池,用于管理内存分配和释放。当客户端连接关闭时,所有分配的内存都会被清理。代码片段如下:
const Client = struct {id: u32,socket: xev.TCP,loop: *xev.Loop,arena: std.heap.ArenaAllocator,client_pool: *ClientPool,completion_pool: *CompletionPool,read_buf: [4096]u8 = undefined,const Self = @This();pub fn work(self: *Self) void {const c_read = self.completion_pool.create() catch unreachable;self.socket.read(self.loop, c_read, .{ .slice = &self.read_buf }, Client, self, Client.readCallback);}pub fn readCallback(self_: ?*Client,l: *xev.Loop,c: *xev.Completion,s: xev.TCP,buf: xev.ReadBuffer,r: xev.TCP.ReadError!usize,) xev.CallbackAction {const self = self_.?;const n = r catch |err| {std.log.err("read error {any}", .{err});s.shutdown(l, c, Client, self, shutdownCallback);return .disarm;};const data = buf.slice[0..n];std.log.info("{s}", .{data});const httpOk =\\HTTP/1.1 200 OK\\Content-Type: text/plain\\Server: xev-http\\Content-Length: {d}\\Connection: close\\\\{s};const content_str =\\Hello, World! {d};const content = std.fmt.allocPrint(self.arena.allocator(), content_str, .{self.id}) catch unreachable;const res = std.fmt.allocPrint(self.arena.allocator(), httpOk, .{ content.len, content }) catch unreachable;self.socket.write(self.loop, c, .{ .slice = res }, Client, self, writeCallback);return .disarm;}fn writeCallback(self_: ?*Client,l: *xev.Loop,c: *xev.Completion,s: xev.TCP,buf: xev.WriteBuffer,r: xev.TCP.WriteError!usize,) xev.CallbackAction {_ = buf; // autofix_ = r catch unreachable;const self = self_.?;s.shutdown(l, c, Client, self, shutdownCallback);return .disarm;}fn shutdownCallback(self_: ?*Client,l: *xev.Loop,c: *xev.Completion,s: xev.TCP,r: xev.TCP.ShutdownError!void,) xev.CallbackAction {_ = r catch {};const self = self_.?;s.close(l, c, Client, self, closeCallback);return .disarm;}fn closeCallback(self_: ?*Client,l: *xev.Loop,c: *xev.Completion,socket: xev.TCP,r: xev.TCP.CloseError!void,) xev.CallbackAction {_ = l;_ = r catch unreachable;_ = socket;var self = self_.?;self.arena.deinit();self.completion_pool.destroy(c);self.client_pool.destroy(self);return .disarm;}pub fn destroy(self: *Self) void {self.arena.deinit();self.client_pool.destroy(self);}
};
我们还需要定义名为Server的结构体,它代表了一个网络服务器。这个服务器结构体包含了几个字段,如loop(事件循环)、gpa(全局内存分配器)、completion_pool(完成操作内存池)、client_pool(客户端内存池)和conns(当前连接数)。
Server结构体定义了一个方法:
- acceptCallback:这个回调函数在服务器接受到新的客户端连接时被调用。它创建了一个新的Client对象,并初始化它的各个字段,包括客户端ID、事件循环、网络套接字、内存分配器和内存池。然后,它调用client.work()方法来开始处理客户端请求。
这个回调函数的目的是接受新的客户端连接,并为每个连接创建一个Client实例来处理它。在创建了新的客户端实例后,它会增加conns计数器来记录当前的连接数。最后,它返回xev.CallbackAction.rearm,这意味着服务器会继续监听新的连接。
这个Server结构体实现了一个简单的网络服务器,它能够接受客户端连接,并为每个连接创建一个Client对象来处理通信。服务器使用内存池来管理客户端实例的内存分配,以提高性能和减少内存碎片。代码片段如下:
const Server = struct {loop: *xev.Loop,gpa: Allocator,completion_pool: *CompletionPool,client_pool: *ClientPool,conns: u32 = 0,fn acceptCallback(self_: ?*Server,l: *xev.Loop,// we ignore the completion, to keep the accept loop going for new connections_: *xev.Completion,r: xev.TCP.AcceptError!xev.TCP,) xev.CallbackAction {const self = self_.?;var client = self.client_pool.create() catch unreachable;client.* = Client{.id = self.conns,.loop = l,.socket = r catch unreachable,.arena = std.heap.ArenaAllocator.init(self.gpa),.client_pool = self.client_pool,.completion_pool = self.completion_pool,};client.work();self.conns += 1;return .rearm;}
};
1.2 进入main实现
main整体流程是:
- 初始化线程池和事件循环。
- 创建一个TCP套接字,并绑定到指定的地址和端口。
- 开始监听传入的连接。
- 初始化完成池和客户端池。
- 创建一个服务器结构体,包含所有必要的组件。
- 注册一个接受连接的回调函数。
- 运行事件循环,等待连接和处理事件。
http服务处理的就是多线程,所以我们借助了第三方类库xev来管理线程池。
var thread_pool = xev.ThreadPool.init(.{});defer thread_pool.deinit();defer thread_pool.shutdown();
- 我们创建了一个xev.ThreadPool类型的变量thread_pool,并初始化它。xev是一个库,ThreadPool是这个库中的一个类型,用于管理线程池。
- defer关键字用于注册一个函数,这个函数会在当前作用域结束时被调用。这里我们注册了thread_pool.deinit()和thread_pool.shutdown(),确保线程池在程序结束时被正确关闭和清理。
const port = 3000;
const addr = try net.Address.parseIp4("0.0.0.0", port);
var socket = try xev.TCP.init(addr);std.log.info("Listening on port {}", .{port});try socket.bind(addr);
try socket.listen(std.os.linux.SOMAXCONN);
绑定socket接口的方式,可以看出zig的简洁之道,和C一样。
socket.accept(&loop, c, Server, &server, Server.acceptCallback);
这行代码调用socket.accept方法,用于接受传入的连接。这个方法需要几个参数:
- &loop:事件循环的引用,用于注册接受连接的事件。
- c:完成事件的引用,用于在连接被接受时通知服务器。
- Server:服务器结构体的类型,用于类型检查。
- &server:服务器结构体的引用,用于在接受连接时传递给回调函数。
- Server.acceptCallback:服务器结构体中的一个函数,当连接被接受时会被调用。
try loop.run(.until_done);这行代码启动事件循环,并开始处理事件。run方法会阻塞当前线程,直到事件循环被关闭或者发生错误。.until_done是一个枚举值,表示事件循环应该运行直到所有任务都完成。
然后在项目直接运行zig build run就可以启动。main.zig完整代码如下:
const std = @import("std");
const xev = @import("xev");const net = std.net;
const Allocator = std.mem.Allocator;const CompletionPool = std.heap.MemoryPoolExtra(xev.Completion, .{});
const ClientPool = std.heap.MemoryPoolExtra(Client, .{});pub fn main() !void {var thread_pool = xev.ThreadPool.init(.{});defer thread_pool.deinit();defer thread_pool.shutdown();var loop = try xev.Loop.init(.{.entries = 4096,.thread_pool = &thread_pool,});defer loop.deinit();var gpa = std.heap.GeneralPurposeAllocator(.{}){};defer _ = gpa.deinit();const alloc = gpa.allocator();const port = 3000;const addr = try net.Address.parseIp4("0.0.0.0", port);var socket = try xev.TCP.init(addr);std.log.info("Listening on port {}", .{port});try socket.bind(addr);try socket.listen(std.os.linux.SOMAXCONN);var completion_pool = CompletionPool.init(alloc);defer completion_pool.deinit();var client_pool = ClientPool.init(alloc);defer client_pool.deinit();const c = try completion_pool.create();var server = Server{.loop = &loop,.gpa = alloc,.completion_pool = &completion_pool,.client_pool = &client_pool,};socket.accept(&loop, c, Server, &server, Server.acceptCallback);try loop.run(.until_done);
}const Client = struct {id: u32,socket: xev.TCP,loop: *xev.Loop,arena: std.heap.ArenaAllocator,client_pool: *ClientPool,completion_pool: *CompletionPool,read_buf: [4096]u8 = undefined,const Self = @This();pub fn work(self: *Self) void {const c_read = self.completion_pool.create() catch unreachable;self.socket.read(self.loop, c_read, .{ .slice = &self.read_buf }, Client, self, Client.readCallback);}pub fn readCallback(self_: ?*Client,l: *xev.Loop,c: *xev.Completion,s: xev.TCP,buf: xev.ReadBuffer,r: xev.TCP.ReadError!usize,) xev.CallbackAction {const self = self_.?;const n = r catch |err| {std.log.err("read error {any}", .{err});s.shutdown(l, c, Client, self, shutdownCallback);return .disarm;};const data = buf.slice[0..n];std.log.info("{s}", .{data});const httpOk =\\HTTP/1.1 200 OK\\Content-Type: text/plain\\Server: xev-http\\Content-Length: {d}\\Connection: close\\\\{s};const content_str =\\Hello, World! {d};const content = std.fmt.allocPrint(self.arena.allocator(), content_str, .{self.id}) catch unreachable;const res = std.fmt.allocPrint(self.arena.allocator(), httpOk, .{ content.len, content }) catch unreachable;self.socket.write(self.loop, c, .{ .slice = res }, Client, self, writeCallback);return .disarm;}fn writeCallback(self_: ?*Client,l: *xev.Loop,c: *xev.Completion,s: xev.TCP,buf: xev.WriteBuffer,r: xev.TCP.WriteError!usize,) xev.CallbackAction {_ = buf; // autofix_ = r catch unreachable;const self = self_.?;s.shutdown(l, c, Client, self, shutdownCallback);return .disarm;}fn shutdownCallback(self_: ?*Client,l: *xev.Loop,c: *xev.Completion,s: xev.TCP,r: xev.TCP.ShutdownError!void,) xev.CallbackAction {_ = r catch {};const self = self_.?;s.close(l, c, Client, self, closeCallback);return .disarm;}fn closeCallback(self_: ?*Client,l: *xev.Loop,c: *xev.Completion,socket: xev.TCP,r: xev.TCP.CloseError!void,) xev.CallbackAction {_ = l;_ = r catch unreachable;_ = socket;var self = self_.?;self.arena.deinit();self.completion_pool.destroy(c);self.client_pool.destroy(self);return .disarm;}pub fn destroy(self: *Self) void {self.arena.deinit();self.client_pool.destroy(self);}
};const Server = struct {loop: *xev.Loop,gpa: Allocator,completion_pool: *CompletionPool,client_pool: *ClientPool,conns: u32 = 0,fn acceptCallback(self_: ?*Server,l: *xev.Loop,// we ignore the completion, to keep the accept loop going for new connections_: *xev.Completion,r: xev.TCP.AcceptError!xev.TCP,) xev.CallbackAction {const self = self_.?;var client = self.client_pool.create() catch unreachable;client.* = Client{.id = self.conns,.loop = l,.socket = r catch unreachable,.arena = std.heap.ArenaAllocator.init(self.gpa),.client_pool = self.client_pool,.completion_pool = self.completion_pool,};client.work();self.conns += 1;return .rearm;}
};
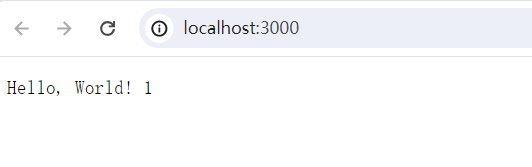
1.3 运行效果:

1.3 学习总结
理解上面代码的关键是理解Zig中的基本概念,如defer、try、结构体、方法和事件循环的工作原理。同时,理解xev库的使用也很重要,因为本次http-server项目大量依赖于这个库的多线程管理能力。
这篇关于实战:Zig 编写高性能 Web 服务(2)的文章就介绍到这儿,希望我们推荐的文章对编程师们有所帮助!


