本文主要是介绍Alamofire常见GET/POST等请求方式的使用,响应直接为json,希望对大家解决编程问题提供一定的参考价值,需要的开发者们随着小编来一起学习吧!

Alamofire
官方仓库地址:https://github.com/Alamofire/Alamofire
xcode中安装和使用:swift网络库Alamofire的安装及简单使用,苹果开发必备-CSDN博客
Alamofire是一个基于Swift语言开发的优秀网络请求库。它封装了底层的网络请求工作,提供了更简单、更易用的接口,大大简化了网络请求代码的编写。Alamofire提供了一套优雅且易于理解的API,使得开发者可以轻松发起各种类型的HTTP请求。它支持GET、POST、PUT、DELETE等常用的请求方法,并且提供了丰富的参数设置选项。Alamofire提供了强大的响应处理功能,支持数据解析、文件上传和下载等常见需求。它基于Swift的特性和语法,代码简洁、可读性强,易于维护和扩展。
GET请求
get请求是最常见的一种请求方式了,默认AF.request发送的就是get请求,代码示例:
// get请求func getData() {print("发送get请求")// 准备一个urllet url = "https://github.com/xiaoyouxinqing/PostDemo/raw/master/PostDemo/Resources/PostListData_hot_1.json"// 使用Alamofile发起请求,默认是GETAF.request(url).responseData(completionHandler: { res in// response.result为枚举类型,所以需要使用switchswitch res.result {case let .success(Data):// 将Data类型的数据转为Json字符串let jsonString = try? JSONSerialization.jsonObject(with: Data)// 打印json字符串print("success\(String(describing: jsonString))")case let .failure(error):print("error\(error)")}// print("响应数据:\(res.result)")})}
POST请求
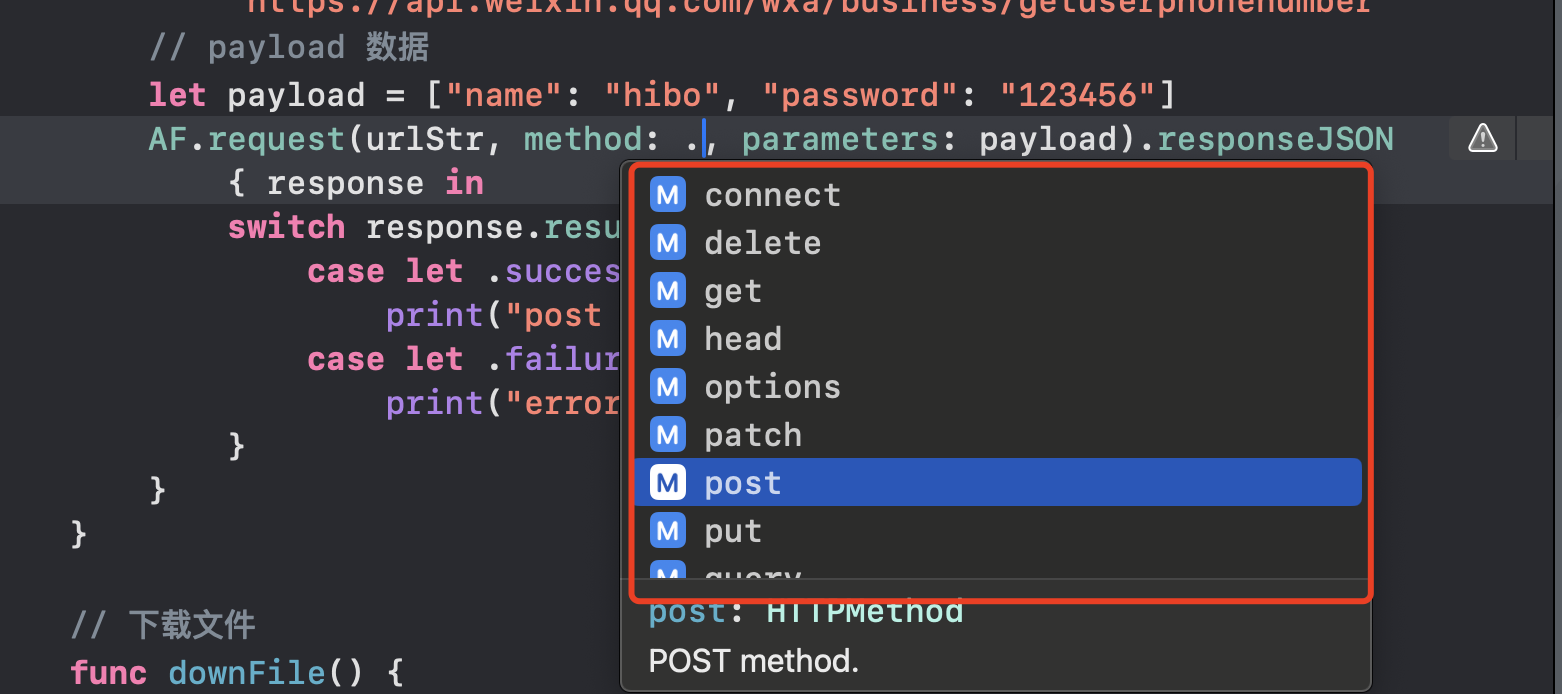
发送post请求要带上method参数,设置为.post,携带的参数放parameters里面,如果想让返回的数据直接是json格式的,可以使用.responseJSON,代码示例:
// post请求func postData() {print("发送post请求")let urlStr = "https://api.weixin.qq.com/wxa/business/getuserphonenumber"// payload 数据let payload = ["name": "hibo", "password": "123456"]AF.request(urlStr, method: .post, parameters: payload).responseJSON { response inswitch response.result {case let .success(json):print("post response: \(json)")case let .failure(error):print("error:\(error)")}}}其他的put/delete等请求和post一样,只是参数不一样而已:
post等请求参数解析: <Parameter:Encodable>
只要参数遵循Encodable协议,那么最终ParameterEncoder都会把Parameter encode成需要的数据类型
举个例子
struct Login: Encodable {let email:Stringlet password:String
}let login = Login(email: "aaa", password: "bbb")
AF.request("https://httpbin.org/post",method: .post,parameters: login,encoder: JSONParameterEncoder.default).response { response indebugPrint(response)
}
Headers请求头设置
设置请求头有三种方式
1.无参构造
/// 1. 无参构造
public init() {}/// 通过以下方式添加值
func add(name: String, value: String)
func add(_ header: HTTPHeader)
2.通过 HTTPHeader 数组构造
/// 2. 通过 HTTPHeader 数组构造
public init(_ headers: [HTTPHeader])let headers: HTTPHeaders = [HTTPHeader(name: "Authorization", value: "Basic VXNlcm5hbWU6UGFzc3dvcmQ="),HTTPHeader(name: "Accept", value: "application/json")
]AF.request("https://httpbin.org/headers", headers: headers).responseJSON { response indebugPrint(response)
}
3.通过key/value 构造
/// 3. 通过key/value 构造
public init(_ dictionary: [String: String])let headers: HTTPHeaders = ["Authorization": "Basic VXNlcm5hbWU6UGFzc3dvcmQ=","Accept": "application/json"
]AF.request("https://httpbin.org/headers", headers: headers).responseJSON { response indebugPrint(response)
}
响应处理
1.Alamofire 提供了4种 Response序列化工具,DataResponseSerializer 解析为Data
// Response Handler - Unserialized Response
func response(queue: DispatchQueue = .main, completionHandler: @escaping (AFDataResponse<Data?>) -> Void) -> Self// Response Data Handler - Serialized into Data
func responseData(queue: DispatchQueue = .main,dataPreprocessor: DataPreprocessor = DataResponseSerializer.defaultDataPreprocessor,emptyResponseCodes: Set<Int> = DataResponseSerializer.defaultEmptyResponseCodes,emptyRequestMethods: Set<HTTPMethod> = DataResponseSerializer.defaultEmptyRequestMethods,completionHandler: @escaping (AFDataResponse<Data>) -> Void) -> Self//示例
AF.request("https://httpbin.org/get").responseData { response indebugPrint("Response: \(response)")
}
2.StringResponseSerializer 解析为String
// Response String Handler - Serialized into String
func responseString(queue: DispatchQueue = .main,dataPreprocessor: DataPreprocessor = StringResponseSerializer.defaultDataPreprocessor,encoding: String.Encoding? = nil,emptyResponseCodes: Set<Int> = StringResponseSerializer.defaultEmptyResponseCodes,emptyRequestMethods: Set<HTTPMethod> = StringResponseSerializer.defaultEmptyRequestMethods,completionHandler: @escaping (AFDataResponse<String>) -> Void) -> Self//示例
AF.request("https://httpbin.org/get").responseString { response indebugPrint("Response: \(response)")
}
3.JSONResponseSerializer 解析为JSON
// Response JSON Handler - Serialized into Any Using JSONSerialization
func responseJSON(queue: DispatchQueue = .main,dataPreprocessor: DataPreprocessor = JSONResponseSerializer.defaultDataPreprocessor,emptyResponseCodes: Set<Int> = JSONResponseSerializer.defaultEmptyResponseCodes,emptyRequestMethods: Set<HTTPMethod> = JSONResponseSerializer.defaultEmptyRequestMethods,options: JSONSerialization.ReadingOptions = .allowFragments,completionHandler: @escaping (AFDataResponse<Any>) -> Void) -> Self
//示例
AF.request("https://httpbin.org/get").responseJSON { response indebugPrint("Response: \(response)")
}
下载文件
1.下载Data
AF.download("https://httpbin.org/image/png").responseData { response inif let data = response.value {let image = UIImage(data: data)}
}
2.下载到指定目录
let destination = DownloadRequest.suggestedDownloadDestination(for: .documentDirectory)
AF.download("https://httpbin.org/image/png", to: destination).response { response indebugPrint(response)if response.error == nil, let imagePath = response.fileURL?.path {let image = UIImage(contentsOfFile: imagePath)}
}
3.下载进度
AF.download("https://httpbin.org/image/png").downloadProgress { progress inprint("Download Progress: \(progress.fractionCompleted)")}.responseData { response inif let data = response.value {let image = UIImage(data: data)}}4.恢复下载
var resumeData: Data!let download = AF.download("https://httpbin.org/image/png").responseData { response inif let data = response.value {let image = UIImage(data: data)}
}// download.cancel(producingResumeData: true) // Makes resumeData available in response only.
download.cancel { data inresumeData = data
}AF.download(resumingWith: resumeData).responseData { response inif let data = response.value {let image = UIImage(data: data)}
}
上传文件
1.上传 Data
let data = Data("data".utf8)AF.upload(data, to: "https://httpbin.org/post").responseDecodable(of: HTTPBinResponse.self) { response indebugPrint(response)
}
2.上传文件
let fileURL = Bundle.main.url(forResource: "video", withExtension: "mov")AF.upload(fileURL, to: "https://httpbin.org/post").responseDecodable(of: HTTPBinResponse.self) { response indebugPrint(response)
}
3.上传 Multipart Data
AF.upload(multipartFormData: { multipartFormData inmultipartFormData.append(Data("one".utf8), withName: "one")multipartFormData.append(Data("two".utf8), withName: "two")
}, to: "https://httpbin.org/post").responseDecodable(of: HTTPBinResponse.self) { response indebugPrint(response)}
4.上传进度
let fileURL = Bundle.main.url(forResource: "video", withExtension: "mov")AF.upload(fileURL, to: "https://httpbin.org/post").uploadProgress { progress inprint("Upload Progress: \(progress.fractionCompleted)")}.responseDecodable(of: HTTPBinResponse.self) { response indebugPrint(response)}这篇关于Alamofire常见GET/POST等请求方式的使用,响应直接为json的文章就介绍到这儿,希望我们推荐的文章对编程师们有所帮助!


