uiimageview专题
[iOS]UIImageView满屏/还原
UIImageView满屏/还原 单击UIImageView设置填满屏幕,双击UIImageView还原位置 - (void)viewDidLoad {[super viewDidLoad];// 属性设置self.imageView = [[UIImageView alloc] initWithFrame:CGRectMake(10, 100, 320, 250)];[self.imageV
给UIImageview 添加边框 或者设置成圆角
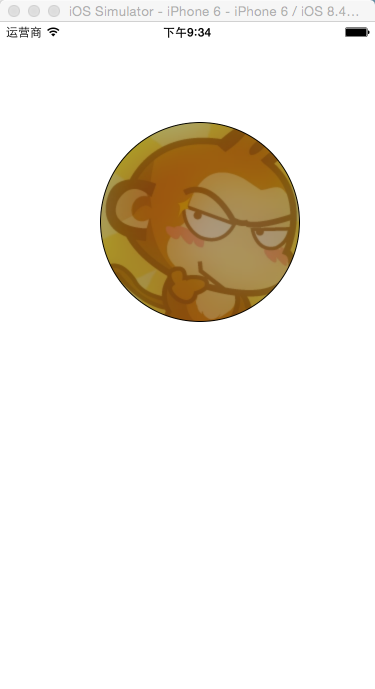
使用layer属性前,应先导入以下包到工程里 #import <QuartzCore/QuartzCore.h> //设置边框 CALayer *layer=[backView layer]; //是否设置边框以及是否可见 [layer setMasksToBounds:YES]; //设置边框圆角的弧度 [layer setCornerRadius:10
UIImageView圆角,自适应图片宽高比例,图片拉伸,缩放比例
设置圆角,通过layer中的cornerRadius和masksToBounds即可。 自适应图片宽高比例。通过UIViewContentModeScaleAspectFit设置,注意这个UIImageView的frame就不是init中的数据了。 同样的UIImage图片放入不同frame中的UIImageView就可以实现比例缩放了。只是UI
【问题记录】UIImageview添加遮罩后不显示图片
iPhone Xs Max 14.5 预期效果图 给UIImageview添加一个气泡框样式的遮罩图,使图片加载后显示为气泡框样式。 原代码: //设置蒙版遮罩层通道UIImageView *imageViewMask = [[UIImageView alloc] initWithImage:image];imageViewMask.frame = CGRectInset
UIImageView 7种手势基本介绍
//UIImageView的使用 UIImageView *imageView = [[UIImageView alloc]initWithFrame:CGRectMake(0, 20, 280, 300)]; [imageView setBackgroundColor:[UIColor redColor]]; [self.view addSubview:im
Snail—UI学习之UIImage及UIImageView
图片是贴在ImageView上面的 - (void)viewDidLoad{[super viewDidLoad];// Do any additional setup after loading the view.self.view.backgroundColor = [UIColor redColor];[self createButton];[self createImage];}
UIImageView 上下和左右翻转 不是旋转
imageView 是一个UIImageView的实例 //左右flip imageView.transform = CGAffineTransformMakeScale(-1.0, 1.0); //上下flip imageView.transform = CGAffineTransformMakeScale(1.0,-1.0);
UIImageView旋转任意角度---实现方法
-(UIImageView *) makeRotation:(UIImageView *)image speedX:(float)X speedY:(float)Y{// 头文件中需要定义 PI// #define PI 3.14159265358979323846264338327950288if (Y<0) {image.transform = CGAffineTransfor
【IOS 开发】基本 UI 控件详解 (UISegmentedControl | UIImageView | UIProgressView | UISlider | UIAlertView )
转载出处:http://blog.csdn.net/shulianghan/article/details/50163725; 一. 分段控件 (UISegmentedControl) 控件展示 : 1. UISegmentedControl 控件属性 (1) Style 属性
Swift开发IOS-UIImageView
UIImageView是IOS系统用来显示图片的控件,目前IOS设备使用的图片尺寸包括三种:1倍尺寸(android_ios.png),@2x尺寸图(android_ios@2x.png)和@3x尺寸图(android_ios@3x.png),我们只需要将这三种尺寸的图片按照这种规则命名放置在本工程目录下,系统就会自动加载对应的图片。 效果如下: 加载本地图片:(加载名为androi
iOS开发-UIImageView响应点击事件
UIImageView是不能够响应点击事件的,在开发过程中我们需要经常对头像等添加点击事件,上网搜索一番后发现有如下两个方法: 1.找到点击图片Event,添加事件处理函数 1 2 3 4 5 6 7 8 9 10 11 12 13 14 UIImageView.userInteractionEnabled = YES ; - ( void )t
iOS UI基础控件之UIImageView
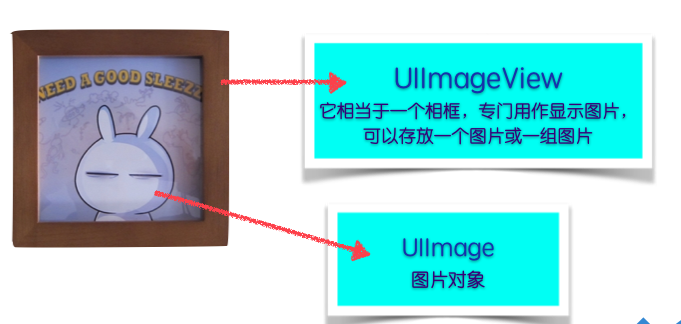
一、UIImageView和UIImage UIImageView是iOS中用于显示图片的类,UIImage是用于存储图片数据的类;iOS中几乎所有看到的图片数据都存储在UIImage中,同时所要的图片都是用UIImageView来显示;UIImageView和UIImage关系如下图: 二. 创建UIImageView的两种方式 1.自己设置图片位置和尺寸 “` UIImageVi
IOS学习之路二十四(UIImageView 加载gif图片)
UIImageView 怎样加载一个gif图片我还不知道(会的大神请指教),不过可以通过加载不同的图片实现gif效果 代码如下: UIImageView* animatedImageView = [[UIImageView alloc] initWithFrame:self.view.bounds];animatedImageView.animationImages = [NSArray
iOS_AFNetworking_UIImageView+AFNetworking(实现图片异步加载)
说明 : UIImageView+AFNetworking 是AFNetworking中一个实现图片异步加载的类, 它是为系统中的UIImageView类添加的类目(Category), 这个类目中的方法为远程异步加载图片功能提供支持.本文主要是针对UIImageView+AFNetworking的一些使用方法和在应用时需要注意的地方进行归纳, 供大家参考和自己学习.程序代码中的 urlStr
UIImageView裁剪成圆形的方法
我知道的实现方法有三种。 1、通过image mask来操作,需要添加mask目标图片。 2、通过imageview的layer来操作 如下代码 1 2 3 4 5 6 7 8 9 10 UIImageView *imageView= (UIImageView*)[statusView viewWithTag:4001]; [imageView setImageWithURL:[N
ios 获取页面的所有uiimageview 和UIButton
- (void) layoutSubviews {//屏蔽系统的ImageView 和 UIButtonfor (UIView *v in [self subviews]) {if ([v class] == [UIImageView class]){[v setHidden:YES];}if ([v isKindOfClass:[UIButton class]] ||[v isKindOfCla
UI10_UIImageView
1.UIImageView- (void)viewDidLoad {UIImage *image = [UIImage imageNamed:@"1.jpg"];UIImageView *imageView = [[UIImageView alloc] initWithFrame:CGRectMake(100, 100, 200, 200)];// 给imageView设置图片.imageVie
iOS base64 转 data |图片Base64转NSData | UIImageView | UIImage
Api 接口返回 base64 图片字符串,需要显示在UIImageView 上。 假设 string类型的 base64ImageStr 为 api返回的 base64字符串 将base64字符串进行处理 //去除掉首尾的空白字符和换行字符NSString * img64 = [img stringByTrimmingCharactersInSet:[NSCharacterSet wh
结合UIImageView实现图片的移动和缩放
因为种种原因,需要在iphone应用中实现图片查看功能,由于iphone屏幕支持多点触摸,于是是想到用“手势”来实现图片的实时缩放和移动。借鉴无所不在的internet网络资料之后,终于实现此一功能,过程如下。 为方便大家下载,示例代码已上传到资源:http://download.csdn.net/detail/kmyhy/4095890 一、 首先实现原图显示(不缩放) 新建MoveScal
UIImageview 模糊、高斯模糊
CIContext *context = [CIContext contextWithOptions:nil]; // 加载本地图片 UIImage *image = [UIImage imageNamed:@""]; CIImage *image2 = [[CIImage alloc] in
UIImageView上添加Button不能响应点击事件
UIImageView *backImageView = [[UIImageView alloc]initWithFrame:CGRectMake(0,self.view.frame.size.height-UITABBAR_HEIGHT-216-39, 320, 43) ]; [backImageView setUserInteractionEnabled:YES];//使添加其上
IOS学习笔记18—UIImageView
mageView中显示图片的话应该首先把图片加载到UIImage中,然后通过其他方式使用该UIImage。以下说明了四种常用的加载UIImage的方法: imageNamed:使用应用程序束中的一个文件来创建,IOS4以后的版本中可以省略图片扩展名; imageWithCGImage:使用Quartz 2D对象创建UIImage,与initWithCGImage等效; imageWithCont
iOS 图片自适应UIImageView
/** 图片自适应 ImageView */ + (void)imageZishiying:(UIImageView *)imageeView { [imageeView setContentScaleFactor:[[UIScreen mainScreen] scale]]; imageeView.contentMode = UIViewContent
iOS 第7课 UIImageView
首先要注意的是UIImageView和UIImage是不同的 0:首先还是通过纯的代码来实现 0:删除3个文件ViewController.h,ViewController.m,Main.storyboard 1:修改点击左边的蓝色按钮,然后选择general-》developer info-》main interface ,将这个main interface 晴空 2:
让UIImageView适应图片的大小
我在一个UIImageView中加入了一张图片,我想让这个图片的尺寸作为该UIImageView的尺寸。 //创建imgV视图-(void)createImgV{//创建视图展示_imgV = [[UIImageView alloc] initWithFrame:CGRectZero];_imgV.backgroundColor=[UIColor yellowColor];// _
![[iOS]UIImageView满屏/还原](/front/images/it_default.gif)


