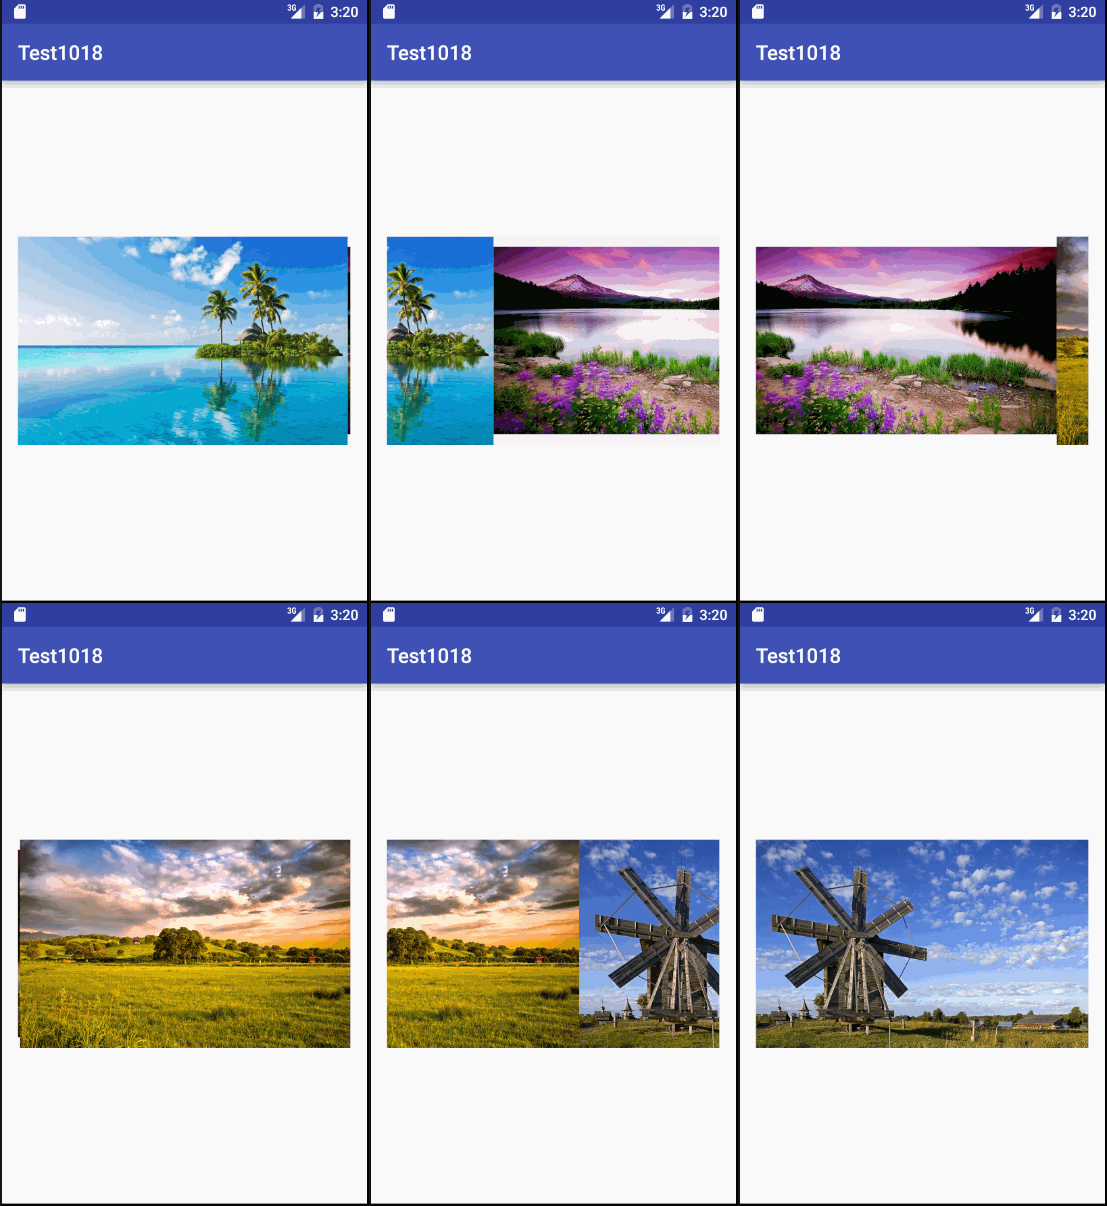
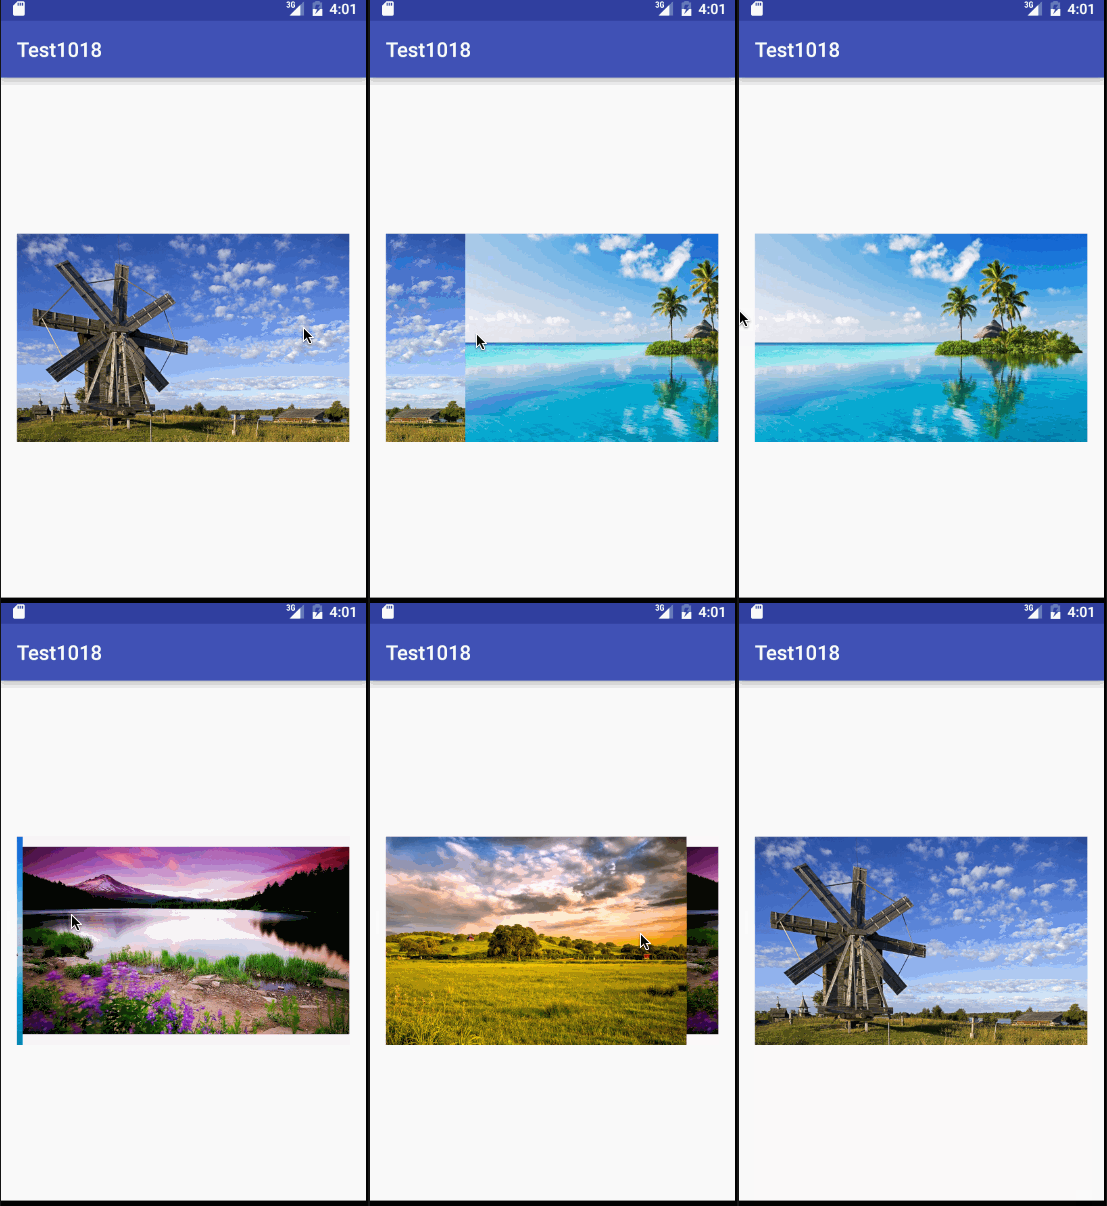
本文主要是介绍2.11 ViewFlipper(翻转视图)的使用,希望对大家解决编程问题提供一定的参考价值,需要的开发者们随着小编来一起学习吧!
一、ViewFlipper 静态导入
1、布局文件
首先,创建4个图片布局文件:
page_1.xml :
<?xml version="1.0" encoding="utf-8"?>
<LinearLayout xmlns:android="http://schemas.android.com/apk/res/android"android:layout_width="match_parent" android:layout_height="match_parent"><ImageView
        android:id="@+id/image1"android:layout_width="match_parent"android:layout_height="match_parent"android:src="@drawable/page1"/></LinearLayout>
page_2.xml :
<?xml version="1.0" encoding="utf-8"?>
<LinearLayout xmlns:android="http://schemas.android.com/apk/res/android"android:layout_width="match_parent" android:layout_height="match_parent"><ImageView
        android:id="@+id/image2"android:layout_width="match_parent"android:layout_height="match_parent"android:src="@drawable/page2"/></LinearLayout>
page_3.xml :
<?xml version="1.0" encoding="utf-8"?>
<LinearLayout xmlns:android="http://schemas.android.com/apk/res/android"android:layout_width="match_parent" android:layout_height="match_parent"><ImageView
        android:id="@+id/image3"android:layout_width="match_parent"android:layout_height="match_parent"android:src="@drawable/page3"/></LinearLayout>
page_4.xml :
<?xml version="1.0" encoding="utf-8"?>
<LinearLayout xmlns:android="http://schemas.android.com/apk/res/android"android:layout_width="match_parent" android:layout_height="match_parent"><ImageView
        android:id="@+id/image4"android:layout_width="match_parent"android:layout_height="match_parent"android:src="@drawable/page4"/></LinearLayout>
在res目录下创建一个文件夹,命名为anim,然后新建两个布局文件:
right_in.xml :
<?xml version="1.0" encoding="utf-8"?>
<set xmlns:android="http://schemas.android.com/apk/res/android"android:layout_width="match_parent" android:layout_height="match_parent"><translate
        android:duration = "2000"android:fromXDelta="100%p"android:toXDelta="0"/></set>
right_out.xml :
<?xml version="1.0" encoding="utf-8"?>
<set xmlns:android="http://schemas.android.com/apk/res/android" android:layout_width="match_parent"android:layout_height="match_parent"><translate
        android:duration = "2000"android:fromXDelta = "0"android:toXDelta = "-100%p"/>
</set>
activity_main.xml 中添加如下代码:
<?xml version="1.0" encoding="utf-8"?>
<RelativeLayout xmlns:android="http://schemas.android.com/apk/res/android"xmlns:tools="http://schemas.android.com/tools" android:layout_width="match_parent"android:layout_height="match_parent" android:paddingLeft="@dimen/activity_horizontal_margin"android:paddingRight="@dimen/activity_horizontal_margin"android:paddingTop="@dimen/activity_vertical_margin"android:paddingBottom="@dimen/activity_vertical_margin" tools:context=".MainActivity"><ViewFlipper
       android:id="@+id/vflp_help"android:layout_width="match_parent"android:layout_height="match_parent"android:inAnimation="@anim/right_in"android:outAnimation="@anim/right_out"android:flipInterval="3000"><include layout="@layout/page_1"/><include layout="@layout/page_2"/><include layout="@layout/page_3"/><include layout="@layout/page_4"/></ViewFlipper></RelativeLayout>
2、Java代码
在MainActivity中添加如下代码:
package com.example.yuancan.test1018;import android.support.v7.app.AppCompatActivity;
import android.os.Bundle;
import android.widget.ViewFlipper;public class MainActivity extends AppCompatActivity {@Overrideprotected void onCreate(Bundle savedInstanceState) {super.onCreate(savedInstanceState);setContentView(R.layout.activity_main);ViewFlipper viewFlipper = (ViewFlipper)findViewById(R.id.vflp_help);viewFlipper.startFlipping();}
}
二、ViewFlipper 动态导入
1、在上面的工程中再添加两个布局文件:
lefi_in.xml
<?xml version="1.0" encoding="utf-8"?>
<set xmlns:android="http://schemas.android.com/apk/res/android"android:layout_width="match_parent" android:layout_height="match_parent"><translate
        android:duration = "500"android:fromXDelta = "-100%p"android:toXDelta = "0"/></set>
left_out.xml
<?xml version="1.0" encoding="utf-8"?>
<set xmlns:android="http://schemas.android.com/apk/res/android" android:layout_width="match_parent"android:layout_height="match_parent"><translate
        android:duration="500"android:fromXDelta="0"android:toXDelta="100%p" />
</set>
2、修改MainAcitvity中的代码:
package com.example.yuancan.test1018;import android.content.Context;
import android.support.v7.app.AppCompatActivity;
import android.os.Bundle;
import android.view.GestureDetector;
import android.view.MotionEvent;
import android.widget.ImageView;
import android.widget.ViewFlipper;public class MainActivity extends AppCompatActivity {private Context mContext;private ViewFlipper viewFlipper;private int[] resId = {R.drawable.page1,R.drawable.page2,R.drawable.page3,R.drawable.page4};private final static int MIN_MOVE = 200;private MyGestureListener mgListener;private GestureDetector mDetector;@Overrideprotected void onCreate(Bundle savedInstanceState) {super.onCreate(savedInstanceState);setContentView(R.layout.activity_main);mContext = MainActivity.this;mgListener = new MyGestureListener();mDetector = new GestureDetector(this,mgListener);viewFlipper = (ViewFlipper)findViewById(R.id.vflp_help);for (int i=0; i<resId.length; i++) {viewFlipper.addView(getImageView(resId[i]));}}@Overridepublic boolean onTouchEvent(MotionEvent event) {return mDetector.onTouchEvent(event);}//自定义一个GestureListenerprivate class MyGestureListener extends GestureDetector.SimpleOnGestureListener {@Overridepublic boolean onFling(MotionEvent e1, MotionEvent e2, float v, float v1) {if (e1.getX() - e2.getX() > MIN_MOVE) {viewFlipper.setInAnimation(mContext,R.anim.right_in);viewFlipper.setOutAnimation(mContext, R.anim.right_out);viewFlipper.showNext();} else  if (e2.getX() - e1.getX() > MIN_MOVE) {viewFlipper.setInAnimation(mContext,R.anim.left_in);viewFlipper.setOutAnimation(mContext, R.anim.left_out);viewFlipper.showNext();}return true;}}private ImageView getImageView(int resId) {ImageView img = new ImageView(this);img.setImageResource(resId);return img;}
}
这篇关于2.11 ViewFlipper(翻转视图)的使用的文章就介绍到这儿,希望我们推荐的文章对编程师们有所帮助!


