本文主要是介绍uniapp小视频项目:同城列表页面,希望对大家解决编程问题提供一定的参考价值,需要的开发者们随着小编来一起学习吧!
文章目录
- 1、同城列表
- 2、选择城市页面
- 3、 字母表布局
- 4、城市联动
- 5、字母表滑动选择
- 6、页面跳转
- 7、切换城市功能
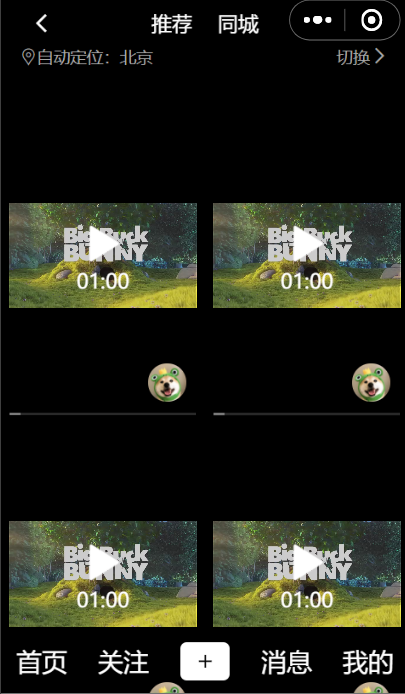
1、同城列表
先看效果:
新建 city.vue 页面
<template><view class="city"><first-nav></first-nav><city-content></city-content><tab></tab></view>
</template><script>import tab from '../../components/tab.vue'import firstNav from '../../components/first-nav.vue'import cityContent from '../../components/cityContent.vue'export default {components:{tab,firstNav,cityContent},data() {return {}},methods: {}}
</script><style>
.city{width: 100%;height: 100%;background: #000000;
}
</style>
为了方便调试,可以把 page.json 里的顺序改到第一个,这样运行时可以直接看到效果
新建 cityContent.vue 显示同城视频
<template><view class="cityContent"><view class="location"><view class="iconfont icon-dingwei location-left">自动定位:北京</view><view class="location-right">切换<text class="iconfont icon-right-1-copy"></text></view></view><view class="video-list"><view class="item"><view class="video"><video style="width: 100%;height: 100%;object-fit:fill ;"src="http://clips.vorwaerts-gmbh.de/big_buck_bunny.mp4" controls=""></video></view><view class="img-box"><image class="img" src="../static/profile.webp"></image></view></view></view></view>
</template><script>export default {name:"cityContent",data() {return {};}}
</script><style>
.cityContent{width: 100%;background: #000000;
}
.location{width: 100%;height: 40px;padding-top: 60px;overflow: hidden;color: #aaaaaa;
}
.location-right{float: right;font-size: 13px;padding-right: 15px;
}
.location-left{float: left;font-size: 13px;padding-left: 15px;
}
.video-list{width: 100%;overflow: auto;background: #000000;
}
.item{width: 50%;float: left;position: relative;
}
.video{width: 92%;height: 300px;margin-left: 4%;z-index: 18;
}
.img-box{position: absolute;bottom: 7px;right: 15px;
}
.img{width: 30px;height: 30px;border-radius: 50px;
}
</style>
多复制几个 <view class="item">...</view> 发现会遮挡 tab,所以给.video增加了 z-index: 18;,然后打开之前写的 tab.vue 增加
.tab{......z-index: 20;
}
其中的定位和向右箭头的小图标依旧是在 iconfont 上下载的,之前的文章使用iconfont已经介绍过,不再赘述
2、选择城市页面
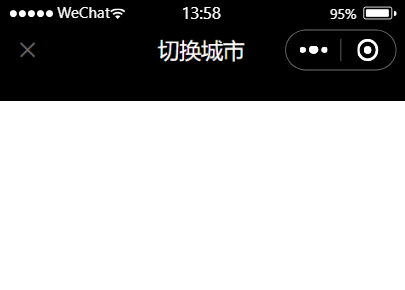
①、先做头部效果
创建选择城市页面 changeCity.vue ,为了方便调试,可以把 page.json 里的顺序改到第一个,这样运行时可以直接看到效果
<template><view><change-header></change-header></view>
</template><script>import changeHeader from '../../components/changeHeader.vue'export default {components:{changeHeader},......}
</script>
......
新建 changeHeader.vue
<template><view><view class="changeHeader"><view class="iconfont icon-guanbi left"></view><view class="title">切换城市</view></view><view class="ground"></view></view>
</template><script>export default {name: "changeHeader",data() {return {};}}
</script><style>.changeHeader {width: 100%;height: 80px;line-height: 80px;position: fixed;top: 0;left: 0;margin: 0 auto;background: #000000;}.ground {width: 100%;height: 80px;}.left {position: absolute;top: 0;left: 15px;height: 80px;line-height: 80px;color: #666666;font-size: 18px;}.title {font-size: 17px;text-align: center;color: #ffffff;}
</style>
②、然后继续写城市列表,接着完成当前城市展示,先看效果图
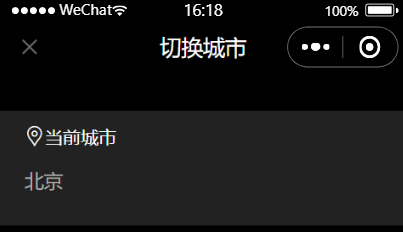
<template><view class="changeList"><view class="box"><view class="title"><icon class="iconfont icon-dingwei"></icon>当前城市</view><view class="currentCity">北京</view></view><view class=""></view><view></view></view>
</template><script>export default {name:"changeList",data() {}}
</script><style>
.changeList{width: 100%;background: #000000;
}
.box{background: #222222;margin-top: 10px;padding: 0 5px 20px 5px;
}
.title{height: 40px;line-height: 40px;margin-left: 15px;color: #ffffff;font-size: 14px;
}
.currentCity{color: #AAAAAA;font-size: 15px;margin-left: 15px;height: 30px;line-height: 30px;
}
</style>
由于有当前城市展示有 margin-top,会露出后边的颜色,我们可以修改 changeCity.vue 的 .city样式,增加一个黑色背景
.city{width: 100%;background: #000000;
}
③、完成热门城市列表
先看效果图:
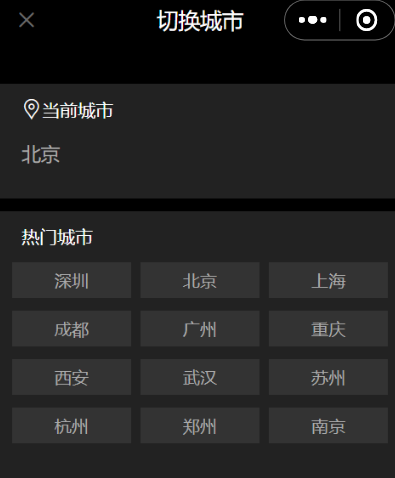
<template><view class="changeList">......<view class="box"><view class="title">热门城市</view><view class="hotList"><view class="item" v-for="(item,index) of list" :key="index">{{item}}</view></view></view><view></view></view>
</template><script>export default {name:"changeList",data() {return {list:['深圳','北京','上海','成都','广州','重庆','西安','武汉','苏州','杭州','郑州','南京']};}}
</script><style>
......
.hotList{width: 100%;overflow: hidden;
}
.item{width: 30%;height: 28px;line-height: 28px;font-size: 13.5px;float: left;background: #333333;margin-left: 2.5%;margin-bottom: 10px;text-align: center;color: #AAAAAA;
}
</style>
④、城市列表
先看效果图:
准备一个 city.json,内容为:
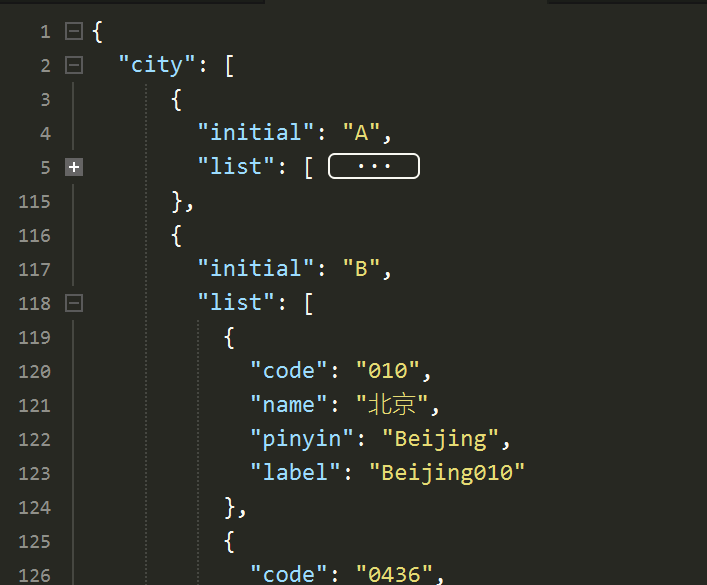
可以直接去我的网盘下载这个 json 文件,然后放到本地服务器
提取码:5s4z
在 changeCity.vue 页面请求到这个 json 数据,打印,格式如下:
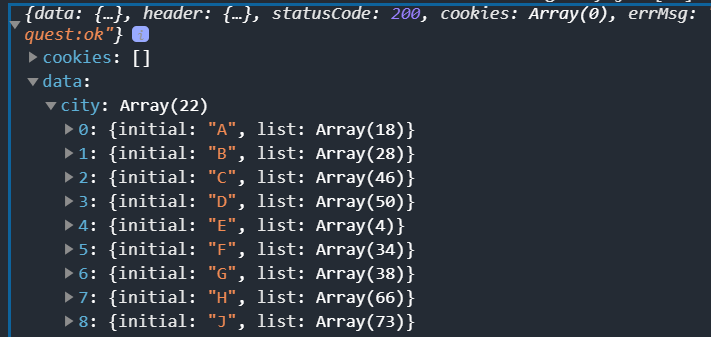
拿到这个数据后,赋值给变量,传给 change-list 组件即可,思路说完了,代码如下:
<template><view class="city"><change-header></change-header><change-list :city="city)"></change-list></view>
</template><script>import changeHeader from '../../components/changeHeader.vue'import changeList from '../../components/changeList.vue'export default {components: {changeHeader,changeList},data() {return {city: []}},methods: {getCityInfo() {uni.request({url: 'http://127.0.0.1:8080/downloads/city.json',success: (res) => {this.city = res.data.city}})}},created() {this.getCityInfo()}}
</script><style>.city {width: 100%;background: #000000;}
</style>
changeList.vue 中使用 props 接收,然后用 v-for 渲染
<template><view class="changeList">......<view class="box-list" v-for="(cities,index) in city" :key="index"><view class="initial">{{cities.initial}}</view><view class="city_name" v-for="item of cities.list" :key="cities.initial">{{item.name}}</view></view></view>
</template><script>export default {props:['city'],name:"changeList",data() {return {list:['深圳','北京','上海','成都','广州','重庆','西安','武汉','苏州','杭州','郑州','南京']};}}
</script>......
可以看到第一层循环我们使用了 v-for in,这里解释下:
VUE列表渲染 FOR-IN 和 FOR-OF 的区别
- V-for 循环遍历数组时推荐使用 of,语法格式为(item,index)
item:迭代时不同的数组元素的值
index:当前元素的索引 - V-for循环遍历对象时推荐使用 in,语法格式为(item,name,index)
item:迭代时对象的键名键值
name:迭代时对象的键名
index:当前元素的索引
-在遍历对象时,会按 Object.keys() 的结果遍历,但是不能保证它的结果在不同的 JavaScript 引擎下都一致
-v-for也可以在实现了可迭代协议的值上使用,包括原生的Map和Set
3、 字母表布局
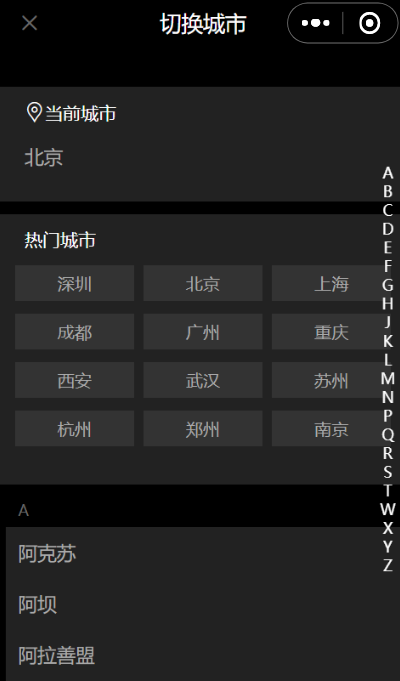
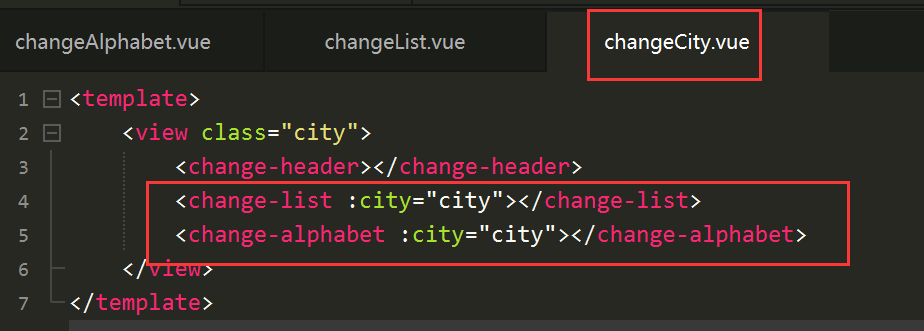
修改 changeCity.vue ,增加一个字母表布局,引入
<template><view class="city"><change-header></change-header><change-list :city="city"></change-list><change-alphabet :city="city"></change-alphabet></view>
</template><script>......import changeAlphabet from '../../components/changeAlphabet.vue'export default {components: {......changeAlphabet},
......
增加字母表组件 changeAlphaBet.vue
<template><view class="changeAlphaBet"><view class="list" v-for="(item,index) of city" :key="index"><view class="item">{{item.initial}}</view></view></view>
</template><script>export default {props:["city"],name:"changeAlphabet",data() {return {};}}
</script><style>
.changeAlphaBet{position: fixed;top: 150px;right: 0px;z-index: 20;color: #ffffff;
}
.list{width: 30px;
}
.item{text-align: center;line-height: 15px;font-size: 12px;
}
</style>
同时需要修改 changeList.vue 的样式,因为会挡住字母表布局,所以增加 z-index 比字母表的小即可
.changeList{width: 100%;background: #000000;z-index: 19;
}
4、城市联动
现在要做的功能是点击右侧字母,跳转相应字母表的城市。首先给字母表增加点击事件,拿到点击的字母,然后传给城市列表组件
字母表组件 change-alphabet 和城市列表组件 change-list 都在 changeCity.vue 中,属于同级组件,所以 change-alphabet 可以先把值穿给父组件 changeCity.vue,然后再由父组件向子组件 change-list 传值
首先子组件( change-alphabet )向父组件(changeCity.vue)传值,这里同时给字母表增加了一个点击变大的效果
<template><view class="changeAlphaBet"><view class="list" v-for="(item,index) of city" :key="index"@click="click(item.initial)"><view class="item" hover-class="hover">{{item.initial}}</view></view></view>
</template><script>export default {......methods:{click(res){this.$emit('change',res)}}}
</script><style>
......
.item{text-align: center;line-height: 15px;font-size: 12px;color: #ffffff;
}
.hover{text-align: center;line-height: 15px;font-size: 18px;color: #ffffff;
}
</style>
父组件(changeCity.vue)接收值,同时向子组件(change-list)传值
<template><view class="city"><change-header></change-header><change-list :city="city" :letter="letter"></change-list><change-alphabet :city="city" @change="change"></change-alphabet></view>
</template><script>......export default {......data() {return {......letter:[]}},methods: {......change(res){this.letter = res}},......}
</script>
......
子组件(change-list)接收值
......
<script>export default {props:['city','letter'],......watch:{letter(){console.log("字母"+this.letter);}}}
</script>
......
这样城市列表就接收到了点击的字母
下面需要跳转相应字母的城市,这就用到了 scrollview,修改 changeAlphabet.vue
<template><view class="changeList"><scroll-view class="scrolly" scroll-y="true" :scroll-into-view="viewId"><view class="city-box">......<view class="box-list" v-for="(cities,index) in city" :key="index"><view class="initial" :id="cities.initial">{{cities.initial}}</view><view class="city_name" v-for="item of cities.list" :key="cities.initial">{{item.name}}</view></view></view></scroll-view></view>
</template><script>export default {......data() {return {......viewId:''};},watch:{letter(){this.viewId = this.letter}}}
</script><style>
.changeList{width: 100%;background: #000000;z-index: 19;height: 100%;
}
......
.scrolly{height: 100%;
}
</style>
把之前写的所有 view 放到一个 scrollview 中,设置它为垂直方向滚动
scroll-into-view的值应为某子元素id(id不能以数字开头)。设置哪个方向可滚动,则在哪个方向滚动到该元素。我们设置它的值为 viewId,初始值为空。然后当传过来的字母发生变化时,再更新
下面设置 :id="cities.initial",也就是 id 为首字母,这样就完成了城市联动
另外样式需要改一下,changeCity.vue 样式修改一下,高度设置成 100%
.city {width: 100%;background: #000000;height: 100%;}
查看效果:

5、字母表滑动选择
给字母表增加触摸事件,当触摸移动时,判断移动到了哪个字母,然后执行刚才写好的城市联动功能即可
增加一个变量 touch,当触摸开始(touchStart)赋值 true,触摸结束(touchEnd)赋值 false,触摸移动时(touchMove),我们打印一下参数
touchMove(e) {console.log(e);
},
打印结果:
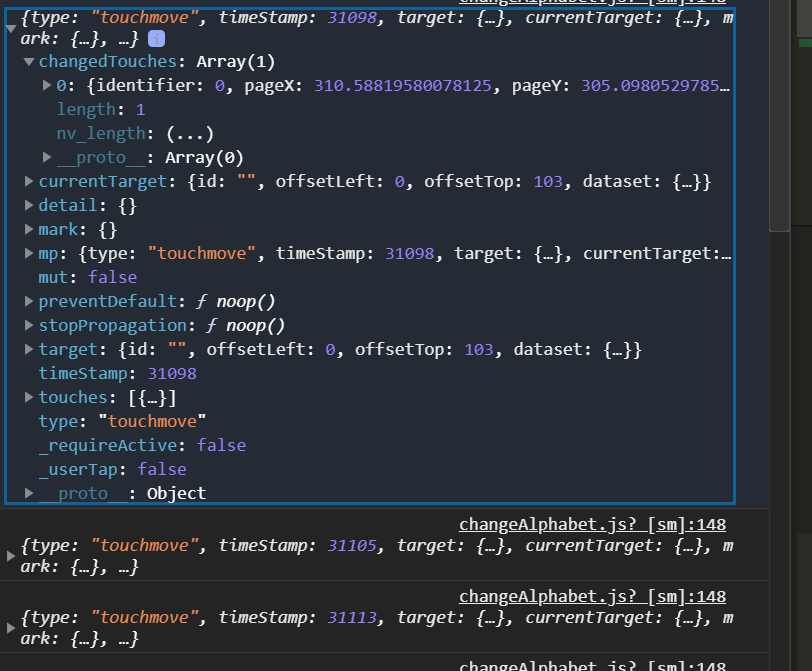
其中的changedTouches中的 pageY 是手指距离顶部的距离,由于字母组件有一个样式是
top: 150px;
所以 pageY - 150 就是手指距离字母表的就,然后除以每个字母的高度,向下取整,即可拿到字母索引
<template><view class="changeAlphaBet"><view class="list" v-for="(item,index) of city" :key="index" @click="click(item.initial)"@touchstart="touchStart" @touchmove="touchMove" @touchend="touchEnd"><view class="item" hover-class="hover">{{item.initial}}</view></view></view>
</template><script>var time = null;export default {props: ["city"],name: "changeAlphabet",data() {return {touch: false};},methods: {click(res) {this.$emit('change', res)},touchStart() {this.touch = true},touchMove(e) {clearTimeout(time)//增加定时器避免短时间重复执行time = setTimeout(()=>{if (this.touch) {const touchY = e.changedTouches[0].pageY - 150const index = Math.floor(touchY / 15)if (index >= 0 && index < this.city.length) {this.$emit('change', this.city[index].initial)}}})},touchEnd() {this.touch = false}}}
</script>
......
最终效果
6、页面跳转
把 pages.json 中的 index 放到第一位,然后我们给首页的同城中增加跳转功能
修改 first.nav,点击同城应跳到 同城页面(city)
<view class="middle"><navigator open-type="switchTab" class="text" url="/pages/index/index">推荐</navigator><navigator open-type="navigate" class="text" url="/pages/city/city">同城</navigator>
</view>
修改 cityContent.vue,点击切换,应跳转切换城市页面(changeCity)
<navigator open-type="" url="/pages/changeCity/changeCity" class="location-right">切换<text class="iconfont icon-right-1-copy"></text>
</navigator>
修改 changeHeader.vue ,点击❌返回上一页
<navigator open-type="navigateBack" class="iconfont icon-guanbi left"></navigator>
查看跳转效果
7、切换城市功能
当点击一个城市的时候,切换城市页面和同城页面选择的城市应该也发生变化。我们可以这样实现,当点击一个城市的时候,将城市加入缓存
修改 chagneList.vue ,把当前城市改成插值表达式 tcity,默认是北京,点击城市后存入缓存,同时修改 tcity 的值
<template><view class="changeList"><scroll-view class="scrolly" scroll-y="true" :scroll-into-view="viewId"><view class="city-box"><view class="box"><view class="title"><icon class="iconfont icon-dingwei"></icon>当前城市</view><view class="currentCity">{{tcity}}</view></view>......</view></scroll-view></view>
</template><script>export default {props: ['city', 'letter'],name: "changeList",data() {return {......tcity:'北京'};},......methods: {click(res) {uni.setStorage({key: "city",data: res})uni.getStorage({key: "city",success: (res) => {this.tcity = res.data}})uni.redirectTo({url:'/pages/city/city'})}}}
</script>
......
然后在 city.vue 中接收到 城市的值,然后传给 city-content
<template><view class="city"><first-nav></first-nav><city-content :tcity="tcity"></city-content><tab></tab></view>
</template><script>......export default {......data() {return {tcity:"北京"}},......onShow() {uni.getStorage({key:"city",success:(res)=>{this.tcity = res.data}})}}
</script>
......
city-content.vue 中接收
<view class="iconfont icon-dingwei location-left">
自动定位:{{tcity}}
</view><script>export default {props:['tcity'],name:"cityContent",data() {return {};}}
</script>
......
这篇关于uniapp小视频项目:同城列表页面的文章就介绍到这儿,希望我们推荐的文章对编程师们有所帮助!


