本文主要是介绍【鸿蒙】鸿蒙App应用-《记账软件》登录,注册,找回密码功能,希望对大家解决编程问题提供一定的参考价值,需要的开发者们随着小编来一起学习吧!
1.登录功能
从【鸿蒙】鸿蒙App应用-《记账软件》开发步骤欢迎引导页进入之后,完成登录功能。界面效果如图

2.布局文件的搭建
在layout文件夹下新建xml文件,布局代码如下:
<?xml version="1.0" encoding="utf-8"?>
<DirectionalLayoutxmlns:ohos="http://schemas.huawei.com/res/ohos"ohos:height="match_parent"ohos:width="match_parent"ohos:orientation="vertical"><Textohos:height="match_content"ohos:background_element="#FFDA44"ohos:width="match_parent"ohos:text="登 录"ohos:padding="10fp"ohos:text_alignment="center"ohos:text_font="HwChinese-medium"ohos:text_weight="1200"ohos:text_color="#000"ohos:text_size="25fp"/><DirectionalLayoutohos:height="match_content"ohos:width="match_parent"ohos:weight="2"ohos:orientation="vertical"><DirectionalLayoutohos:height="match_content"ohos:width="match_parent"ohos:alignment="vertical_center"ohos:background_element="$graphic:background_textfield"ohos:margin="20fp"ohos:orientation="horizontal"><Imageohos:height="50vp"ohos:width="50vp"ohos:image_src="$media:lr_ico_phone"ohos:left_margin="10vp"ohos:scale_mode="stretch"/><TextFieldohos:id="$+id:tv_user"ohos:height="match_content"ohos:width="match_parent"ohos:hint="手机号"ohos:text_input_type="pattern_number"ohos:hint_color="#aaaaaa"ohos:padding="15vp"ohos:text_color="#aaaaaa"ohos:text_size="20fp"/></DirectionalLayout><DirectionalLayoutohos:height="match_content"ohos:width="match_parent"ohos:alignment="vertical_center"ohos:background_element="$graphic:background_textfield"ohos:left_margin="20fp"ohos:orientation="horizontal"ohos:right_margin="20fp"><Imageohos:height="50vp"ohos:width="50vp"ohos:image_src="$media:lr_ico_pass"ohos:left_margin="10vp"ohos:scale_mode="stretch"/><TextFieldohos:id="$+id:tv_psd"ohos:height="match_content"ohos:width="match_parent"ohos:hint="账号密码"ohos:text_input_type="pattern_password"ohos:hint_color="#aaaaaa"ohos:padding="15vp"ohos:text_color="#aaaaaa"ohos:text_size="20fp"/></DirectionalLayout><Buttonohos:id="$+id:btn_login"ohos:height="match_content"ohos:width="match_parent"ohos:background_element="$graphic:background_button_login"ohos:margin="20fp"ohos:padding="10fp"ohos:text="登录"ohos:text_color="#ffffff"ohos:text_size="25fp"/><DirectionalLayoutohos:height="match_content"ohos:width="match_parent"ohos:left_margin="20fp"ohos:orientation="horizontal"ohos:right_margin="20fp"><Textohos:id="$+id:tv_register"ohos:height="match_content"ohos:width="match_content"ohos:text="注册"ohos:text_alignment="left"ohos:text_color="#FFDA44"ohos:text_size="20fp"ohos:weight="1"/><Textohos:id="$+id:tv_findpsd"ohos:height="match_content"ohos:width="match_content"ohos:text="找回密码"ohos:text_alignment="right"ohos:text_color="#FFDA44"ohos:text_size="20fp"ohos:weight="1"/></DirectionalLayout></DirectionalLayout><DirectionalLayoutohos:height="match_content"ohos:width="match_parent"ohos:weight="1"ohos:orientation="vertical"><Textohos:height="match_content"ohos:width="match_parent"ohos:text_size="20fp"ohos:text_alignment="center"ohos:text_color="#666"ohos:text="*第三方账号快速登录*"/><DirectionalLayoutohos:height="match_content"ohos:width="match_parent"ohos:margin="30fp"ohos:alignment="horizontal_center"ohos:orientation="horizontal"><DirectionalLayoutohos:height="match_content"ohos:width="match_content"ohos:weight="1"ohos:alignment="center"><Imageohos:height="60fp"ohos:width="60fp"ohos:scale_mode="stretch"ohos:image_src="$media:loadweixin"/><Textohos:height="match_content"ohos:width="match_content"ohos:text_size="20fp"ohos:text="微信"/></DirectionalLayout><DirectionalLayoutohos:height="match_content"ohos:width="match_content"ohos:weight="1"ohos:alignment="center"><Imageohos:height="60fp"ohos:width="60fp"ohos:scale_mode="stretch"ohos:image_src="$media:qq"/><Textohos:height="match_content"ohos:width="match_content"ohos:text_size="20fp"ohos:text="QQ"/></DirectionalLayout><DirectionalLayoutohos:height="match_content"ohos:width="match_content"ohos:weight="1"ohos:alignment="center"><Imageohos:height="60fp"ohos:width="60fp"ohos:scale_mode="stretch"ohos:image_src="$media:weibo"/><Textohos:height="match_content"ohos:width="match_content"ohos:text_size="20fp"ohos:text="微博"/></DirectionalLayout></DirectionalLayout></DirectionalLayout></DirectionalLayout>
在graphic文件夹中新建background_button_login.xml文件,用于控制登录按钮的显示样式
<?xml version="1.0" encoding="utf-8"?>
<shapexmlns:ohos="http://schemas.huawei.com/res/ohos"ohos:shape="rectangle"><cornersohos:radius="20"/><solidohos:color="#FFE3C33F"/>
</shape>
在graphic文件夹中新建background_textfield.xml文件,用于控制手机号和密码输入框的边框样式
<?xml version="1.0" encoding="utf-8"?>
<shapexmlns:ohos="http://schemas.huawei.com/res/ohos"ohos:shape="rectangle"><cornersohos:radius="20"/><solidohos:color="#FFffff"/><strokeohos:color="#FFDA44"ohos:width="10"/>
</shape>
结合当前组件和资源图片文本搭建登陆页面的布局,主题以黄色为主。
3.创建LoginAbilitySlice类完成登录功能
在src文件夹下的包中新建登录的界面,并继承至BaseAilitySlice基类。
加载布局之后,定义initView方法,初始化这些组件的对象。
/*** 初始化组件*/private void initView() {tv_user= (Text) this.findComponentById(ResourceTable.Id_tv_user);tv_findpsd= (Text) this.findComponentById(ResourceTable.Id_tv_findpsd);tv_psd= (Text) this.findComponentById(ResourceTable.Id_tv_psd);tv_register= (Text) this.findComponentById(ResourceTable.Id_tv_register);btn_login= (Button) this.findComponentById(ResourceTable.Id_btn_login);tv_register.setClickedListener(listener);tv_findpsd.setClickedListener(listener);btn_login.setClickedListener(listener);}设置登录按钮,注册,找回密码的监听事件
private Component.ClickedListener listener =new Component.ClickedListener() {@Overridepublic void onClick(Component component) {switch (component.getId()){case ResourceTable.Id_btn_login://登录按钮String name=tv_user.getText();String psd=tv_psd.getText();Map map=new HashMap();map.put("phone",name);map.put("psd",psd);User user= DBUtil.getInstance(rs).login("tb_user",map);if (user==null)showToastDialogShort("登录失败");else {showToastDialogShort("登录成功");CommonUtil.user=user;present(new MainAbilitySlice(),new Intent());terminate();}break;case ResourceTable.Id_tv_register://注册present(new RegisterAilitySlice(),new Intent());break;case ResourceTable.Id_tv_findpsd://找回密码break;}}};完整代码如下:
package com.example.bookkeepproject.slice;import com.example.bookkeepproject.ResourceTable;
import com.example.bookkeepproject.entity.User;
import com.example.bookkeepproject.utils.CommonUtil;
import com.example.bookkeepproject.utils.DBUtil;
import ohos.aafwk.content.Intent;
import ohos.agp.components.Button;
import ohos.agp.components.Component;
import ohos.agp.components.Text;import java.util.HashMap;
import java.util.Map;/*** 主子界面*/
public class LoginAbilitySlice extends BaseAbilitySlice {private Text tv_user,tv_psd,tv_register,tv_findpsd;private Button btn_login;@Overridepublic void onStart(Intent intent) {super.onStart(intent);super.setUIContent(ResourceTable.Layout_ability_login);initView();}/*** 初始化组件*/private void initView() {tv_user= (Text) this.findComponentById(ResourceTable.Id_tv_user);tv_findpsd= (Text) this.findComponentById(ResourceTable.Id_tv_findpsd);tv_psd= (Text) this.findComponentById(ResourceTable.Id_tv_psd);tv_register= (Text) this.findComponentById(ResourceTable.Id_tv_register);btn_login= (Button) this.findComponentById(ResourceTable.Id_btn_login);tv_register.setClickedListener(listener);tv_findpsd.setClickedListener(listener);btn_login.setClickedListener(listener);}private Component.ClickedListener listener =new Component.ClickedListener() {@Overridepublic void onClick(Component component) {switch (component.getId()){case ResourceTable.Id_btn_login://登录按钮String name=tv_user.getText();String psd=tv_psd.getText();Map map=new HashMap();map.put("phone",name);map.put("psd",psd);User user= DBUtil.getInstance(rs).login("tb_user",map);if (user==null)showToastDialogShort("登录失败");else {showToastDialogShort("登录成功");CommonUtil.user=user;present(new MainAbilitySlice(),new Intent());terminate();}break;case ResourceTable.Id_tv_register://注册present(new RegisterAilitySlice(),new Intent());break;case ResourceTable.Id_tv_findpsd://找回密码break;}}};@Overridepublic void onActive() {super.onActive();}@Overridepublic void onForeground(Intent intent) {super.onForeground(intent);}
}
4.定义用户实体类
完成登录功能需要获得当前登录的用户的个人信息,并进行存储。
package com.example.bookkeepproject.entity;public class User {private int id;private String name;private String psd;private String phone;private String sex;private int age;public User(int id, String name, String psd, String phone, String sex, int age) {this.id = id;this.name = name;this.psd = psd;this.phone = phone;this.sex = sex;this.age = age;}@Overridepublic String toString() {return "User{" +"id=" + id +", name='" + name + '\'' +", psd='" + psd + '\'' +", phone='" + phone + '\'' +", sex='" + sex + '\'' +", age=" + age +'}';}public int getId() {return id;}public void setId(int id) {this.id = id;}public String getName() {return name;}public void setName(String name) {this.name = name;}public String getPsd() {return psd;}public void setPsd(String psd) {this.psd = psd;}public String getPhone() {return phone;}public void setPhone(String phone) {this.phone = phone;}public String getSex() {return sex;}public void setSex(String sex) {this.sex = sex;}public int getAge() {return age;}public void setAge(int age) {this.age = age;}
}
5.创建Sqlite关系型数据库
新建一个工具包Utils,在该包下存放整个项目需要用的工具类,这里需要创建数据库工具类以及执行sql的工具类
5.1创建数据库工具类
在utils包下新建MyHelper类继承至RdbOpenCallback类,实现抽象类中为实现的方法。
package com.example.bookkeepproject.utils;import ohos.app.Context;
import ohos.data.DatabaseHelper;
import ohos.data.preferences.Preferences;
import ohos.data.rdb.RdbOpenCallback;
import ohos.data.rdb.RdbStore;
import ohos.data.rdb.StoreConfig;/*** 创建sqlite数据库的辅助类*/
public class MyHelper extends RdbOpenCallback {DatabaseHelper db;private RdbStore rs;private static MyHelper helper;private Preferences preferences;// id,name,info,typeprivate String tb_user = "create table tb_user(id Integer primary key autoincrement,name,phone,psd,sex,age)";//支出,收入类型,具体支出,收入来源,来源的图片,年,月,日,金额,备注信息private String tb_jz = "create table tb_jz(id Integer primary key autoincrement,userid,type,subtype,image,year,month,day,money,info)";//单例设计模式public static RdbStore getInstance(Context context,String DBName){if (helper==null)helper=new MyHelper(context,DBName);return helper.rs;}public static Preferences getInstance(String fileName,Context context){if (helper==null)helper=new MyHelper(fileName,context);return helper.preferences;}public MyHelper(String fileName,Context context) {db=new DatabaseHelper(context);preferences=db.getPreferences(fileName);}public MyHelper(Context context,String DBName) {db=new DatabaseHelper(context);//创建数据库StoreConfig config=StoreConfig.newDefaultConfig(DBName);rs=db.getRdbStore(config,1,this,null);}@Overridepublic void onCreate(RdbStore rdbStore) {//创建表rdbStore.executeSql(tb_user);rdbStore.executeSql(tb_jz);rdbStore.executeSql("insert into tb_user(name,phone,psd,sex,age) values('1','1','1','1',1)");}@Overridepublic void onUpgrade(RdbStore rdbStore, int i, int i1) {System.out.println("版本已更新");}
}
必须实现构造方法,以及创建数据库的方法和版本更新的方法
5.2 创建执行sql操作类
在utils包中新建DBUtil工具类,并采用单例模式减少对象的重复创建而导致影响软件运行速度。
package com.example.bookkeepproject.utils;import com.example.bookkeepproject.entity.BookKeepInfo;
import com.example.bookkeepproject.entity.User;
import ohos.app.Context;
import ohos.data.rdb.RdbPredicates;
import ohos.data.rdb.RdbStore;
import ohos.data.rdb.ValuesBucket;
import ohos.data.resultset.ResultSet;import java.util.ArrayList;
import java.util.List;
import java.util.Map;/*** 数据库工具类*/
public class DBUtil {public static DBUtil db;private static RdbStore rs;//单例设计模式public static DBUtil getInstance(RdbStore rs) {if (db == null)db = new DBUtil();DBUtil.rs = rs;return db;}/*** 登录功能** @param tableName* @param map* @return*/public User login(String tableName, Map<String, Object> map) {User user = null;//定义要查询的字段数组String[] columns = new String[]{"id", "name", "age", "phone", "sex", "psd"};//设置要查询的表,以及查询的条件RdbPredicates rdbPredicates = new RdbPredicates(tableName);for (Map.Entry<String, Object> e : map.entrySet()) {rdbPredicates.equalTo(e.getKey(), (String) e.getValue());}ResultSet resultSet = rs.query(rdbPredicates, columns);if (resultSet.goToNextRow()) {int id = resultSet.getInt(resultSet.getColumnIndexForName("id"));String name = resultSet.getString(resultSet.getColumnIndexForName("name"));String psd = resultSet.getString(resultSet.getColumnIndexForName("psd"));String phone = resultSet.getString(resultSet.getColumnIndexForName("phone"));String sex = resultSet.getString(resultSet.getColumnIndexForName("sex"));int age = resultSet.getInt(resultSet.getColumnIndexForName("age"));user = new User(id, name, psd, phone, sex, age);}return user;}}
6.注册功能
通过从登录的界面点击“注册”进行页面跳转至注册界面,完成注册的功能操作。
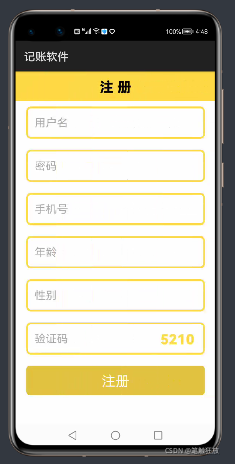
6.1新建注册页面的xml布局文件
在layout文件夹中新建xml文件,布局代码如下:
<?xml version="1.0" encoding="utf-8"?>
<ScrollViewxmlns:ohos="http://schemas.huawei.com/res/ohos"ohos:height="match_parent"ohos:width="match_parent"><DirectionalLayoutohos:height="match_content"ohos:width="match_parent"ohos:orientation="vertical"><Textohos:height="match_content"ohos:width="match_parent"ohos:background_element="#FFDA44"ohos:padding="10fp"ohos:text="注 册"ohos:text_alignment="center"ohos:text_color="#000"ohos:text_font="HwChinese-medium"ohos:text_size="25fp"ohos:text_weight="1200"/><DirectionalLayoutohos:height="match_content"ohos:width="match_parent"ohos:alignment="vertical_center"ohos:background_element="$graphic:background_textfield"ohos:left_margin="20fp"ohos:right_margin="20fp"ohos:top_margin="10fp"ohos:bottom_margin="10fp"ohos:orientation="horizontal"><TextFieldohos:id="$+id:re_user"ohos:height="match_content"ohos:width="match_parent"ohos:hint="用户名"ohos:hint_color="#aaaaaa"ohos:padding="15vp"ohos:text_color="#aaaaaa"ohos:text_size="20fp"/></DirectionalLayout><DirectionalLayoutohos:height="match_content"ohos:width="match_parent"ohos:alignment="vertical_center"ohos:background_element="$graphic:background_textfield"ohos:left_margin="20fp"ohos:right_margin="20fp"ohos:top_margin="10fp"ohos:bottom_margin="10fp"ohos:orientation="horizontal"><TextFieldohos:id="$+id:re_psd"ohos:height="match_content"ohos:width="match_parent"ohos:hint="密码"ohos:text_input_type="pattern_password"ohos:hint_color="#aaaaaa"ohos:padding="15vp"ohos:text_color="#aaaaaa"ohos:text_size="20fp"/></DirectionalLayout><DirectionalLayoutohos:height="match_content"ohos:width="match_parent"ohos:alignment="vertical_center"ohos:background_element="$graphic:background_textfield"ohos:left_margin="20fp"ohos:right_margin="20fp"ohos:top_margin="10fp"ohos:bottom_margin="10fp"ohos:orientation="horizontal"><TextFieldohos:id="$+id:re_phone"ohos:height="match_content"ohos:width="match_parent"ohos:hint="手机号"ohos:hint_color="#aaaaaa"ohos:text_input_type="pattern_number"ohos:padding="15vp"ohos:text_color="#aaaaaa"ohos:text_size="20fp"/></DirectionalLayout><DirectionalLayoutohos:height="match_content"ohos:width="match_parent"ohos:alignment="vertical_center"ohos:background_element="$graphic:background_textfield"ohos:left_margin="20fp"ohos:right_margin="20fp"ohos:top_margin="10fp"ohos:bottom_margin="10fp"ohos:orientation="horizontal"><TextFieldohos:id="$+id:re_age"ohos:height="match_content"ohos:width="match_parent"ohos:hint="年龄"ohos:text_input_type="pattern_number"ohos:hint_color="#aaaaaa"ohos:padding="15vp"ohos:text_color="#aaaaaa"ohos:text_size="20fp"/></DirectionalLayout><DirectionalLayoutohos:height="match_content"ohos:width="match_parent"ohos:alignment="vertical_center"ohos:background_element="$graphic:background_textfield"ohos:left_margin="20fp"ohos:right_margin="20fp"ohos:top_margin="10fp"ohos:bottom_margin="10fp"ohos:orientation="horizontal"><TextFieldohos:id="$+id:re_sex"ohos:height="match_content"ohos:width="match_parent"ohos:hint="性别"ohos:hint_color="#aaaaaa"ohos:padding="15vp"ohos:text_color="#aaaaaa"ohos:text_size="20fp"/></DirectionalLayout><DirectionalLayoutohos:height="match_content"ohos:width="match_parent"ohos:alignment="vertical_center"ohos:background_element="$graphic:background_textfield"ohos:left_margin="20fp"ohos:right_margin="20fp"ohos:top_margin="10fp"ohos:bottom_margin="10fp"ohos:orientation="horizontal"><TextFieldohos:id="$+id:re_code"ohos:height="match_content"ohos:width="match_content"ohos:hint="验证码"ohos:hint_color="#aaaaaa"ohos:padding="15vp"ohos:text_color="#aaaaaa"ohos:text_size="20fp"ohos:weight="1"/><Textohos:id="$+id:tv_code"ohos:height="50fp"ohos:width="80fp"ohos:text="1234"ohos:text_color="#FFDA44"ohos:text_font="HwChinese-medium"ohos:text_size="25fp"ohos:text_weight="1000"/></DirectionalLayout><Buttonohos:id="$+id:btn_register"ohos:height="match_content"ohos:width="match_parent"ohos:background_element="$graphic:background_button_login"ohos:left_margin="20fp"ohos:right_margin="20fp"ohos:top_margin="10fp"ohos:bottom_margin="10fp"ohos:padding="10fp"ohos:text="注册"ohos:text_color="#ffffff"ohos:text_size="25fp"/></DirectionalLayout>
</ScrollView>
6.2创建RegisterAbilitySlice界面
在slice包中新建AbilitySlice类继承至BaseAbilitySlice类,代码如下:
package com.example.bookkeepproject.slice;import com.example.bookkeepproject.ResourceTable;
import com.example.bookkeepproject.utils.DBUtil;
import ohos.aafwk.content.Intent;
import ohos.agp.components.Button;
import ohos.agp.components.Component;
import ohos.agp.components.Text;
import ohos.agp.components.TextField;
import ohos.data.rdb.ValuesBucket;import java.util.HashMap;
import java.util.Map;
import java.util.Random;public class RegisterAilitySlice extends BaseAbilitySlice {private TextField re_user,re_psd,re_phone,re_age,re_sex,re_code;private Text tv_code;private Button btn_register;private int code;@Overrideprotected void onStart(Intent intent) {super.onStart(intent);this.setUIContent(ResourceTable.Layout_ability_register);initView();showRandomCode();}private void initView() {re_age= (TextField) this.findComponentById(ResourceTable.Id_re_age);re_user= (TextField) this.findComponentById(ResourceTable.Id_re_user);re_psd= (TextField) this.findComponentById(ResourceTable.Id_re_psd);re_phone= (TextField) this.findComponentById(ResourceTable.Id_re_phone);re_sex= (TextField) this.findComponentById(ResourceTable.Id_re_sex);re_code= (TextField) this.findComponentById(ResourceTable.Id_re_code);tv_code= (Text) this.findComponentById(ResourceTable.Id_tv_code);btn_register= (Button) this.findComponentById(ResourceTable.Id_btn_register);tv_code.setClickedListener(listener);btn_register.setClickedListener(listener);}private Component.ClickedListener listener=new Component.ClickedListener() {@Overridepublic void onClick(Component component) {switch (component.getId()){case ResourceTable.Id_tv_code:showRandomCode();break;case ResourceTable.Id_btn_register:String user=re_user.getText();String psd=re_psd.getText();String phone=re_phone.getText();String age=re_age.getText();String sex=re_sex.getText();String code=re_code.getText();Map map=new HashMap();map.put("phone",phone);if (code==null||"".equals(code))showToastDialogShort("验证码不能为空");else if (!code.equals(String.valueOf(RegisterAilitySlice.this.code))) {showToastDialogShort("验证码不正确");showRandomCode();re_code.setText("");}else if(DBUtil.getInstance(rs).selectPhone("tb_user",map)){showToastDialogShort("该手机号已被注册,请重新注册");re_code.setText("");re_age.setText("");re_phone.setText("");re_psd.setText("");re_sex.setText("");re_user.setText("");showRandomCode();}else {ValuesBucket vb = new ValuesBucket();vb.putString("name",user);vb.putString("psd",psd);vb.putString("phone",phone);vb.putString("sex",sex);vb.putInteger("age",Integer.parseInt(age));long i= DBUtil.getInstance(rs).insert("tb_user",vb);if (i>0) {showToastDialogShort("注册成功");terminate();}else {showToastDialogShort("注册失败");re_code.setText("");re_age.setText("");re_phone.setText("");re_psd.setText("");re_sex.setText("");re_user.setText("");showRandomCode();}}break;}}};private void showRandomCode() {code=new Random().nextInt(9000)+1000;tv_code.setText(code+"");}
}
6.3 完成数据库的数据添加操作
在DButils工具类中定义查询当前手机号是否存在,用于判断注册的时候出现相同手机号
/*** 验证手机号是否已被注册** @param tableName* @param map* @return*/public boolean selectPhone(String tableName, Map<String, Object> map) {boolean is = false;//定义要查询的字段数组String[] columns = new String[]{"id", "name", "age", "phone", "sex", "psd"};//设置要查询的表,以及查询的条件RdbPredicates rdbPredicates = new RdbPredicates(tableName);for (Map.Entry<String, Object> e : map.entrySet()) {rdbPredicates.equalTo(e.getKey(), (String) e.getValue());}ResultSet resultSet = rs.query(rdbPredicates, columns);if (resultSet.goToNextRow())is = true;return is;}在DBUtils工具类中定义执行插入数据的操作方法
//添加public long insert(String tableName, ValuesBucket vb) {return rs.insert(tableName, vb);}点击注册的时候进行判断验证码是否一致,或者注册信息是否全面,如果不符合要求则清空用户填写的所有数据,同时刷新验证码,重新注册,直到注册成功。注册成功后,销毁当前页面,回到上一页面,也就是登录页面,进行登录。登录成功后进入主页面。主界面效果图如下:

主界面的功能将在后面的文章中展出,感谢大家的关注和阅读。
这篇关于【鸿蒙】鸿蒙App应用-《记账软件》登录,注册,找回密码功能的文章就介绍到这儿,希望我们推荐的文章对编程师们有所帮助!


