本文主要是介绍浪漫编码:手把手教你实现校园表白墙功能,希望对大家解决编程问题提供一定的参考价值,需要的开发者们随着小编来一起学习吧!

💓 博客主页:从零开始的-CodeNinja之路
⏩ 收录文章:浪漫编码:手把手教你实现校园表白墙功能
🎉欢迎大家点赞👍评论📝收藏⭐文章


这里写目录标题
- 表白墙
- 数据准备
- 引入MyBatis和MySQL驱动依赖
- 配置MySQL账号密码
- 编写后端代码
- 测试代码
表白墙
前面的案例中,我们写了表白墙,但是⼀旦服务器重启,数据仍然会丢失.
要想数据不丢失,需要把数据存储在数据库中.接下来咱们借助MyBatis来实现数据的操作

数据准备
DROP TABLE IF EXISTS message_info;CREATE TABLE `message_info` (`id` INT ( 11 ) NOT NULL AUTO_INCREMENT,`from` VARCHAR ( 127 ) NOT NULL,`to` VARCHAR ( 127 ) NOT NULL,`message` VARCHAR ( 256 ) NOT NULL,`delete_flag` TINYINT ( 4 ) DEFAULT 0 COMMENT '0-正常, 1-删除',`create_time` DATETIME DEFAULT now(),`update_time` DATETIME DEFAULT now() ON UPDATE now(),PRIMARY KEY ( `id` )
) ENGINE = INNODB DEFAULT CHARSET = utf8mb4;
ONUPDATEnow():当数据发生更新操作时,自动把该列的值设置为now(),
now()可以替换成其他获取时间的标识符,⽐如:CURRENT_TIMESTAMP(),LOCALTIME()等MySQL<5.6.5
- 只有TIMESTAMP⽀持自动更新
- ⼀个表只能有⼀列设置自动更新
- 不允许同时存在两个列,其中⼀列设置了DEFAULTCURRENT_TIMESTAMP,]
- TIMESTAMP和DATETIME都⽀持自动更新,且可以有多列
引入MyBatis和MySQL驱动依赖
修改pom文件
<dependency><groupId>org.mybatis.spring.boot</groupId><artifactId>mybatis-spring-boot-starter</artifactId><version>3.0.3</version>
</dependency><dependency><groupId>com.mysql</groupId><artifactId>mysql-connector-j</artifactId><scope>runtime</scope>
</dependency>
或者使用插件EditStarters来引入依赖

配置MySQL账号密码
spring:datasource:url: jdbc:mysql://127.0.0.1:3306/mybatis_test?
characterEncoding=utf8&useSSL=falseusername: rootpassword: rootdriver-class-name: com.mysql.cj.jdbc.Driver
mybatis:configuration: # 配置打印 MyBatis⽇志map-underscore-to-camel-case: true #配置驼峰自动转换
编写后端代码
import lombok.Data;@Data
public class MessageInfo {private Integer id;private String from;private String to;private String message;private Integer deleteFlag;private Date createTime;private Date updateTime;
}
MessageInfoMapper
import com.example.demo.model.MessageInfo;
import org.apache.ibatis.annotations.Insert;
import org.apache.ibatis.annotations.Mapper;
import org.apache.ibatis.annotations.Select;
import java.util.List;@Mapper
public interface MessageInfoMapper {@Select("select `id`, `from`, `to`, `message` from message_info where delete_flag=0")List<MessageInfo> queryAll();@Insert("insert into message_info (`from`,`to`, `message`) values(#{from},#{to},#{message})")Integer addMessage(MessageInfo messageInfo);
}
MessageInfoService
import com.example.demo.mapper.MessageInfoMapper;
import com.example.demo.model.MessageInfo;
import org.springframework.beans.factory.annotation.Autowired;
import org.springframework.stereotype.Service;
import java.util.List;@Service
public class MessageInfoService {@Autowiredprivate MessageInfoMapper messageInfoMapper;public List<MessageInfo> queryAll() {return messageInfoMapper.queryAll();}public Integer addMessage(MessageInfo messageInfo) {return messageInfoMapper.addMessage(messageInfo);}
}
MessageController
import com.example.demo.model.MessageInfo;
import com.example.demo.service.MessageInfoService;
import org.springframework.beans.factory.annotation.Autowired;
import org.springframework.util.StringUtils;
import org.springframework.web.bind.annotation.RequestMapping;
import org.springframework.web.bind.annotation.RestController;
import java.util.List;
@RequestMapping("/message")
@RestController
public class MessageController {@Autowiredprivate MessageInfoService messageInfoService;/*** 获取留言列表* @return*/@RequestMapping("/getList")public List<MessageInfo> getList() {return messageInfoService.queryAll();}/*** 发表留言* @param messageInfo* @return*/@RequestMapping("/publish")public boolean publish(MessageInfo messageInfo) {System.out.println(messageInfo);if (StringUtils.hasLength(messageInfo.getFrom())&& StringUtils.hasLength(messageInfo.getTo())&& StringUtils.hasLength(messageInfo.getMessage())) {messageInfoService.addMessage(messageInfo);return true;}return false;}
}
测试代码
部署程序,验证服务器是否能正确响应:http://127.0.0.1:8080/messagewall.html

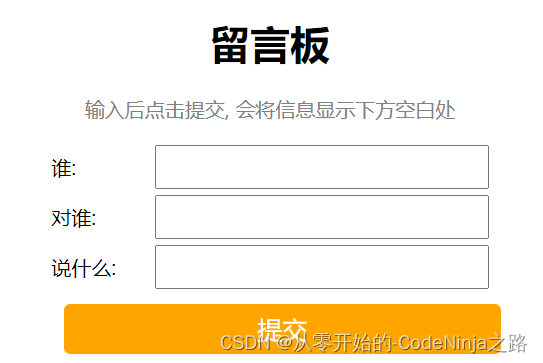
输入留言信息,点击提交,发现页面列表显示新的数据,并且数据库中也添加了⼀条记录.


重启服务,页面显示不变.
这篇关于浪漫编码:手把手教你实现校园表白墙功能的文章就介绍到这儿,希望我们推荐的文章对编程师们有所帮助!


