本文主要是介绍SpringBoot3.0新特性尝鲜,秒启动的快感!熟悉SpringAOT与RuntimeHints,希望对大家解决编程问题提供一定的参考价值,需要的开发者们随着小编来一起学习吧!
文章目录
- 一、前置知识
- 1、官网
- 2、安装GraalVM
- 3、GraalVM的限制
- 4、安装maven
- 5、背景
- 二、打包SpringBoot3.0
- 1、项目准备
- 2、打包
- 3、打包成docker
- 三、认识AOT
- 1、RuntimeHints
- 2、RuntimeHintsRegistrar
- 3、@RegisterReflectionForBinding
- 4、@ImportRuntimeHints
- 5、使用JDK动态代理也需要配置
- 6、@Reflective
- 四、AOT的原理
- 参考资料
一、前置知识
1、官网
Spring6.0新特性:https://github.com/spring-projects/spring-framework/wiki/What%27s-New-in-Spring-Framework-6.x
SpringBoot3.0:https://docs.spring.io/spring-boot/docs/current/reference/html/
2、安装GraalVM
下载地址:https://github.com/graalvm/graalvm-ce-builds/releases
按照jdk版本下载GraalVM。SpringBoot3.0必须要使用jdk17以上了。
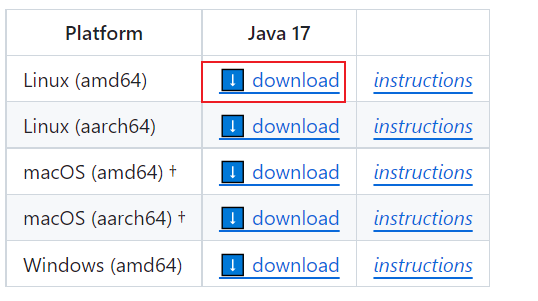
安装过程与普通的jdk安装一样。
安装成功之后,使用java -version,可以看到VM是GraalVM了。

3、GraalVM的限制
GraalVM在编译成二进制可执行文件时,需要确定该应用到底用到了哪些类、哪些方法、哪些属性,从而把这些代码编译为机器指令(也就是exe文件)。但是我们一个应用中某些类可能是动态生成的,也就是应用运行后才生成的,为了解决这个问题,GraalVM提供了配置的方式,比如我们可以在编译时告诉GraalVM哪些方法会被反射调用,比如我们可以通过reflect-config.json来进行配置。
4、安装maven
略,注意配置阿里云加速。
5、背景
为了应对Serverless大环境,使Springboot项目快速启动,所以才会推出AOT与直接编译为字节码的功能。
因为Java程序运行,需要启动虚拟机,然后由虚拟机将class字节码文件编译为机器指令,所以启动过程比较慢。
而如果像C语言那样,直接编译为机器指令,会大大提高启动速度,但是会丢失Java反射、动态代理等功能(有解决方案-RuntimeHints)。
而且Springboot3.0-AOT更是将Bean扫描阶段提前到了编译器,而不是启动期间进行扫描,大大提高了启动速度。
二、打包SpringBoot3.0
1、项目准备
<parent><groupId>org.springframework.boot</groupId><artifactId>spring-boot-starter-parent</artifactId><version>3.2.5</version><relativePath/> <!-- lookup parent from repository --></parent><dependencies><dependency><groupId>org.springframework.boot</groupId><artifactId>spring-boot-starter-web</artifactId></dependency><dependency><groupId>org.springframework.boot</groupId><artifactId>spring-boot-starter-test</artifactId><scope>test</scope></dependency></dependencies><build><plugins><plugin><groupId>org.graalvm.buildtools</groupId><artifactId>native-maven-plugin</artifactId></plugin><plugin><groupId>org.springframework.boot</groupId><artifactId>spring-boot-maven-plugin</artifactId></plugin></plugins></build>
import org.springframework.boot.SpringApplication;
import org.springframework.boot.autoconfigure.SpringBootApplication;@SpringBootApplication
public class DemoApplication {public static void main(String[] args) {SpringApplication.run(DemoApplication.class, args);}}import org.springframework.web.bind.annotation.GetMapping;
import org.springframework.web.bind.annotation.RestController;@RestController
public class Controller {@GetMapping("/demo1")public String demo1() {return "hello world";}
}
2、打包
# 注意需要使用GraalVM环境,需要有C语言环境 ,最好使用linux系统
mvn -Pnative native:compile
打包过程会久一些。
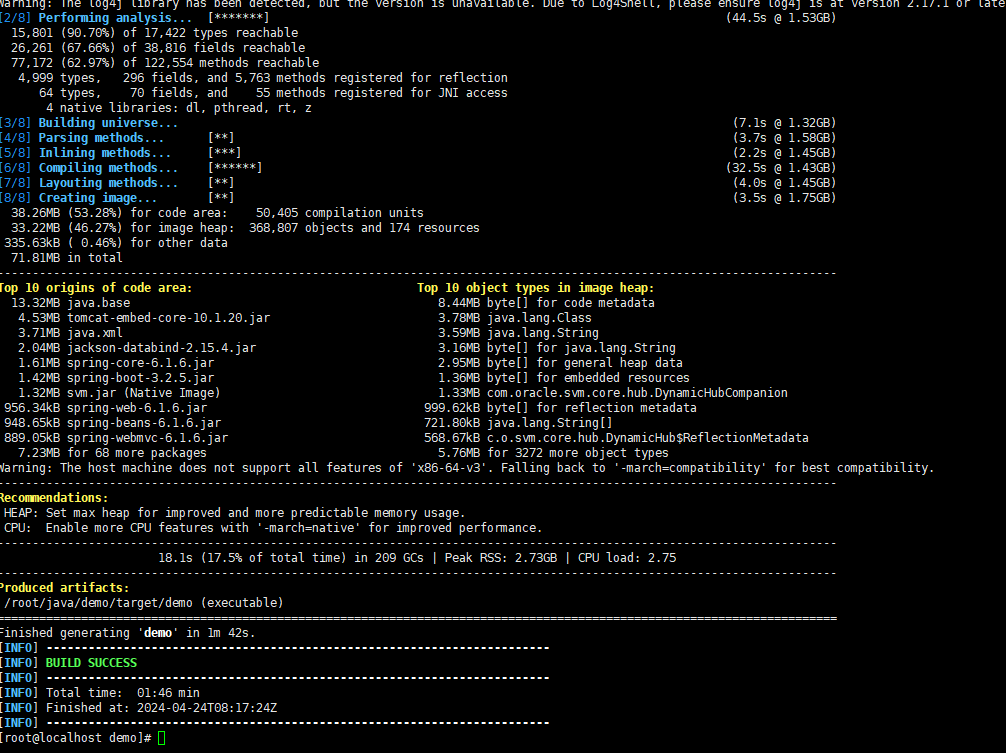
会将可执行文件、jar包都打出来:

运行demo:仅仅几十毫秒就能启动!!!

使用jar包运行:很明显会慢很多!!

3、打包成docker
# 打包成docker
mvn -Pnative spring-boot:build-imagedocker run --rm -p 8080:8080 demo# 如果要传参数,可以通过-e
docker run --rm -p 8080:8080 -e methodName=test demo
# 不过代码中,得通过以下代码获取:
String methodName = System.getenv("methodName")
#也可以使用Environment获取,注入Environment
environment.getProperty("methodName");
注意,打包的过程会下载java环境镜像,比较慢。

仅仅几十毫秒就可以启动一个简单的Springboot项目!
三、认识AOT
1、RuntimeHints
假设以下代码:
@Component
public class UserService {public String test(){String result = "";try {Method test = MyService.class.getMethod("test", null);result = (String) test.invoke(MyService.class.newInstance(), null);} catch (NoSuchMethodException e) {throw new RuntimeException(e);} catch (InvocationTargetException e) {throw new RuntimeException(e);} catch (IllegalAccessException e) {throw new RuntimeException(e);} catch (InstantiationException e) {throw new RuntimeException(e);}return result;}
}
在MyService中,通过反射的方式使用到了MyService的无参构造方法(MyService.class.newInstance()),如果我们不做任何处理,那么打成二进制可执行文件后是运行不了的,可执行文件中是没有MyService的无参构造方法的,会报方法找不到的错误。
我们可以使用Spring提供的Runtime Hints机制来间接的配置reflect-config.json。
2、RuntimeHintsRegistrar
提供一个RuntimeHintsRegistrar接口的实现类,并导入到Spring容器中就可以了:
@Component
@ImportRuntimeHints(UserService.MyServiceRuntimeHints.class)
public class UserService {public String test(){String result = "";try {Method test = MyService.class.getMethod("test", null);result = (String) test.invoke(MyService.class.newInstance(), null);} catch (NoSuchMethodException e) {throw new RuntimeException(e);} catch (InvocationTargetException e) {throw new RuntimeException(e);} catch (IllegalAccessException e) {throw new RuntimeException(e);} catch (InstantiationException e) {throw new RuntimeException(e);}return result;}static class MyServiceRuntimeHints implements RuntimeHintsRegistrar {@Overridepublic void registerHints(RuntimeHints hints, ClassLoader classLoader) {try {hints.reflection().registerConstructor(MyService.class.getConstructor(), ExecutableMode.INVOKE);} catch (NoSuchMethodException e) {throw new RuntimeException(e);}}}
}
3、@RegisterReflectionForBinding
// 该类的所有方法都会编译为机器码
@RegisterReflectionForBinding(MyService.class)
public String test(){String result = "";try {Method test = MyService.class.getMethod("test", null);result = (String) test.invoke(MyService.class.newInstance(), null);} catch (NoSuchMethodException e) {throw new RuntimeException(e);} catch (InvocationTargetException e) {throw new RuntimeException(e);} catch (IllegalAccessException e) {throw new RuntimeException(e);} catch (InstantiationException e) {throw new RuntimeException(e);}return result;
}
4、@ImportRuntimeHints
注意
如果代码中的methodName是通过参数获取的,那么GraalVM在编译时就不能知道到底会使用到哪个方法,那么test方法也要利用RuntimeHints来进行配置。
@Component
@ImportRuntimeHints(MyService.MyServiceRuntimeHints.class)
public class UserService {public String test(){String methodName = System.getProperty("methodName");String result = "";try {Method test = MyService.class.getMethod(methodName, null);result = (String) test.invoke(MyService.class.newInstance(), null);} catch (NoSuchMethodException e) {throw new RuntimeException(e);} catch (InvocationTargetException e) {throw new RuntimeException(e);} catch (IllegalAccessException e) {throw new RuntimeException(e);} catch (InstantiationException e) {throw new RuntimeException(e);}return result;}static class MyServiceRuntimeHints implements RuntimeHintsRegistrar {@Overridepublic void registerHints(RuntimeHints hints, ClassLoader classLoader) {try {hints.reflection().registerConstructor(MyService.class.getConstructor(), ExecutableMode.INVOKE);hints.reflection().registerMethod(MyService.class.getMethod("test"), ExecutableMode.INVOKE);} catch (NoSuchMethodException e) {throw new RuntimeException(e);}}}
}
5、使用JDK动态代理也需要配置
public String test() throws ClassNotFoundException {String className = System.getProperty("className");Class<?> aClass = Class.forName(className);Object o = Proxy.newProxyInstance(UserService.class.getClassLoader(), new Class[]{aClass}, new InvocationHandler() {@Overridepublic Object invoke(Object proxy, Method method, Object[] args) throws Throwable {return method.getName();}});return o.toString();
}
也可以利用RuntimeHints来进行配置要代理的接口:
public void registerHints(RuntimeHints hints, ClassLoader classLoader) {hints.proxies().registerJdkProxy(UserInterface.class);
}
6、@Reflective
对于反射用到的地方,我们可以直接加一个@Reflective,前提是MyService得是一个Bean:
@Component
public class MyService{@Reflectivepublic MyService() {}@Reflectivepublic String test(){return "hello";}
}
以上Spring6提供的RuntimeHints机制,我们可以使用该机制更方便的告诉GraalVM我们额外用到了哪些类、接口、方法等信息,最终Spring会生成对应的reflect-config.json、proxy-config.json中的内容,GraalVM就知道了。
四、AOT的原理
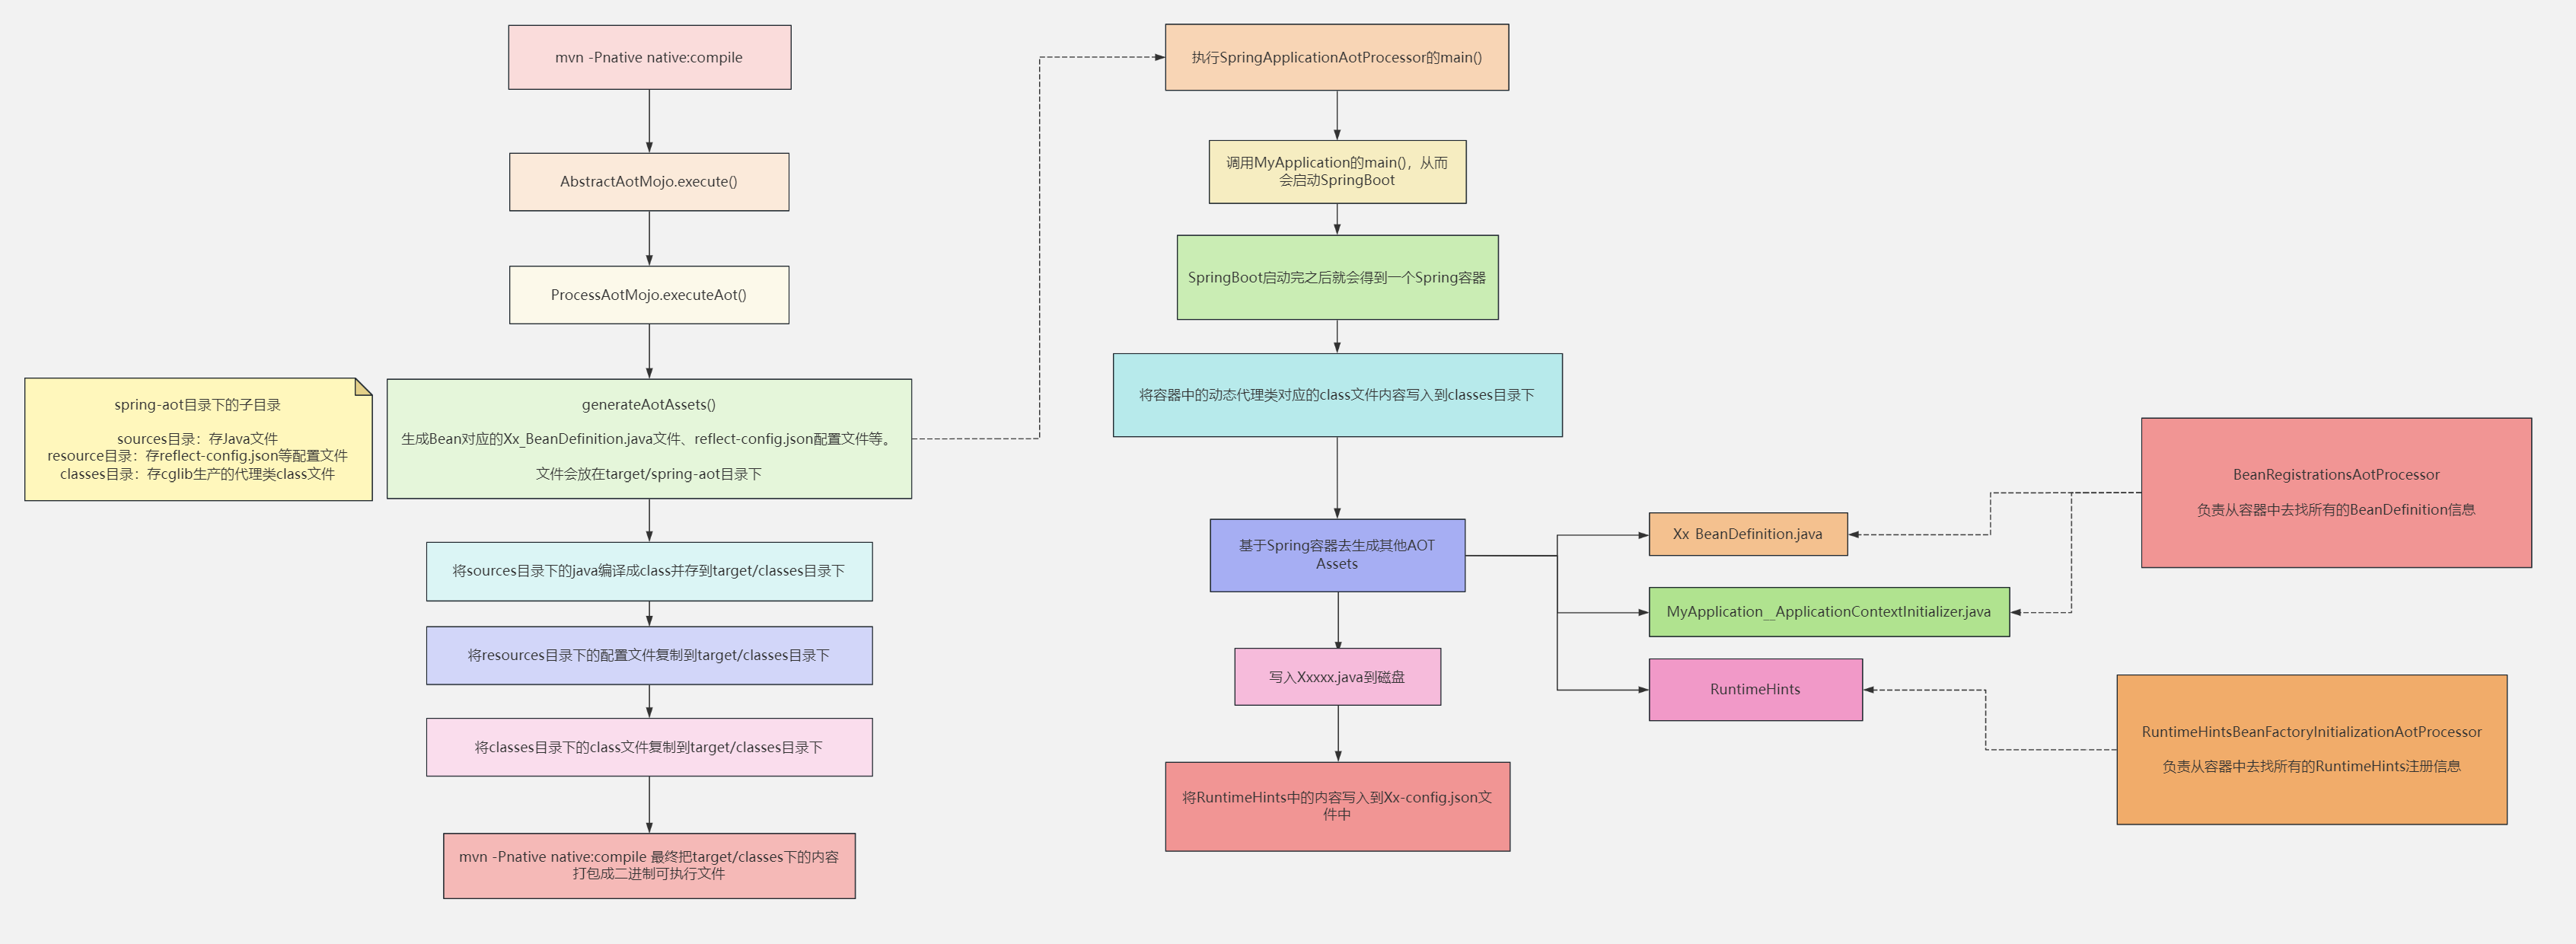
1、插件执行逻辑
我们执行mvn -Pnative native:compile时,实际上执行的是插件native-maven-plugin的逻辑。
会先编译我们自己的java代码,然后执行ProcessAotMojo.executeAot()方法(会生成一些Java文件并编译成class文件,以及GraalVM的配置文件),然后才执行利用GraalVM打包出二进制可执行文件。
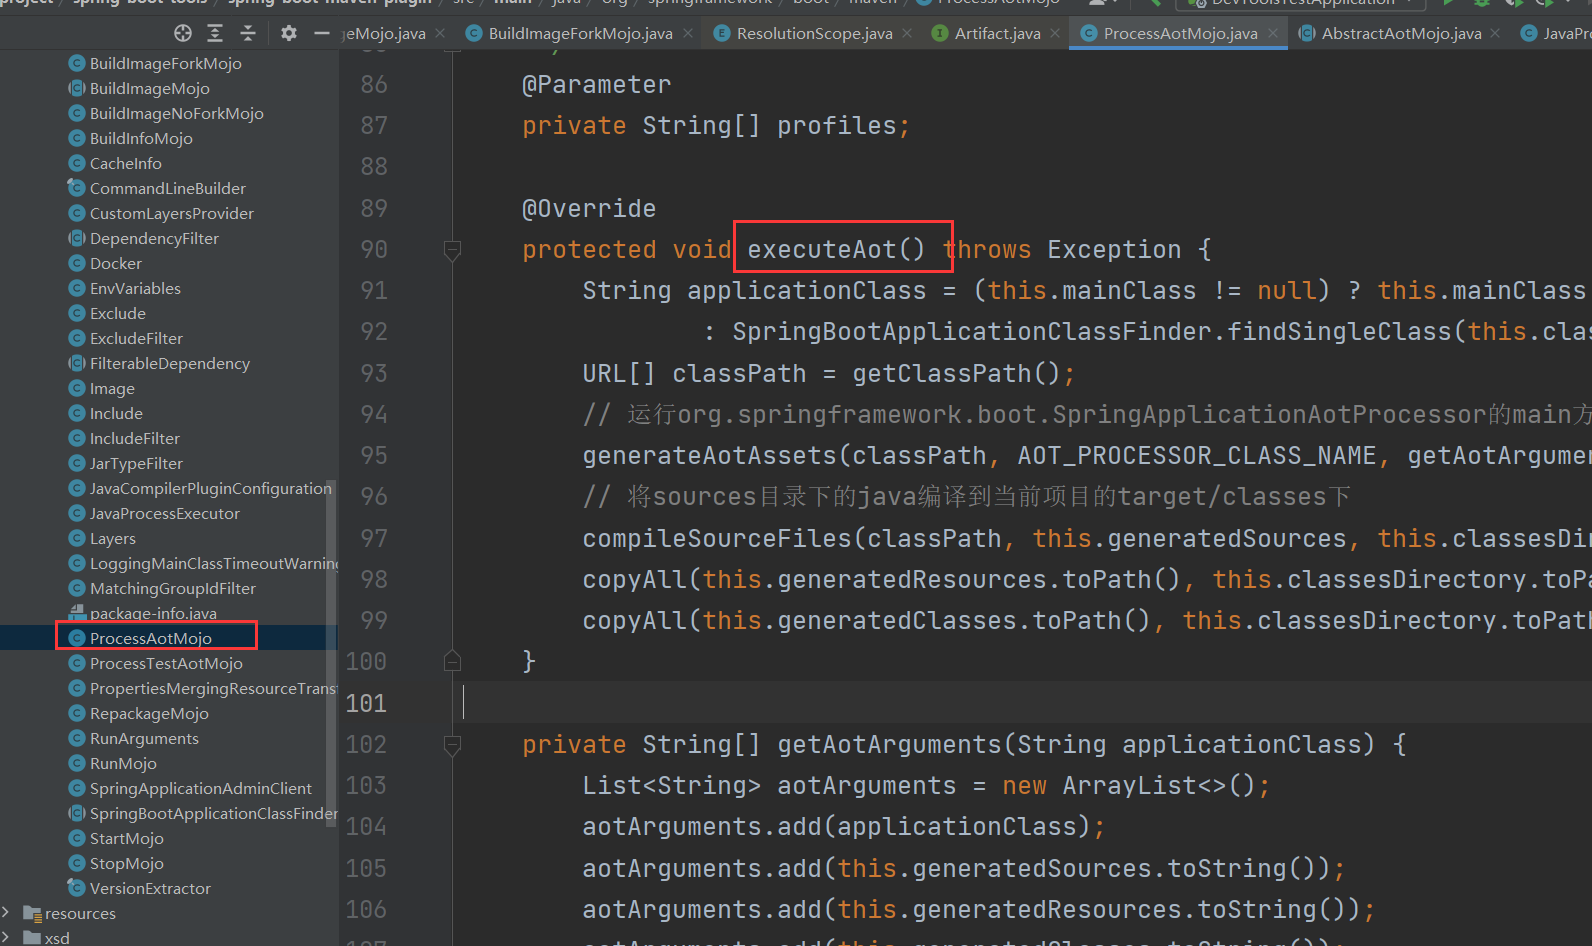
maven插件在编译的时候,就会调用到executeAot()这个方法,这个方法会:
- 先执行org.springframework.boot.SpringApplicationAotProcessor的main方法
- 从而执行SpringApplicationAotProcessor的process()
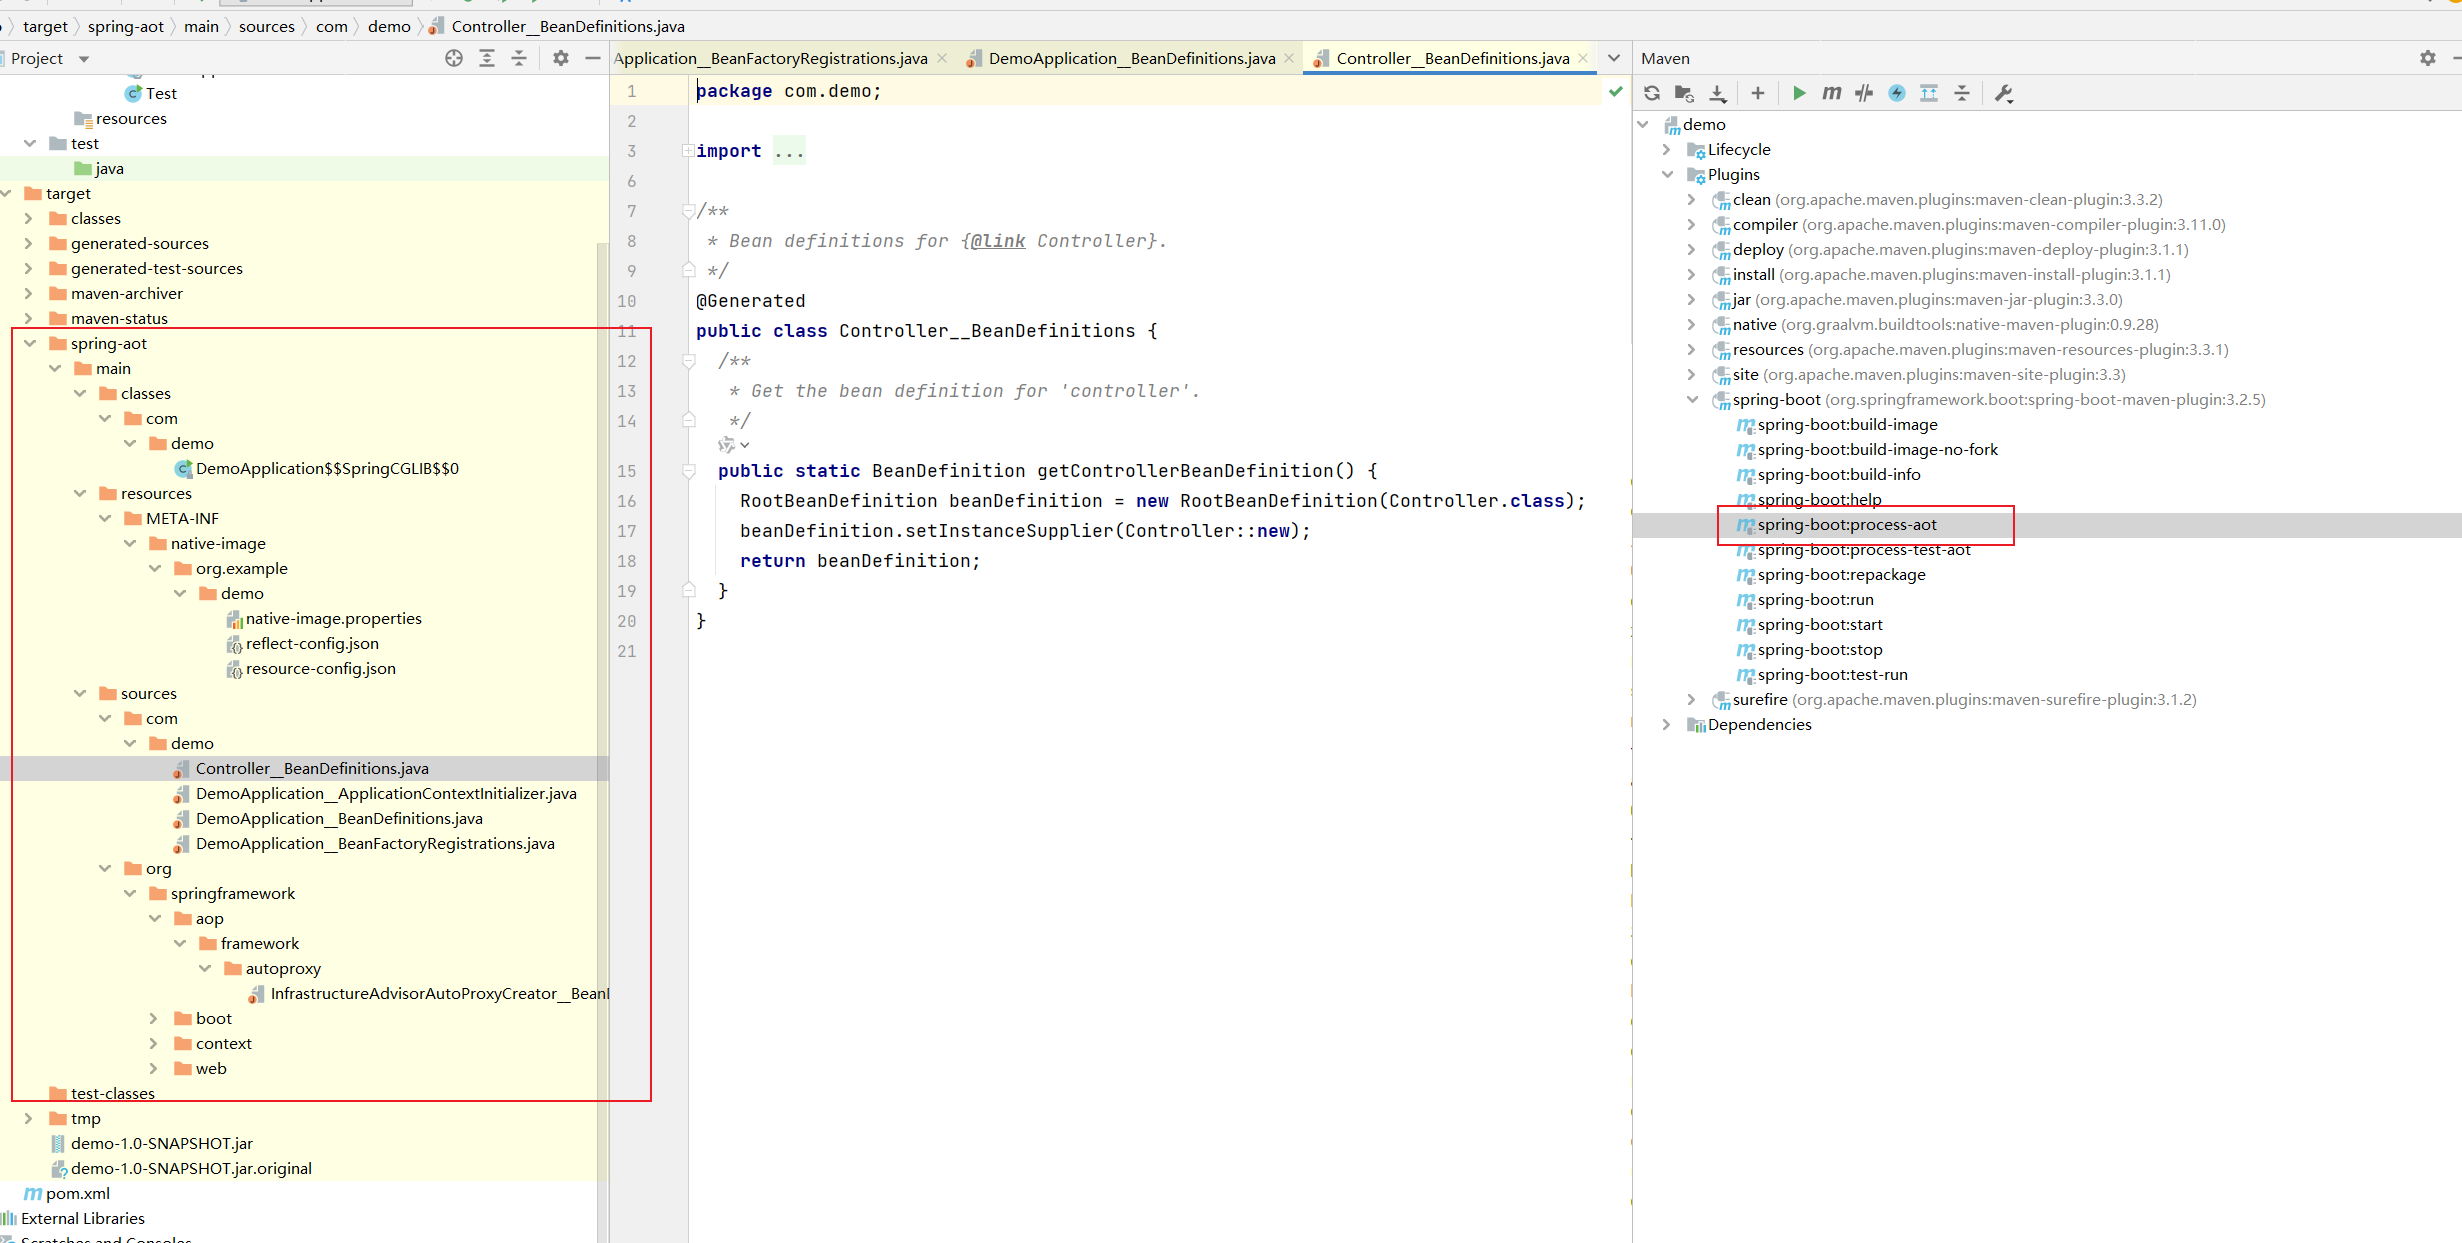
- 从而执行ContextAotProcessor的doProcess(),从而会生成一些Java类并放在spring-aot/main/sources目录下,详情看后文
- 然后把生成在spring-aot/main/sources目录下的Java类进行编译,并把对应class文件放在项目的编译目录下target/classes
- 然后把spring-aot/main/resources目录下的graalvm配置文件复制到target/classes
- 然后把spring-aot/main/classes目录下生成的class文件复制到target/classes
2、AOT生成的类
AOT会提前启动Spring容器,并执行Bean扫描的过程,将这个过程产生的所有BeanDefinition提前生成为Java文件,如下那样,所以,可以在编译期间通过插件生成BeanDefinition,而不是在启动期间进行扫描。
我们看一下SpringApplication.run方法:
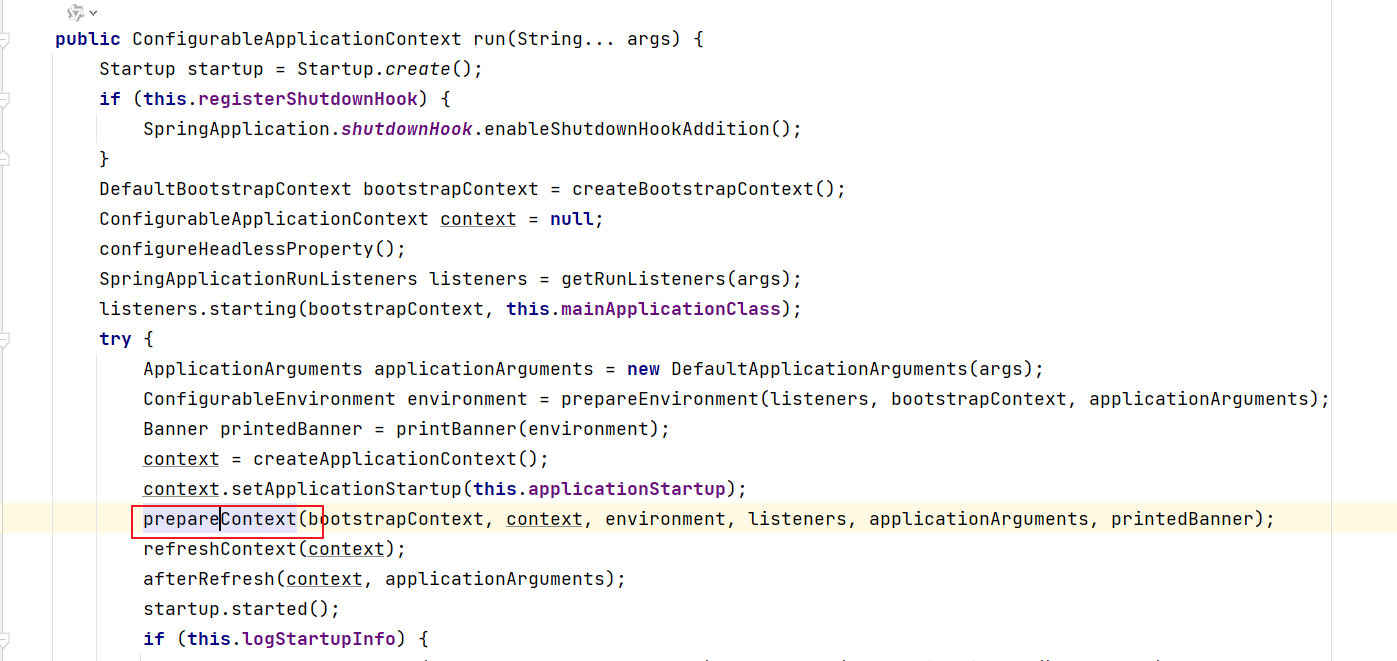
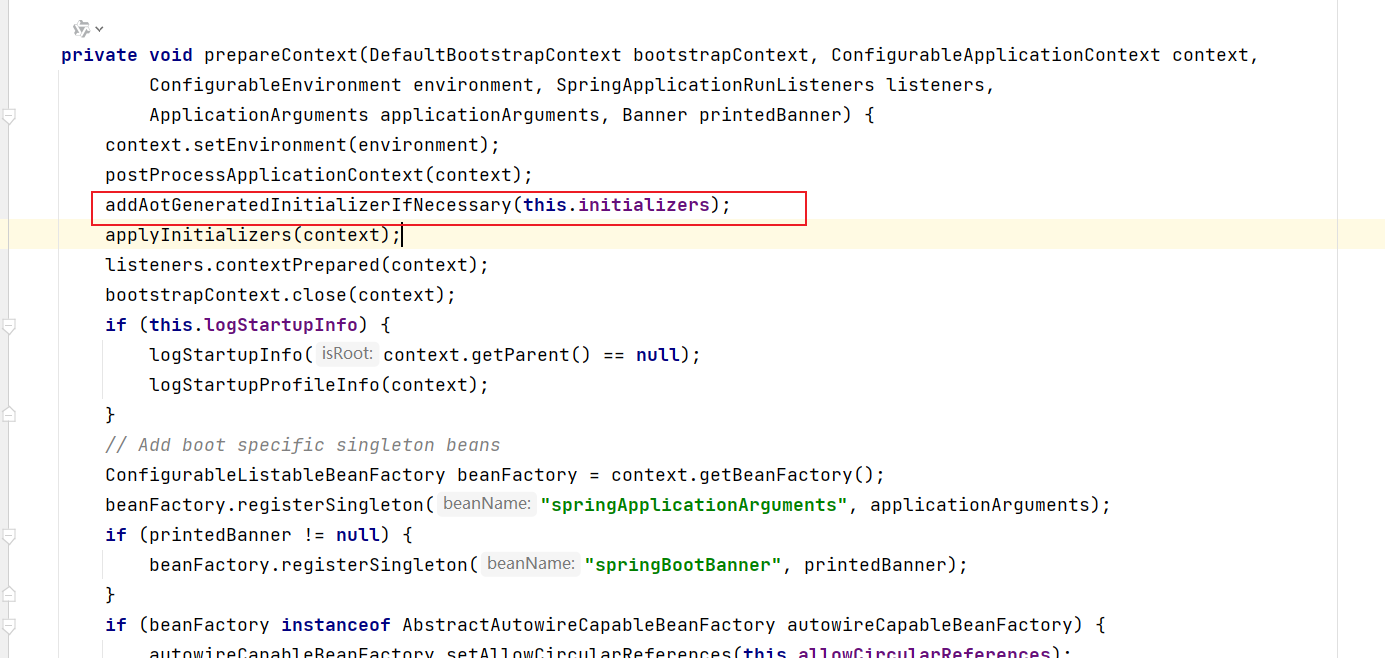
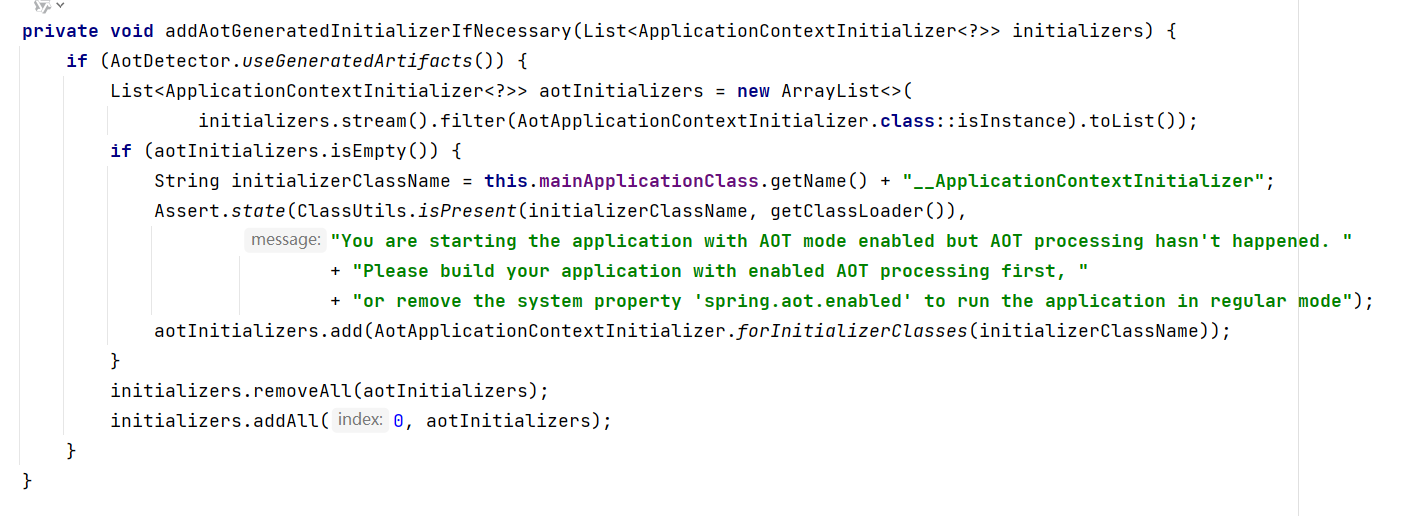
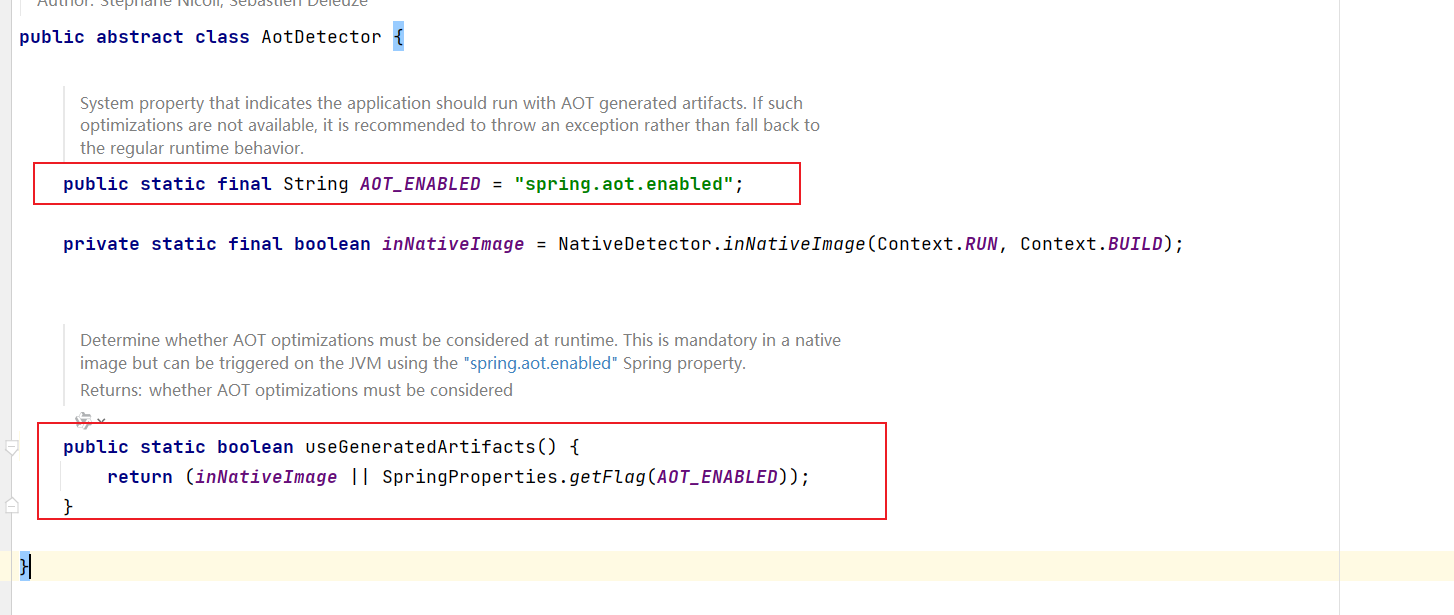
可以选择以AOT的方式运行,可以跳过Bean扫描的过程。
3、使用
一般配合GraalVM使用,如果单独使用的话,需要加上面那个参数开启AOT,并且通过插件进行打包。
4、原理图
参考资料
周瑜老师
这篇关于SpringBoot3.0新特性尝鲜,秒启动的快感!熟悉SpringAOT与RuntimeHints的文章就介绍到这儿,希望我们推荐的文章对编程师们有所帮助!


