本文主要是介绍用Nest实现对数据库的增删改查~,希望对大家解决编程问题提供一定的参考价值,需要的开发者们随着小编来一起学习吧!
概述
为了与 SQL和 NoSQL 数据库集成,Nest 提供了 @nestjs/typeorm 包。Nest 使用TypeORM是因为它是 TypeScript 中最成熟的对象关系映射器( ORM )。因为它是用 TypeScript 编写的,所以可以很好地与 Nest 框架集成。
TypeORM 提供了对许多关系数据库的支持,比如 PostgreSQL 、Oracle、Microsoft SQL Server、SQLite,甚至像 MongoDB 这样的 NoSQL 数据库。
安装插件
npm安装
npm install --save @nestjs/typeorm typeorm mysql2
或者yarn安装
yarn add @nestjs/typeorm typeorm mysql
连接数据库
forRoot() 方法支持所有TypeORM包中createConnection()函数暴露出的配置属性
| 配置字段 | 描述 |
|---|---|
type: ‘mysql’ | 数据库类型 |
host: ‘localhost’ | 连接ip |
port: 3306 | 端口 |
username: ‘root’ | 数据库连接账号 |
password: ‘123456’ | 数据库连接密码 |
database: ‘testbase’ | 要连接的数据库名(需要手动创建名为testbase数据库) |
如果找不到对应的数据库,报如下错误 | |
entities: [] | 要加载的实体 |
synchronize: true | 警告:设置 synchronize: true 不能被用于生产环境,否则您可能会丢失生产环境数据 |
app.module.ts中配置
import { Module } from '@nestjs/common';
import { TypeOrmModule } from '@nestjs/typeorm';@Module({imports: [TypeOrmModule.forRoot({type: 'mysql',//数据库类型host: 'localhost',//连接ipport: 3306,//端口username: 'root',//数据库连接账号password: '123456',//数据库连接密码database: 'testbase',//要连接的数据库名(需要手动创建名为testbase数据库)entities: [],synchronize: true,//警告:设置 synchronize: true 不能被用于生产环境,否则您可能会丢失生产环境数据}),],controllers: [],providers: [],
})
export class AppModule { }
完整代码
以下示例为简单的用户列表增删改查接口
- 创建实体
user.entity.ts
import { Entity, Column, PrimaryGeneratedColumn } from 'typeorm';@Entity()
export class User {@PrimaryGeneratedColumn()//int类型 + 主键 + 自增长id: number;@Column()name: string;@Column({ default: '1' })//默认值为1 status: string;
}
- 创建服务
users.service.ts
import { Injectable } from '@nestjs/common';
import { InjectRepository } from '@nestjs/typeorm';
import { Repository } from 'typeorm';
import { User } from './user.entity';@Injectable()
export class UsersService {constructor(@InjectRepository(User)private usersRepository: Repository<User>,) {}// 定义方法供路由调用findAll() {return this.usersRepository.find();}// 定义方法供路由调用add(user: User) {return this.usersRepository.insert(user)}// 定义方法供路由调用update(user: User) {return this.usersRepository.update(user.id, user)}// 定义方法供路由调用remove(id: any) {return this.usersRepository.remove(id)}}
- 创建控制器
users.controller.ts
import { Controller, Get, Post, Body, Delete, Put } from '@nestjs/common';
import { UsersService } from './users.service';
import { User } from './user.entity';@Controller('user')
export class UsersController {// 将UsersService服务注入到userService属性中constructor(private userService: UsersService) {}// 获取列表@Get('list')// [Get请求] 路由:/user/listfindAll() {// 使用userService的findAll方法return this.userService.findAll()}// 插入数据@Post('add')// [Post请求] 路由:/user/addasync findOne(@Body() param: User) {// 使用userService的add方法return this.userService.add(param)}// 修改数据@Put('update')// [Put请求] 路由:/user/updateasync updateOne(@Body() param: User){// 使用userService的update方法return this.userService.update(param)}// 删除数据@Delete('remove')// [Delete请求] 路由:/user/removeasync remove(@Body() id:any) {// 使用userService的remove方法return this.userService.remove(id)}}
- 创建user模块(引入实体
entity、服务service、控制器controller)
user.module.ts
import { Module } from '@nestjs/common';
import { TypeOrmModule } from '@nestjs/typeorm';
import { UsersService } from './users.service';
import { UsersController } from './users.controller';
import { User } from './user.entity';@Module({imports: [TypeOrmModule.forFeature([User])],//引入实体providers: [UsersService],//引入服务controllers: [UsersController],//引入控制器
})
export class UsersModule {}- 主模块中引入user模块
app.module.ts
import { Module } from '@nestjs/common';
import { TypeOrmModule } from '@nestjs/typeorm';
import { UsersModule } from './user/user.module';
import { User } from './user/user.entity';@Module({imports: [TypeOrmModule.forRoot({type: 'mysql',//数据库类型host: 'localhost',//连接ipport: 3306,//端口username: 'root',//数据库连接账号password: '123456',//数据库连接密码database: 'testbase',//要连接的数据库名(需要手动创建名为testbase数据库)entities: [User],//加载的实体(User对应表名是user,表不存在时会自动创建表)synchronize: true,//警告:设置 synchronize: true 不能被用于生产环境,否则您可能会丢失生产环境数据}),UsersModule//引入user模块],controllers: [],providers: [],
})
export class AppModule { }
接口测试
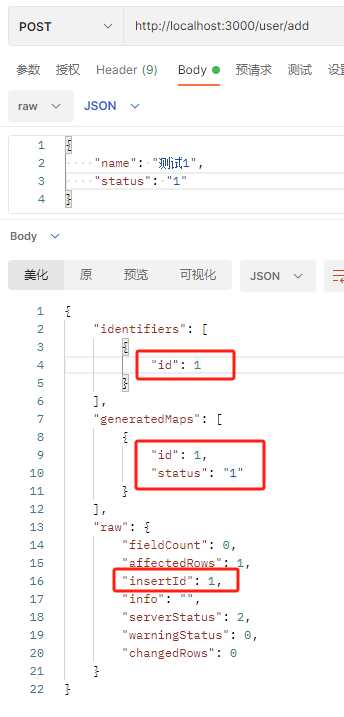
1. 新增测试
图中可以看到响应结果中看到新增的数据,和该数据的id
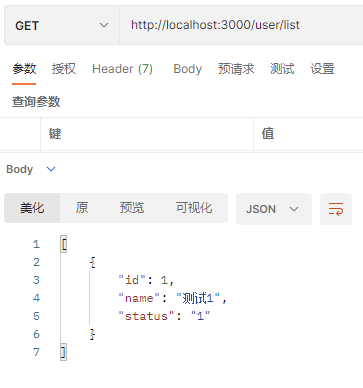
查询可以看到数据新增成功了
多插入几条数据
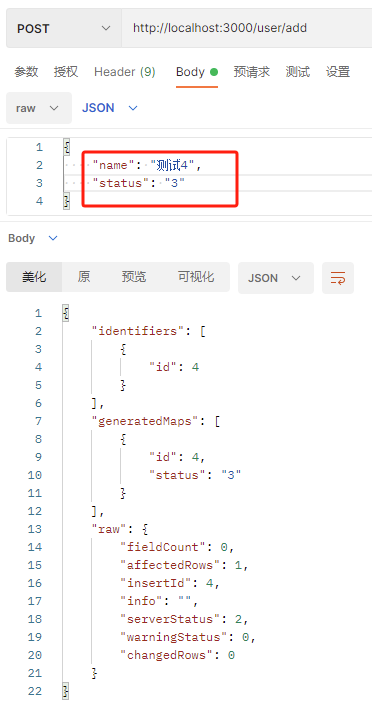
再次查询,数据也变多了

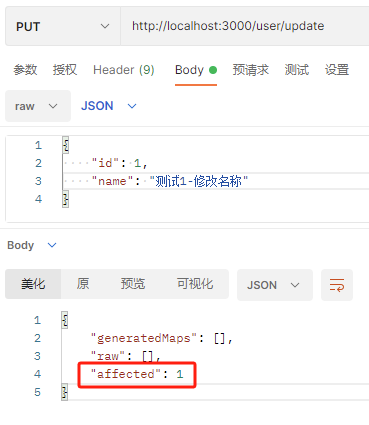
2. 编辑测试
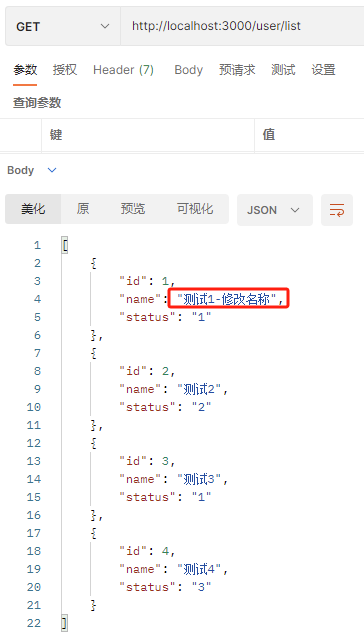
在原有的4条数据的基础上,编辑一条id为1的数据
响应结果中affected表示受影响的条数为1
再次查询可以看到id为1的数据被成功修改了
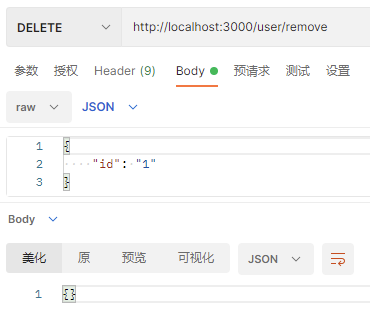
3. 删除测试
删除一个id为1的数据(重复删除id为1的数据不会报错,只是没有任何作用)
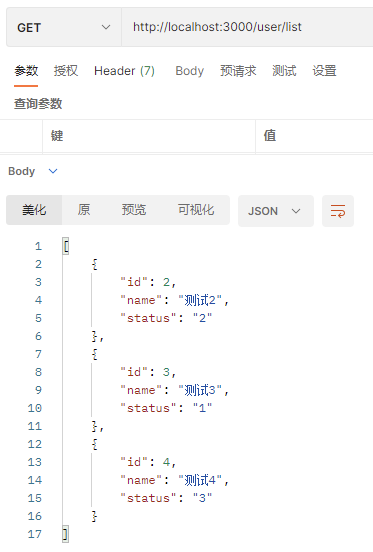
再次查询后,id为1的数据消失了
这篇关于用Nest实现对数据库的增删改查~的文章就介绍到这儿,希望我们推荐的文章对编程师们有所帮助!


