本文主要是介绍Android中使用 MediaExtractor 和 MediaMuxer解析、封装 mp4 文件,希望对大家解决编程问题提供一定的参考价值,需要的开发者们随着小编来一起学习吧!
最近开始学习Android下的封装和解封装技术,熟悉MediaExtractor和MediaMuxer的使用。
1、MainActivity.java文件:
package com.example.tongjiangsong.mediaextractmuxer;import android.support.v7.app.AppCompatActivity;
import android.os.Bundle;
import android.view.View;
import android.widget.Button;public class MainActivity extends AppCompatActivity {private Button button;@Overrideprotected void onCreate(Bundle savedInstanceState) {super.onCreate(savedInstanceState);setContentView(R.layout.activity_main);button = (Button)findViewById(R.id.button);button.setOnClickListener(new View.OnClickListener() {@Overridepublic void onClick(View v) {new ExtractorMuxerThread().start();}});}
}
2、ExtractorMuxerThread.java文件:
package com.example.tongjiangsong.mediaextractmuxer;import android.media.MediaCodec;
import android.media.MediaExtractor;
import android.media.MediaFormat;
import android.media.MediaMuxer;
import android.os.Environment;
import android.widget.Toast;import java.io.IOException;
import java.nio.ByteBuffer;
import android.view.View;public class ExtractorMuxerThread extends Thread {@Overridepublic void run() {super.run();mixer();}public void mixer() {MediaExtractor videoExtractor = null;MediaExtractor audioExtractor = null;MediaMuxer mixMediaMuxer = null;String outputVideoFilePath = Environment.getExternalStorageDirectory().getAbsolutePath()+"/people.mp4";String outputAudioFilePath = Environment.getExternalStorageDirectory().getAbsolutePath()+"/qishi.aac";String outputFilePath = Environment.getExternalStorageDirectory().getAbsolutePath()+"/mixer.mp4";try {videoExtractor = new MediaExtractor();videoExtractor.setDataSource(outputVideoFilePath);int videoIndex = -1;MediaFormat videoTrackFormat = null;int trackCount = videoExtractor.getTrackCount();for (int i = 0; i < trackCount; i++) {videoTrackFormat = videoExtractor.getTrackFormat(i);if (videoTrackFormat.getString(MediaFormat.KEY_MIME).startsWith("video/")) {videoIndex = i;break;}}audioExtractor = new MediaExtractor();audioExtractor.setDataSource(outputAudioFilePath);int audioIndex = -1;MediaFormat audioTrackFormat = null;trackCount = audioExtractor.getTrackCount();for (int i = 0; i < trackCount; i++) {audioTrackFormat = audioExtractor.getTrackFormat(i);if (audioTrackFormat.getString(MediaFormat.KEY_MIME).startsWith("audio/")) {audioIndex = i;break;}}videoExtractor.selectTrack(videoIndex);audioExtractor.selectTrack(audioIndex);MediaCodec.BufferInfo videoBufferInfo = new MediaCodec.BufferInfo();MediaCodec.BufferInfo audioBufferInfo = new MediaCodec.BufferInfo();mixMediaMuxer = new MediaMuxer(outputFilePath, MediaMuxer.OutputFormat.MUXER_OUTPUT_MPEG_4);int videoTrackIndex = mixMediaMuxer.addTrack(videoTrackFormat);int audioTrackIndex = mixMediaMuxer.addTrack(audioTrackFormat);mixMediaMuxer.start();ByteBuffer byteBuffer = ByteBuffer.allocate(1024 * 1024);long videotime;long audiotime;{videoExtractor.readSampleData(byteBuffer, 0);if (videoExtractor.getSampleFlags() == MediaExtractor.SAMPLE_FLAG_SYNC) {videoExtractor.advance();}videoExtractor.readSampleData(byteBuffer, 0);long sampleTime = videoExtractor.getSampleTime();videoExtractor.advance();videoExtractor.readSampleData(byteBuffer, 0);long sampleTime1 = videoExtractor.getSampleTime();videoExtractor.advance();videotime = Math.abs(sampleTime - sampleTime1);}{audioExtractor.readSampleData(byteBuffer, 0);if (audioExtractor.getSampleFlags() == MediaExtractor.SAMPLE_FLAG_SYNC) {audioExtractor.advance();}audioExtractor.readSampleData(byteBuffer, 0);long sampleTime = audioExtractor.getSampleTime();audioExtractor.advance();audioExtractor.readSampleData(byteBuffer, 0);long sampleTime1 = audioExtractor.getSampleTime();audioExtractor.advance();audiotime = Math.abs(sampleTime - sampleTime1);}videoExtractor.unselectTrack(videoIndex);videoExtractor.selectTrack(videoIndex);while (true) {int data = videoExtractor.readSampleData(byteBuffer, 0);if (data < 0) {break;}videoBufferInfo.size = data;videoBufferInfo.presentationTimeUs += videotime;videoBufferInfo.offset = 0;videoBufferInfo.flags = videoExtractor.getSampleFlags();mixMediaMuxer.writeSampleData(videoTrackIndex, byteBuffer, videoBufferInfo);videoExtractor.advance();}while (true) {int data = audioExtractor.readSampleData(byteBuffer, 0);if (data < 0) {break;}audioBufferInfo.size = data;audioBufferInfo.presentationTimeUs += audiotime;audioBufferInfo.offset = 0;audioBufferInfo.flags = audioExtractor.getSampleFlags();mixMediaMuxer.writeSampleData(audioTrackIndex, byteBuffer, audioBufferInfo);audioExtractor.advance();}} catch (IOException e) {e.printStackTrace();} finally {if (mixMediaMuxer != null) {mixMediaMuxer.stop();mixMediaMuxer.release();}if (videoExtractor != null){videoExtractor.release();}if (audioExtractor != null){audioExtractor.release();}}}
}
3、activity_main.xml文件:
<?xml version="1.0" encoding="utf-8"?>
<android.support.constraint.ConstraintLayout xmlns:android="http://schemas.android.com/apk/res/android"xmlns:app="http://schemas.android.com/apk/res-auto"xmlns:tools="http://schemas.android.com/tools"android:layout_width="match_parent"android:layout_height="match_parent"tools:context=".MainActivity"><Buttonandroid:id="@+id/button"android:layout_width="wrap_content"android:layout_height="wrap_content"android:text="解封装和封装!"app:layout_constraintBottom_toBottomOf="parent"app:layout_constraintLeft_toLeftOf="parent"app:layout_constraintRight_toRightOf="parent"app:layout_constraintTop_toTopOf="parent" /></android.support.constraint.ConstraintLayout>
4、权限:
<uses-permission android:name="android.permission.WRITE_EXTERNAL_STORAGE" />
<uses-permission android:name="android.permission.READ_EXTERNAL_STORAGE" />
5、运行结果:
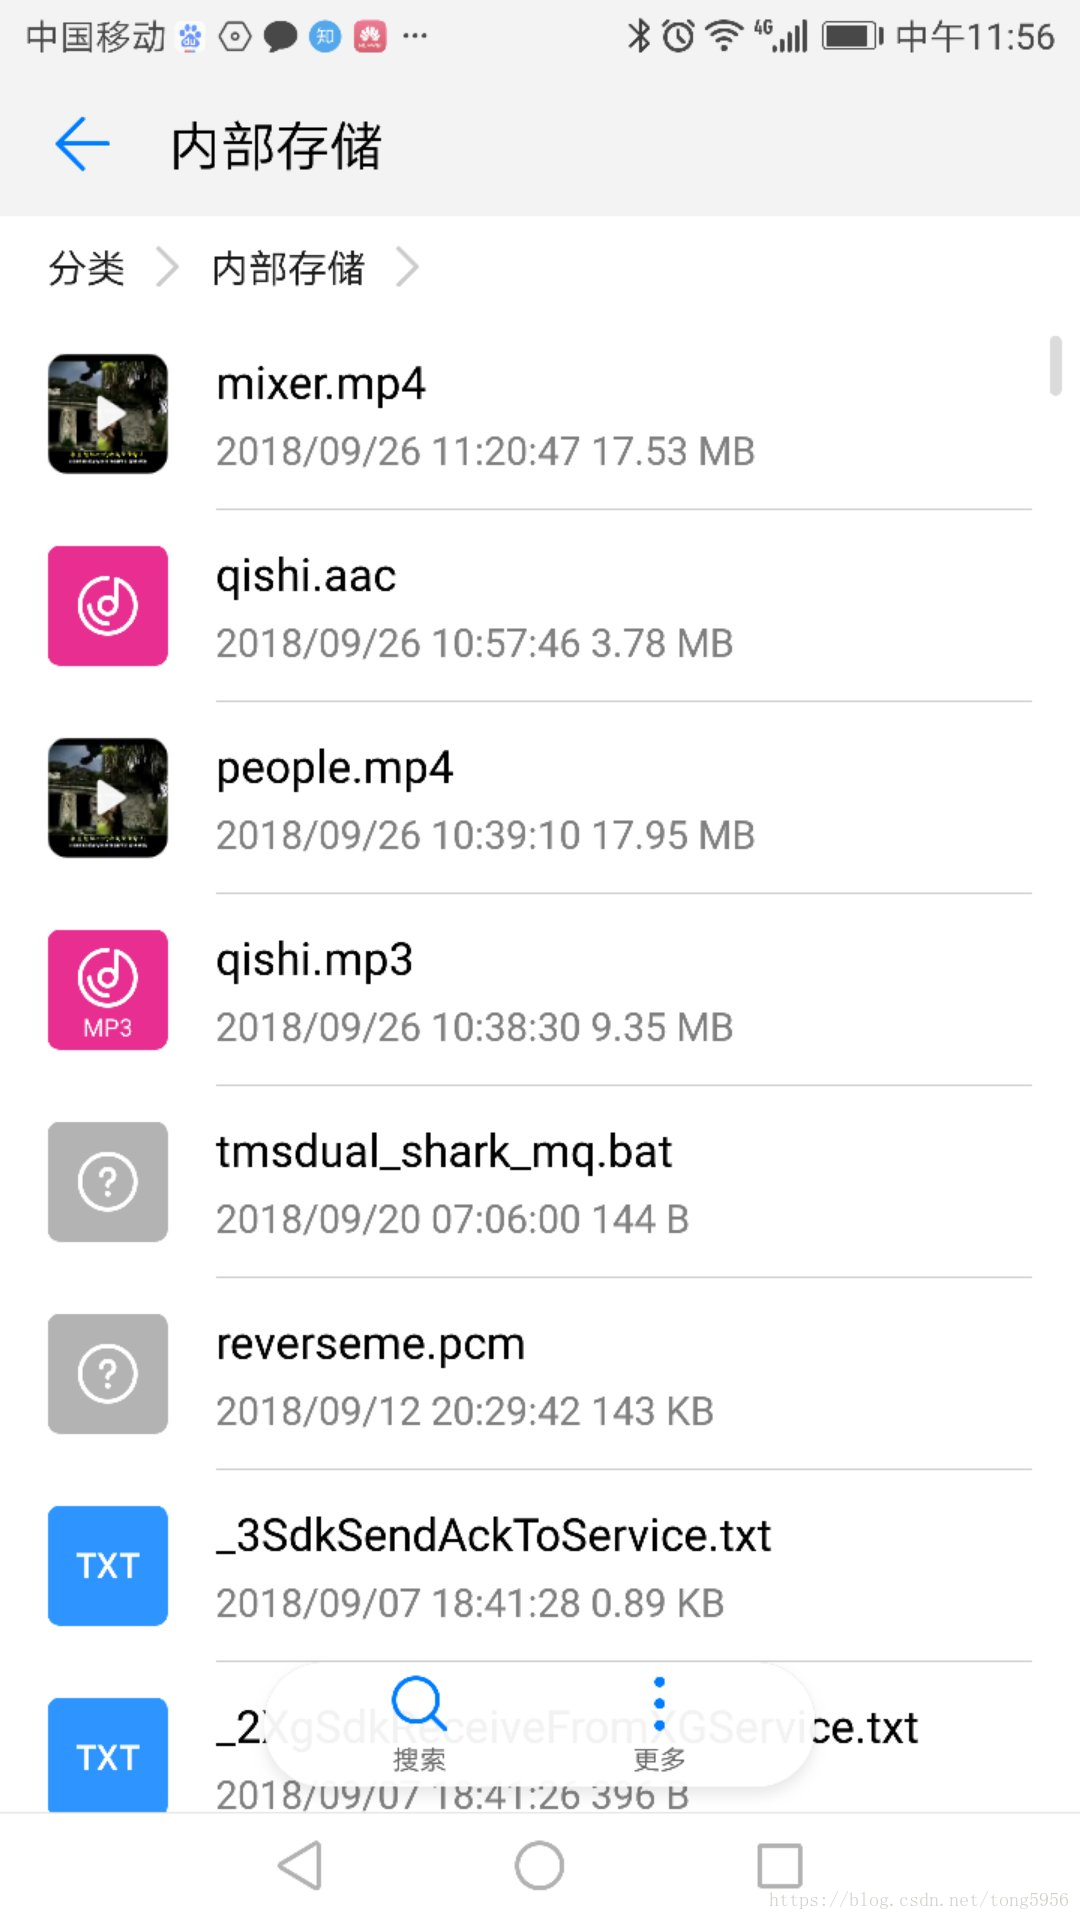
这篇关于Android中使用 MediaExtractor 和 MediaMuxer解析、封装 mp4 文件的文章就介绍到这儿,希望我们推荐的文章对编程师们有所帮助!


