本文主要是介绍Qt C++调用libssh2实现sftp传输文件,希望对大家解决编程问题提供一定的参考价值,需要的开发者们随着小编来一起学习吧!
文章目录
- 1.重点说明
- 1.1SFTP
- 1.2 FTPS
- 1.3 FTP
- 2.测试环境搭建
- 2.1 Xlight FTP工具
- 3.简单说明libssh2编译
- 3.1 windows下编译成功后得到:
- 3.2 Linux下成功编译后得到:
- 3.3 cmake输出信息参考:
- 4.直接上代码
- 调用
1.重点说明
FTP、FTPS、SFTP不要混淆,我们这里是SFTP
1.1SFTP
- SFTP(SSH File Transfer Protocol,也称 Secret File Transfer Protocol)是一种安全的文件传输协议,一种通过网络传输文件的安全方法;它确保使用私有和安全的数据流来安全地传输数据。
1.2 FTPS
- FTPS是一种对常用的文件传输协议(FTP)添加传输层安全(TLS)和安全套接层(SSL)加密协议支持的扩展协议。FTPS不应与基于SSH的SSH文件传输协议或是Secure FTP协议相混淆。
1.3 FTP
- FTP(File Transfer Protocol,文件传输协议) 是 TCP/IP 协议组中的协议之一。FTP协议包括两个组成部分,其一为FTP服务器,其二为FTP客户端。其中FTP服务器用来存储文件,用户可以使用FTP客户端通过FTP协议访问位于FTP服务器上的资源。在开发网站的时候,通常利用FTP协议把网页或程序传到Web服务器上。此外,由于FTP传输效率非常高,在网络上传输大的文件时,一般也采用该协议。
- 默认情况下FTP协议使用TCP端口中的 20和21这两个端口,其中20用于传输数据,21用于传输控制信息。但是,是否使用20作为传输数据的端口与FTP使用的传输模式有关,如果采用主动模式,那么数据传输端口就是20;如果采用被动模式,则具体最终使用哪个端口要服务器端和客户端协商决定。
2.测试环境搭建
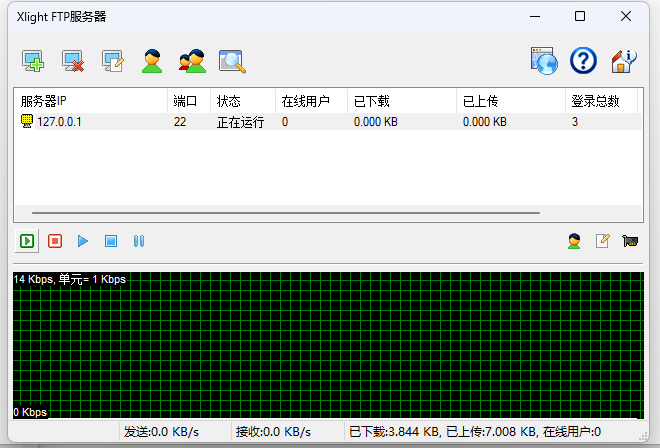
2.1 Xlight FTP工具
Xlight FTP服务器是非常容易使用的FTP服务器。 为了保证高性能,FTP服务器全部用C语言写成,服务器运行时占用很少的系统资源。它具有高效网络算法,在大量用户情况下, 可以充分利用FTP服务器带宽, 能够轻松处理数千用户的同时下载。
- 我们使用了Xlight FTP工具,具体安装和配置这里不提供!
3.简单说明libssh2编译
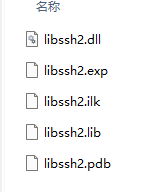
3.1 windows下编译成功后得到:
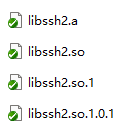
3.2 Linux下成功编译后得到:
3.3 cmake输出信息参考:
-- The following features have been enabled:* Static library, creating libssh2 static library* Shared library, creating libssh2 shared library (.so/.dll)* Crypto backend, OpenSSL-- The following OPTIONAL packages have been found:* OpenSSL* ZLIB-- The following features have been disabled:* Logging, Logging of execution with debug trace* Without deprecated APIs* Compression, using zlib for compression-- Configuring done (0.0s)
-- Generating done (0.1s)
-- Build files have been written to:
4.直接上代码
/*** SFTP download by libssh2*/#include <fcntl.h>
#include <errno.h>
#include <stdio.h>#include <ctype.h>#ifdef Q_OS_LINUX
#include <sys/socket.h>
#include <netinet/in.h>
#include <arpa/inet.h>
#include <sys/time.h>
#include <sys/types.h>
#include <unistd.h>
#else
#include <winsock2.h>
#include <Windows.h>
#endif#include "sftp_get.h"using namespace std;SftpGet::SftpGet(): m_socket(0), m_sshSession(NULL), m_sftpSession(NULL)
{
}SftpGet::~SftpGet()
{
}int SftpGet::Connect(const char* host, int port, const char* username, const char* password)
{int rc = libssh2_init(0);if (rc != 0){snprintf(m_lastError, sizeof(m_lastError), "libssh2 initialization failed: %d", rc);return rc;}m_socket = socket(AF_INET, SOCK_STREAM, 0);sockaddr_in sin;sin.sin_family = AF_INET;sin.sin_port = htons(port);sin.sin_addr.s_addr = inet_addr(host);if (::connect(m_socket, (struct sockaddr*)(&sin), sizeof(struct sockaddr_in)) != 0){snprintf(m_lastError, sizeof(m_lastError), "failed to connect!");return -1;}// Create a session instancem_sshSession = libssh2_session_init();if(!m_sshSession){snprintf(m_lastError, sizeof(m_lastError), "libssh2_session_init failed!");return -1;}// Since we have set non-blocking, tell libssh2 we are blockinglibssh2_session_set_blocking(m_sshSession, 1);rc = libssh2_session_handshake(m_sshSession, m_socket);if (rc != 0){snprintf(m_lastError, sizeof(m_lastError), "Failure establishing SSH session: %d", rc);return rc;}// const char* fingerprint =libssh2_hostkey_hash(m_sshSession, LIBSSH2_HOSTKEY_HASH_SHA1);// check what authentication methods are availableconst char* userauthlist = libssh2_userauth_list(m_sshSession, username, strlen(username));if (strstr(userauthlist, "password") == NULL){snprintf(m_lastError, sizeof(m_lastError), "Authentication by password not supported");return 1;}// authenticate via passwordif (libssh2_userauth_password(m_sshSession, username, password)){snprintf(m_lastError, sizeof(m_lastError), "Authentication by password failed");return 2;}m_sftpSession = libssh2_sftp_init(m_sshSession);if (!m_sftpSession){snprintf(m_lastError, sizeof(m_lastError), "Unable to init SFTP session");return -1;}return 0;
}int SftpGet::SFtpRead(const char* remoteFile, char* data_buf, int* data_len)
{// Request a file via SFTPLIBSSH2_SFTP_HANDLE* sftpHandle = libssh2_sftp_open(m_sftpSession, remoteFile, LIBSSH2_FXF_READ, 0);if (!sftpHandle){snprintf(m_lastError, sizeof(m_lastError), "Unable to open file with SFTP: %ld\n",libssh2_sftp_last_error(m_sftpSession));return -1;}// libssh2_sftp_open() is done, now receive data!int len = 0;while(1){if (len < *data_len){int sz = libssh2_sftp_read(sftpHandle, data_buf + len, *data_len - len);if (sz > 0){len += sz;}else{break;}}else{snprintf(m_lastError, sizeof(m_lastError), "The data buffer is too small for the file data");return 1;}}*data_len = len;libssh2_sftp_close(sftpHandle);return 0;
}int SftpGet::Download(const char* remoteFile, const char* localPath)
{// Request a file via SFTPLIBSSH2_SFTP_HANDLE* sftpHandle = libssh2_sftp_open(m_sftpSession, remoteFile, LIBSSH2_FXF_READ, 0);if (!sftpHandle){snprintf(m_lastError, sizeof(m_lastError), "Unable to open file with SFTP: %ld\n",libssh2_sftp_last_error(m_sftpSession));return -1;}// libssh2_sftp_open() is done, now receive data!FILE* fp = fopen(localPath, "w");if (!fp){snprintf(m_lastError, sizeof(m_lastError), "Fail to create file: %s", localPath);return 2;}char buf[1024];while(1){int sz = libssh2_sftp_read(sftpHandle, buf, sizeof(buf));if (sz > 0){fwrite(buf, 1, sz, fp);}else{break;}}fclose(fp);libssh2_sftp_close(sftpHandle);return 0;
}void SftpGet::Close()
{if (m_sftpSession){libssh2_sftp_shutdown(m_sftpSession);m_sftpSession = NULL;}if (m_sshSession){libssh2_session_disconnect(m_sshSession, "Shutdown");libssh2_session_free(m_sshSession);m_sshSession = NULL;}if (m_socket){::close(m_socket);m_socket = 0;}libssh2_exit();
}string SftpGet::GetLastError()
{return m_lastError;
}
调用
// 测试从SFtp,上传、下载文件
int Upload2DownloadFile_SFtp()
{SftpGet fg;int ret = fg.Connect("127.0.0.1", 22, "root", "johnshao");if (ret){std:string errmsg = fg.GetLastError();qDebug() << errmsg.c_str();return -1;}int len = 1024 * 1024;char buf[len] = { 0 };ret = fg.SFtpRead("interview/binary_find.cpp", buf, &len);if (ret){std::string errmsg = fg.GetLastError();qDebug() << errmsg.c_str();return -1;}qDebug() << buf;ret = fg.Download("interview/binary_find.cpp", "binary_find.cpp");if (ret){std::string errmsg = fg.GetLastError();qDebug() << errmsg.c_str();return -1;}return 0;
}
这篇关于Qt C++调用libssh2实现sftp传输文件的文章就介绍到这儿,希望我们推荐的文章对编程师们有所帮助!


