本文主要是介绍Linux搭建(nodejs + grunt + compass) 开发环境,希望对大家解决编程问题提供一定的参考价值,需要的开发者们随着小编来一起学习吧!
由于工作原因,需要写一些前端页面。有尝试用notepad++编辑,效率着实不高,感觉也挺low,于是网上查阅相关资料,结合一些自己的理解,动手搭建(nodejs + grunt + compass) 开发环境,从而简化提高开发效率。
工具安装
1.安装Nodejs
Grunt需要Nodejs的支持,所以我们先安装Nodejs。直接进入Nodejs官网 中根据自己的系统选择下载。我这里是Centos,所以下载的是Linux 二进制包,解压后可直接使用。
# wget https://nodejs.org/dist/v10.9.0/node-v10.9.0-linux-x64.tar.xz    // 下载
# tar -xvf  node-v10.9.0-linux-x64.tar.xz -C    /usr/local     // 解压
# cd  /usr/local/node-v10.9.0-linux-x64/                  // 进入解压目录
# ./bin/node -v                               // 执行node命令 查看版本
v10.9.0
添加用户环境变量,cd到用户家目录:
# vim .bash_profile
# export PATH=$PATH:/usr/local/node-v10.9.0-linux-x64//bin
# source .bash_profile
配置国内npm镜像
# npm config set registry http://registry.npm.taobao.org/
2.安装grunt
通过npm安装grunt命令:
# npm install grunt-cli -g
3.安装Sass和Compass
Compass是Sass的样式框架,SASS是Ruby语言写的,不懂Ruby没关系,照样使用。只是必须先安装Ruby,然后再安装SASS。下载最新版的 Ruby 压缩文件。请点击这里下载。
# tar -xvf ruby-2.7.2.tar.gz
# cd ruby-2.7.2
# ./configure
# make &  make install
gem 添加国内源
# gem sources -l
# gem sources --add https://gems.ruby-china.com/ --remove https://rubygems.org/
gem安装Sass
# gem install sass
# sass -v
gem安装Compass
# gem install compass
# compass -v
gem安装bootstrap-sass
# gem install bootstrap-sass
创建项目
通过上面的步骤,项目环境基本准备好了,现在可以开始我们的项目。
1.创建项目目录,进到目录
# mkdir grunt-bootstrap
# cd grunt-bootstrap
2.目录中创建compass项目
# compass creat assert -r bootstrap-sass --using bootstrap
# mkdir config
# mv assert/config.rb config
3.修改config.rb中的资源路径
# vim config/config.rb
require 'bootstrap-sass'
require 'compass/import-once/activate'
# Require any additional compass plugins here.# Set this to the root of your project when deployed:
http_path = "./assert/"
css_dir = "./assert/stylesheets"
sass_dir = "./assert/sass"
images_dir = "./assert/images"
javascripts_dir = "./assert/javascripts"
fonts_dir = "./assert/fonts"# You can select your preferred output style here (can be overridden via the command line):
# output_style = :expanded or :nested or :compact or :compressed# To enable relative paths to assets via compass helper functions. Uncomment:
# relative_assets = true# To disable debugging comments that display the original location of your selectors. Uncomment:
# line_comments = false# If you prefer the indented syntax, you might want to regenerate this
# project again passing --syntax sass, or you can uncomment this:
# preferred_syntax = :sass
# and then run:
# sass-convert -R --from scss --to sass sass scss && rm -rf sass && mv scss sass
4.创建package.json和Gruntfile.js,文件可以通过npm init 创建,也可以通过grunt-init 通过模板创建。具体参考grunt官网
package.json
{"engines": {"node": ">= 0.10.0"},"devDependencies": {"grunt": "^1.3.0","grunt-contrib-compass": "^1.1.1","grunt-contrib-connect": "^3.0.0","grunt-contrib-watch": "^1.1.0"}
}
Gruntfile.js
/*global module:false*/
module.exports = function(grunt) {// Project configuration.grunt.initConfig({// Metadata.meta: {basePath: './',srcPath: './assert/sass/',deployPath: './assert/stylesheets/'},pkg: grunt.file.readJSON('package.json'),banner: '/*! <%= pkg.title || pkg.name %> - v<%= pkg.version %> - ' +'<%= grunt.template.today("yyyy-mm-dd") %>\n' +'<%= pkg.homepage ? "* " + pkg.homepage + "\\n" : "" %>' +'* Copyright (c) <%= grunt.template.today("yyyy") %> <%= pkg.author.name %>;' +' Licensed <%= _.pluck(pkg.licenses, "type").join(", ") %> */\n',// Task configuration.connect:{//这里为插件子刷新方式options: {port: 9000,hostname: 'localhost', //默认就是这个值,可配置为本机某个 IP,localhost 或域名livereload: 35729  //声明给 watch 监听的端口},server: {options: {open: true, //自动打开网页 http://base: ['.'  //主目录]}}},sass: {dist: {files: {'<%= meta.deployPath %>screen.css': '<%= meta.srcPath %>screen.scss'}}},compass: {dist: {options: {config: './config/config.rb', }}},watch: {scripts: {files: ['<%= meta.srcPath %>/**/*.scss'],tasks: ['compass']},livereload: {options: {livereload:'<%=connect.options.livereload%>'  //监听前面声明的端口  35729},files:[  //下面文件的改变就会实时刷新网页'*.html','./assert/stylesheets/styles.css']}}});// These plugins provide necessary tasks.//grunt.loadNpmTasks('grunt-contrib-sass');grunt.loadNpmTasks('grunt-contrib-compass');grunt.loadNpmTasks('grunt-contrib-watch');grunt.loadNpmTasks('grunt-contrib-connect');// Default task.grunt.registerTask('default', ['compass','connect','watch']);};
5.创建index.html
<!DOCTYPE html>
<html>
<head><meta charset="utf-8"><meta http-equiv="X-UA-Compatible" content="IE=edge"><meta name="viewport" content="width=device-width, initial-scale=1"><title>Bootstrap Demo</title><link href="/assert/stylesheets/styles.css" rel="stylesheet" type="text/css" />
</head>
<body><div class="container"><p>This is a test page.</p></div><script src="https://cdn.jsdelivr.net/npm/jquery@1.12.4/dist/jquery.min.js"></script><script src="/assert/javascripts/bootstrap.min.js"></script>
</body>
</html>
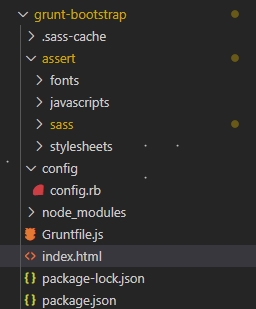
6.最后vscode中的项目目录结构
7.项目中运行grunt,至此我们编写sass就可自动编译成css文件,并自动刷新index页面。
这篇关于Linux搭建(nodejs + grunt + compass) 开发环境的文章就介绍到这儿,希望我们推荐的文章对编程师们有所帮助!


