本文主要是介绍oauth2.0实现短信验证码登录(无需密码),希望对大家解决编程问题提供一定的参考价值,需要的开发者们随着小编来一起学习吧!
为了能够快速解决这个问题,我会先说明操作步骤,步骤讲完了之后再下一篇中分析源码,说明理由.
当然,在实现短信验证码的前提是:您已经将密码模式已经整合到项目中.
好的,开整!
1.找到org.springframework.security.authentication.dao.DaoAuthenticationProvider类,这个类其实就是校验密码的类

2.复制全路径,将其放在自己的模块中(注意,需要和源码的存放路径保持一致)

3.将该类源码全部复制到自己类中,其目的是为了覆盖源码类,当oauth2.0在加载这个类的时候,走的是我们自己创建的这个类,而不会走源码类.(源码内容如下,)
/** Copyright 2004, 2005, 2006 Acegi Technology Pty Limited** Licensed under the Apache License, Version 2.0 (the "License");* you may not use this file except in compliance with the License.* You may obtain a copy of the License at**      https://www.apache.org/licenses/LICENSE-2.0** Unless required by applicable law or agreed to in writing, software* distributed under the License is distributed on an "AS IS" BASIS,* WITHOUT WARRANTIES OR CONDITIONS OF ANY KIND, either express or implied.* See the License for the specific language governing permissions and* limitations under the License.*/package org.springframework.security.authentication.dao;import org.springframework.security.authentication.AuthenticationProvider;
import org.springframework.security.authentication.BadCredentialsException;
import org.springframework.security.authentication.InternalAuthenticationServiceException;
import org.springframework.security.authentication.UsernamePasswordAuthenticationToken;
import org.springframework.security.core.Authentication;
import org.springframework.security.core.AuthenticationException;
import org.springframework.security.core.userdetails.UserDetails;
import org.springframework.security.core.userdetails.UserDetailsService;
import org.springframework.security.core.userdetails.UsernameNotFoundException;
import org.springframework.security.crypto.factory.PasswordEncoderFactories;
import org.springframework.security.crypto.password.PasswordEncoder;
import org.springframework.security.core.userdetails.UserDetailsPasswordService;
import org.springframework.util.Assert;/*** An {@link AuthenticationProvider} implementation that retrieves user details from a* {@link UserDetailsService}.** @author Ben Alex* @author Rob Winch*/
public class DaoAuthenticationProvider extends AbstractUserDetailsAuthenticationProvider {// ~ Static fields/initializers// =====================================================================================/*** The plaintext password used to perform* PasswordEncoder#matches(CharSequence, String)}  on when the user is* not found to avoid SEC-2056.*/private static final String USER_NOT_FOUND_PASSWORD = "userNotFoundPassword";// ~ Instance fields// ================================================================================================private PasswordEncoder passwordEncoder;/*** The password used to perform* {@link PasswordEncoder#matches(CharSequence, String)} on when the user is* not found to avoid SEC-2056. This is necessary, because some* {@link PasswordEncoder} implementations will short circuit if the password is not* in a valid format.*/private volatile String userNotFoundEncodedPassword;private UserDetailsService userDetailsService;private UserDetailsPasswordService userDetailsPasswordService;public DaoAuthenticationProvider() {setPasswordEncoder(PasswordEncoderFactories.createDelegatingPasswordEncoder());}// ~ Methods// ========================================================================================================@SuppressWarnings("deprecation")protected void additionalAuthenticationChecks(UserDetails userDetails,UsernamePasswordAuthenticationToken authentication)throws AuthenticationException {if (authentication.getCredentials() == null) {logger.debug("Authentication failed: no credentials provided");throw new BadCredentialsException(messages.getMessage("AbstractUserDetailsAuthenticationProvider.badCredentials","Bad credentials"));}String presentedPassword = authentication.getCredentials().toString();if (!passwordEncoder.matches(presentedPassword, userDetails.getPassword())) {logger.debug("Authentication failed: password does not match stored value");throw new BadCredentialsException(messages.getMessage("AbstractUserDetailsAuthenticationProvider.badCredentials","Bad credentials"));}}protected void doAfterPropertiesSet() throws Exception {Assert.notNull(this.userDetailsService, "A UserDetailsService must be set");}protected final UserDetails retrieveUser(String username,UsernamePasswordAuthenticationToken authentication)throws AuthenticationException {prepareTimingAttackProtection();try {UserDetails loadedUser = this.getUserDetailsService().loadUserByUsername(username);if (loadedUser == null) {throw new InternalAuthenticationServiceException("UserDetailsService returned null, which is an interface contract violation");}return loadedUser;}catch (UsernameNotFoundException ex) {mitigateAgainstTimingAttack(authentication);throw ex;}catch (InternalAuthenticationServiceException ex) {throw ex;}catch (Exception ex) {throw new InternalAuthenticationServiceException(ex.getMessage(), ex);}}@Overrideprotected Authentication createSuccessAuthentication(Object principal,Authentication authentication, UserDetails user) {boolean upgradeEncoding = this.userDetailsPasswordService != null&& this.passwordEncoder.upgradeEncoding(user.getPassword());if (upgradeEncoding) {String presentedPassword = authentication.getCredentials().toString();String newPassword = this.passwordEncoder.encode(presentedPassword);user = this.userDetailsPasswordService.updatePassword(user, newPassword);}return super.createSuccessAuthentication(principal, authentication, user);}private void prepareTimingAttackProtection() {if (this.userNotFoundEncodedPassword == null) {this.userNotFoundEncodedPassword = this.passwordEncoder.encode(USER_NOT_FOUND_PASSWORD);}}private void mitigateAgainstTimingAttack(UsernamePasswordAuthenticationToken authentication) {if (authentication.getCredentials() != null) {String presentedPassword = authentication.getCredentials().toString();this.passwordEncoder.matches(presentedPassword, this.userNotFoundEncodedPassword);}}/*** Sets the PasswordEncoder instance to be used to encode and validate passwords. If* not set, the password will be compared using {@link PasswordEncoderFactories#createDelegatingPasswordEncoder()}** @param passwordEncoder must be an instance of one of the {@code PasswordEncoder}* types.*/public void setPasswordEncoder(PasswordEncoder passwordEncoder) {Assert.notNull(passwordEncoder, "passwordEncoder cannot be null");this.passwordEncoder = passwordEncoder;this.userNotFoundEncodedPassword = null;}protected PasswordEncoder getPasswordEncoder() {return passwordEncoder;}public void setUserDetailsService(UserDetailsService userDetailsService) {this.userDetailsService = userDetailsService;}protected UserDetailsService getUserDetailsService() {return userDetailsService;}public void setUserDetailsPasswordService(UserDetailsPasswordService userDetailsPasswordService) {this.userDetailsPasswordService = userDetailsPasswordService;}
}
在该类中,我们可以看到有一段代码是在校验密码是否正确

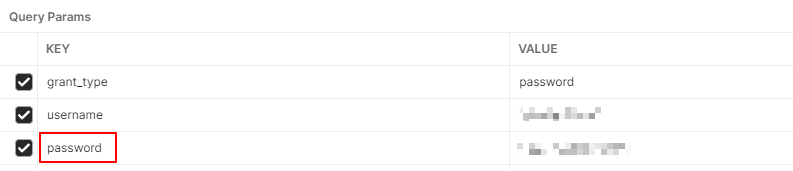
当初在BEBUG的时候,我发现这个方法会走两次,第一次是走的不是用户输入的密码校验,而是客户端id和客户端密码,在postman中截图如下

而第二次走这个方法的时候,这个presentedPassword就是用户输入的密码了,在postman中截图如下:
那么我们知道,如果使用短信验证码验证的时候,是不需要进行密码校验的,第一反应当然是把密码校验的这一步给删了!!
显然不行,因为如果删了,第一步的客户端密码校验就会通不过,所以,我们可以采用双重判断,在if语句中额外增加一个条件
String presentedPassword = authentication.getCredentials().toString();if ((!passwordEncoder.matches(presentedPassword, userDetails.getPassword())) && !presentedPassword.equals("123456")) {logger.debug("Authentication failed: password does not match stored value");throw new BadCredentialsException(messages.getMessage("AbstractUserDetailsAuthenticationProvider.badCredentials","Bad credentials"));}
在原有的判断基础上,额外增加一个与判断,大概意思是:如果用户输入的密码和真实密码不符 并且 用户输入的密码不是123456,则报错.
那是不是能够说明,无论用户的真实密码是多少,只要用户输入的密码是123456,密码验证这一步就通过了呢?
到这里,我们的源码改造就完毕了,接下来就是业务层的逻辑处理了.
新建一个手机号登录接口,该接口参数对象内部属性是手机号和验证码
@PostMapping("/login4Phone")
@ResponseBody
public Result<Object> login4Phone(@RequestBody RequestMsg requestMsg, HttpServletResponse response) {//校验参数if (StringUtils.isEmpty(requestMsg.getPhone())) {return new Result<>(StatusCode.SUCCESS, "请输入手机号", 0);}if (StringUtils.isEmpty(requestMsg.getCode()) || Boolean.FALSE.equals(redisTemplate.hasKey("login_" + requestMsg.getPhone())) || !Objects.equals(redisTemplate.boundValueOps("login_" + requestMsg.getPhone()).get(), requestMsg.getCode())) {return new Result<>(StatusCode.SUCCESS, "验证码错误", -1);}//申请令牌 authtokenAuthToken authToken;try {authToken = authService.login4Phone(requestMsg.getPhone(), clientId, clientSecret);} catch (Exception e) {e.printStackTrace();return new Result<>(StatusCode.SUCCESS, "系统错误", -2);}//返回结果return new Result<>(StatusCode.SUCCESS, "登录成功", authToken.getJti());}
发送验证码的接口我就不放了,只需要将验证码放入Redis中即可,这部分主要在判断redis中的验证码是否和用户输入的验证码是否一致.
如果验证码输入正确了,那么我们就来到service层去申请令牌,模拟/oauth/token接口,我们知道,申请令牌在postman中是这样的

所以,我们只需要模拟调用这个接口即可
@Overridepublic AuthToken login4Phone(String phone, String clientId, String clientSecret) {//1.申请令牌ServiceInstance serviceInstance = loadBalancerClient.choose("oauth");URI uri = serviceInstance.getUri();String url=uri+"/oauth/token";MultiValueMap<String, String> body = new LinkedMultiValueMap<>();body.add("grant_type","password");body.add("username",phone);body.add("password","123456");MultiValueMap<String, String> headers = new LinkedMultiValueMap<>();headers.add("Authorization",this.getHttpBasic(clientId,clientSecret));HttpEntity<MultiValueMap<String,String>> requestEntity = new HttpEntity<>(body,headers);restTemplate.setErrorHandler(new DefaultResponseErrorHandler(){@Overridepublic void handleError(ClientHttpResponse response) throws IOException {if (response.getRawStatusCode()!=400 && response.getRawStatusCode()!=401){super.handleError(response);}}});ResponseEntity<Map> responseEntity = restTemplate.exchange(url, HttpMethod.POST, requestEntity, Map.class);Map map = responseEntity.getBody();if (map == null || map.get("access_token") == null || map.get("refresh_token") == null || map.get("jti") == null){//申请令牌失败throw new RuntimeException("申请令牌失败");}//2.封装结果数据AuthToken authToken = new AuthToken();authToken.setAccessToken((String) map.get("access_token"));authToken.setRefreshToken((String) map.get("refresh_token"));authToken.setJti((String)map.get("jti"));//3.将jti作为redis中的key,将jwt作为redis中的value进行数据的存放stringRedisTemplate.boundValueOps(authToken.getJti()).set(authToken.getAccessToken(),ttl, TimeUnit.DAYS);return authToken;}private String getHttpBasic(String clientId, String clientSecret) {String value = clientId+":"+clientSecret;byte[] encode = Base64Utils.encode(value.getBytes());return "Basic "+new String(encode);}
这部分代码就是在模拟调用/oauth/token接口,可以看到,在body中,虽然password输入的123456,但是用户在接口中输入的是手机号和验证码,123456是我们在内部代码中加入的,所以完全可以放心用户如果输入123456的密码的问题.并且,手机登陆和密码登录时不同的两个接口,密码登录时不会走我们这个service类,唯一需要注意的是,建议把123456改成其他密码,因为这个无法阻止某些用户直接通过调用/oauth/token去申请令牌,所以密码不能过于暴露,天知地知你知我不知即可.
在此告一段落,评价一下这种方法,这种方式唯一的缺点就是略微入侵了源码,后期或许会出现一些未知问题,但好处是和密码登录方式完全一样,安全系数和oauth2.0原生安全系数一致,大大提高了安全性.
下一篇我会讲解从/oauth/token入口开始,oauth2.0是如何一步一步走向获取JWT令牌的.
这篇关于oauth2.0实现短信验证码登录(无需密码)的文章就介绍到这儿,希望我们推荐的文章对编程师们有所帮助!


