本文主要是介绍boot整合xfire,希望对大家解决编程问题提供一定的参考价值,需要的开发者们随着小编来一起学习吧!
最近换了项目组,框架使用的boot整合的xfire,之前没使用过xfire,所以写个例子记录下,看 前辈的帖子 整理下
pom文件
<parent><groupId>org.springframework.boot</groupId><artifactId>spring-boot-starter-parent</artifactId><version>2.4.2</version><relativePath/> <!-- lookup parent from repository -->
</parent>
<!-- webservice start -->
<dependency><groupId>org.codehaus.xfire</groupId><artifactId>xfire-all</artifactId><version>1.2.6</version>
</dependency><dependency><groupId>org.springframework.boot</groupId><artifactId>spring-boot-starter-web-services</artifactId>
</dependency>
<!-- webservice end -->定义XfireServlet
package com.example.demo.config;import org.codehaus.xfire.spring.XFireSpringServlet;
import org.springframework.boot.web.servlet.ServletRegistrationBean;
import org.springframework.context.annotation.Bean;
import org.springframework.context.annotation.Configuration;@Configuration
public class XfireServlet {@Beanpublic ServletRegistrationBean registrationBean(){ServletRegistrationBean registrationBean=new ServletRegistrationBean();registrationBean.addUrlMappings("/webservice/*");registrationBean.setServlet(new XFireSpringServlet());return registrationBean;}
}
创建boot-xfire.xml文件

其中<context:component-scan base-package="" />路径对应的@WebService的所在位置
<?xml version="1.0" encoding="UTF-8" ?>
<beans xmlns="http://www.springframework.org/schema/beans"xmlns:xsi="http://www.w3.org/2001/XMLSchema-instance"xmlns:context="http://www.springframework.org/schema/context"xsi:schemaLocation="http://www.springframework.org/schema/beanshttp://www.springframework.org/schema/beans/spring-beans-2.0.xsdhttp://www.springframework.org/schema/contexthttp://www.springframework.org/schema/context/spring-context-3.1.xsd"><!--扫描被@webService的包--><context:component-scan base-package="com.example.demo.webservice.impl" /><import resource="classpath:org/codehaus/xfire/spring/xfire.xml" /><!--<import resource="xfire.xml" />--><bean id="webAnnotations" class="org.codehaus.xfire.annotations.jsr181.Jsr181WebAnnotations" /><bean id="jsr181HandlerMapping" class="org.codehaus.xfire.spring.remoting.Jsr181HandlerMapping"><property name="xfire" ref="xfire" /><property name="webAnnotations" ref="webAnnotations" /></bean>
</beans>
创建XfireConfig文件 引入配置文件
package com.example.demo.config;import org.springframework.context.annotation.ImportResource;
import org.springframework.stereotype.Component;@ImportResource(locations = {"classpath:config/boot-xfire.xml"})
@Component
public class XfireConfig {
}
创建WebApplicationContextLocator文件
package com.example.demo.config;import org.springframework.boot.web.servlet.ServletContextInitializer;
import org.springframework.context.annotation.Configuration;
import org.springframework.web.context.WebApplicationContext;
import org.springframework.web.context.support.WebApplicationContextUtils;import javax.servlet.ServletContext;
import javax.servlet.ServletException;@Configuration
public class WebApplicationContextLocator implements ServletContextInitializer {private static WebApplicationContext webApplicationContext;public static WebApplicationContext getWebApplicationContext(){return webApplicationContext;}@Overridepublic void onStartup(ServletContext servletContext) throws ServletException {webApplicationContext= WebApplicationContextUtils.getWebApplicationContext(servletContext);}
}
创建webservice
package com.example.demo.webservice;import javax.jws.WebService;@WebService
public interface UserWebService {String queryAgeLarge(int age);}
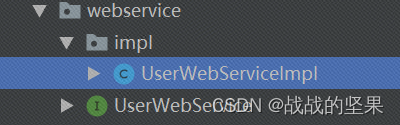
创建webservice实现类
package com.example.demo.webservice.impl;import com.example.demo.entity.User;
import com.example.demo.mapper.UserMapper;
import com.example.demo.webservice.UserWebService;
import org.json.JSONArray;
import org.springframework.beans.factory.annotation.Autowired;
import org.springframework.stereotype.Service;import javax.jws.WebService;
import javax.xml.ws.BindingType;
import javax.xml.ws.soap.SOAPBinding;
import java.util.List;/*** serviceName: 请求时的地址* name: 无用,与serviceName一致* targetNamespace: 命名空间 一般是包路径反过来*/
@WebService(serviceName = "userWebService",name = "userWebService",targetNamespace = "http://impl.webservice.demo.example.com")
@BindingType(value = SOAPBinding.SOAP12HTTP_BINDING)
@Service
public class UserWebServiceImpl implements UserWebService {@Autowiredprivate UserMapper userMapper;@Overridepublic String queryAgeLarge(int age) {//todoList<User> userList = userMapper.queryAgeLarge(age);JSONArray jsonArray = new JSONArray(userList);String json = jsonArray.toString();return returnXml("200",json);}private String returnXml(String code,String data){return "<resp><code>"+code+"</code>"+"<data>"+data+"</data>"+"</resp>";}
}
项目启动,但是报错
报错一
Offending resource: class path resource [config/boot-xfire.xml]; nested exception is org.springframework.beans.factory.xml.XmlBeanDefinitionStoreException: Line 10 in XML document from class path resource [org/codehaus/xfire/spring/xfire.xml] is invalid; nested exception is org.xml.sax.SAXParseException; lineNumber: 10; columnNumber: 24;
Attribute "singleton" must be declared for element type "bean".
解决:用好压打开本地仓库的 org\codehaus\xfire\xfire-all\1.2.6 路径的 xfire-all-1.2.6.jar 包,将xfire.xml和xfireXmlBeans.xml文件的属性singletnotallow="true"删除,保存后更新
报错二
Cannot convert value of type 'org.codehaus.xfire.spring.editors.ServiceFactoryEditor' to required type 'java.lang.Class' for property 'customEditors[org.codehaus.xfire.service.ServiceFactory]': PropertyEditor [org.springframework.beans.propertyeditors.ClassEditor] returned inappropriate value of type 'org.codehaus.xfire.spring.editors.ServiceFactoryEditor'
解决:用好压打开本地仓库的 org\codehaus\xfire\xfire-all\1.2.6 路径的 xfire-all-1.2.6.jar 包,将customEditors.xml文件的<map></map>标签内信息换成 <entry key="org.codehaus.xfire.service.ServiceFactory" value="org.codehaus.xfire.spring.editors.ServiceFactoryEditor"></entry> 保存后更新
接口发布
项目启动,浏览器访问

接口调用
XfireClient类
package com.example.demo.config;import lombok.extern.slf4j.Slf4j;
import org.codehaus.xfire.client.Client;
import org.springframework.stereotype.Component;import java.net.URL;@Component
@Slf4j
public class XfireClient {public static String xfireSendMsg(String xfireUrl, String namespaceURI, String method, int reqXml) throws Exception {// 创建服务Client client = new Client(new URL(xfireUrl));// 设置调用的方法和方法的命名空间client.setProperty(namespaceURI, method);// 通过映射获得结果Object[] result = new Object[0];try {result = client.invoke(method, new Object[]{reqXml});} catch (Exception e) {e.printStackTrace();throw e;}String xml = (String) result[0];log.info("响应报文 : {}", xml);return xml;}
}
controller类
package com.example.demo.controller;import com.example.demo.config.XfireClient;
import lombok.extern.slf4j.Slf4j;
import org.springframework.beans.factory.annotation.Autowired;
import org.springframework.web.bind.annotation.RequestMapping;
import org.springframework.web.bind.annotation.RestController;@RestController
@RequestMapping("/testXfire")
@Slf4j
public class TestXfireController {@Autowiredprivate XfireClient client;@RequestMapping("/test")public String test() throws Exception {String queryAgeLarge = client.xfireSendMsg("http://localhost:8888//webservice/userWebService?wsdl","http://impl.webservice.demo.example.com","queryAgeLarge",1);log.info("输出日志={}",queryAgeLarge);return queryAgeLarge;}
}
postman调用
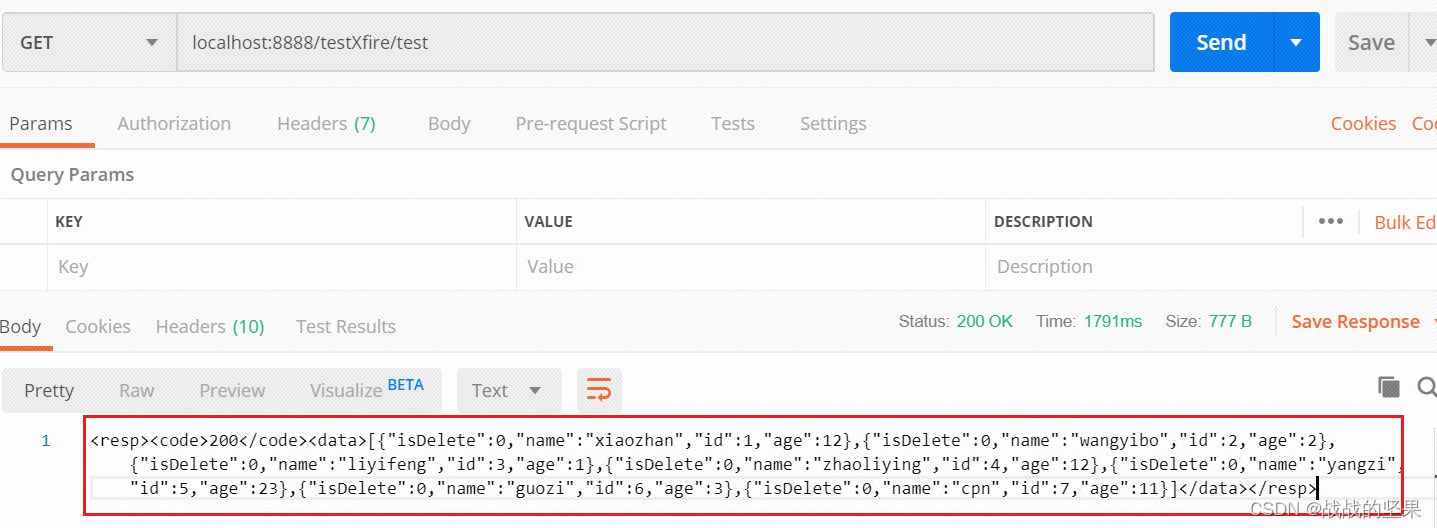
可见xml信息正常接收到!
不足之处,还请之处!!!
这篇关于boot整合xfire的文章就介绍到这儿,希望我们推荐的文章对编程师们有所帮助!


