本文主要是介绍springcloud Finchley版本系列,希望对大家解决编程问题提供一定的参考价值,需要的开发者们随着小编来一起学习吧!
1.springcloud简介
1.1微服务概念
要说springcloud 分布式之前,先引入微服务概念。
微服务简单说,一个 springboot 就是一个 微服务,并且这个 springboot 做的事情很单纯。 比如 product-service 这个项目,就可以拆成两个微服务,分别是 数据微服务,和视图微服务,其实就是俩 springboot, 只是各自做的事情都更单纯。
在微服务架构中,需要几个基础的服务治理组件,包括服务注册与发现、服务消费、负载均衡、断路器、智能路由、配置管理等,由这几个基础组件相互协作,共同组建了一个简单的微服务系统。
1.2分布式概念
简单说,原来是在一个 springboot里就完成的事情,现在分布在多个 springboot里做,这就是初步具备 分布式雏形了
那么分布式有什么好处呢?
- 如果我要更新数据微服务,视图微服务是不受影响的
- 可以让不同的团队开发不同的微服务,他们之间只要约定好接口,彼此之间是低耦合的。
- 如果视图微服务挂了,数据微服务依然可以继续使用 等等
1.3spring cloud版本说明
参考博客SpringCloud版本新旧命名方式:https://www.cnblogs.com/codhome/p/14239141.html
在线查看地址:https://mvnrepository.com/artifact/org.springframework.cloud/spring-cloud-dependencies
springcloud新旧版本名命方式
采用版本名+版本号,其中版本名采用伦敦地铁站命名,其中按照地铁首字母A-Z依次命令如Hoxton.SR9。但是现在已更改为主版本号.次版本号.修订号如2020.0.0
旧版本命名方式中,开发的快照版本(BUILD-SNAPSHOT)到里程碑版本(M),开发的差不多到会发布的候选发布版(RELEASE),最后到正式版(SR)版本。
新版本命名是YYYY.MINOR.MICRO[-MODIFIER],拿2020.0.1-SNAPSHOT 这个版本来说,其中YYYY为年份全称、MINOR为辅助版本号、MICRO为补丁版本号。MODIFIER同上述修饰关键节点,BUILD-SNAPSHOT、里程碑M等
2.springcloud 服务注册中心
2.1创建父工程
pom文件
<?xml version="1.0" encoding="UTF-8"?><project xmlns="http://maven.apache.org/POM/4.0.0" xmlns:xsi="http://www.w3.org/2001/XMLSchema-instance"xsi:schemaLocation="http://maven.apache.org/POM/4.0.0 http://maven.apache.org/xsd/maven-4.0.0.xsd"><modelVersion>4.0.0</modelVersion><groupId>com.xxx.springcloud</groupId><artifactId>springcloudF</artifactId><version>1.0-SNAPSHOT</version><modules><module>eureka-server-8761</module><module>eureka-client-8762</module></modules><name>springcloudF</name><url>http://www.example.com</url><packaging>pom</packaging><parent><groupId>org.springframework.boot</groupId><artifactId>spring-boot-starter-parent</artifactId><version>2.0.3.RELEASE</version><relativePath/> <!--relativePath元素不是必须的,指定后会优先从指定的位置查找父pom--></parent><properties><project.build.sourceEncoding>UTF-8</project.build.sourceEncoding><maven.compiler.source>1.7</maven.compiler.source><maven.compiler.target>1.7</maven.compiler.target><spring-cloud.version>Finchley.RELEASE</spring-cloud.version></properties><dependencies><dependency><groupId>cn.hutool</groupId><artifactId>hutool-all</artifactId><version>5.5.1</version></dependency><dependency><groupId>org.springframework.boot</groupId><artifactId>spring-boot-starter-test</artifactId></dependency></dependencies><dependencyManagement><dependencies><dependency><groupId>org.springframework.cloud</groupId><artifactId>spring-cloud-dependencies</artifactId><version>${spring-cloud.version}</version><type>pom</type><scope>import</scope></dependency></dependencies></dependencyManagement>
</project>
2.2创建服务注册中心
目录结构
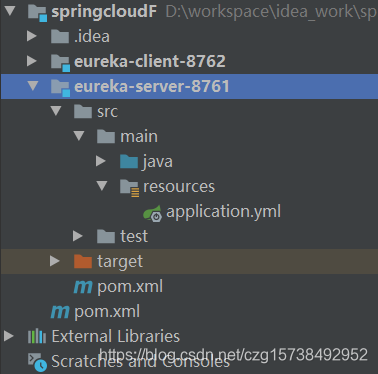
子项目 pom.xml ,增加 spring-cloud-starter-netflix-eureka-server jar 包
<?xml version="1.0" encoding="UTF-8"?><project xmlns="http://maven.apache.org/POM/4.0.0" xmlns:xsi="http://www.w3.org/2001/XMLSchema-instance"xsi:schemaLocation="http://maven.apache.org/POM/4.0.0 http://maven.apache.org/xsd/maven-4.0.0.xsd"><parent><artifactId>springcloudF</artifactId><groupId>com.xxx.springcloud</groupId><version>1.0-SNAPSHOT</version></parent><modelVersion>4.0.0</modelVersion><artifactId>eureka-server-8761</artifactId><name>eureka-server-8761</name><!-- FIXME change it to the project's website --><url>http://www.example.com</url><dependencies><dependency><groupId>org.springframework.cloud</groupId><artifactId>spring-cloud-starter-netflix-eureka-server</artifactId></dependency></dependencies>
</project>
2.3EurekaServerApplication
EurekaServer 启动类。
这是一个 EurekaServer ,它扮演的角色是注册中心,用于注册各种微服务,以便于其他微服务找到和访问。
EurekaServer 本身就是个 Springboot 微服务, 所以它有 @SpringBootApplication 注解。
@EnableEurekaServer 表示这是个 EurekaServer 。
@SpringBootApplication
@EnableEurekaServer
public class EurekaserverApplication {public static void main(String[] args) {SpringApplication.run(EurekaserverApplication.class,args);}
}
2.4application.yml
配置文件,提供 eureka 的相关信息。
hostname: localhost 表示主机名称。
registerWithEureka:false. 表示是否注册到服务器。 因为它本身就是服务器,所以就无需把自己注册到服务器了。
fetchRegistry: false. 表示是否获取服务器的注册信息,和上面同理,这里也设置为 false。
defaultZone: http:// e u r e k a . i n s t a n c e . h o s t n a m e : {eureka.instance.hostname}: eureka.instance.hostname:{server.port}/eureka/ 自己作为服务器,公布出来的地址。 比如后续某个微服务要把自己注册到 eureka server, 那么就要使用这个地址: http://localhost:8761/eureka/
server:port: 8761
eureka:instance:hostname: localhostclient:register-with-eureka: false fetch-registry: false service-url:default-zone: http://${eureka.instance.hostname}:${server.port}/eureka
spring:application:name: eureka-server-8761
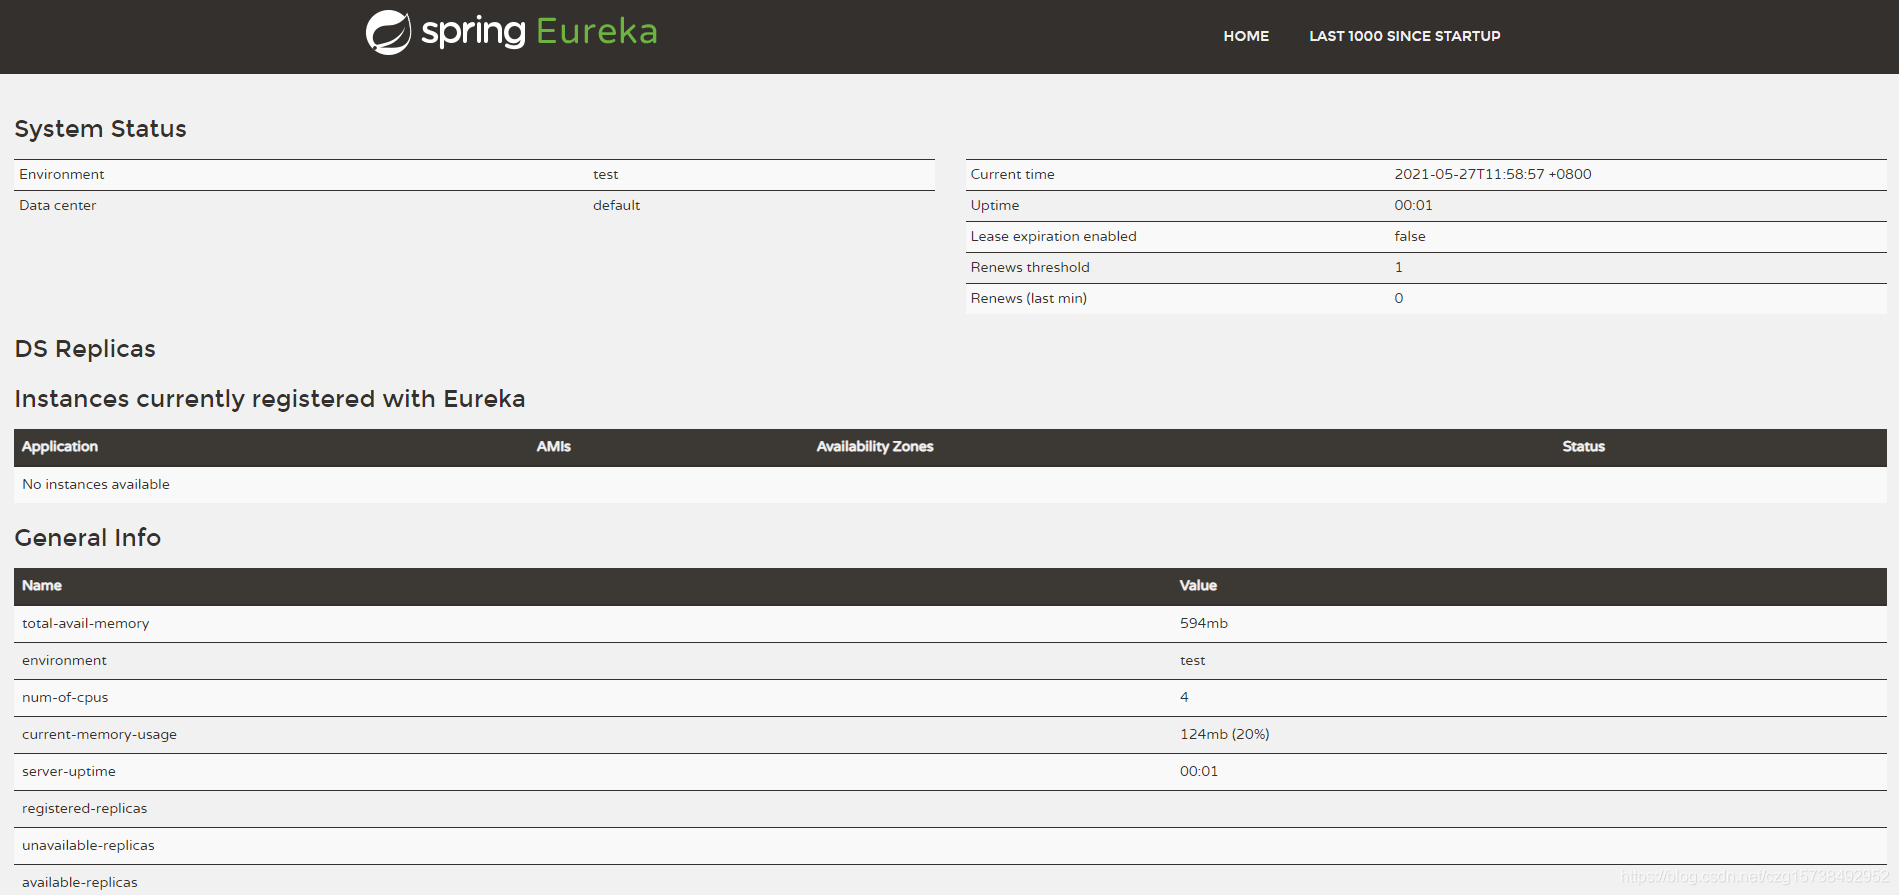
2.5启动并访问
运行 EurekaServerApplication,并访问:
http://127.0.0.1:8761/
这就是注册中心的管理界面,主要看 :Instances currently registered with Eureka, 可以发现信息是:No instances available。
这表示 暂时还没有微服务注册进来。
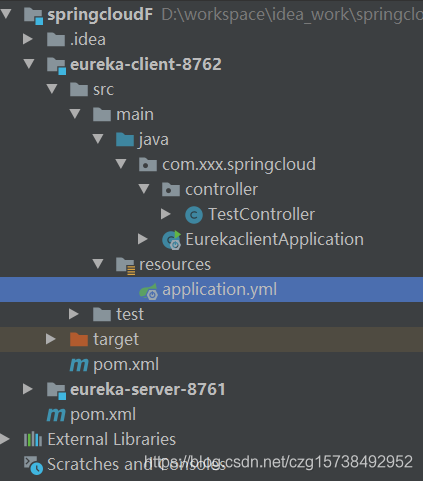
3.springcloud 服务提供者(eureka client)
2.1目录结构
2.2pom.xml
spring-cloud-starter-netflix-eureka-client 表示这是个 eureka 客户端。
spring-boot-starter-web: 表示这是个web服务,会提供控制层
<?xml version="1.0" encoding="UTF-8"?><project xmlns="http://maven.apache.org/POM/4.0.0" xmlns:xsi="http://www.w3.org/2001/XMLSchema-instance"xsi:schemaLocation="http://maven.apache.org/POM/4.0.0 http://maven.apache.org/xsd/maven-4.0.0.xsd"><parent><artifactId>springcloudF</artifactId><groupId>com.xxx.springcloud</groupId><version>1.0-SNAPSHOT</version></parent><modelVersion>4.0.0</modelVersion><artifactId>eureka-client-8762</artifactId><name>eureka-client-8762</name><!-- FIXME change it to the project's website --><url>http://www.example.com</url><dependencies><dependency><groupId>org.springframework.cloud</groupId><artifactId>spring-cloud-starter-netflix-eureka-client</artifactId></dependency><dependency><groupId>org.springframework.boot</groupId><artifactId>spring-boot-starter-web</artifactId></dependency></dependencies>
</project>
2.3TestController
@RestController
public class TestController {@Value("${server.port}")private String port;@RequestMapping("hi")public String hi(String name){return "hi"+name+" ,i am from port:" + port;}
}
2.4EurekaclientApplication
启动类, 考虑到要做集群。 所以自己输入端口,推荐 8001,8002,8003.
通过注解@EnableEurekaClient 表明自己是一个eurekaclient.
@SpringBootApplication
@EnableEurekaClient
public class EurekaclientApplication {public static void main(String[] args) {int port = 8001;Scanner scanner = new Scanner(System.in);while(true) {String strPort = scanner.nextLine();if (!NumberUtil.isInteger(strPort)) {System.err.println("只能是数字");} else {port = Convert.toInt(strPort);scanner.close();break;}}new SpringApplicationBuilder(EurekaclientApplication.class).properties("server.port=" + port).run(args);}
}
2.5application.yml
通过注解@EnableEurekaClient 表明自己是一个eurekaclient.
#server:
#  port: 8762 因为会启动多个 service-hi, 所以端口号由用户自动设置,推荐 8001,8002,8003
eureka:client:service-url:default-zone: http://localhost:8761/eureka/ #服务注册中心地址
spring:application:name: service-hi
2.6启动两个 微服务
需要指明spring.application.name,这个很重要,这在以后的服务与服务之间相互调用一般都是根据这个name 。
启动两次 EurekaclientApplication, 分别输入 8001和8002.
可以在注册中心 http://127.0.0.1:8761/ 看到,service-hi 这个微服务,有两个实例,分别是8001和8002端口。

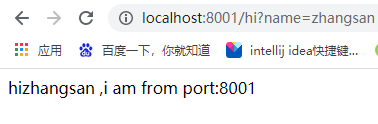
2.7访问微服务
可以如此访问: http://127.0.0.1:8001/hi ,http://127.0.0.1:8002/hi,并看到如图所示的数据。
但是这种方式是通过 http 协议 访问微服务本身,和注册中心没有关系,也观察不到集群的效果,接下来我们就会讲如何用微服务,访问另一个微服务。
3.服务消费者(rest+ribbon)
3.1 ribbon简介
接下来,我们就要访问前面注册好的数据微服务了。 springcloud 提供了两种方式,一种是 Ribbon,一种是 Feign。
Ribbon 是使用 restTemplate 进行调用,并进行客户端负载均衡。 什么是客户端负载均衡呢? 在前面 注册数据微服务 里,注册了8001和8002两个微服务, Ribbon 会从注册中心获知这个信息,然后由 Ribbon 这个客户端自己决定是调用哪个,这个就叫做客户端负载均衡。
Feign 是什么呢? Feign 是对 Ribbon的封装,调用起来更简单。。。
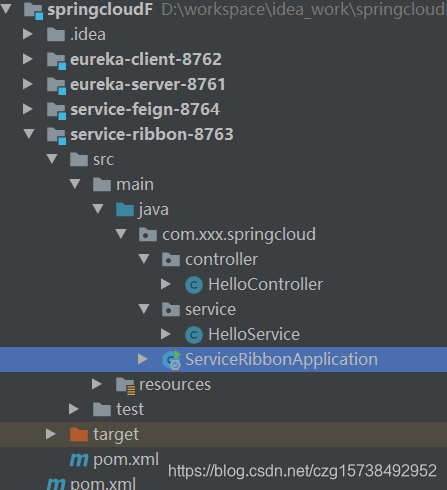
3.2 目录结构
3.3pom.xml
包含以下jar:
spring-cloud-starter-netflix-eureka-client: eureka 客户端
spring-boot-starter-web: springmvc
spring-cloud-starter-netflix-ribbon
<?xml version="1.0" encoding="UTF-8"?><project xmlns="http://maven.apache.org/POM/4.0.0" xmlns:xsi="http://www.w3.org/2001/XMLSchema-instance"xsi:schemaLocation="http://maven.apache.org/POM/4.0.0 http://maven.apache.org/xsd/maven-4.0.0.xsd"><parent><artifactId>springcloudF</artifactId><groupId>com.xxx.springcloud</groupId><version>1.0-SNAPSHOT</version></parent><modelVersion>4.0.0</modelVersion><artifactId>service-ribbon-8763</artifactId><name>service-ribbon-8763</name><!-- FIXME change it to the project's website --><url>http://www.example.com</url><dependencies><dependency><groupId>org.springframework.cloud</groupId><artifactId>spring-cloud-starter-netflix-eureka-client</artifactId></dependency><dependency><groupId>org.springframework.boot</groupId><artifactId>spring-boot-starter-web</artifactId></dependency><dependency><groupId>org.springframework.cloud</groupId><artifactId>spring-cloud-starter-netflix-ribbon</artifactId></dependency></dependencies>
</project>
3.4ServiceRibbonApplication
@EnableEurekaClient只适用于Eureka作为注册中心,@EnableDiscoveryClient 可以是其他注册中心
启动类, 注解@EnableEurekaClient, 表示用于发现eureka 注册中心的微服务。
还多了个 RestTemplate,就表示用 restTemplate 这个工具来开启负载均衡功能。
@SpringBootApplication
@EnableEurekaClient
public class ServiceRibbonApplication {public static void main(String[] args) {int port = 8763;Scanner scanner = new Scanner(System.in);while(true) {String strPort = scanner.nextLine();if (!NumberUtil.isInteger(strPort)) {System.err.println("只能是数字");} else {port = Convert.toInt(strPort);scanner.close();break;}}new SpringApplicationBuilder(ServiceRibbonApplication.class).properties("server.port=" + port).run(args);}@Bean@LoadBalancedRestTemplate restTemplate(){return new RestTemplate();}
}
3.5application.yml
在工程的配置文件指定服务的注册中心地址为http://localhost:8761/eureka/,程序名称为 service-ribbon。配置文件application.yml如下:
#server:
#  port: 8763
eureka:client:service-url:default-zone: http://localhost:8761/eureka/ #服务注册中心地址
spring:application:name: service-ribbon
3.6Ribbon 客户端
写一个测试类HelloService,通过之前注入ioc容器的restTemplate来消费service-hi服务的“/hi”接口,在这里我们直接用的程序名替代了具体的url地址,在ribbon中它会根据服务名来选择具体的服务实例,根据服务实例在请求的时候会用具体的url替换掉服务名,代码如下:
@Service
public class HelloService {@Autowiredprivate RestTemplate restTemplate;public String hiService(String name){return restTemplate.getForObject("http://service-hi/hi?name="+name,String.class);}
}
3.7控制器
写一个controller,在controller中用调用HelloService 的方法,代码如下:
@RestController
public class HelloController {@Autowiredprivate HelloService helloService;@RequestMapping("hi")public String hi(String name){return helloService.hiService(name);}
}
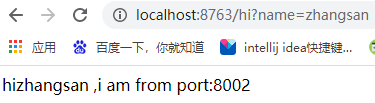
3.8启动并访问
在浏览器上多次访问http://localhost:8763/hi?name=zhangsan,浏览器交替显示:
hizhangsan ,i am from port:8001
hizhangsan ,i am from port:8002

此时的架构:
一个服务注册中心,eureka server,端口为8761
service-hi工程跑了两个实例,端口分别为8001,8002,分别向服务注册中心注册
sercvice-ribbon端口为8763,向服务注册中心注册
当sercvice-ribbon通过restTemplate调用service-hi的hi接口时,因为用ribbon进行了负载均衡,会轮流的调用service-hi:8762和8763 两个端口的hi接口。
4.服务消费者(Feign)
3.1feign简介
Feign 是什么呢? Feign 是对 Ribbon的封装,使用注解的方式,调用起来更简单。。。 也是主流的方式
Feign是一个声明式的伪Http客户端,它使得写Http客户端变得更简单。使用Feign,只需要创建一个接口并注解。它具有可插拔的注解特性,可使用Feign 注解和JAX-RS注解。Feign支持可插拔的编码器和解码器。Feign默认集成了Ribbon,并和Eureka结合,默认实现了负载均衡的效果。
Ribbon方式
public String hiService(String name){return restTemplate.getForObject("http://service-hi/hi?name="+name,String.class);}Feign方式
@FeignClient(value = "service-hi")
public interface SchedualServiceHi {@RequestMapping(value = "hi",method = RequestMethod.GET)String sayHiFromClient(@RequestParam(value = "name") String name);
}
简而言之:Feign 采用的是基于接口的注解
Feign 整合了ribbon,具有负载均衡的能力
整合了Hystrix,具有熔断的能力
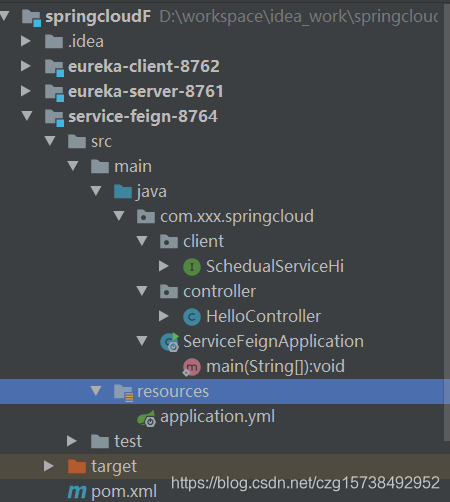
3.2 目录结构
3.3pom.xml
jar 包多了个 spring-cloud-starter-openfeign,就是用来支持 Feign 方式的。
<?xml version="1.0" encoding="UTF-8"?><project xmlns="http://maven.apache.org/POM/4.0.0" xmlns:xsi="http://www.w3.org/2001/XMLSchema-instance"xsi:schemaLocation="http://maven.apache.org/POM/4.0.0 http://maven.apache.org/xsd/maven-4.0.0.xsd"><parent><artifactId>springcloudF</artifactId><groupId>com.xxx.springcloud</groupId><version>1.0-SNAPSHOT</version></parent><modelVersion>4.0.0</modelVersion><artifactId>service-feign-8764</artifactId><name>service-feign-8764</name><!-- FIXME change it to the project's website --><url>http://www.example.com</url><dependencies><dependency><groupId>org.springframework.cloud</groupId><artifactId>spring-cloud-starter-netflix-eureka-client</artifactId></dependency><dependency><groupId>org.springframework.boot</groupId><artifactId>spring-boot-starter-web</artifactId></dependency><dependency><groupId>org.springframework.cloud</groupId><artifactId>spring-cloud-starter-openfeign</artifactId></dependency></dependencies>
</project>
3.4ServiceRibbonApplication
启动类, 注解多了个 @EnableFeignClients, 表示用于使用 Feign 方式。
@SpringBootApplication
@EnableEurekaClient
@EnableFeignClients //开启Feign功能
public class ServiceFeignApplication {public static void main(String[] args) {int port = 8764;Scanner scanner = new Scanner(System.in);while(true) {String strPort = scanner.nextLine();if (!NumberUtil.isInteger(strPort)) {System.err.println("只能是数字");} else {port = Convert.toInt(strPort);scanner.close();break;}}new SpringApplicationBuilder(ServiceFeignApplication.class).properties("server.port=" + port).run(args);}
}
3.5application.yml
在工程的配置文件application.yml文件,指定程序名为service-feign,服务注册地址为http://localhost:8761/eureka/ ,代码如下:
#server:
#  port: 8764
eureka:client:service-url:default-zone: http://localhost:8761/eureka/ #服务注册中心地址
spring:application:name: service-feign
3.6Feign客户端
定义一个feign接口,通过@ FeignClient(“服务名”),来指定调用哪个服务。比如在代码中调用了service-hi服务的“/hi”接口,代码如下:
@FeignClient(value = "service-hi")
public interface SchedualServiceHi {@RequestMapping(value = "hi",method = RequestMethod.GET)String sayHiFromClient(@RequestParam(value = "name") String name);
}
3.7控制器
在Web层的controller层,对外暴露一个"/hi"的API接口,通过上面定义的Feign客户端SchedualServiceHi 来消费服务。代码如下:
@RestController
public class HelloController {@Autowiredprivate SchedualServiceHi schedualServiceHi;@RequestMapping("hi")public String hi(String name){return schedualServiceHi.sayHiFromClient(name);}
}
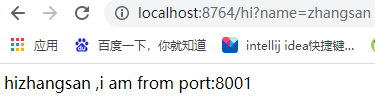
3.8启动并访问
在浏览器上多次访问http://localhost:8764/hi?name=zhangsan,浏览器交替显示:
hizhangsan ,i am from port:8001
hizhangsan ,i am from port:8002

5.服务链路追踪(zipkin)
5.1简介
服务追踪组件zipkin,Spring Cloud Sleuth集成了zipkin组件。
Spring Cloud Sleuth 主要功能就是在分布式系统中提供追踪解决方案,并且兼容支持了 zipkin,你只需要在pom文件中引入相应的依赖即可。
在spring Cloud为F版本的时候,已经不需要自己构建Zipkin Server了,只需要下载jar即可
下载地址:https://pan.baidu.com/s/1f9uwwEsz1XXU-bF9aXG3zQ
提取码:utf9
下载完成jar 包之后,需要运行jar,如下:
java -jar zipkin-server-2.10.1-exec.jar
访问浏览器 http://localhost:9411/zipkin/
5.2改造
eureka-server 不需要做改造。
eureka-client-8762和service-fegin-8764 需要进行改造以使其可以被追踪到。
5.3pom.xml
eureka-client-8762的pom.xml
<?xml version="1.0" encoding="UTF-8"?><project xmlns="http://maven.apache.org/POM/4.0.0" xmlns:xsi="http://www.w3.org/2001/XMLSchema-instance"xsi:schemaLocation="http://maven.apache.org/POM/4.0.0 http://maven.apache.org/xsd/maven-4.0.0.xsd"><parent><artifactId>springcloudF</artifactId><groupId>com.xxx.springcloud</groupId><version>1.0-SNAPSHOT</version></parent><modelVersion>4.0.0</modelVersion><artifactId>eureka-client-8762</artifactId><name>eureka-client-8762</name><!-- FIXME change it to the project's website --><url>http://www.example.com</url><dependencies><dependency><groupId>org.springframework.cloud</groupId><artifactId>spring-cloud-starter-netflix-eureka-client</artifactId></dependency><dependency><groupId>org.springframework.boot</groupId><artifactId>spring-boot-starter-web</artifactId></dependency><dependency><groupId>org.springframework.cloud</groupId><artifactId>spring-cloud-starter-zipkin</artifactId></dependency></dependencies>
</project>
service-fegin-8764的pom.xml
<?xml version="1.0" encoding="UTF-8"?><project xmlns="http://maven.apache.org/POM/4.0.0" xmlns:xsi="http://www.w3.org/2001/XMLSchema-instance"xsi:schemaLocation="http://maven.apache.org/POM/4.0.0 http://maven.apache.org/xsd/maven-4.0.0.xsd"><parent><artifactId>springcloudF</artifactId><groupId>com.xxx.springcloud</groupId><version>1.0-SNAPSHOT</version></parent><modelVersion>4.0.0</modelVersion><artifactId>service-feign-8764</artifactId><name>service-feign-8764</name><!-- FIXME change it to the project's website --><url>http://www.example.com</url><dependencies><dependency><groupId>org.springframework.cloud</groupId><artifactId>spring-cloud-starter-netflix-eureka-client</artifactId></dependency><dependency><groupId>org.springframework.boot</groupId><artifactId>spring-boot-starter-web</artifactId></dependency><dependency><groupId>org.springframework.cloud</groupId><artifactId>spring-cloud-starter-openfeign</artifactId></dependency><dependency><groupId>org.springframework.cloud</groupId><artifactId>spring-cloud-starter-zipkin</artifactId></dependency></dependencies>
</project>
5.4配置信息
两个的配置文件都加上
spring:zipkin:base-url: http://localhost:9411
eureka-client-8762的application.yml
eureka:client:service-url:default-zone: http://localhost:8761/eureka/ #服务注册中心地址
#  instance:
#    instance-id: service-hi #修改status名称
#    prefer-ip-address: true #访问路径可以显示IP地址
spring:application:name: service-hizipkin:base-url: http://localhost:9411
service-fegin-8764的application.yml
eureka:client:service-url:default-zone: http://localhost:8761/eureka/ #服务注册中心地址
spring:application:name: service-feignzipkin:base-url: http://localhost:9411
5.5启动并访问
- 启动 zipkin-server
java -jar zipkin-server-2.10.1-exec.jar
2.依次启动eureka-server, 改造后的 eureka-client-8762和service-fegin-8764
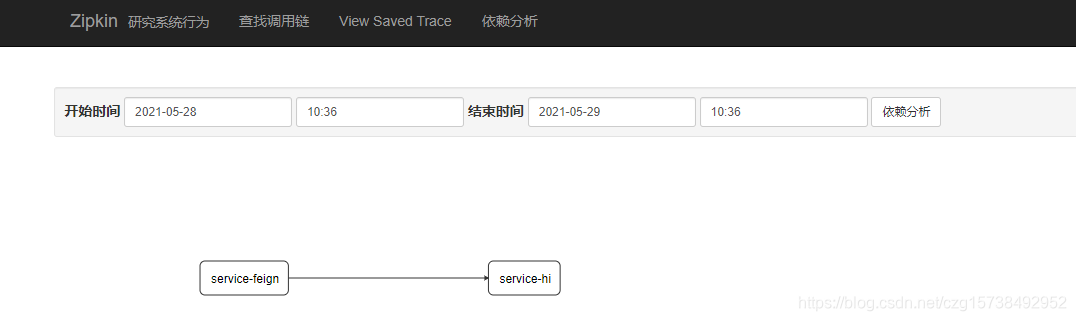
3.访问一次 http://localhost:8764/hi?name=zhangsan 通过 视图微服务去访问数据微服务,这样链路追踪服务器才知道有这事儿发生~
2. 然后打开链路追踪服务器 http://localhost:9411/zipkin/dependency/ 可以看到具体服务相互调用的数据了。
3. 
6.断路器 HYSTRIX
我们知道,视图微服务是依赖于数据微服务的。
那么当数据微服务不可用的时候,会怎么样呢?
我们主动把 EurekaclientApplication 关闭,然后再访问 :
http://localhost:8764/hi 就会抛出如图所示的异常。
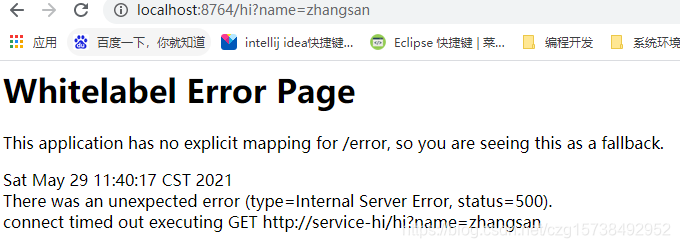
出现这个问题肯定是难以避免的,比如service-hi微服务所在的机房停电了。 但是这样的提示信息是非常不友好的,客户也看不懂这个是什么。
为了解决这个问题,我们就会引入断路器的概念。
6.1准备工作
基于上一篇文章的工程,首先启动上一篇文章的工程,启动eureka-server 工程;启动service-hi工程,它的端口为8001
6.2在ribbon使用断路器
改造serice-ribbon 工程的代码,首先在pox.xml文件中加入spring-cloud-starter-netflix-hystrix的起步依赖:
 <dependency><groupId>org.springframework.cloud</groupId><artifactId>spring-cloud-starter-netflix-hystrix</artifactId>
</dependency>
在程序的启动类ServiceRibbonApplication 加@EnableHystrix注解开启Hystrix:
@SpringBootApplication
@EnableEurekaClient
@EnableHystrix //开启Hystrix
public class ServiceRibbonApplication {
......
}
改造HelloService类,在hiService方法上加上@HystrixCommand注解。该注解对该方法创建了熔断器的功能,并指定了fallbackMethod熔断方法,熔断方法直接返回了一个字符串,字符串为"hi,"+name+",sorry,error!",代码如下:
@Service
public class HelloService {@Autowiredprivate RestTemplate restTemplate;//该注解对该方法创建了熔断器的功能,并指定了fallbackMethod熔断方法@HystrixCommand(fallbackMethod = "hiError")public String hiService(String name){return restTemplate.getForObject("http://service-hi/hi?name="+name,String.class);}public String hiError(String name){return "hi,"+name+",sorry,error!";}
}
启动:service-ribbon 工程,当我们访问http://localhost:8763/hi?name=zhangsan,浏览器显示:
hi,zhangsan,i am from port:8001
此时关闭 service-hi 工程,当我们再访问http://localhost:8763/hi?name=zhangsan,浏览器会显示:
hi,zhangsan,sorry,error!
这就说明当 service-hi 工程不可用的时候,service-ribbon调用 service-hi的API接口时,会执行快速失败,直接返回一组字符串,而不是等待响应超时,这很好的控制了容器的线程阻塞。
6.3Feign中使用断路器
Feign是自带断路器的,在D版本的Spring Cloud之后,它没有默认打开。需要在配置文件中配置打开它,在配置文件加以下代码:
feign.hystrix.enabled: true
基于service-feign工程进行改造,只需要在FeignClient的SchedualServiceHi接口的注解中加上fallback的指定类就行了:
@FeignClient(value = "service-hi",fallback = HelloClientFeignHystrix.class)
public interface SchedualServiceHi {@RequestMapping(value = "hi",method = RequestMethod.GET)String sayHiFromClient(@RequestParam(value = "name") String name);
}
HelloClientFeignHystrix需要实现SchedualServiceHi 接口,并注入到Ioc容器中,代码如下:
@Component
public class HelloClientFeignHystrix implements SchedualServiceHi{@Overridepublic String sayHiFromClient(String name) {return "hello数据微服务不可用";}
}
启动servcie-feign工程,浏览器打开http://localhost:8764/hi?name=zhangsan,注意此时service-hi工程没有启动,网页显示:
hello数据微服务不可用

打开service-hi工程,再次访问,浏览器显示:
hizhangsan ,i am from port:8001
这证明断路器起到作用了。
7.断路器监控Hystrix Dashboard
7.1简介
在微服务架构中为例保证程序的可用性,防止程序出错导致网络阻塞,出现了断路器模型。断路器的状况反应了一个程序的可用性和健壮性,它是一个重要指标。Hystrix Dashboard是作为断路器状态的一个组件,提供了数据监控和友好的图形化界面。
那么service-hi服务什么时候可用,什么时候不可用,如何监控这个事情呢? 我们就要用到 断路器监控 来可视化掌控这个情况了。
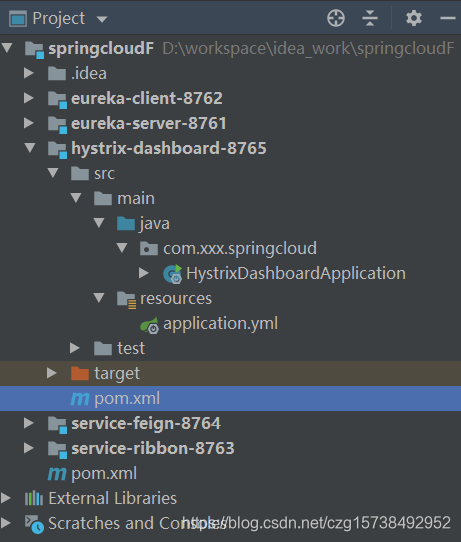
7.2目录结构
创建服务hystrix-dashboard-8765
7.3pom.xml
引入jar 包 主要是hystrix-dashboard
<?xml version="1.0" encoding="UTF-8"?><project xmlns="http://maven.apache.org/POM/4.0.0" xmlns:xsi="http://www.w3.org/2001/XMLSchema-instance"xsi:schemaLocation="http://maven.apache.org/POM/4.0.0 http://maven.apache.org/xsd/maven-4.0.0.xsd"><parent><artifactId>springcloudF</artifactId><groupId>com.xxx.springcloud</groupId><version>1.0-SNAPSHOT</version></parent><modelVersion>4.0.0</modelVersion><artifactId>hystrix-dashboard-8765</artifactId><name>hystrix-dashboard-8765</name><!-- FIXME change it to the project's website --><url>http://www.example.com</url><dependencies><dependency><groupId>org.springframework.cloud</groupId><artifactId>spring-cloud-starter-netflix-eureka-client</artifactId></dependency><dependency><groupId>org.springframework.boot</groupId><artifactId>spring-boot-starter-actuator</artifactId></dependency><dependency><groupId>org.springframework.cloud</groupId><artifactId>spring-cloud-starter-netflix-hystrix</artifactId></dependency><dependency><groupId>org.springframework.cloud</groupId><artifactId>spring-cloud-starter-netflix-hystrix-dashboard</artifactId></dependency></dependencies>
</project>
7.4HystrixDashboardApplication
断路器监控启动类,主要就是@EnableHystrixDashboard 这个注解,开启HystrixDashboard
@SpringBootApplication
@EnableHystrixDashboard
public class HystrixDashboardApplication {public static void main(String[] args) {int port = 8765;Scanner scanner = new Scanner(System.in);while(true) {String strPort = scanner.nextLine();if (!NumberUtil.isInteger(strPort)) {System.err.println("只能是数字");} else {port = Convert.toInt(strPort);scanner.close();break;}}new SpringApplicationBuilder(HystrixDashboardApplication.class).properties("server.port=" + port).run(args);}
}
7.5配置信息
spring:application:name: hystrix-dashboard
eureka:client:service-url:default-zone: http://localhost:8761/eureka/ #服务注册中心地址 默认是这个地址
7.6改造service-feign
接下来修改service-feign微服务项目,以使得它可以把信息共享给监控中心。
修改ServiceFeignApplication, 增加 @EnableCircuitBreaker注解,开启开启HystrixDashboard
@SpringBootApplication
@EnableEurekaClient
@EnableFeignClients //开启Feign功能
@EnableCircuitBreaker
public class ServiceFeignApplication {public static void main(String[] args) {int port = 8764;Scanner scanner = new Scanner(System.in);while(true) {String strPort = scanner.nextLine();if (!NumberUtil.isInteger(strPort)) {System.err.println("只能是数字");} else {port = Convert.toInt(strPort);scanner.close();break;}}new SpringApplicationBuilder(ServiceFeignApplication.class).properties("server.port=" + port).run(args);}@Beanpublic Sampler defaultSampler(){return Sampler.ALWAYS_SAMPLE;}//springboot 版本如果是2.0则需要添加 ServletRegistrationBean 因为springboot的默认路径不是 "/hystrix.stream",//只要在自己的项目里配置上下面的servlet就可以了@Beanpublic ServletRegistrationBean getServlet() {HystrixMetricsStreamServlet streamServlet = new HystrixMetricsStreamServlet();ServletRegistrationBean registrationBean = new ServletRegistrationBean(streamServlet);registrationBean.setLoadOnStartup(1);// http://localhost:8765/actuator/hystrix.stream加不加actuator下面这句说的算registrationBean.addUrlMappings("/actuator/hystrix.stream");registrationBean.setName("HystrixMetricsStreamServlet");return registrationBean;}
}
7.7启动并访问
1.首先挨个运行 EurekaServerApplication, EurekaclientApplication, ServiceFeignApplication,HystrixDashboardApplication
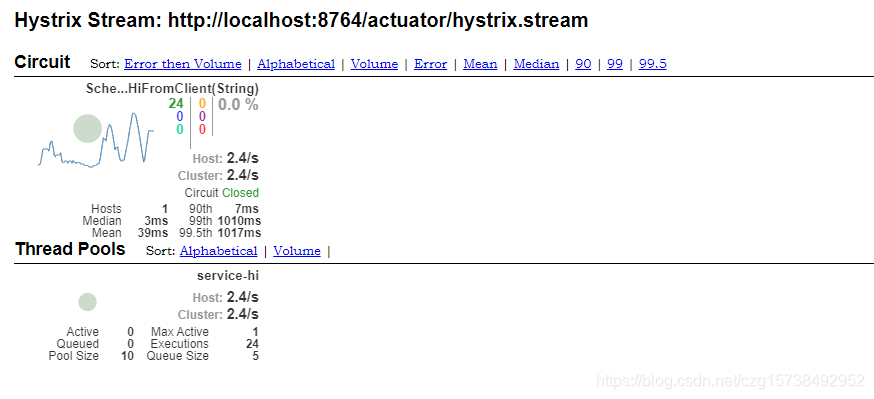
2 . 运行service-feign微服务里接口访问 http://localhost:8764/hi?name=zhangsan。 因为只有访问了,监控里才能看到数据。
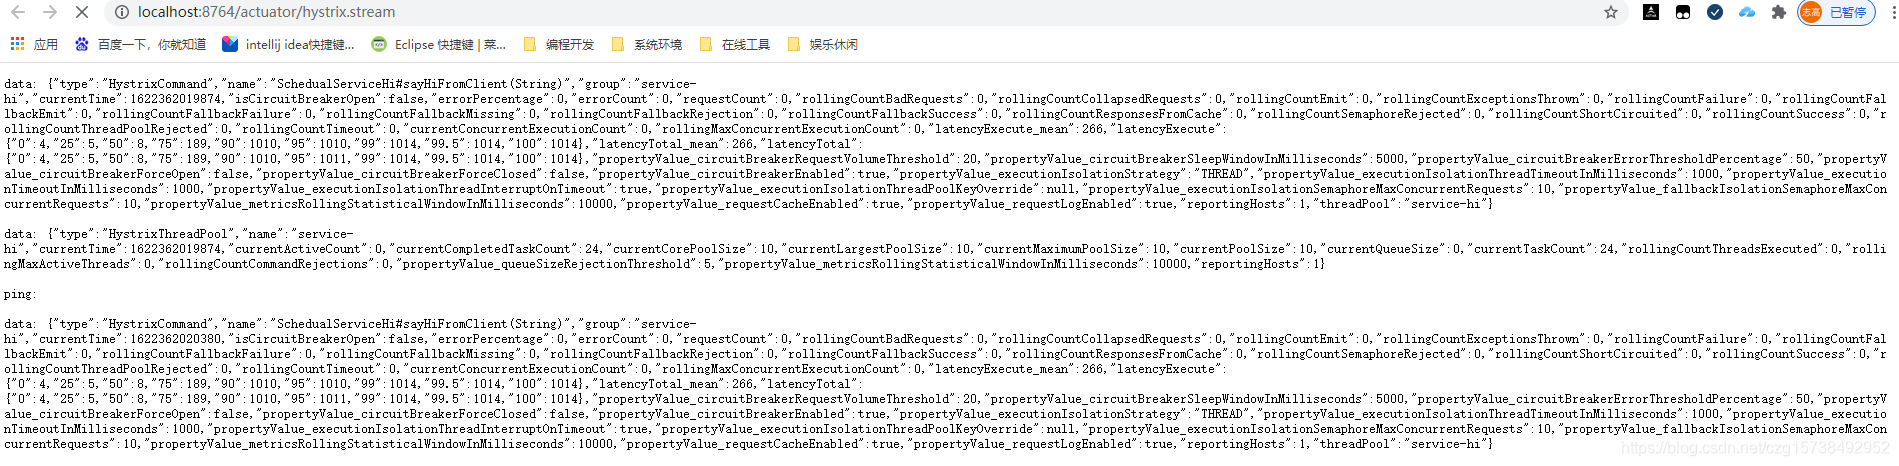
3.打开http://localhost:8764/actuator/hystrix.stream,可以看到一些具体的数据:
4. 打开监控地址
http://localhost:8765/hystrix
5. 如图所示,在最上面输入
http://localhost:8764/actuator/hystrix.stream
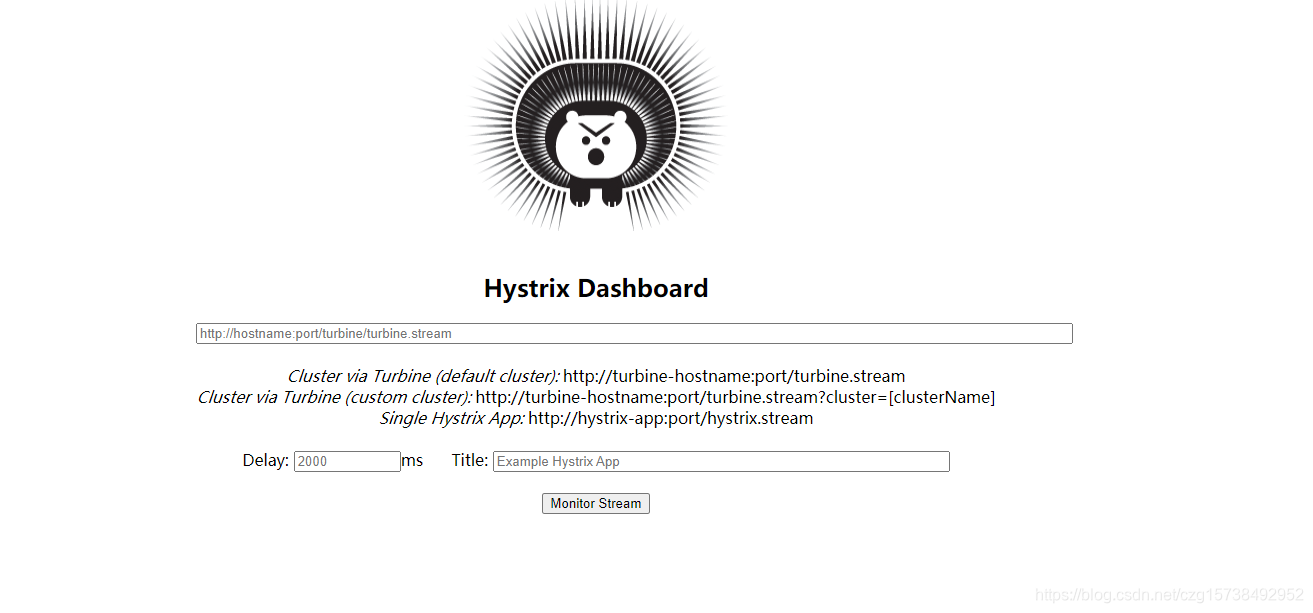
输入: http://localhost:8764/actuator/hystrix.stream
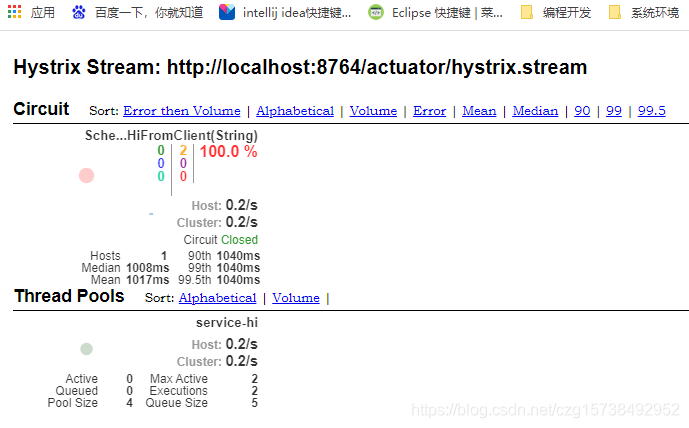
关闭service-hi微服务,此时关闭数据服务,再观察,不一会儿红色的数据就达到 100%啦
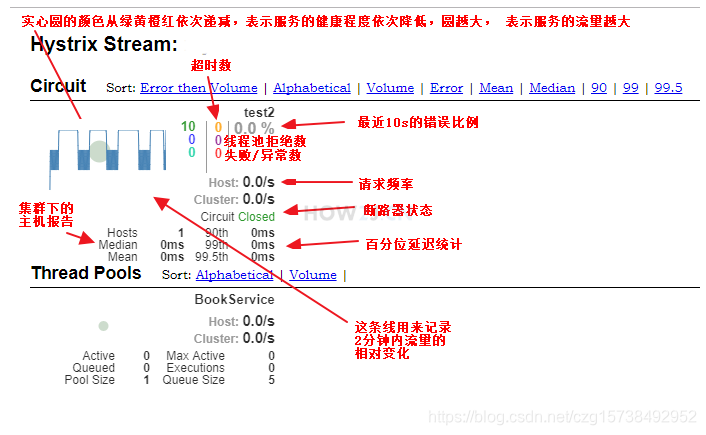
监控 信息中各部分标记解释
8. 断路器监控Turbine
8.1简介
在上个知识点讲解了针对一个微服务的断路器监控,但是微服务通常会是多个实例组成的一个集群。 倘若集群里的实例比较多,难道要挨个挨个去监控这些实例吗? 何况有时候,根据集群的需要,会动态增加或者减少实例,监控起来就更麻烦了。
所以为了方便监控集群里的多个实例,springCloud 提供了一个 turbine 项目,它的作用是把一个集群里的多个实例汇聚在一个 turbine里,这个然后再在 断路器监控里查看这个 turbine, 这样就能够在集群层面进行监控啦。
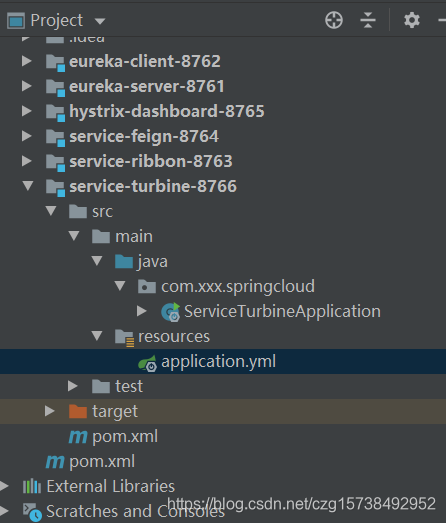
8.2目录结构
创建service-turbine微服务
8.3pom.xml
引入turbine jar包
<?xml version="1.0" encoding="UTF-8"?><project xmlns="http://maven.apache.org/POM/4.0.0" xmlns:xsi="http://www.w3.org/2001/XMLSchema-instance"xsi:schemaLocation="http://maven.apache.org/POM/4.0.0 http://maven.apache.org/xsd/maven-4.0.0.xsd"><parent><artifactId>springcloudF</artifactId><groupId>com.xxx.springcloud</groupId><version>1.0-SNAPSHOT</version></parent><modelVersion>4.0.0</modelVersion><artifactId>service-turbine-8766</artifactId><name>service-turbine-8766</name><!-- FIXME change it to the project's website --><url>http://www.example.com</url><dependencies><dependency><groupId>org.springframework.cloud</groupId><artifactId>spring-cloud-starter-netflix-eureka-client</artifactId></dependency><dependency><groupId>org.springframework.boot</groupId><artifactId>spring-boot-starter-web</artifactId></dependency><dependency><groupId>org.springframework.boot</groupId><artifactId>spring-boot-starter-actuator</artifactId></dependency><dependency><groupId>org.springframework.cloud</groupId><artifactId>spring-cloud-starter-netflix-hystrix</artifactId></dependency><dependency><groupId>org.springframework.cloud</groupId><artifactId>spring-cloud-starter-netflix-hystrix-dashboard</artifactId></dependency><dependency><groupId>org.springframework.cloud</groupId><artifactId>spring-cloud-starter-netflix-turbine</artifactId></dependency></dependencies>
</project>
8.4ServiceTurbineApplication
启动类,主要是注解:@EnableTurbine 开启turbine,@EnableTurbine注解包含了@EnableDiscoveryClient注解,即开启了注册服务。
@SpringBootApplication
@EnableTurbine
public class ServiceTurbineApplication {public static void main(String[] args) {int port = 8766;Scanner scanner = new Scanner(System.in);while(true) {String strPort = scanner.nextLine();if (!NumberUtil.isInteger(strPort)) {System.err.println("只能是数字");} else {port = Convert.toInt(strPort);scanner.close();break;}}new SpringApplicationBuilder(ServiceTurbineApplication.class).properties("server.port=" + port).run(args);}
}
8.5配置信息
配置信息,主要是:
app-config: service-feign
这就表示它会把所有微服务名称是 service-feign 的实例信息都收集起来。
spring:application:name: service-turbine
eureka:client:service-url:defaultZone: http://localhost:8761/eureka/
turbine:aggregator:cluster-config: defaultapp-config: service-feign # 配置Eureka中的serviceId列表,表明监控哪些服务clusterNameExpression: new String("default")
8.6启动并访问
- 首先挨个运行 EurekaServerApplication, EurekaclientApplication, ServiceFeignApplication启动两个(8887,8764),HystrixDashboardApplication,ServiceTurbineApplication
- 运行service-hi微服务 访问 http://localhost:8887/hi?name=zhangsan和 http://localhost:8764/hi?name=zhangsan。 因为只有访问了,监控里才能看到数据。
- 打开监控地址
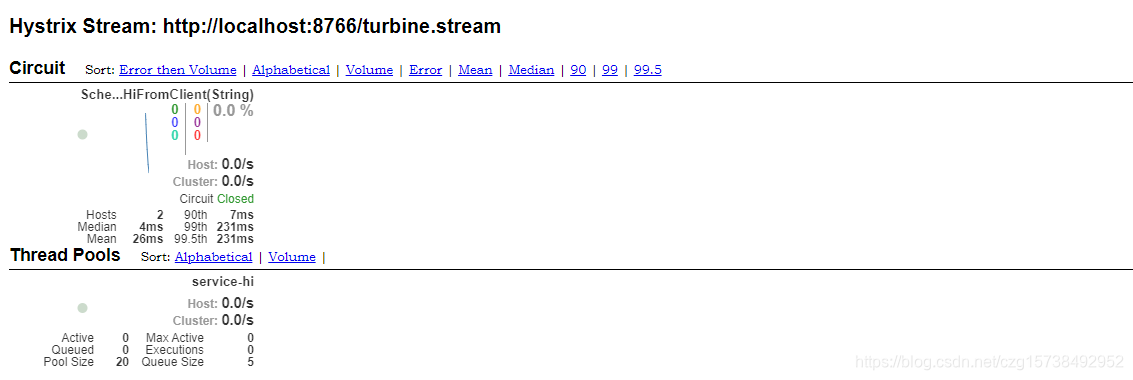
http://localhost:8765/hystrix - 在最上面输入
http://localhost:8766/turbine.stream
这个地址就是汇聚了8764,8887 两个视图微服务 turbine聚合信息。 - 然后点击 Monitor Stream 就可以看到监控信息了。
9.路由网关(zuul)
9.1简介
Zuul的主要功能是路由转发和过滤器。路由功能是微服务的一部分,比如/api/user转发到到user服务,/api/shop转发到到shop服务。zuul默认和Ribbon结合实现了负载均衡的功能。
我们现在有两种微服务,他们有可能放在不同的 ip 地址上,有可能是不同的端口。
为了访问他们,就需要记录这些地址和端口。 而地址和端口都可能会变化,这就增加了访问者的负担。
所以这个时候,我们就可以用网关来解决这个问题。
如果要访问service-ribbon服务,访问地址 http://ip:port/api-a/hi 即可。
如果要访问service-feign服务,访问地址 http://ip:port/api-b/hi 即可。
9.2目录结构
创建service-zuul微服务

9.3pom.xml
pom.xml文件如下:
<?xml version="1.0" encoding="UTF-8"?><project xmlns="http://maven.apache.org/POM/4.0.0" xmlns:xsi="http://www.w3.org/2001/XMLSchema-instance"xsi:schemaLocation="http://maven.apache.org/POM/4.0.0 http://maven.apache.org/xsd/maven-4.0.0.xsd"><parent><artifactId>springcloudF</artifactId><groupId>com.xxx.springcloud</groupId><version>1.0-SNAPSHOT</version></parent><modelVersion>4.0.0</modelVersion><artifactId>service-zuul-8767</artifactId><name>service-zuul-8767</name><!-- FIXME change it to the project's website --><url>http://www.example.com</url><dependencies><dependency><groupId>org.springframework.cloud</groupId><artifactId>spring-cloud-starter-netflix-eureka-client</artifactId></dependency><dependency><groupId>org.springframework.boot</groupId><artifactId>spring-boot-starter-web</artifactId></dependency><dependency><groupId>org.springframework.cloud</groupId><artifactId>spring-cloud-starter-netflix-zuul</artifactId></dependency></dependencies>
</project>
9.4ServiceZuulApplication
在其入口application类加上注解@EnableZuulProxy,开启zuul的功能
@SpringBootApplication
@EnableEurekaClient
@EnableZuulProxy
public class ServiceZuulApplication {public static void main(String[] args) {int port = 8767;Scanner scanner = new Scanner(System.in);while(true) {String strPort = scanner.nextLine();if (!NumberUtil.isInteger(strPort)) {System.err.println("只能是数字");} else {port = Convert.toInt(strPort);scanner.close();break;}}new SpringApplicationBuilder(ServiceZuulApplication.class).properties("server.port=" + port).run(args);}
}
9.5配置信息
首先指定服务注册中心的地址为http://localhost:8761/eureka/,服务名为service-zuul;以/api-a/ 开头的请求都转发给service-ribbon服务;以/api-b/开头的请求都转发给service-feign服务;
eureka:client:serviceUrl:defaultZone: http://localhost:8761/eureka/
zuul:routes:api-a:path: /api-a/**serviceId: service-ribbonapi-b:path: /api-b/**serviceId: service-feign
spring:application:name: service-turbine
9.6启动并访问
- 首先挨个运行 EurekaServerApplication, EurekaclientApplication, ServiceFeignApplication, ServiceRibbonApplication
- 然后启动 ServiceZuulApplication
- 接着访问地址:
http://localhost:8767/api-a/hi?name=forezp
显示:hiforezp ,i am from port:8001
http://localhost:8767/api-b/hi?name=forezp
显示:hiforezp ,i am from port:8001
这说明zuul起到了路由的作用,就可以访问服务集了,并且无需去记住那么多ip地址和端口号了。
zuul不仅只是路由,并且还能过滤,做一些安全验证。
10.分布式配置中心
10.1简介
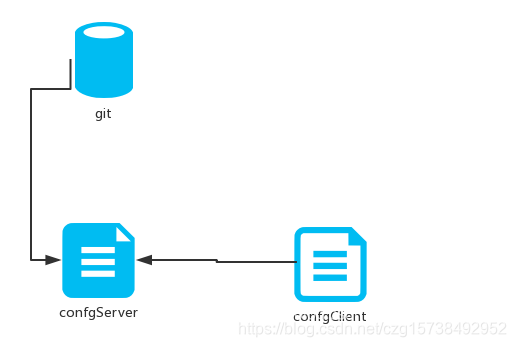
在分布式系统中,由于服务数量巨多,为了方便服务配置文件统一管理,实时更新,所以需要分布式配置中心组件。在Spring Cloud中,有分布式配置中心组件spring cloud config ,它支持配置服务放在配置服务的内存中(即本地),也支持放在远程Git仓库中。在spring cloud config 组件中,分两个角色,一是config server,二是config client。
这样只要修改git上的信息,那么同一个集群里的所有微服务都立即获取相应信息了,这样就大大节约了开发,上线和重新部署的时间了。
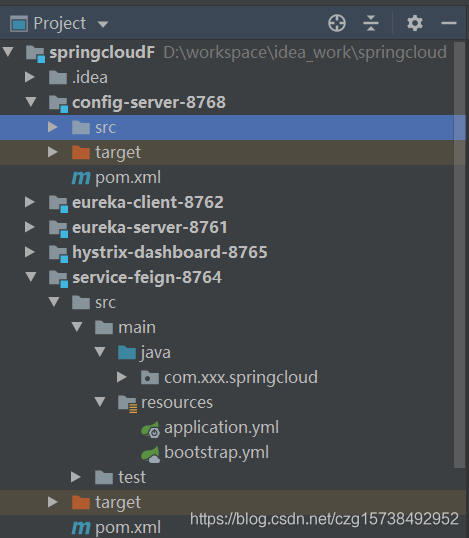
10.2目录结构
创建一个config-server微服务,更改service-feign微服务
10.3构建Config Server
10.3.1 pom.xml
<?xml version="1.0" encoding="UTF-8"?><project xmlns="http://maven.apache.org/POM/4.0.0" xmlns:xsi="http://www.w3.org/2001/XMLSchema-instance"xsi:schemaLocation="http://maven.apache.org/POM/4.0.0 http://maven.apache.org/xsd/maven-4.0.0.xsd"><parent><artifactId>springcloudF</artifactId><groupId>com.xxx.springcloud</groupId><version>1.0-SNAPSHOT</version></parent><modelVersion>4.0.0</modelVersion><artifactId>config-server-8768</artifactId><name>config-server-8768</name><!-- FIXME change it to the project's website --><url>http://www.example.com</url><dependencies><dependency><groupId>org.springframework.cloud</groupId><artifactId>spring-cloud-starter-netflix-eureka-client</artifactId></dependency><dependency><groupId>org.springframework.boot</groupId><artifactId>spring-boot-starter-web</artifactId></dependency><dependency><groupId>org.springframework.cloud</groupId><artifactId>spring-cloud-config-server</artifactId></dependency></dependencies>
</project>
10.3.2ConfigServerApplication
@SpringBootApplication
@EnableEurekaClient
@EnableConfigServer //表示 springboot 是个配置服务器
public class ConfigServerApplication {public static void main(String[] args) {int port = 8768;Scanner scanner = new Scanner(System.in);while(true) {String strPort = scanner.nextLine();if (!NumberUtil.isInteger(strPort)) {System.err.println("只能是数字");} else {port = Convert.toInt(strPort);scanner.close();break;}}new SpringApplicationBuilder(ConfigServerApplication.class).properties("server.port=" + port).run(args);}
}
10.3.3准备git
首先要准备git。
如下是已经准备好的 git:
https://gitee.com/Cheng_Teams/springcloud-config/blob/master/respo/service-feign-dev.properties
这里就准备了版本信息:version = ccc springcloud version 1.8
注意:
英文我们读取的配置文件名字叫 config-client-dev.properties
根据规则 /{application}-{profile}.properties
该文件只能给应用名叫config-client的服务当配置文件,所以一个字符都不能改
我这里config-client是用的service-feign服务,所有名称叫:service-feign-dev.properties

http请求地址和资源文件映射如下:
/{application}/{profile}[/{label}]
/{application}-{profile}.yml
/{label}/{application}-{profile}.yml
/{application}-{profile}.properties
/{label}/{application}-{profile}.properties
10.3.4配置信息
spring:application:name: config-servercloud:config:label: masterserver:git:uri: https://gitee.com/Cheng_Teams/springcloud-config.gitsearch-paths: respo
eureka:client:service-url:defaultZone: http://localhost:8761/eureka/
10.3.5启动并访问
先启动 EurekaServerApplication, 再启动 ConfigServerApplication, 然后访问
http://localhost:8768/config-server/dev
看到如图所示,就表示配置服务器准备好了

10.4 构建一个config client
改造service-feign
10.4.1pom.xml
引入 spring-cloud-starter-config 包
<?xml version="1.0" encoding="UTF-8"?><project xmlns="http://maven.apache.org/POM/4.0.0" xmlns:xsi="http://www.w3.org/2001/XMLSchema-instance"xsi:schemaLocation="http://maven.apache.org/POM/4.0.0 http://maven.apache.org/xsd/maven-4.0.0.xsd"><parent><artifactId>springcloudF</artifactId><groupId>com.xxx.springcloud</groupId><version>1.0-SNAPSHOT</version></parent><modelVersion>4.0.0</modelVersion><artifactId>service-feign-8764</artifactId><name>service-feign-8764</name><!-- FIXME change it to the project's website --><url>http://www.example.com</url><dependencies><dependency><groupId>org.springframework.cloud</groupId><artifactId>spring-cloud-starter-netflix-eureka-client</artifactId></dependency><dependency><groupId>org.springframework.boot</groupId><artifactId>spring-boot-starter-web</artifactId></dependency><dependency><groupId>org.springframework.cloud</groupId><artifactId>spring-cloud-starter-openfeign</artifactId></dependency><dependency><groupId>org.springframework.cloud</groupId><artifactId>spring-cloud-starter-zipkin</artifactId></dependency><dependency><groupId>org.springframework.cloud</groupId><artifactId>spring-cloud-starter-netflix-hystrix</artifactId></dependency><dependency><groupId>org.springframework.cloud</groupId><artifactId>spring-cloud-starter-config</artifactId></dependency></dependencies>
</project>
10.4.2bootstrap.yml
作为配置客户端,比较。。。特别~ 它需要在 bootstrap.yml 里配置 config-server 的信息,而不是像以前那样在 application.yml 里进行配置。
bootstrap.yml 和 application.yml 的区别,简单说就是前者先启动,并且一些系统方面的配置需要在 bootstrap.yml 里进行配置。
spring.cloud.config.label 指明远程仓库的分支
spring.cloud.config.profile
dev开发环境配置文件
test测试环境
pro正式环境
spring.cloud.config.uri= http://localhost:8768/ 指明配置服务中心的网址。
spring.cloud.config.discovery.enabled 是从配置中心读取文件。
spring:cloud:config:label: masterprofile: devdiscovery:enabled: trueserviceId: config-serveruri: http://localhost:8768/
10.4.3 HelloController
增加这个属性,就可以从 config-server 去获取 version 信息了。
 @Value("${version}")
String version;
写一个API接口“/version”,返回从配置中心读取version变量的值,代码如下:
@RequestMapping("version")
public String getVersion(){return  version;}
10.4.4运行并访问
打开网址访问:http://localhost:8764/version,网页显示:
ccc springcloud version 1.8
这就说明,config-client从config-server获取了version的属性,而config-server是从git仓库读取的,如图:
11.消息总线BUS
11.1 简介
之前的教程虽然配置了config-server, 也把 service-feign服务改造成了配置客户端,但是当需要刷新配置信息的时候,不得不既重启 config-server, 又重启微服务。 这样的体验当然是不太好的。 我们当然是希望一旦 git 上的配置信息修改之后,就可以自动地刷新到微服务里,而不是需要手动重启才可以。
11.2目录结构
11.3 改造server-feign
为了达到上述效果,基于上个知识点配置客户端做了哪些改造。
11.4pom.xml
- 多了spring-boot-starter-actuator 用于访问路径:/actuator/bus-refresh
- 多了spring-cloud-starter-bus-amqp 用于支持 rabbitmq
<?xml version="1.0" encoding="UTF-8"?><project xmlns="http://maven.apache.org/POM/4.0.0" xmlns:xsi="http://www.w3.org/2001/XMLSchema-instance"xsi:schemaLocation="http://maven.apache.org/POM/4.0.0 http://maven.apache.org/xsd/maven-4.0.0.xsd"><parent><artifactId>springcloudF</artifactId><groupId>com.xxx.springcloud</groupId><version>1.0-SNAPSHOT</version></parent><modelVersion>4.0.0</modelVersion><artifactId>service-feign-8764</artifactId><name>service-feign-8764</name><!-- FIXME change it to the project's website --><url>http://www.example.com</url><dependencies><dependency><groupId>org.springframework.cloud</groupId><artifactId>spring-cloud-starter-netflix-eureka-client</artifactId></dependency><dependency><groupId>org.springframework.boot</groupId><artifactId>spring-boot-starter-web</artifactId></dependency><dependency><groupId>org.springframework.cloud</groupId><artifactId>spring-cloud-starter-openfeign</artifactId></dependency><dependency><groupId>org.springframework.cloud</groupId><artifactId>spring-cloud-starter-zipkin</artifactId></dependency><dependency><groupId>org.springframework.cloud</groupId><artifactId>spring-cloud-starter-netflix-hystrix</artifactId></dependency><dependency><groupId>org.springframework.cloud</groupId><artifactId>spring-cloud-starter-config</artifactId></dependency><dependency><groupId>org.springframework.boot</groupId><artifactId>spring-boot-starter-actuator</artifactId></dependency><dependency><groupId>org.springframework.cloud</groupId><artifactId>spring-cloud-starter-bus-amqp</artifactId></dependency></dependencies>
</project>
11.5bootstrap.yml
新增 but总线配置
bus: enabled: truetrace:enabled: true
新增 rabbitMQ 配置(也是默认)
rabbitmq:host: localhostprot: 5762username: guestpassword: guest
所有配置
spring:cloud:config:label: masterprofile: devdiscovery:enabled: trueserviceId: config-serveruri: http://localhost:8768/bus: # 新增 but总线配置enabled: truetrace:enabled: truerabbitmq:host: localhostprot: 5762username: guestpassword: guest
11.6application.yml
新增路径访问允许:
# 允许访问 /actuator/bus-refresh
management:endpoints:web:exposure:include: "*"cors:allowed-origins: "*"allowed-methods: "*"
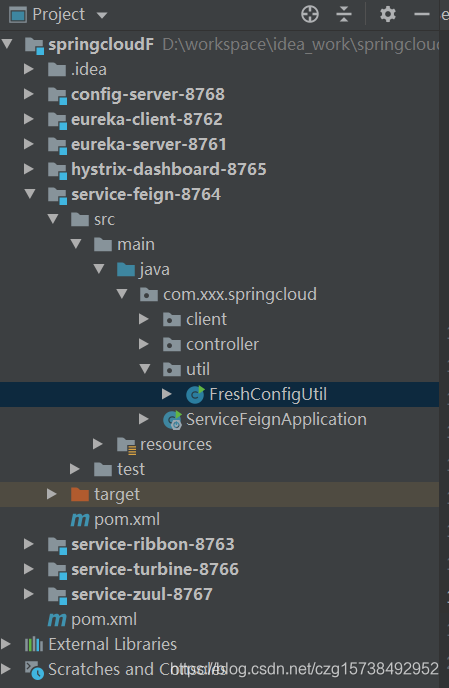
11.7FreshConfigUtil
使用 post 的方式访问 http://localhost:8764/actuator/bus-refresh 地址,之所以要专门做一个 FreshConfigUtil 类,就是为了可以使用 post 访问,因为它不支持 get 方式访问,直接把这个地址放在浏览器里,是会抛出 405错误的。
public class FreshConfigUtil {public static void main(String[] args) {HashMap<String,String> headers =new HashMap<>();headers.put("Content-Type", "application/json; charset=utf-8");System.out.println("因为要去git获取,还要刷新config-server, 会比较卡,所以一般会要好几秒才能完成,请耐心等待");String result = HttpUtil.createPost("http://localhost:8764/actuator/bus-refresh").addHeaders(headers).execute().body();System.out.println("result:"+result);System.out.println("refresh 完成");}
}
11.8对服务链路追踪的影响
因为视图服务进行了改造,支持了 rabbitMQ, 那么在默认情况下,它的信息就不会进入 Zipkin了。 在Zipkin 里看不到视图服务的资料了。
为了解决这个问题,在启动 Zipkin 的时候 带一个参数就好了:
zipkin.collector.rabbitmq.addresses=localhost
即本来是
java -jar zipkin-server-2.10.1-exec.jar
现在改成了
java -jar zipkin-server-2.10.1-exec.jar --zipkin.collector.rabbitmq.addresses=localhost
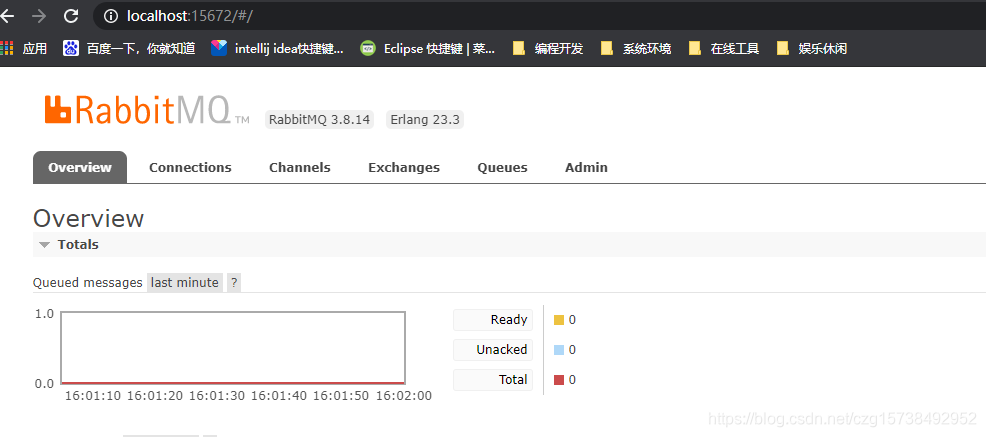
11.9RabbitMQ
springCloud 通过 rabbitMQ 来进行消息广播,以达到有配置信息发生改变的时候,广播给多个微服务的效果。
所以需要先安装 rabbitMQ 服务器。
启动rabbitMQ服务器
11.10运行并访问
- 首先挨个启动 EurekaServerApplication, ConfigServerApplication, ServiceFeignApplication
- 此时访问 http://localhost:8764/version
- 修改 git 里的版本号为新的数值
- 然后运行 FreshConfigUtil, 使用 post 的方式访问 http://localhost:8764/actuator/bus-refresh 地址,之所以要专门做一个 FreshConfigUtil 类,就是为了可以使用 post 访问,因为它不支持 get 方式访问,直接把这个地址放在浏览器里,是会抛出 405错误的。
这个地址的作用就是让 config-server 去 git 获取最新的配置信息,并把此信息广播给service-feign微服务。 - 再次访问
http://localhost:8764/version
可以看到 版本号是修改之后的值了
12.路由网关(Gateway)
12.1简介
服务的相互调用都是依赖于服务中心提供的入口来使用,服务中心往往注册了很多服务,如果每个服务都需要单独配置的话,非常麻烦。Spring Cloud Gateway 提供了一种默认转发的能力,只要将 Spring Cloud Gateway 注册到服务中心,Spring Cloud Gateway 默认就会代理服务中心的所有服务
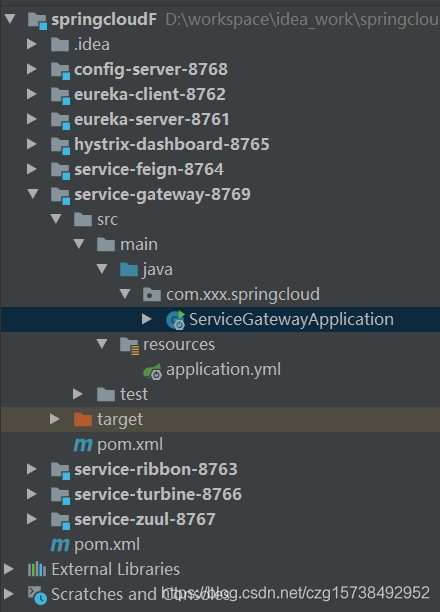
12.2目录结构
创建一个service-geteway微服务
12.3pom.xml
<?xml version="1.0" encoding="UTF-8"?><project xmlns="http://maven.apache.org/POM/4.0.0" xmlns:xsi="http://www.w3.org/2001/XMLSchema-instance"xsi:schemaLocation="http://maven.apache.org/POM/4.0.0 http://maven.apache.org/xsd/maven-4.0.0.xsd"><parent><artifactId>springcloudF</artifactId><groupId>com.xxx.springcloud</groupId><version>1.0-SNAPSHOT</version></parent><modelVersion>4.0.0</modelVersion><artifactId>service-gateway-8769</artifactId><name>service-gateway-8769</name><!-- FIXME change it to the project's website --><url>http://www.example.com</url><dependencies><dependency><groupId>org.springframework.cloud</groupId><artifactId>spring-cloud-starter-gateway</artifactId></dependency><dependency><groupId>org.springframework.cloud</groupId><artifactId>spring-cloud-starter-netflix-eureka-client</artifactId></dependency></dependencies>
</project>
12.4ServiceGatewayApplication
@SpringBootApplication
@EnableEurekaClient
public class ServiceGatewayApplication {public static void main(String[] args) {int port = 8769;Scanner scanner = new Scanner(System.in);while(true) {String strPort = scanner.nextLine();if (!NumberUtil.isInteger(strPort)) {System.err.println("只能是数字");} else {port = Convert.toInt(strPort);scanner.close();break;}}new SpringApplicationBuilder(ServiceGatewayApplication.class).properties("server.port=" + port).run(args);}
}
12.5配置信息
spring:application:name: service-getewaycloud:gateway:discovery:locator:enabled: truelower-case-service-id: true
eureka:client:service-url:defaultZone: http://localhost:8761/eureka/
spring.cloud.gateway.discovery.locator.enabled:是否与服务注册于发现组件进行结合,通过 serviceId 转发到具体的服务实例。默认为 false,设为 true 便开启通过服务中心的自动根据 serviceId 创建路由的功能。
spring.cloud.gateway.discovery.locator.lowerCaseServiceId:是将请求路径上的服务名配置为小写(因为服务注册的时候,向注册中心注册时将服务名转成大写的了)。
eureka.client.service-url.defaultZone:指定注册中心的地址,以便使用服务发现功能。
logging.level.org.springframework.cloud.gateway:调整相 gateway 包的 log 级别,以便排查问题。
12.6启动并访问
启动三个项目EurekaserverApplication,EurekaclientApplication,ServiceGatewayApplication后,访问 http://localhost:8769/service-hi/hi?name=zhangsan,返回如下:
hizhangsan ,i am from port:8001
说明服务网关转发成功了。
12.7自定义请求路径
在上面的例子中,向service-gateway发送的请求时,url必须带上服务名service-hi这个前缀,才能转发到service-hi上,转发之前会将service-hi去掉。有时服务名称过长,不易使用,需要自定义路径并转发到具体的服务上。配置如下:
application.yml
spring:application:name: service-getewaycloud:gateway:discovery:locator:enabled: falselower-case-service-id: trueroutes:- id: service-hiuri: lb://SERVICE-HIpredicates:- Path=/demo/**filters:- StripPrefix=1
eureka:client:service-url:defaultZone: http://localhost:8761/eureka/
在上面的配置中,配置了一个Path 的 predict,将以/demo/**开头的请求都会转发到uri为lb://SERVICE-HI的地址上,lb://SERVICE-HI即service-hi服务的负载均衡地址,并用StripPrefix的filter 在转发之前将/demo去掉。同时将spring.cloud.gateway.discovery.locator.enabled改为false,如果不改的话,之前的localhost:8768/service-hi/hi?name=zhangsan~这样的请求地址也能正常访问,因为这时为每个服务创建了2个router。
重启service-gateway项目后,访问 http://localhost:8769/demo/hi?name=zhangsan~ ,返回如下:
hizhangsan~ ,i am from port:8001
服务网关转发成功,说明自定义请求路径生效了。
13.注册中心consul
13.1简介
前面分别讲了Eureka注册中心搭建,今天说说Consul搭建。
Consul 使用 Go 语言编写,因此具有天然可移植性(支持Linux、windows和Mac OS X);安装包仅包含一个可执行文件,方便部署,与 Docker 等轻量级容器可无缝配合。
13.2安装并运行consul
consul下载: https://www.consul.io
安装并运行:
解压后得到consul.exe

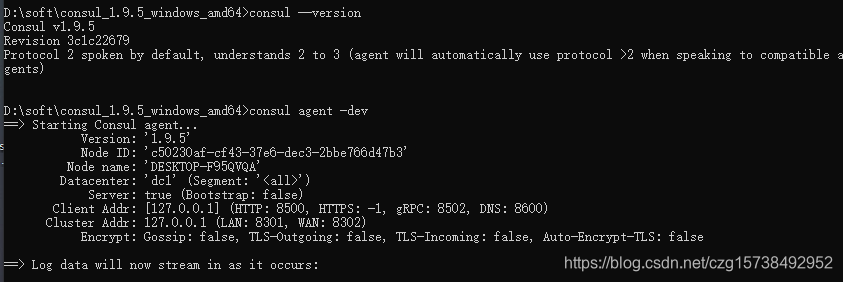
在cmd中输入:consul --version,查看版本

运行,在cmd输入:
consul agent -dev-dev表示开发模式运行,另外还有-server表示服务模式运行
运行结果:
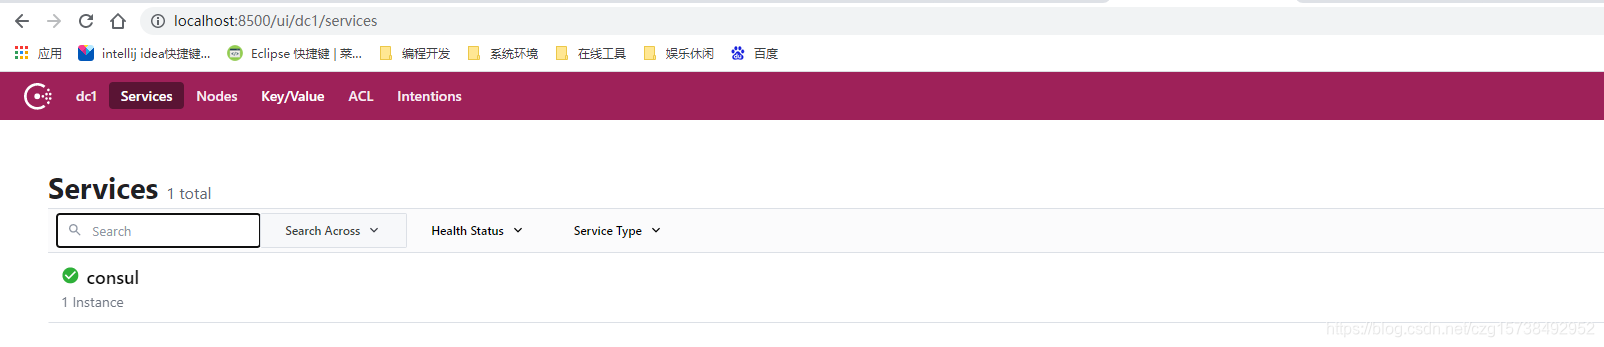
输入地址查看运行结果: http://localhost:8500/ui
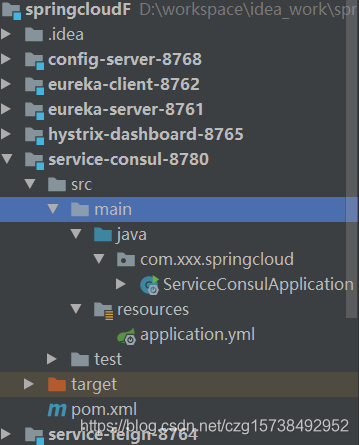
13.3目录结构
创建一个 service-consul-8780 服务
13.4 pom.xml
引入consul 依赖和actuator 健康检查
<?xml version="1.0" encoding="UTF-8"?><project xmlns="http://maven.apache.org/POM/4.0.0" xmlns:xsi="http://www.w3.org/2001/XMLSchema-instance"xsi:schemaLocation="http://maven.apache.org/POM/4.0.0 http://maven.apache.org/xsd/maven-4.0.0.xsd"><parent><artifactId>springcloudF</artifactId><groupId>com.xxx.springcloud</groupId><version>1.0-SNAPSHOT</version></parent><modelVersion>4.0.0</modelVersion><artifactId>service-consul-8780</artifactId><name>service-consul-8780</name><!-- FIXME change it to the project's website --><url>http://www.example.com</url><dependencies><dependency><groupId>org.springframework.boot</groupId><artifactId>spring-boot-starter-web</artifactId></dependency><!-- 引入 consul 依赖--><dependency><groupId>org.springframework.cloud</groupId><artifactId>spring-cloud-starter-consul-discovery</artifactId></dependency><!-- 引入 actuator 健康检查 --><dependency><groupId>org.springframework.boot</groupId><artifactId>spring-boot-starter-actuator</artifactId></dependency></dependencies>
</project>
13.5配置信息
Consul 的地址和端口号默认是 localhost:8500 ,如果不是这个地址可以自行配置。spring.cloud.consul.discovery.serviceName 是指注册到 Consul 的服务名称,后期客户端会根据这个名称来进行服务调用。
spring:application:name: service-consulcloud:consul: #consul注册中心地址host: localhostport: 8500discovery:service-name: ${spring.application.name} #可不写,默认
13.6ServiceConsulApplication
@SpringBootApplication
@EnableDiscoveryClient //开启客户端注解
public class ServiceConsulApplication {public static void main(String[] args) {int port = 8780;Scanner scanner = new Scanner(System.in);while(true) {String strPort = scanner.nextLine();if (!NumberUtil.isInteger(strPort)) {System.err.println("只能是数字");} else {port = Convert.toInt(strPort);scanner.close();break;}}new SpringApplicationBuilder(ServiceConsulApplication.class).properties("server.port=" + port).run(args);}
}
13.7启动并访问
启动ServiceConsulApplication,刷新Consul,可以看到service-consul服务已经注册上去了。

这篇关于springcloud Finchley版本系列的文章就介绍到这儿,希望我们推荐的文章对编程师们有所帮助!


