本文主要是介绍RHCE作业:搭建web网站,希望对大家解决编程问题提供一定的参考价值,需要的开发者们随着小编来一起学习吧!
综合练习:
请给openlab搭建web网站
网站需求:
1.域名访问网站
基于域名www.openlab.com可以访问网站内容为 welcome to openlab!!!
2.创建界面
给该公司创建三个子界面分别显示学生信息,教学资料 和缴费网站,基于www.openlab.com/data网站访问
教学 资料 www.openlab.com/money网站访问缴费网站。
3.要求:
(1)学生信息网站只有song和tian两人可以访问,其他 用户不能访问。
(2)访问缴费网站实现数据加密基于https访问。
具体操作
第一步:准备工作
# 恢复快照,关闭安全软件
# 安装所需软件
[root@server ~]# yum install nginx httpdtools -y

此时以显示完成。
# Windows的 C:\Windows\System32\drivers\etc\hosts 文件进 行DNS映射 192.168.48.130 www.openlab.com

映射是不能写子域名,任何的DNS域名解析映射的都是主域名!
第二步:创建www.openlab.com网站
总步骤
[root@server ~]# mkdir -p /www/openlab[root@server ~]# echo 'welcom to openlab' > /www/openlab/index.html[root@server ~]# vim /etc/nginx/nginx.conf server { listen 80; server_name www.openlab.com; root /www/openlab; }[root@server ~]# systemctl start nginx# Windows端打开浏览器输入www.openlab.com测试1.创建目录及网页:
[root@server ~]# mkdir -p /www/openlab
[root@server ~]# echo 'welcome to openlab' > /www/openlab/index.html
打开nginx的配置文件,修改server内容: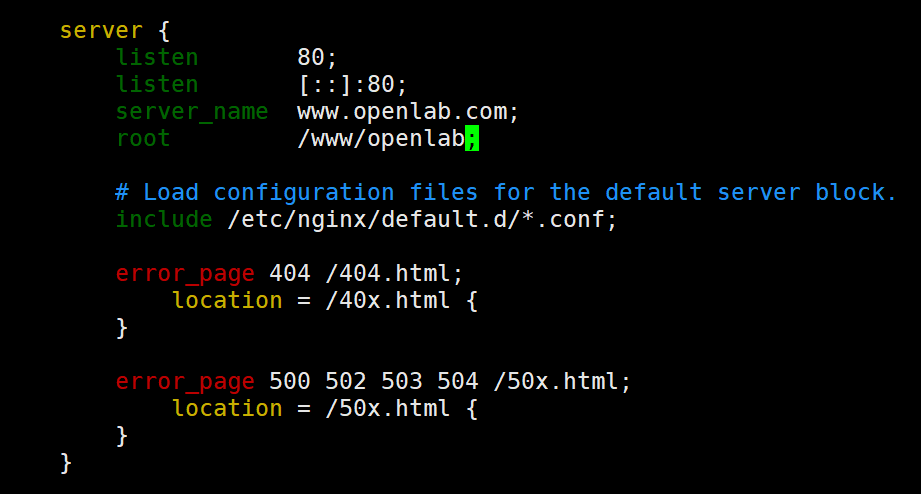
2.重启服务

3.进入浏览器进行测试

第三步:创建教学资料子网站www.openlab.com/data
总步骤
[root@server ~]# mkdir /www/openlab/data
[root@server ~]# echo 'data' >
/www/openlab/data/index.html
[root@server ~]# vim /etc/nginx/nginx.conf
# 接着之前的继续向下编写
server {listen       80;server_name
www.openlab.com;root         /www/openlab;# 增加如下子配置location /data {alias /www/openlab/data;index index.html index.htm;}}
[root@server ~]# systemctl restart nginx
# Windows端打开浏览器输入www.openlab.com/data测试
1.创建目录及网页

2.编辑nginx配置文件
vim /etc/nginx/nginx.conf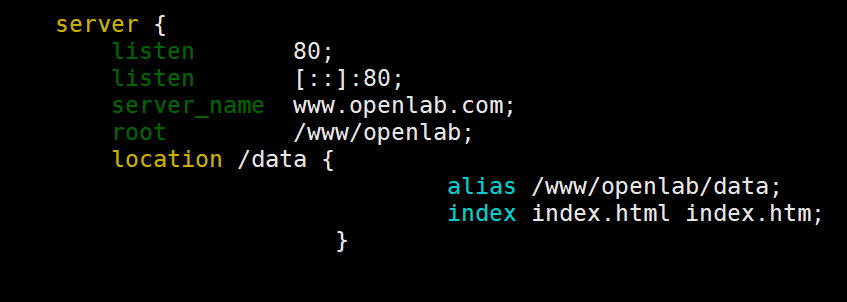
3.重启服务

******在每次修改完配置文件时,可以用 -t 命令检查文件是否配置正确!
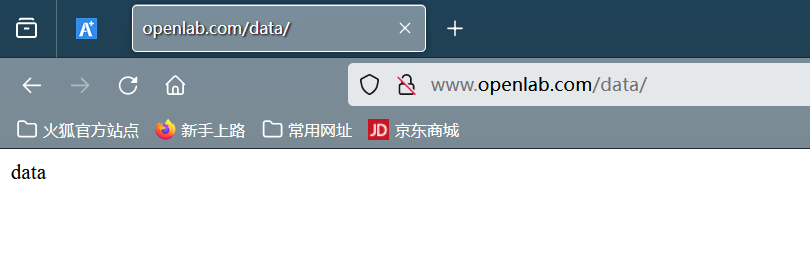
4.打开浏览器测试
打开浏览器,输入 www.openlab.com/data 进行测试.
第四步:创建学生信息子网站www.openlab.com/studen t
总步骤
[root@server ~]# mkdir /www/openlab/student
[root@server ~]# echo 'student' >
/www/openlab/student/index.html
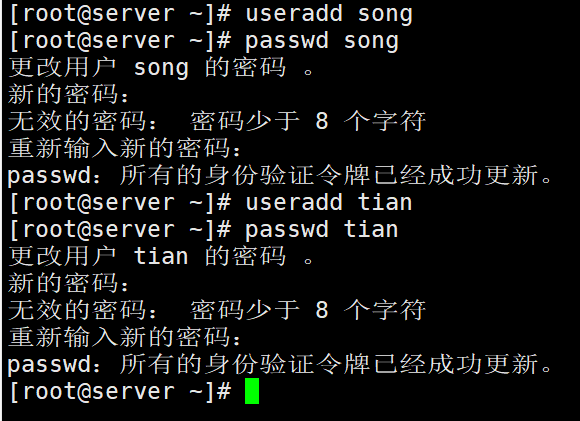
[root@server ~]# useradd song
[root@server ~]# passwd song   # 密码123456
[root@server ~]# useradd tian
[root@server ~]# passwd tian   # 密码654321
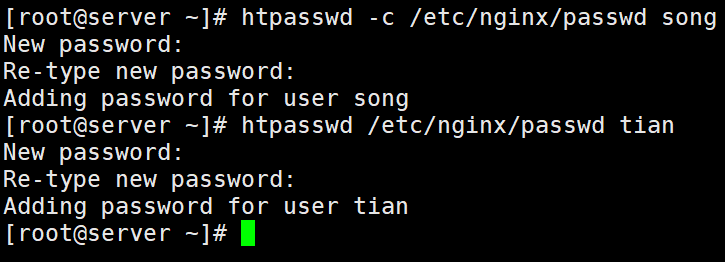
[root@server ~]# htpasswd -c
/etc/nginx/passwd song # 密码123456
[root@server ~]# htpasswd /etc/nginx/passwd
tian   # 密码654321
[root@server ~]# vim /etc/nginx.conf   # 接
着之前的继续向下编写
server {listen       80;server_name www.openlab.com;root         /www/openlab;location /data {alias
/www/openlab/data;index
index.html index.htm;}# 增加如下子配置location /student{alias
/www/openlab/student;index
index.html index.htm;auth_basic
"Please input password";auth_basic_user_file   /etc/nginx/passwd;}}
[root@server ~]# systemctl restart nginx
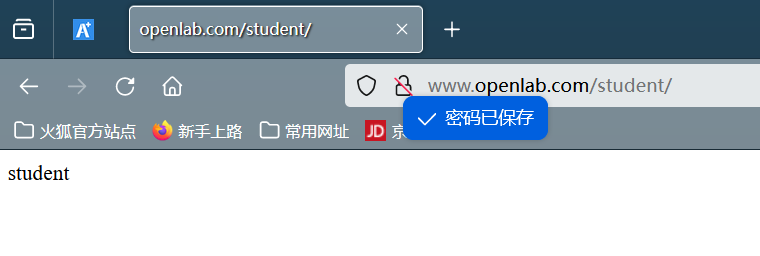
# Windows端打开浏览器输入
www.openlab.com/student测试,多次测试需要清除浏览器缓存
1.创建目录及网页

2.创建用户
3.创建用户加密信息
4.编辑nginx配置文件

5.重启服务

6.打开浏览器测试
Windows端打开浏览器输入 www.openlab.com/student测试,多次测试需要清除浏 览器缓存

第五步:创建缴费子网站www.openlab.com/money
总步骤
[root@server ~]# mkdir /www/openlab/money
[root@server ~]# echo 'money' >
/www/openlab/money/index.html
[root@server ~]# openssl genrsa -aes128
2048 > /etc/nginx/money.key
Generating RSA private key, 2048 bit long
modulus (2 primes)
....................+++++
...................................+++++
e is 65537 (0x010001)
Enter pass phrase:               # 输入加密私Verifying - Enter pass phrase:   # 在输入一遍
[root@server ~]# openssl req -utf8 -new
-key /etc/nginx/money.key -x509 -days
365 -out /etc/nginx/money.crt   # 制作证书
Enter pass phrase for /etc/nginx/money.key:
You are about to be asked to enter
information that will be incorporated
into your certificate request.
What you are about to enter is what is
called a Distinguished Name or a DN.
There are quite a few fields but you can
leave some blank
For some fields there will be a default
value,
If you enter '.', the field will be left
blank.
-----# 证书信息:
Country Name (2 letter code) [AU]:86
State or Province Name (full name) [SomeState]:shanxi
LocalityName (eg, city) []:xi'an
Organization Name (eg, company) [Internet
Widgits Pty Ltd]:openlab
Organizational Unit Name (eg, section)
[]:RHCE
Common Name (e.g. server FQDN or YOUR name)
[]:server
Email Address []:andy@qq.com
[root@server ~]# cd /etc/nginx
[root@server nginx]# cp money.key
money.key.org
钥的密码123456
[root@server nginx]# openssl rsa -in
money.key.org -out money.key
Enter pass phrase for money.key.org:    # 输
入私钥密码
writing RSA key
[root@server nginx]# vim
/etc/nginx/nginx.conf
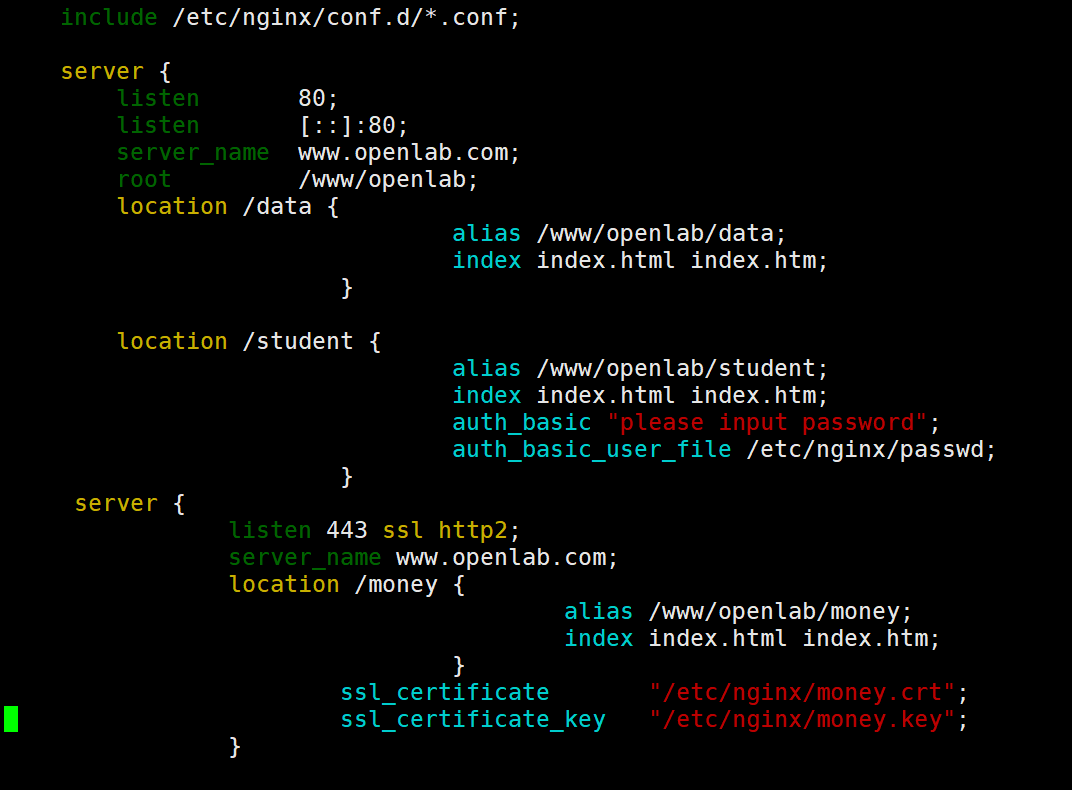
server {listen       80;server_name www.openlab.com;root         /www/openlab;location /data {alias
/www/openlab/data;index
index.html index.htm;                       }location /student{alias
/www/openlab/student;index
index.html index.htm;auth_basic
"Please input password";auth_basic_user_file   /etc/nginx/passwd;}}# 增加以下内容server {listen       443 ssl http2;server_name
www.openlab.com;location /money {alias /www/openlab/money;index index.html index.htm;}ssl_certificate
"/etc/nginx/money.crt";ssl_certificate_key
"/etc/nginx/money.key";}[root@server nginx]# systemctl restart nginx # Windows端打开浏览器输入
https://www.openlab.com/money测试
1.创建目录及网页

2.制作私钥

3.制作证书

4.去除私钥加密密码

5.编辑nginx配置文件
6.重启服务

7.打开浏览器测试

这篇关于RHCE作业:搭建web网站的文章就介绍到这儿,希望我们推荐的文章对编程师们有所帮助!
