本文主要是介绍基础知识学习 -- qnx 系统,希望对大家解决编程问题提供一定的参考价值,需要的开发者们随着小编来一起学习吧!
QNX是一个基于优先级抢占的系统。
这也导致其基本调度算法相对比较简单。因为不需要像别的通用操作系统考虑一些复杂的“公平性”,只需要保证“优先级最高的线程最优先得到 CPU”就可以了。
基本调度算法
调度算法,是基于优先级的。QNX的线程优先级,是一个0-255的数字,数字越大优先级越高。所以,优先级0是内核中的idle线程。同时,优先级64是一个分界岭。就是说,优先级1 – 63 是非特权优先级,一般用户都可以用,而64 – 255必须是有root权限的线程才以设。这个“优先级64”分界线,如果有必要,还可以通过启动Procnto时传 –P <priority> 来改变。
调度算法的对像是线程,而线程在QNX上,有大约20个状态。(参考 /usr/include/sys/states.h)在这许多状态中,跟调度有关的,其实只有 STATE_RUNNING和STATE_READY两个状态。STATE_RUNNING是线程当前正在使用CPU,而STATE_READY是等着被执行(被调度)的线程。其他状态的线程,处于某种“阻塞”状态中,调度算法不需要关注。


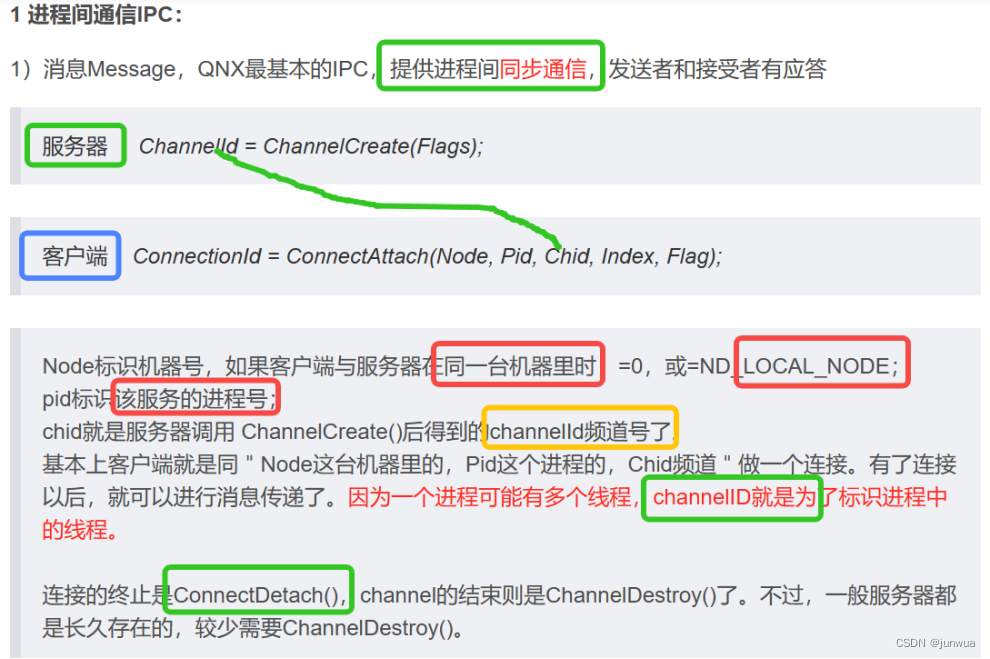
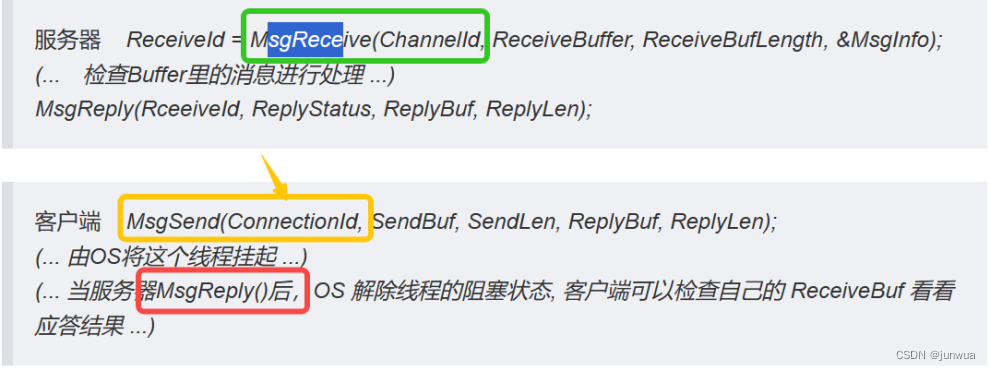
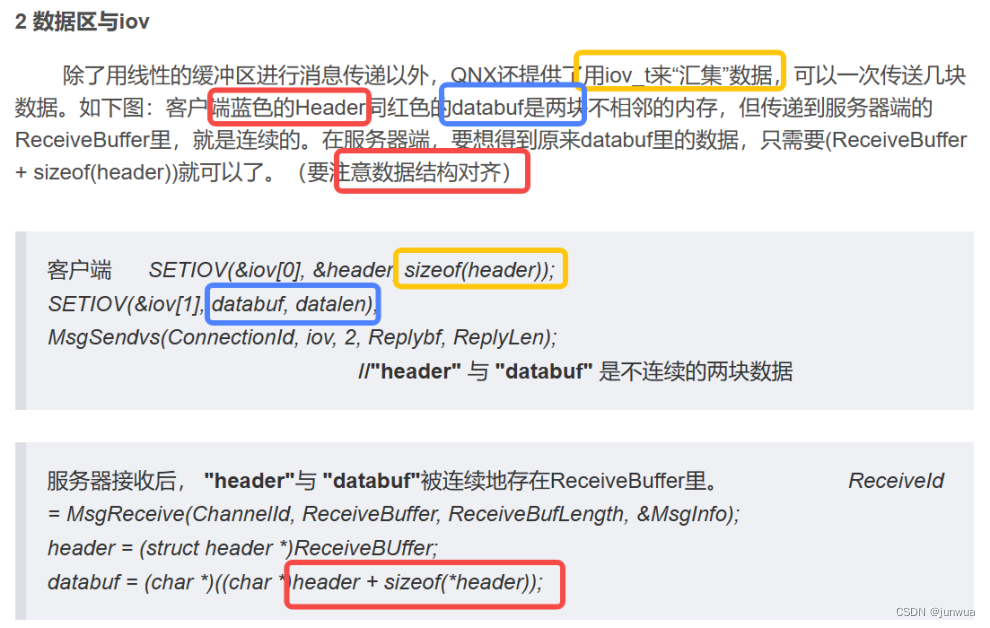
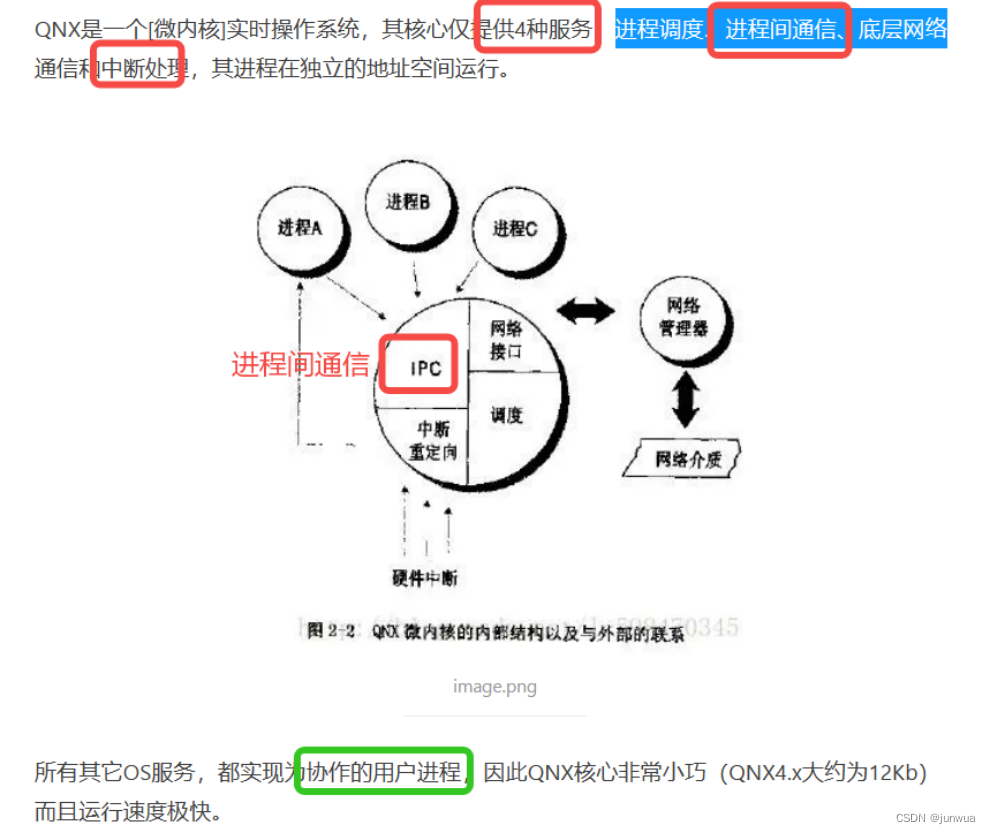

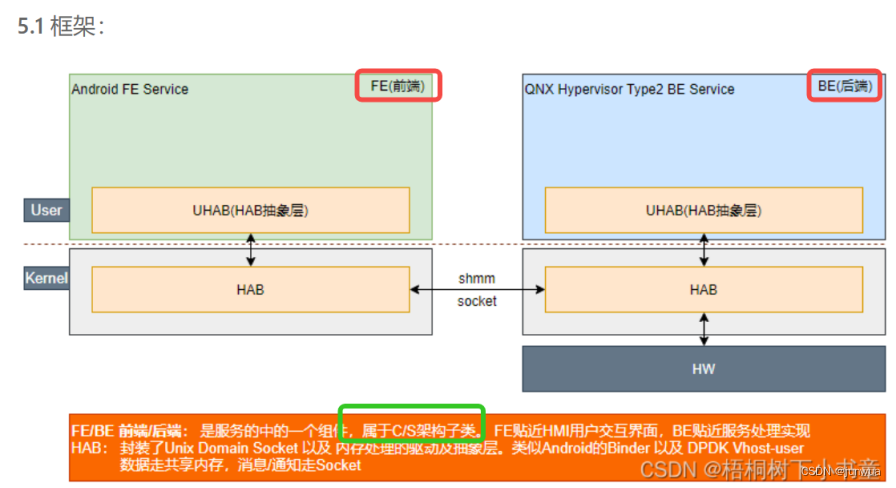

GVM: Guest Virtual Machine
QVM: hypervisor的一个process
PVM: Physical virtual machine
LA: Linux Android
LV: Linux Vehicle/Auto Grade Linux
VMM:Virtual machine manager
HAB:Hypervisor Abstract Communication driver
QTD
Secure Boot中最后一项是可选的完整性保护的文件系统,QTD便是其中一种。QTD(QNX Trusted Disk),是QNX针对数据存储的安全机制,通过结合哈希树和PKI密钥签名,为二进制数据、关键系统配置等提供完整性和真实性保护。它基于 Merkle 树,如图2所示,在构建 QTD 映像时,元数据哈希树是从源文件系统映像的块一层一层构建的,直至RootHash
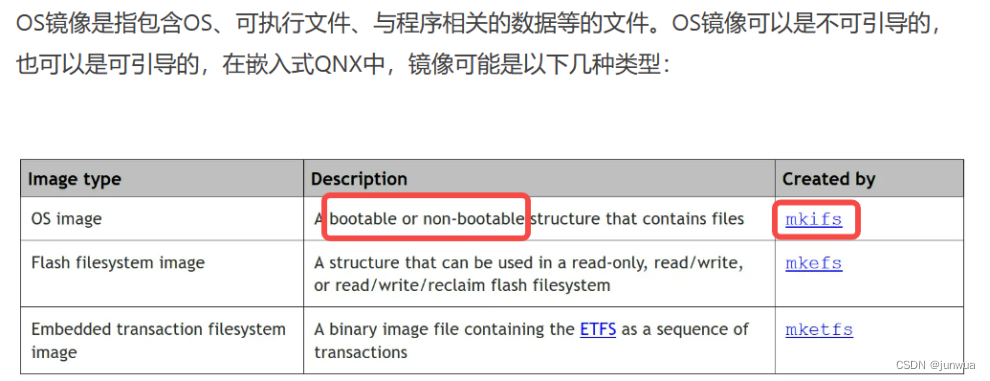
Image filesystem
每个QNX Neutrino系统映像都提供了一个简单的只读文件系统,该文件系统将一组文件内置于操作系统映像中。
由于这个映像可能同时包含可执行文件和数据文件,因此这个文件系统对于许多嵌入式系统来说就足够了。如果需要额外的文件系统,它们将作为模块放置在映像中,以便根据需要启动它们。
RAM “filesystem”
每个QNX Neutrino系统还提供了一个简单的基于ram的“文件系统”,允许将读写文件放在/dev/shmem下.(注意: /dev/shmem实际上不是一个文件系统。它是一个关于共享内存名称的窗口,这些名称碰巧具有一些文件系统式的特征)。这种RAM文件系统在小型嵌入式系统中最有用,在这些系统中,不需要重新引导进行持久存储,但是需要一个具有有限功能的小型、快速、临时存储文件系统。
文件系统是随procnto免费提供的,不需要任何设置。可以简单地在/dev/shmem下创建文件,并将它们增长到任意大小(取决于RAM资源)。尽管RAM文件系统本身不支持硬链接或软链接或目录,但可以通过使用process-manager链接创建到它的链接。例如,可以创建一个指向基于ram的/filedir目录的链接:
这告诉procnto创建一个到/dev/shmem的进程管理器链接,即“/filedir”。然后,应用程序可以打开/filedir下的文件,就好像它是一个普通的文件系统一样。为了最小化进程管理器中RAM文件系统代码的大小,这个文件系统特别不包含“大文件系统”特性,例如文件锁定和目录创建。
power-Safe (fs-qnx6.so) filesystem
The limits for Power-Safe filesystems (supported by fs-qnx6.so) include:
Physical disk sectors
32-bit (2 TB), using the devb API.
Logical filesystem block size
512, 1024, 2048, 4096, 8192, 16384, 32768, or 65536 bytes. This is set when you initially format the filesystem; the default block size is 4096 bytes.
Filename length
510 bytes (UTF-8). If the filename is less than 28 bytes long, it's stored in the directory entry; if it's longer, it's stored in an external file, and the directory entry points to the name.
Pathname length
PATH_MAX (1024) bytes, not including the mountpoint or the terminating NUL.
Maximum file size
The maximum file size depends on the block size but also the maximum filesystem size.
Although 64-bit addressing is used, the block pointers are always 32 bits. The inode for a file has 16 pointers at the root of the block lookup tree. So, with a 1 KB block size, you can fit 256 block pointers in a block and so, a file that's up to 16 × 256 × 1 KB (4 MB) requires one level of indirect pointers. If the file is bigger, you need two levels (i.e., 16 blocks of 256 pointers to blocks holding another 256 pointers to blocks), which gives a maximum file size of 1 GB. For three levels of indirect pointers, the maximum file size is 256 GB.
If the block size is 2 KB, then each block holds up to 512 pointers, and everything scales accordingly. However, for block sizes of 4 KB and higher, the maximum file size is limited by the maximum filesystem size. So the file size limits in the bottom four rows of the table shown just below match those in the corresponding rows of the table shown for the maximum filesystem size (see this other property's description further below):
Maximum number of files
The same as the maximum number of inodes minus two (one is reserved for "/", the other for "/.boot").
This number can be set by either mkqnx6fs (with the -i option), or mkqnx6fsimg (with the num_inodes attribute in the buildfile). Both utilities assign default values if the number isn't specified.
You can query this value at any time with df -g mountpoint, where the variable is set to the Power-Safe filesystem mountpoint. The chkqnx6fs -S option also shows this value.
https://www.qnx.com/developers/docs/7.0.0/index.html#com.qnx.doc.neutrino.user_guide/topic/limits_QNX6_limits.html
gpio in/gpio out/ interrupt采用dts的配置方法,配置参数解释如下:
对于linux-4.9:
gpios = <&r_pio PL 0x4 0x0 0x1 0x0 0x1>;
| | | | | | `---输出电平,只有output才有效
| | | | | `-------驱动能力,值为0x0时采用默认值
| | | | `-----------上下拉,值为0x1时采用默认值
| | | `---------------复用类型
| | `-------------------当前bank中哪个引脚
| `-----------------------哪个bank
`---------------------------指向哪个pio,属于cpus要用&r_pio
使用上述方式配置gpio时,需要驱动调用以下接口解析dts的配置参数:
int of_get_named_gpio_flags(struct device_node *np, const char *list_name, int index,
enum of_gpio_flags *flags)
拿到gpio的配置信息后(保存在flags参数中,见4.2.8.小节),在根据需要调用相应的标准接口实现自己的功能
对于linux-5.4:
gpios = <&r_pio 0 4 GPIO_ACTIVE_HIGH>;
| | |
| | `-------------------gpio active时状态,如果需要上下拉,还可以或上
GPIO_PULL_UP、GPIO_PULL_DOWN标志
| `-----------------------哪个bank
`---------------------------指向哪个pio,属于cpus要用&r_pio
main函数的返回值
1.main函数的返回值是返回给调用它的父进程也就是执行它的可执行文件。比如shell调用,这个父进程调用子进程来执行一个任务,然后子进程执行完成后通过main函数的返回值返回给父进程一个答复,这个答复来表示子进程执行的结果是正确还是错误(0表示成功,负数表示失败)
(1)用shell脚本执行程序可以获取获取程序的返回值
创建shell脚本:vi return.sh
qnx 和linux下测试都是 ok,
int main(int argc, char *argv[ ]) {
printf("---------------------- main 1\n");
oem_pm_pulse_register();
//while(1)
{
// pause();
}
printf("------------------ test qnx return ret 10 \n");
return 10;
}
apps/qnx_ap/vendor/test/oem_app_test/src$ vim main.c
test.sh
#!/bin/sh
./oem_app_test
echo $?
# chmod a+x test.sh
# ./test.sh
---------------------- main 1
oem_pm register failed: -1
------------------ test qnx return ret 10
这篇关于基础知识学习 -- qnx 系统的文章就介绍到这儿,希望我们推荐的文章对编程师们有所帮助!


