本文主要是介绍【踩坑】最新亲测能用!修复MacOS安装软件时提示“应该移到废纸篓”并且无法打开软件,希望对大家解决编程问题提供一定的参考价值,需要的开发者们随着小编来一起学习吧!
转载请注明出处:小锋学长生活大爆炸[xfxuezhang.cn]
目录
网上方法的尝试
方法一:xattr
方法二:UPX
真的能用的方法
GateKeeper_Helper.command的内容
网上方法的尝试
方法一:xattr
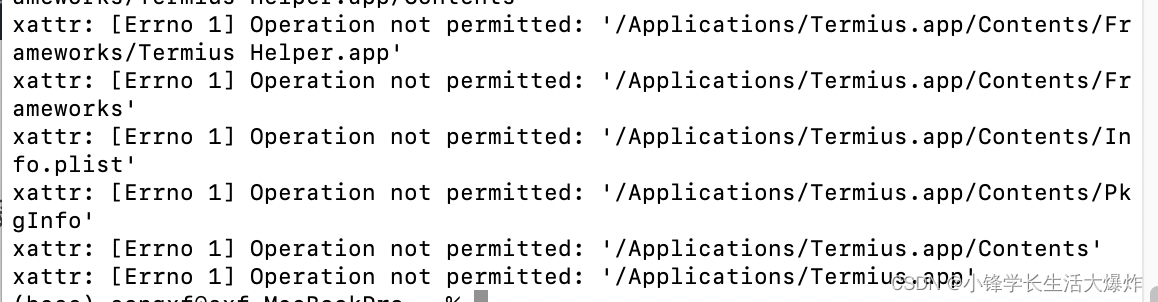
以前的Mac版本可以通过以下方式来解开限制,可以先尝试一下:
sudo xattr -r -d com.apple.quarantine /Applications/Sketch.app但新版本的Mac会报错没有权限:
方法二:UPX
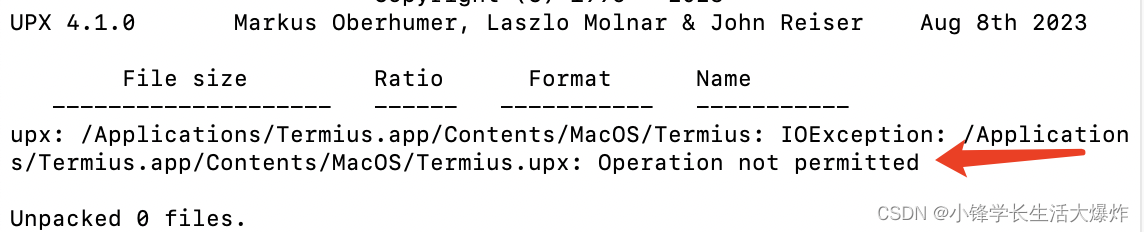
也有方法说借助UPX来安装,具体来说:
brew install upx
sudo upx -d /Applications/Termius.app/Contents/MacOS/Termius
但新版本的Mac依旧会报错:
真的能用的方法
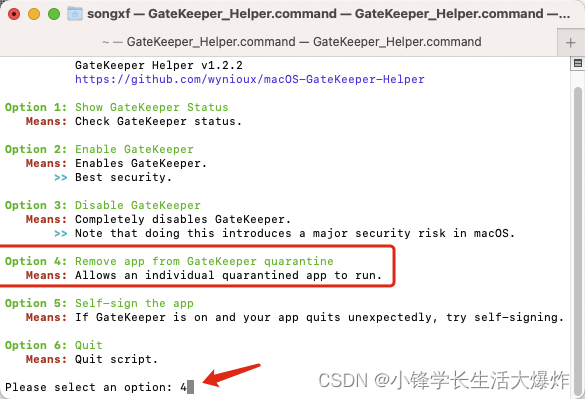
1、首先下载这个脚本:macOS-GateKeeper-Helper: Simple macOS GateKeeper script.
2、授予可执行权限:
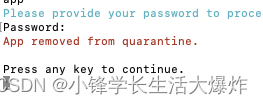
chmod +x GateKeeper_Helper.command3、双击脚本运行,并选择“4”,按回车:
4、将要安装的app拖入(也可以直接输入路径),按回车:
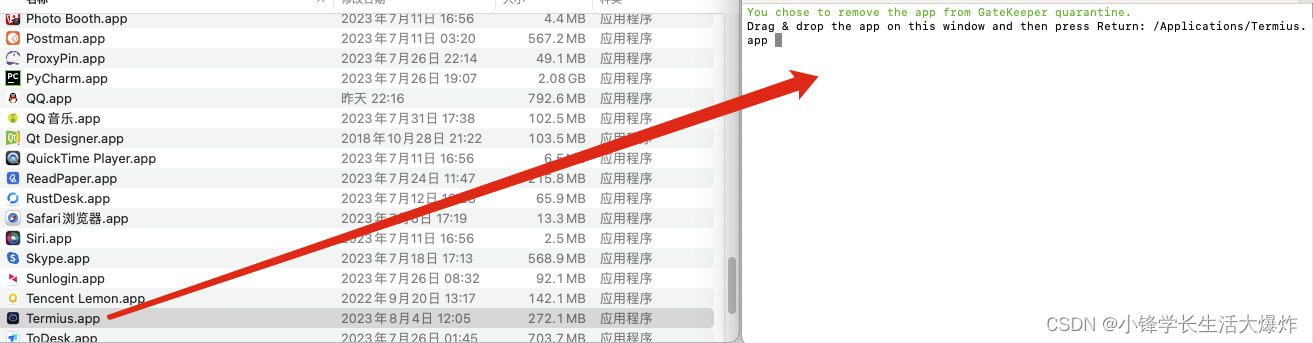
5、安装成功,可以双击app运行了:
GateKeeper_Helper.command的内容
#!/bin/zsh#Attribute
GITHUB_URL="https://github.com/wynioux/macOS-GateKeeper-Helper"
RELEASE_VERSION="v1.2.2"
ROOT_PASSWORD=0# Color Set
# Reset
Color_Off='\033[0m'       # Text Reset# Regular Colors
Black='\033[0;30m'        # Black
Red='\033[0;31m'          # Red
Green='\033[0;32m'        # Green
Yellow='\033[0;33m'       # Yellow
Blue='\033[0;34m'         # Blue
Purple='\033[0;35m'       # Purple
Cyan='\033[0;36m'         # Cyan
White='\033[0;37m'        # White# Bold
BBlack='\033[1;30m'       # Black
BRed='\033[1;31m'         # Red
BGreen='\033[1;32m'       # Green
BYellow='\033[1;33m'      # Yellow
BBlue='\033[1;34m'        # Blue
BPurple='\033[1;35m'      # Purple
BCyan='\033[1;36m'        # Cyan
BWhite='\033[1;37m'       # White# Underline
UBlack='\033[4;30m'       # Black
URed='\033[4;31m'         # Red
UGreen='\033[4;32m'       # Green
UYellow='\033[4;33m'      # Yellow
UBlue='\033[4;34m'        # Blue
UPurple='\033[4;35m'      # Purple
UCyan='\033[4;36m'        # Cyan
UWhite='\033[4;37m'       # White# Functions
# Shows menu.
showMenu()
{echo "\n          GateKeeper Helper ${RELEASE_VERSION}"echo "          ${Blue}${GITHUB_URL}${Color_Off}\n"echo "${BGreen}Option 1: ${Green}Show GateKeeper Status${Color_Off}"echo "   ${BRed}Means:${Color_Off} Check GateKeeper status.\n"echo "${BGreen}Option 2: ${Green}Enable GateKeeper${Color_Off}"echo "   ${BRed}Means:${Color_Off} Enables GateKeeper."echo "       ${BCyan}>>${Color_Off} Best security.\n"echo "${BGreen}Option 3: ${Green}Disable GateKeeper${Color_Off}"echo "   ${BRed}Means:${Color_Off} Completely disables GateKeeper."echo "       ${BCyan}>>${Color_Off} Note that doing this introduces a major security risk in macOS.\n"echo "${BGreen}Option 4: ${Green}Remove app from GateKeeper quarantine${Color_Off}"echo "   ${BRed}Means:${Color_Off} Allows an individual quarantined app to run.\n"echo "${BGreen}Option 5: ${Green}Self-sign the app${Color_Off}"echo "   ${BRed}Means:${Color_Off} If GateKeeper is on and your app quits unexpectedly, try self-signing.\n"echo "${BGreen}Option 6: ${Green}Quit${Color_Off}"echo "   ${BRed}Means:${Color_Off} Quit script.\n"
}# Asks password.
askPassword()
{case $ROOT_PASSWORD in0)echo "${Cyan}Please provide your password to proceed, or press ^C to quit.${Color_Off}"ROOT_PASSWORD=1;;esac}# Shows continue message.
continueMessage()
{echo "\nPress any key to continue."read
}# Shows gatekeeper status.
showGateKeeperStatus()
{echo "${Green}You choose to show GateKeeper status.${Color_Off}"askPasswordsudo spctl --statuscontinueMessage
}# Enables gatekeeper.
enableGateKeeper()
{echo "${Green}You chose to enable GateKeeper. Good for you!${Color_Off}"askPasswordsudo spctl --master-enableecho "${Red}GateKeeper enabled.${Color_Off}"continueMessage
}# Disables gatekeeper.
disableGateKeeper()
{echo "${Green}You chose to disable GateKeeper.${Color_Off}"echo -e "    ${Red}>> Danger!${Color_Off}"echo -e "       Disabling GateKeeper is a very bad idea and creates"echo -e "       a major security hole in macOS\n"askPasswordsudo spctl --master-disableecho "${Red}GateKeeper disabled.${Color_Off}"continueMessage
}# Removes an app from gatekeeper quarantine
removeAppFromGateKeeper()
{echo "${Green}You chose to remove the app from GateKeeper quarantine.${Color_Off}"read "?Drag & drop the app on this window and then press Return: " FILEPATHaskPasswordsudo xattr -rd com.apple.quarantine "$FILEPATH"if [ $? -eq 0 ]; thenecho "${Red}App removed from quarantine.${Color_Off}"elseecho "${Red}App could not be removed from quarantine!${Color_Off}"ficontinueMessage
}# Self-signs an app.
selfSignApp()
{echo "${Green}You chose to self-sign an app.${Color_Off}"read "?Drag & drop the app on this window and then press Return: " FILEPATHaskPasswordsudo codesign -f -s - --deep "$FILEPATH"echo "${Red}If you see - replacing existing signature - that means you are done!${Color_Off}"echo "${Red}Otherwise please try again, sometimes it works second time.${Color_Off}"continueMessage
}# Shows quit message.
quitScript()
{echo "Quitting..."continueMessage
}# Shows invalid option message.
showInvalid()
{echo "${Red}Invalid option: ${BRed}${SELECTED_OPTION}${Color_Off}"continueMessage
}# Main function of the script.
startScript()
{while : doclearshowMenuread "?Please select an option: " SELECTED_OPTIONcase $SELECTED_OPTION in1)clearshowGateKeeperStatus;;2)clearenableGateKeeper;;3)cleardisableGateKeeper;;4)  clearremoveAppFromGateKeeper;;5)clearselfSignApp;;6)clearquitScriptbreak;;*)clearshowInvalid;;esacdone
}# Script starts here.
startScript
这篇关于【踩坑】最新亲测能用!修复MacOS安装软件时提示“应该移到废纸篓”并且无法打开软件的文章就介绍到这儿,希望我们推荐的文章对编程师们有所帮助!


