本文主要是介绍备忘 clang diagnostic 类的应用示例 ubuntu 22.04,希望对大家解决编程问题提供一定的参考价值,需要的开发者们随着小编来一起学习吧!
系统的ncurses环境有些问题
通过源码安装了ncurses6.3后,才可以在 llvmort-18.1.rc4中编译通过示例:
1,折腾环境
ncurses-6.3$ ./configure
ncurses-6.3$ make -j
ncurses-6.3$ sudo make install
sudo apt install libtinfo5
sudo apt install libtinfo
sudo apt-get install lib64tinfo6
$ sudo apt-get install libtinfo-dev
2,编译llvmorg-18.1.rc4
Debug 版本,link 时容易爆掉内存,故make -j N 的 N 可以小一点,此处256GB内存,选了N==16,没有问题,32,34,36都不行。
cmake -G "Unix Makefiles" ../llvm      -DLLVM_ENABLE_PROJECTS="bolt;clang;clang-tools-extra;compiler-rt;cross-project-tests;libc;libclc;lld;lldb;mlir;openmp;polly;pstl;flang"      -DLLVM_BUILD_EXAMPLES=ON           -DLLVM_TARGETS_TO_BUILD="host"      -DCMAKE_BUILD_TYPE=Debug           -DLLVM_ENABLE_ASSERTIONS=ON           -DLLVM_ENABLE_RUNTIMES=all             -DLLVM_BUILD_LLVM_DYLIB=ON              -DCMAKE_INSTALL_PREFIX=../../local_wholemake -j 16
16物理核,不用超线程 make install
3,示例
cat set_env.sourceme
export PATH=/home/hipper/llvm_3_4_0_ex/browse_llvm_17/local/bin:$PATH
export LD_LIBRARY_PATH=/home/hipper/llvm_3_4_0_ex/browse_llvm_17/local/lib:$LD_LIBRARY_PATH
Makefile
LLVM_CONFIG ?= llvm-config
#CXX := clang++
ifndef VERBOSE
QUIET :=@
endifSRC_DIR ?= $(PWD)
LDFLAGS += $(shell $(LLVM_CONFIG) --ldflags)
COMMON_FLAGS = -Wall -Wextra
CXXFLAGS += $(COMMON_FLAGS) $(shell $(LLVM_CONFIG) --cxxflags)
LCXX :=$(shell $(LLVM_CONFIG) --cxxflags)
CPPFLAGS += $(shell $(LLVM_CONFIG) --cppflags) -I$(SRC_DIR)CLANGLIBS = \-Wl,--start-group \-lclang \-lclangFrontend \-lclangDriver \-lclangSerialization \-lclangParse \-lclangSema \-lclangAnalysis \-lclangEdit \-lclangAST \-lclangLex \-lclangBasic \-Wl,--end-groupLLVMLIBS = $(shell $(LLVM_CONFIG) --libs)PROJECT = hello_diagnostic
PROJECT_OBJECTS = hello_diagnostic.odefault: $(PROJECT)%.o : $(SRC_DIR)/%.cpp@echo Compiling $*.cpp$(QUIET)$(CXX) -c $(CPFLAGS) $(CXXFLAGS) $<$(PROJECT) : $(PROJECT_OBJECTS) @echo Linking $@$(QUIET)$(CXX) -o $@ $(LDFLAGS) $^ $(CLANGLIBS) $(LLVMLIBS) -lncurses.PHONY: clean
clean:$(QUIET)rm -f $(PROJECT) $(PROJECT_OBJECTS).PHONY: echo
echo:@echo "CXX 	is	$(CXX)"@echo "LDFLAGS 	is	$(LDFLAGS)}"@echo "CXXFLAGS	is	$(CXXFLAGS)"@echo "CPPFLAGS	is	$(CPPFLAGS)"@echo "SRC_DIR	is	$(SRC_DIR)"
hello_diagnostic.cpp
extern "C"{
#include "clang-c/Index.h"
}#include "llvm/Support/CommandLine.h"
#include <iostream>using namespace llvm;static cl::opt<std::string> FileName(cl::Positional, cl::desc("Input file"), cl::Required);int main(int argc, char** argv)
{cl::ParseCommandLineOptions(argc, argv, "Diagnostics Example");CXIndex index = clang_createIndex(0, 0);const char* args[]={"-I/usr/include","-I."};CXTranslationUnit translationUnit = clang_parseTranslationUnit(index, FileName.c_str(), args, 2, NULL, 0, CXTranslationUnit_None);unsigned diagnosticCount = clang_getNumDiagnostics(translationUnit);for(unsigned i=0; i<diagnosticCount; ++i){CXDiagnostic diagnostic = clang_getDiagnostic(translationUnit, i);CXString category = clang_getDiagnosticCategoryText(diagnostic);CXString message = clang_getDiagnosticSpelling(diagnostic);unsigned severity = clang_getDiagnosticSeverity(diagnostic);CXSourceLocation loc = clang_getDiagnosticLocation(diagnostic);CXString fName;unsigned line = 0, col = 0;clang_getPresumedLocation(loc, &fName, &line, &col);std::cout << ""<<severity<<" File: "<< clang_getCString(fName) << " Line: "<< line << " Col: " << col << " Category: \" "<< clang_getCString(category) << "\" Message: "<< clang_getCString(message) << std::endl;clang_disposeString(fName);clang_disposeString(message);clang_disposeString(category);clang_disposeDiagnostic(diagnostic);       }clang_disposeTranslationUnit(translationUnit);clang_disposeIndex(index);return 0;
}
hip
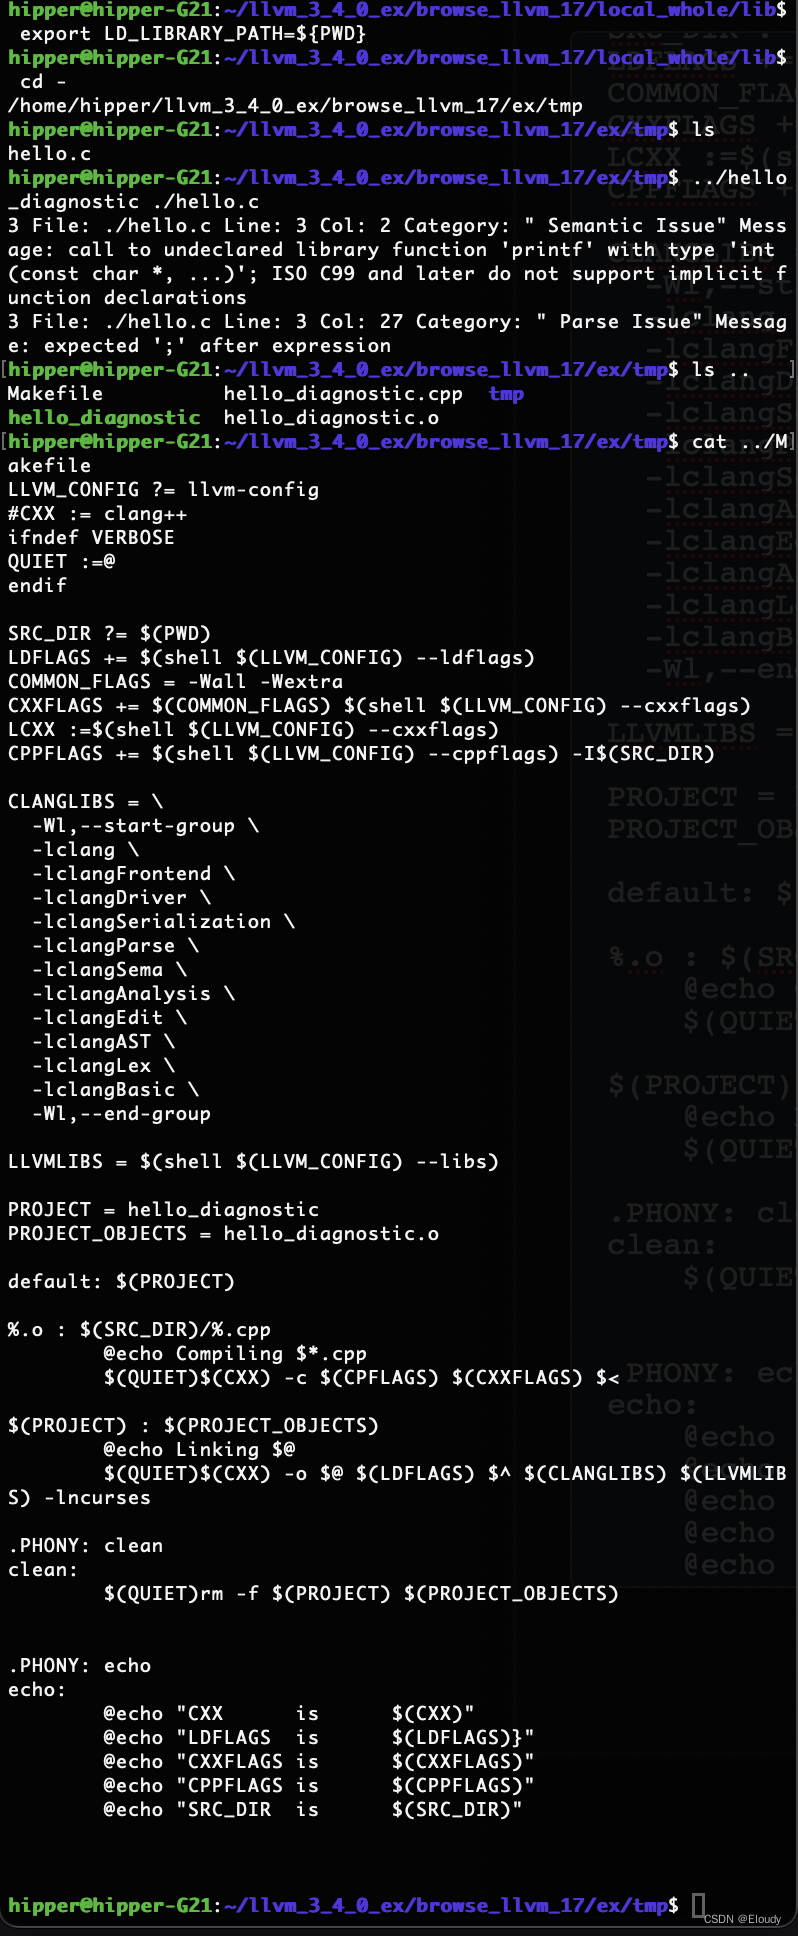
被诊断的带有错误的源码:
hello.c
int main(){printf("hello, world!\n")}这里有两个错误,
1,没有#include <stdio.h> 故,没有声明 printf;
2,printf() 后面没有分号,违反了c语言的语法;
下图中被诊断了出来:
示例效果:

4, llvm 3.4.0 示例
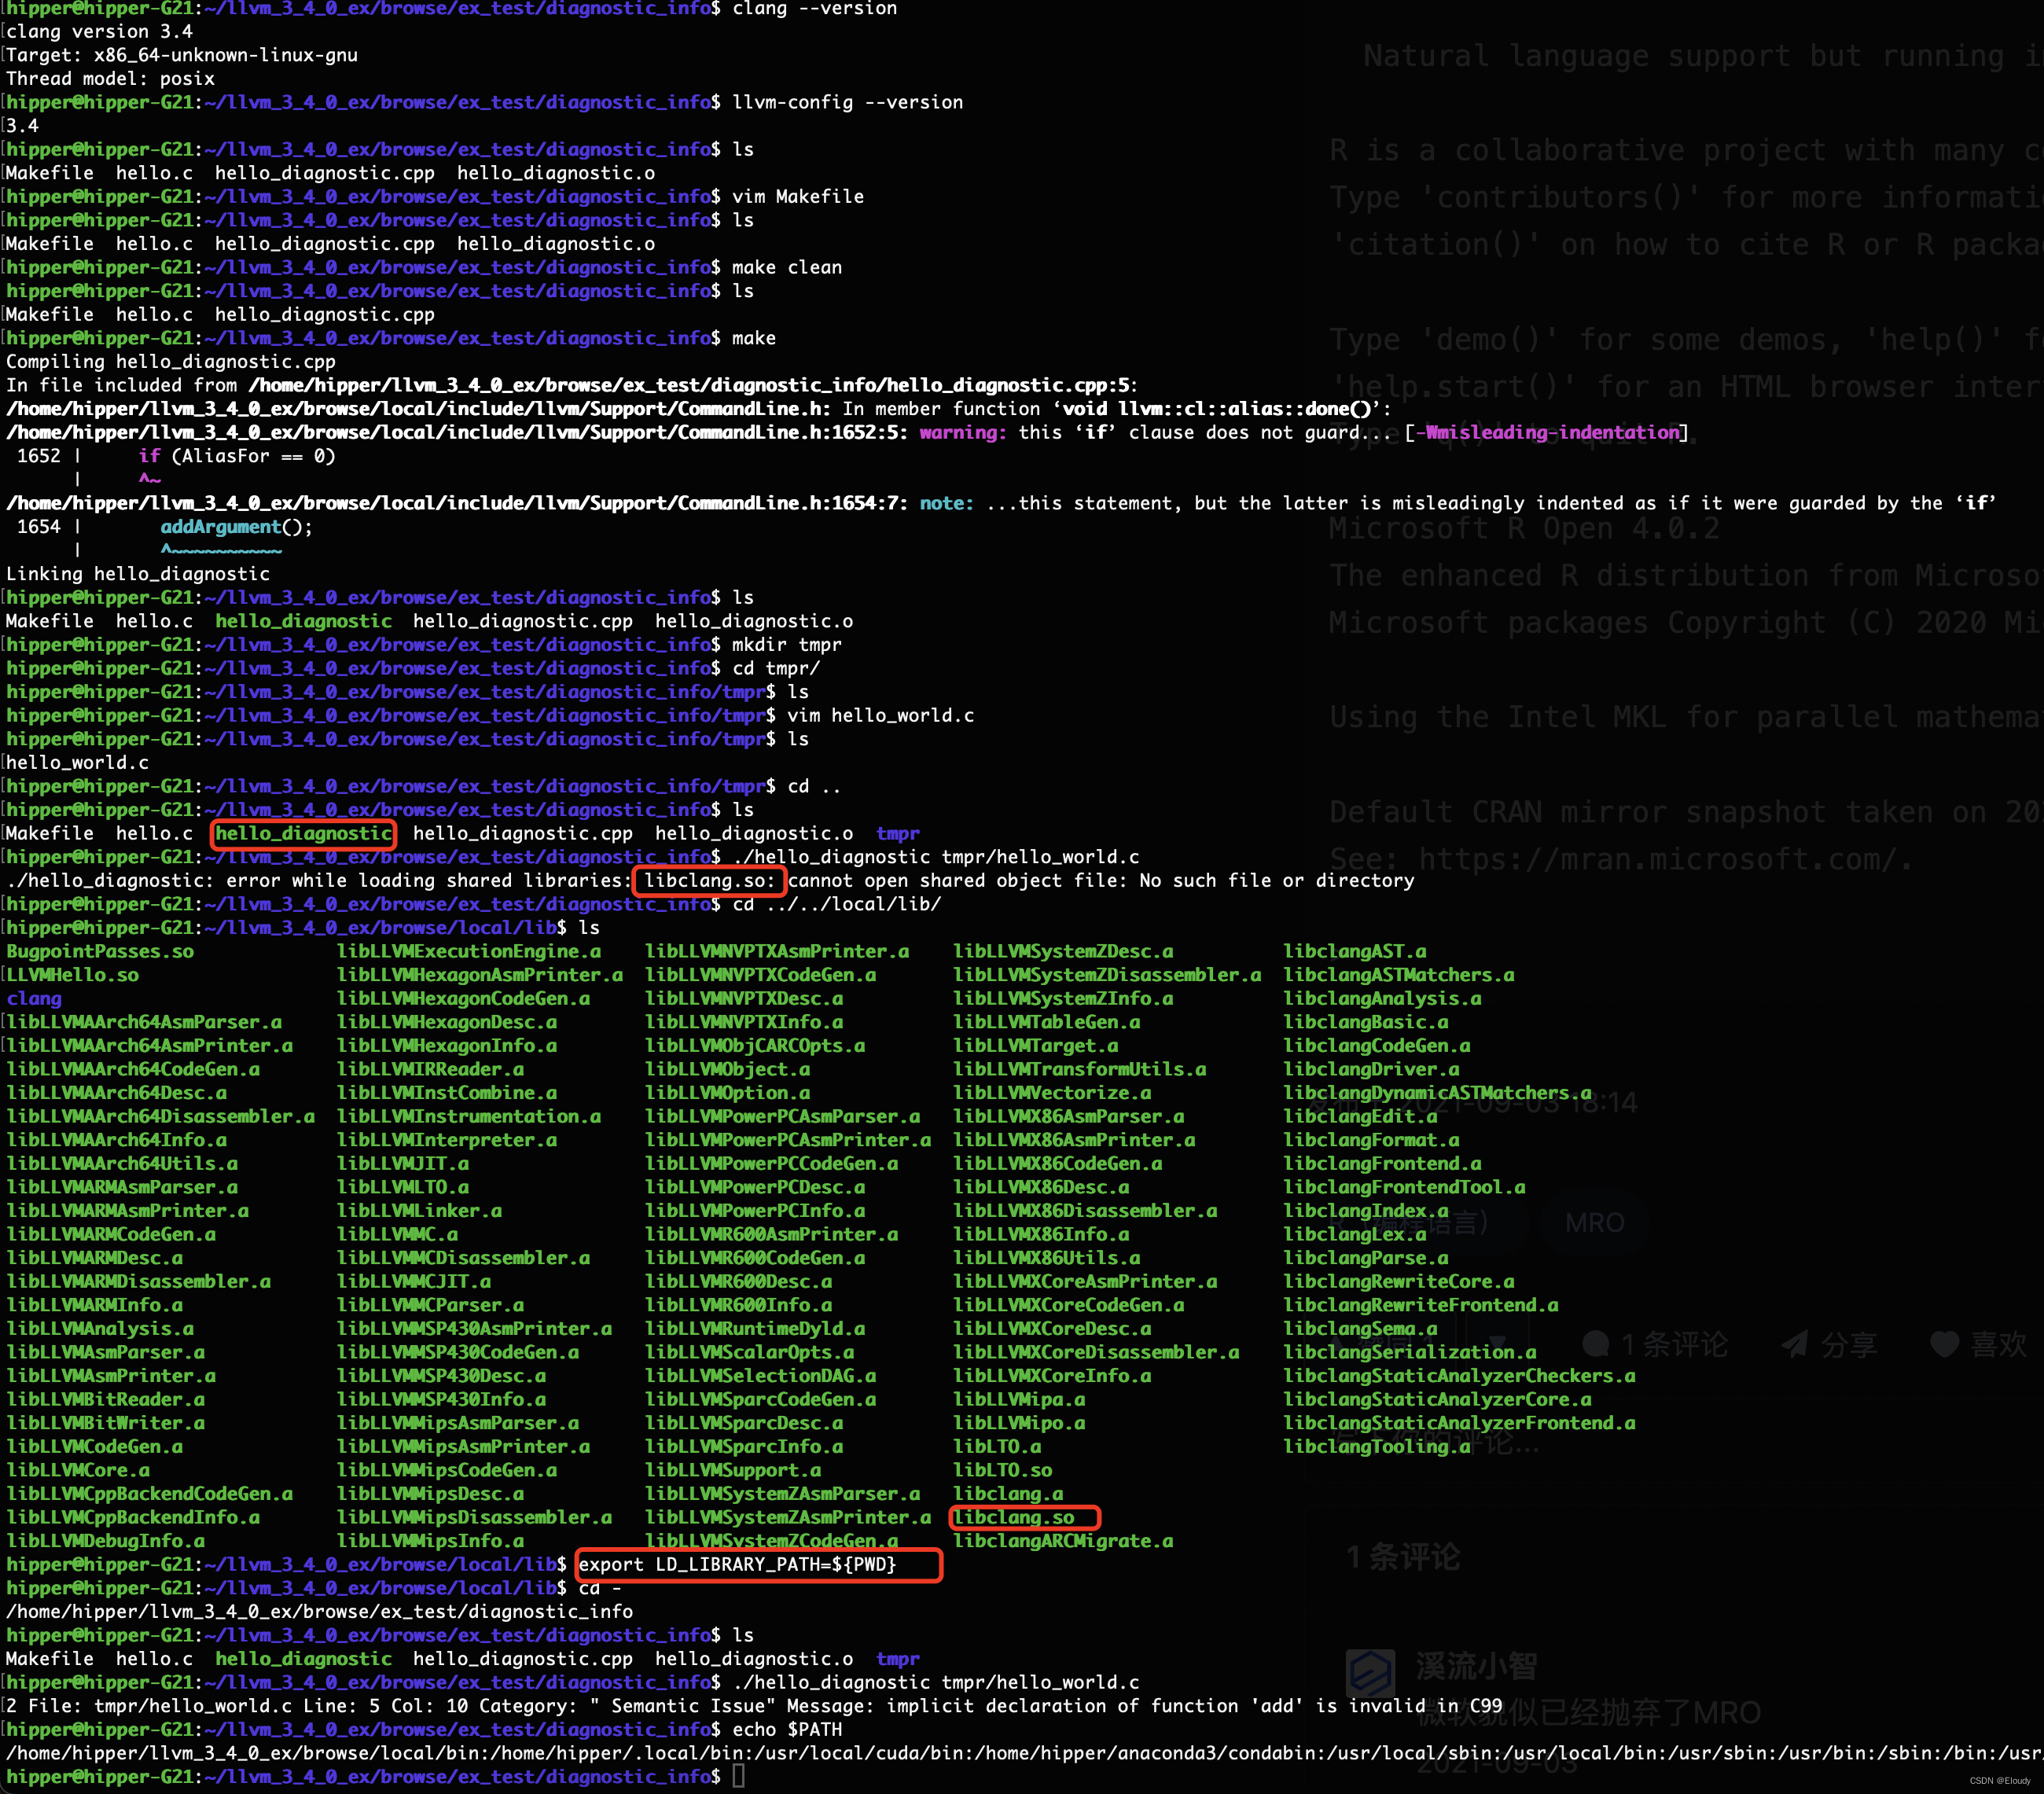
同样的代码,在llvmorg-3.4.0 环境下测试也通过了:
cat set_env.sourceme
export PATH=/home/hipper/llvm_3_4_0_ex/browse/local/bin:$PATH
export LD_LIBRARY_PATH=/home/hipper/llvm_3_4_0_ex/browse/local/lib:$LD_LIBRARY_PATH
这篇关于备忘 clang diagnostic 类的应用示例 ubuntu 22.04的文章就介绍到这儿,希望我们推荐的文章对编程师们有所帮助!


