本文主要是介绍SpringBoot | SpringBoot员工管理系统(超细笔记+静态资源链接+附完整源码),希望对大家解决编程问题提供一定的参考价值,需要的开发者们随着小编来一起学习吧!
文章目录
- SpringBoot 员工管理系统(源码在文末)
- 1、配置环境
- 1.1、新建SpringBoot项目
- 1.2、编写实体类
- 1.3、编写Dao层(模拟数据库)
- 1.4、导入静态资源(附资源链接)
- 2、首页
- 2.1、导入依赖
- 2.2、跳转首页
- 2.3、将导入的静态资源修改为Thymeleaf模板规范
- 3、国际化
- 3.1、修改IDEA中properties的编码设置
- 3.2、编写国际化配置文件
- 3.3、编写配置
- 3.4、查看国际化配置源码
- 3.5、配置messages路径
- 3.6、页面获取国际化的值
- 3.7、配置国际化解析
- 4、登录功能实现
- 4.1、关闭模板引擎缓存
- 4.2、登录
- 4.3、代码优化
- 5、登录拦截
- 5.1、编写拦截器LoginHandlerInterceptor
- 5.2、在MyMvcConfig配置类中注册拦截器
- 5.3、测试拦截功能
- 5.4、修改dashboard.html
- 6、员工列表展示
- 6.1、修改 dashboard.html
- 6.2、编写 EmployeeController
- 6.3、抽取系统顶部和侧边栏
- 6.4、点击高亮显示
- 6.5、展示员工列表数据
- 7、增加员工
- 7.1、编写添加员工页面
- 7.2、实现添加功能
- 7.3、修改日期格式
- 8、修改员工信息
- 8.1、补充RestFul风格
- 8.2、给编辑按钮添加请求
- 8.3、添加一个更新员工信息页面
- 8.4、处理请求
- 8.5、测试功能
- 8.6、修改日期格式
- 8.7、处理修改请求
- 9、删除员工
- 9.1、给删除按钮添加请求
- 9.2、处理删除请求
- 10、注销功能实现
- 10.1、给退出按钮添加请求
- 10.2、处理`logout`请求
- 11、定制404页面
- 11.1、源码分析
- 11.1、实现定制404页面
- 12、问题总结
- 12.1、java: 非法字符: '\ufeff'
- 12.2、修改员工信息报错400
- 13、完整源码
SpringBoot 员工管理系统(源码在文末)
1、配置环境
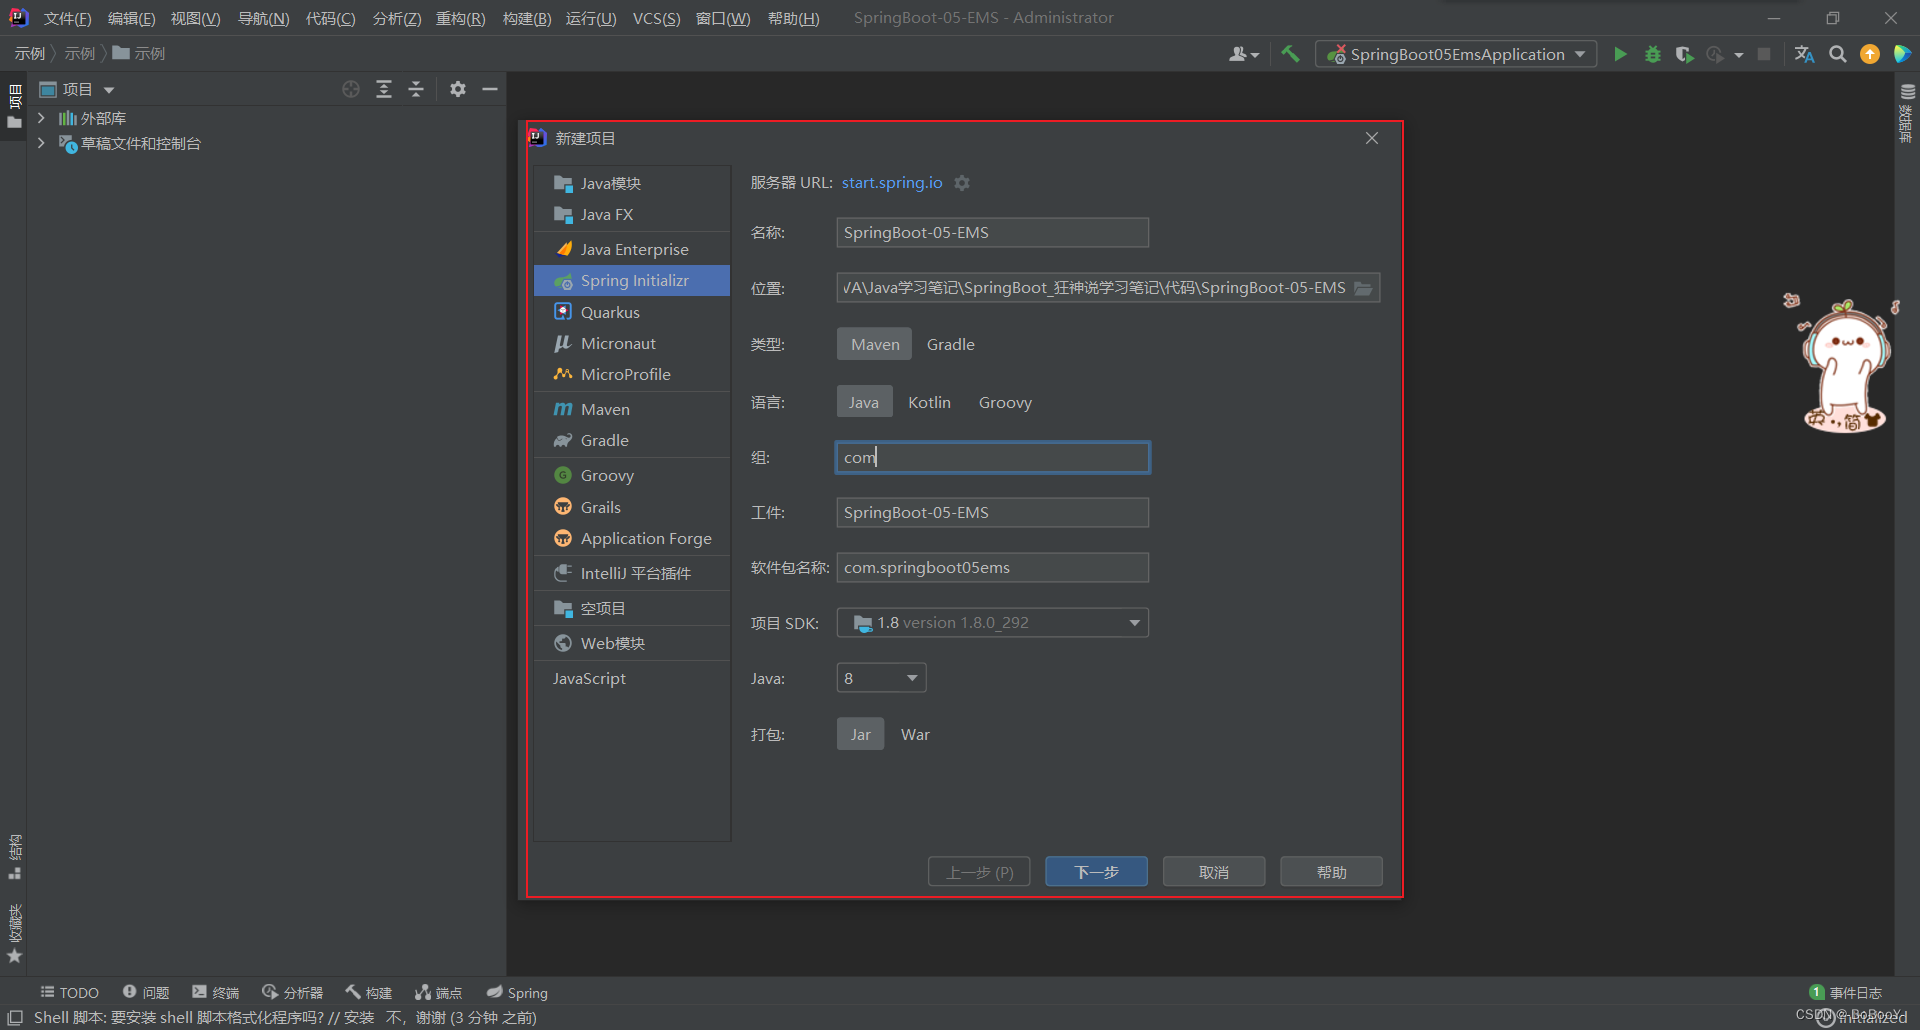
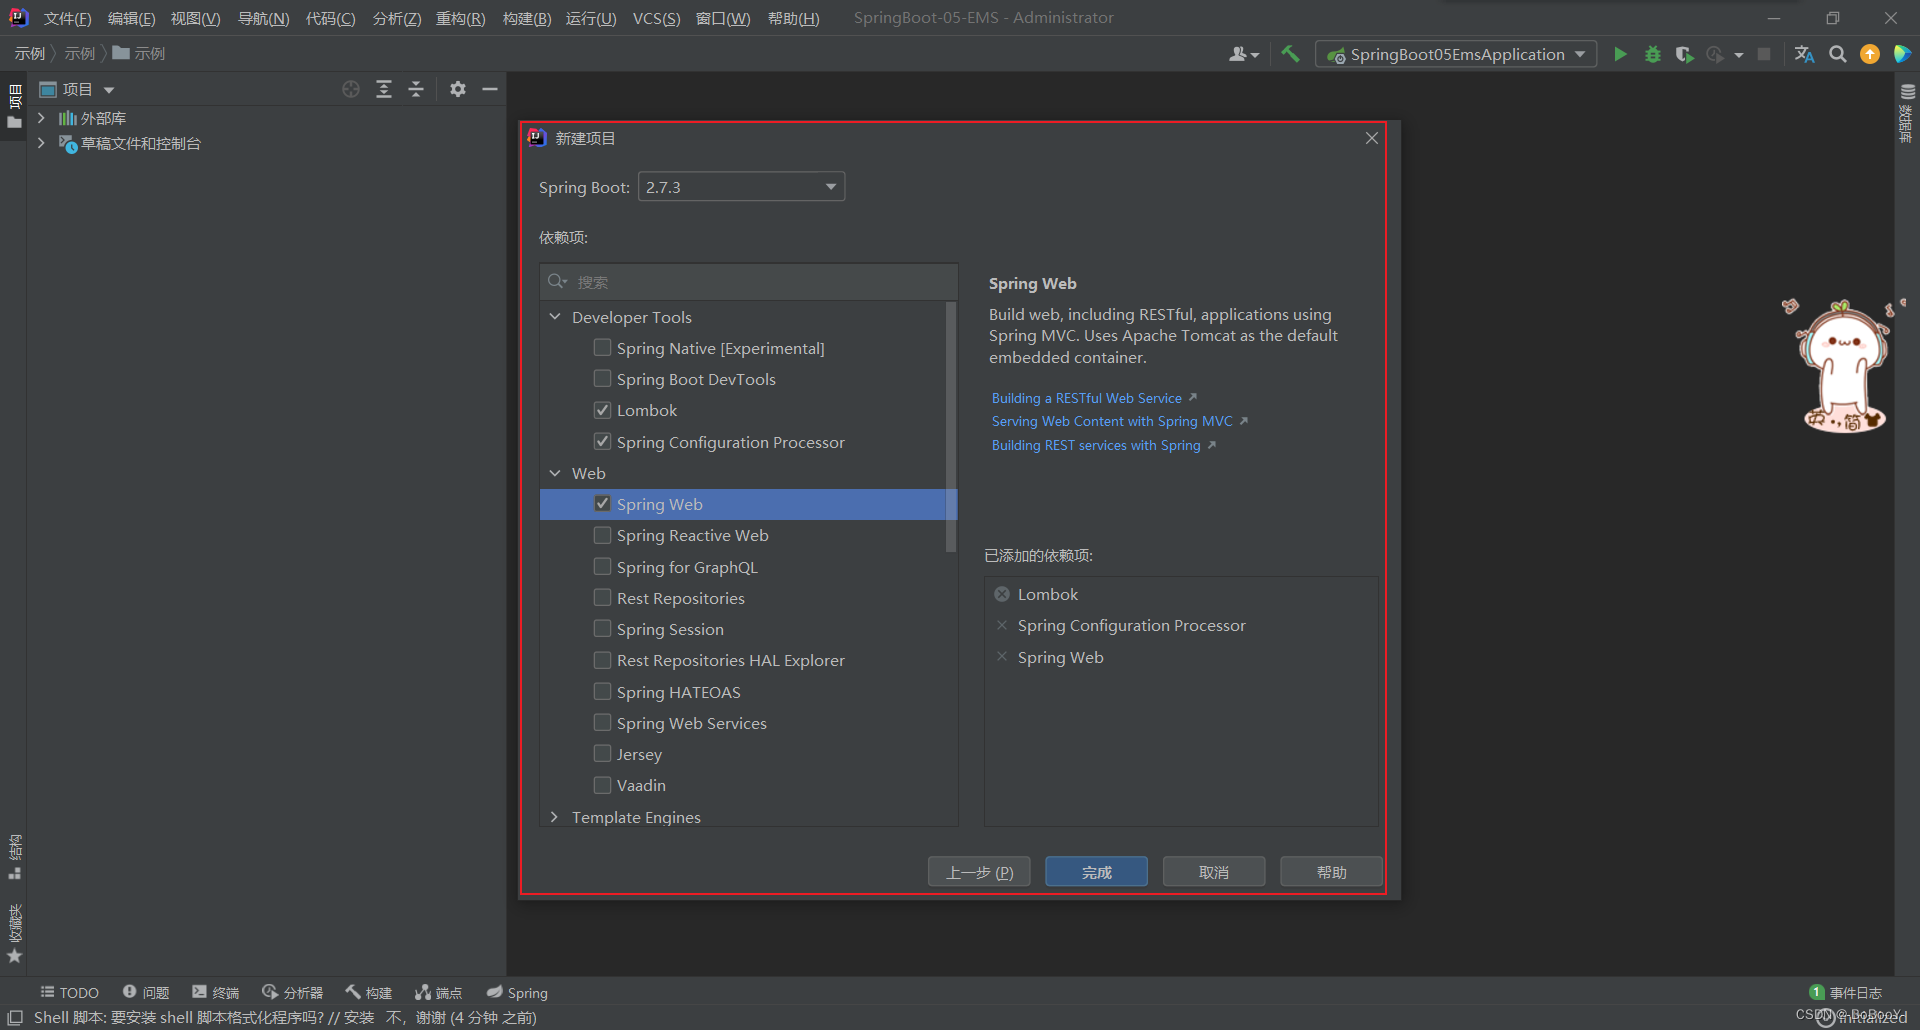
1.1、新建SpringBoot项目
查看 pom.xml
<?xml version="1.0" encoding="UTF-8"?>
<project xmlns="http://maven.apache.org/POM/4.0.0" xmlns:xsi="http://www.w3.org/2001/XMLSchema-instance"xsi:schemaLocation="http://maven.apache.org/POM/4.0.0 https://maven.apache.org/xsd/maven-4.0.0.xsd"><modelVersion>4.0.0</modelVersion><parent><groupId>org.springframework.boot</groupId><artifactId>spring-boot-starter-parent</artifactId><version>2.7.3</version><relativePath/> <!-- lookup parent from repository --></parent><groupId>com</groupId><artifactId>SpringBoot-05-EMS</artifactId><version>0.0.1-SNAPSHOT</version><name>SpringBoot-05-EMS</name><description>Demo project for Spring Boot</description><properties><java.version>1.8</java.version></properties><dependencies><dependency><groupId>org.springframework.boot</groupId><artifactId>spring-boot-starter-web</artifactId></dependency><dependency><groupId>org.springframework.boot</groupId><artifactId>spring-boot-configuration-processor</artifactId><optional>true</optional></dependency><dependency><groupId>org.projectlombok</groupId><artifactId>lombok</artifactId><optional>true</optional></dependency><dependency><groupId>org.springframework.boot</groupId><artifactId>spring-boot-starter-test</artifactId><scope>test</scope></dependency></dependencies><build><plugins><plugin><groupId>org.springframework.boot</groupId><artifactId>spring-boot-maven-plugin</artifactId><configuration><excludes><exclude><groupId>org.projectlombok</groupId><artifactId>lombok</artifactId></exclude></excludes></configuration></plugin></plugins></build></project>
1.2、编写实体类
- 部门类
// 部门类
@Data
@AllArgsConstructor
@NoArgsConstructor
public class Department {private Integer id;private String departmentName;}
- 员工类
// 员工类
@Data
@AllArgsConstructor
@NoArgsConstructor
public class Employee {private Integer id;private String lastName;private String email;private Integer gender;private Department department;private Date birth;
}
1.3、编写Dao层(模拟数据库)
- DepartmentDao
package com.springboot05ems.dao;import com.springboot05ems.pojo.Department;
import org.springframework.stereotype.Repository;import java.util.Collection;
import java.util.HashMap;
import java.util.Map;/*** @author BoBooY* @data 2022/9/4 19:57*/
@Repository
public class DepartmentDao {// 模拟数据库中的数据private static Map<Integer, Department> departments = null;static {departments = new HashMap<Integer, Department>();   // 创建一个部门集合departments.put(101,new Department(101,"运营部"));departments.put(102,new Department(102,"策划部"));departments.put(103,new Department(103,"法务部"));departments.put(104,new Department(104,"开发部"));departments.put(105,new Department(105,"宣传部"));}//获取所有部门的信息public Collection<Department> getDepartments() {return departments.values();}// 通过ID查询部门public Department getDepartmentById(Integer id) {return departments.get(id);}
}
- EmployeeDao
package com.springboot05ems.dao;import com.springboot05ems.pojo.Department;
import com.springboot05ems.pojo.Employee;
import org.springframework.beans.factory.annotation.Autowired;
import org.springframework.stereotype.Repository;import java.util.Collection;
import java.util.Date;
import java.util.HashMap;
import java.util.Map;/*** @author BoBooY* @data 2022/9/4 20:25*/
@Repository
public class EmployeeDao {// 模拟数据库中的数据private static Map<Integer, Employee> employees = null;// 员工所属部门@Autowiredprivate DepartmentDao departmentDao;static {employees = new HashMap<>();   // 创建一个部门employees.put(1001, new Employee(1001, "BoBooY", "A1234567@qq.com", 1, new Department(1001, "运营部"), new Date()));employees.put(1002, new Employee(1002, "BoBooY", "B1234567@qq.com", 0, new Department(1002, "策划部"), new Date()));employees.put(1003, new Employee(1003, "BoBooY", "C1234567@qq.com", 1, new Department(1003, "法务部"), new Date()));employees.put(1004, new Employee(1004, "BoBooY", "D1234567@qq.com", 0, new Department(1004, "开发部"), new Date()));employees.put(1005, new Employee(1005, "BoBooY", "F1234567@qq.com", 1, new Department(1005, "宣传部"), new Date()));}// 增加员工,主键自增private static Integer initid = 1006;public void save(Employee employee){if(employee.getId()==null){employee.setId(initid++);}employee.setDepartment(departmentDao.getDepartmentById(employee.getDepartment().getId()));employees.put(employee.getId(),employee);}// 查询全部员工信息public Collection<Employee> getAll(){return employees.values();}// 通过ID查询员工public Employee getEmployee(Integer id){return employees.get(id);}// 删除员工public void delete(Integer id){employees.remove(id);}
}
1.4、导入静态资源(附资源链接)
- css,js等放在static文件夹下
- html 放在 templates文件夹下
静态资源链接:https://blog.csdn.net/qq_58233406/article/details/126838809?spm=1001.2014.3001.5502

2、首页
2.1、导入依赖
<dependency><groupId>org.springframework.boot</groupId><artifactId>spring-boot-starter-thymeleaf</artifactId>
</dependency>
2.2、跳转首页
方式一:编写一个Controller控制器
- 编写IndexController
package com.springboot05ems.controller;import org.springframework.stereotype.Controller;
import org.springframework.web.bind.annotation.RequestMapping;/*** @author BoBooY* @data 2022/9/5 14:32*/
@Controller
public class IndexController {@RequestMapping({"/","/index.html"})public String index() {return "index";}
}
- 启动测试
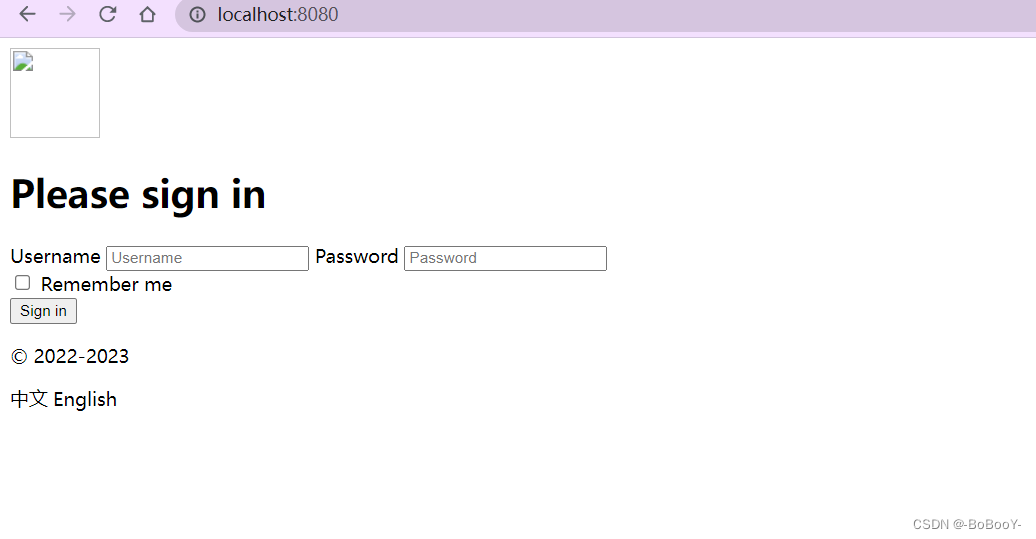

成功访问首页
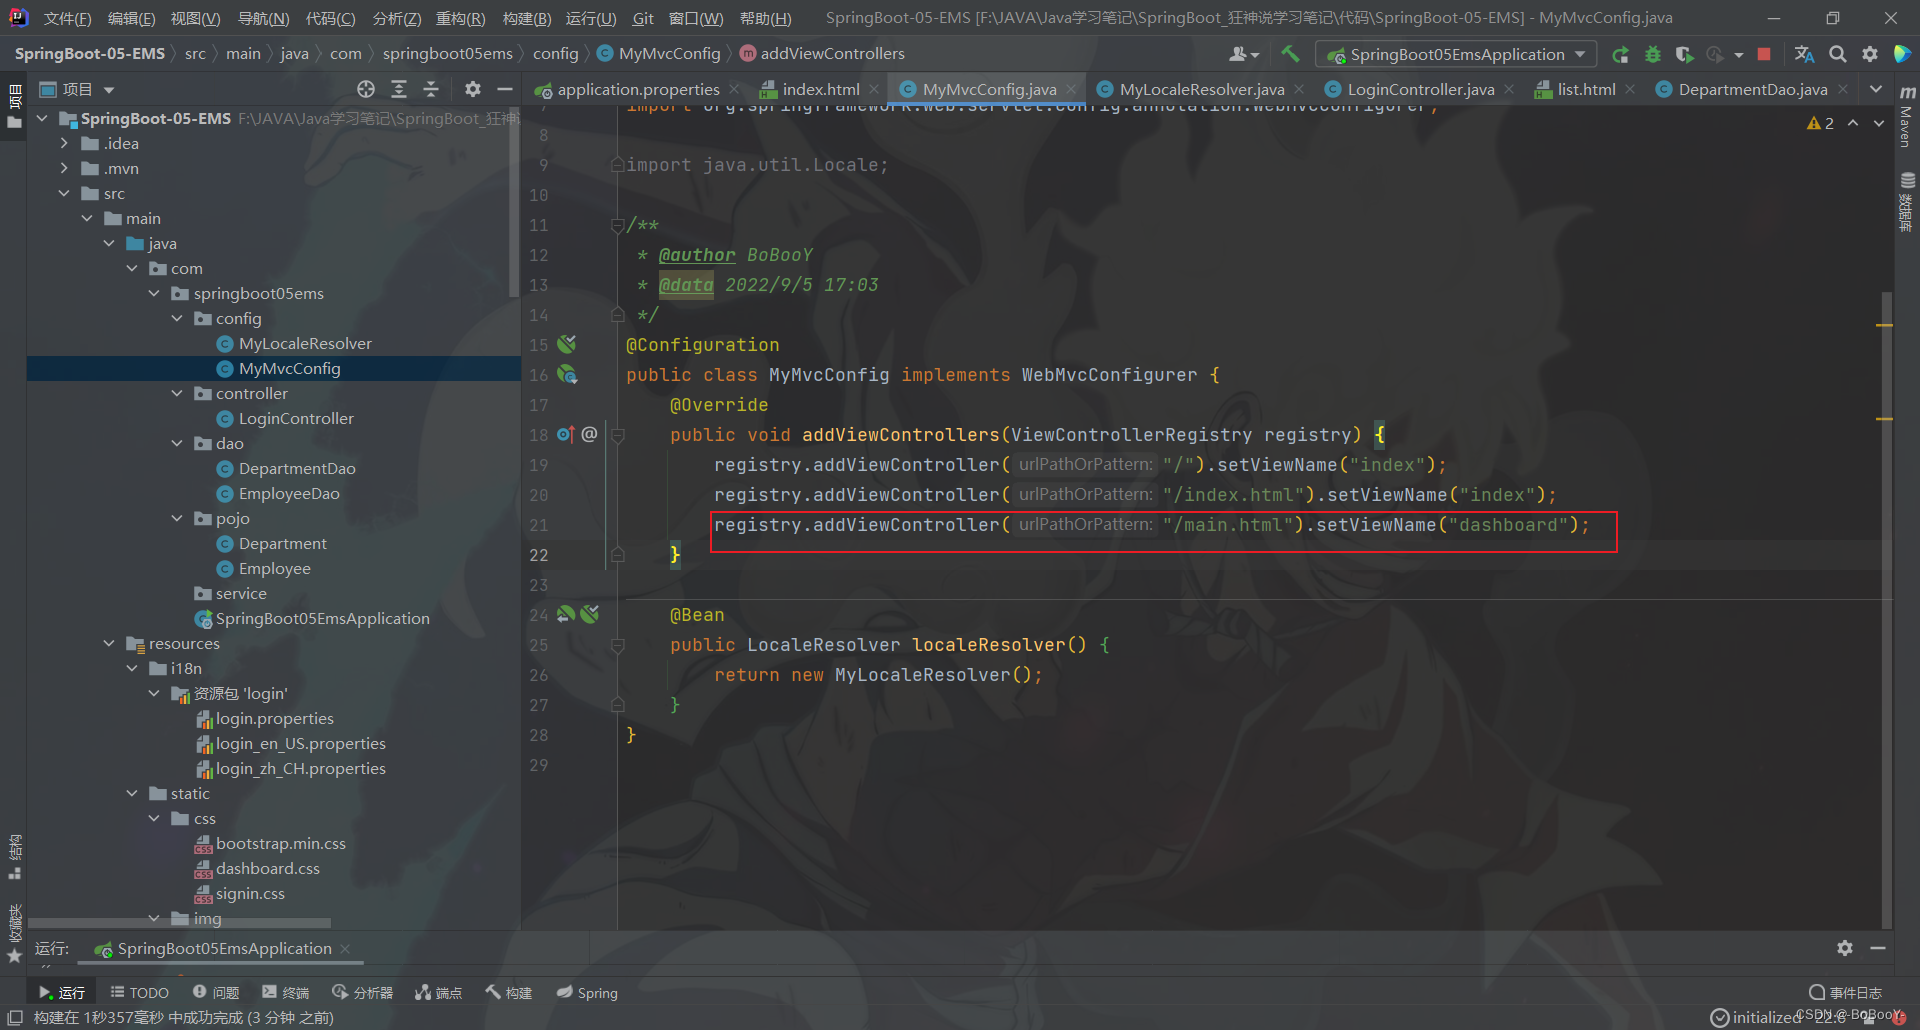
方式二:自己编写MVC的扩展配置
- 编写MyMvcConfig
package com.springboot05ems.config;import org.springframework.context.annotation.Configuration;
import org.springframework.web.servlet.config.annotation.ViewControllerRegistry;
import org.springframework.web.servlet.config.annotation.WebMvcConfigurer;/*** @author BoBooY* @data 2022/9/5 17:03*/
@Configuration
public class MyMvcConfig implements WebMvcConfigurer {@Overridepublic void addViewControllers(ViewControllerRegistry registry) {registry.addViewController("/").setViewName("index");registry.addViewController("/index.html").setViewName("index");}
}
- 运行测试
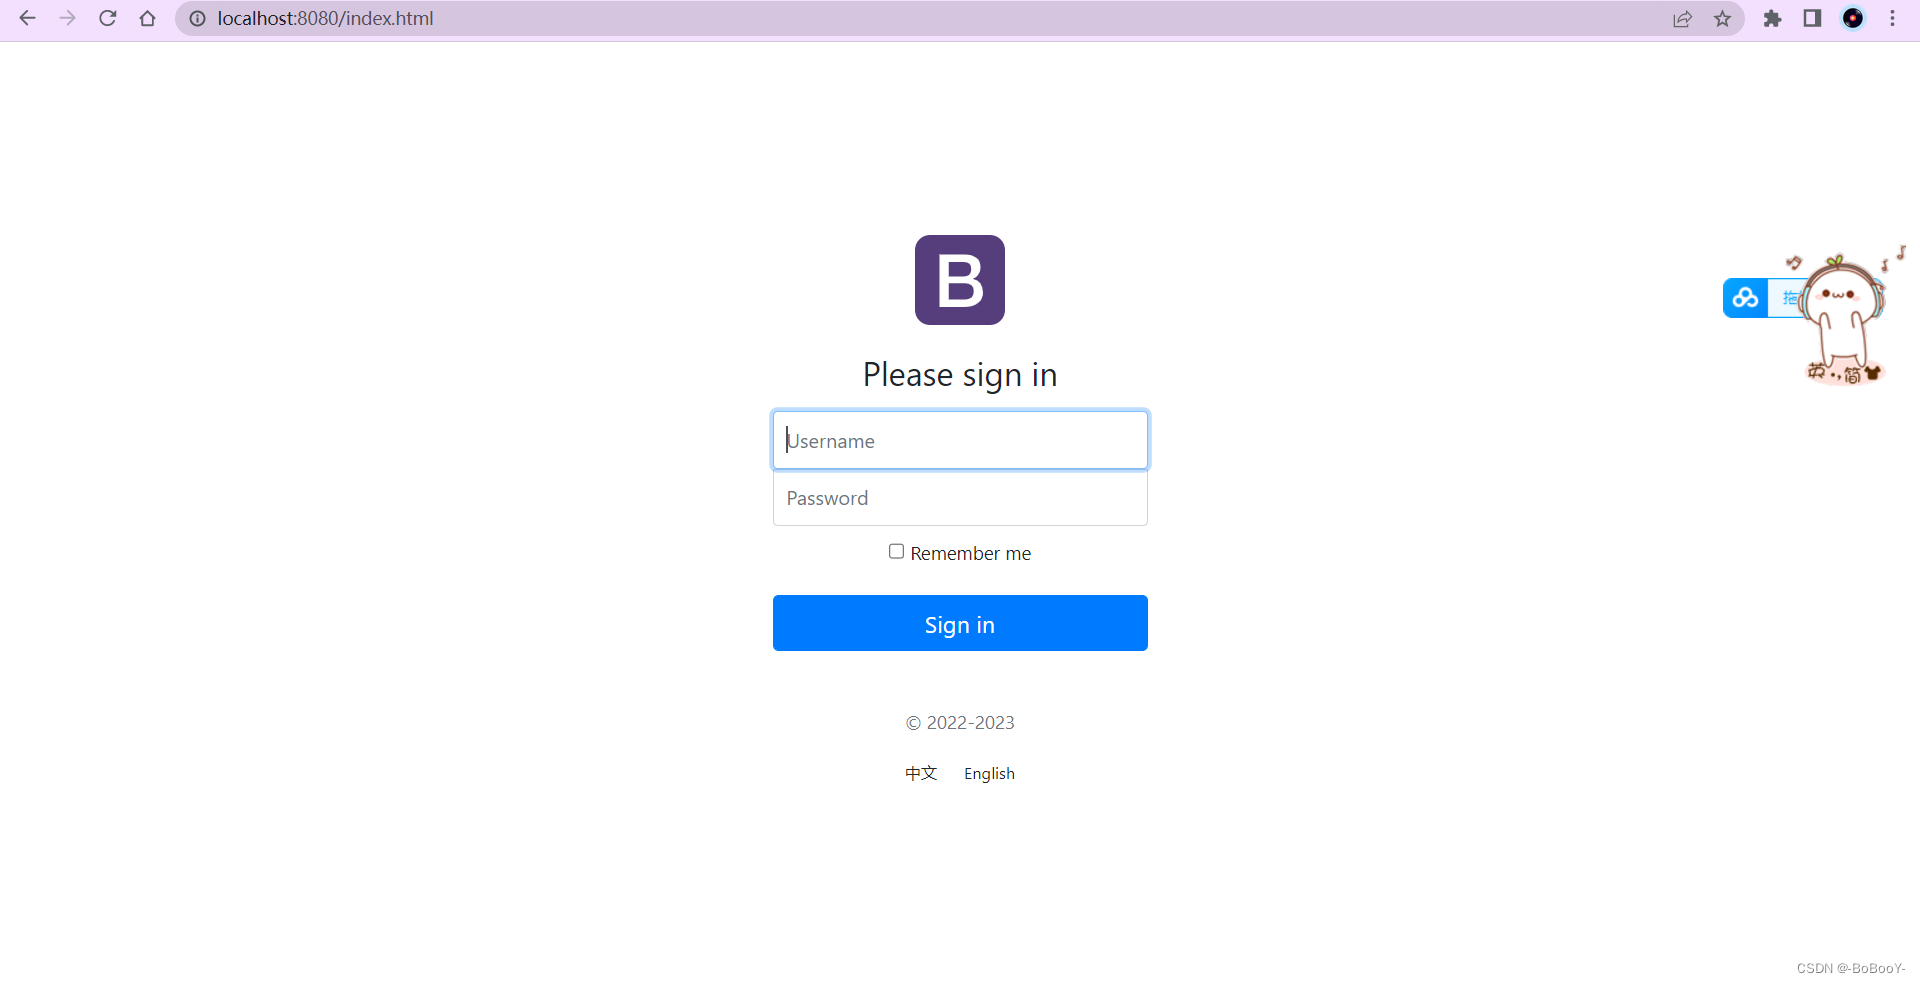
2.3、将导入的静态资源修改为Thymeleaf模板规范
- 修改index.html(示例)
<!DOCTYPE html>
<html lang="en" xmlns:th="http://www.thymeleaf.org"><head><meta http-equiv="Content-Type" content="text/html; charset=UTF-8"><meta name="viewport" content="width=device-width, initial-scale=1, shrink-to-fit=no"><meta name="description" content=""><meta name="author" content=""><title>Signin Template for Bootstrap</title><!-- Bootstrap core CSS --><link th:href="@{/css/bootstrap.min.css}" rel="stylesheet"><!-- Custom styles for this template --><link th:href="@{/css/signin.css}" rel="stylesheet"></head><body class="text-center"><form class="form-signin" action="dashboard.html"><img class="mb-4" th:src="@{/img/bootstrap-solid.svg}" alt="" width="72" height="72"><h1 class="h3 mb-3 font-weight-normal">Please sign in</h1><label class="sr-only">Username</label><input type="text" class="form-control" placeholder="Username" required="" autofocus=""><label class="sr-only">Password</label><input type="password" class="form-control" placeholder="Password" required=""><div class="checkbox mb-3"><label><input type="checkbox" value="remember-me"> Remember me</label></div><button class="btn btn-lg btn-primary btn-block" type="submit">Sign in</button><p class="mt-5 mb-3 text-muted">© 2022-2023</p><a class="btn btn-sm">中文</a><a class="btn btn-sm">English</a></form></body></html>
- 修改404.html,dashboard.html,list.html(省略)
与上面示例修改方式一样,将src与href属性修改为模板规范格式,注意修改静态资源导入路径,本人的css,img,js在static目录下,删掉了asserts目录
3、国际化
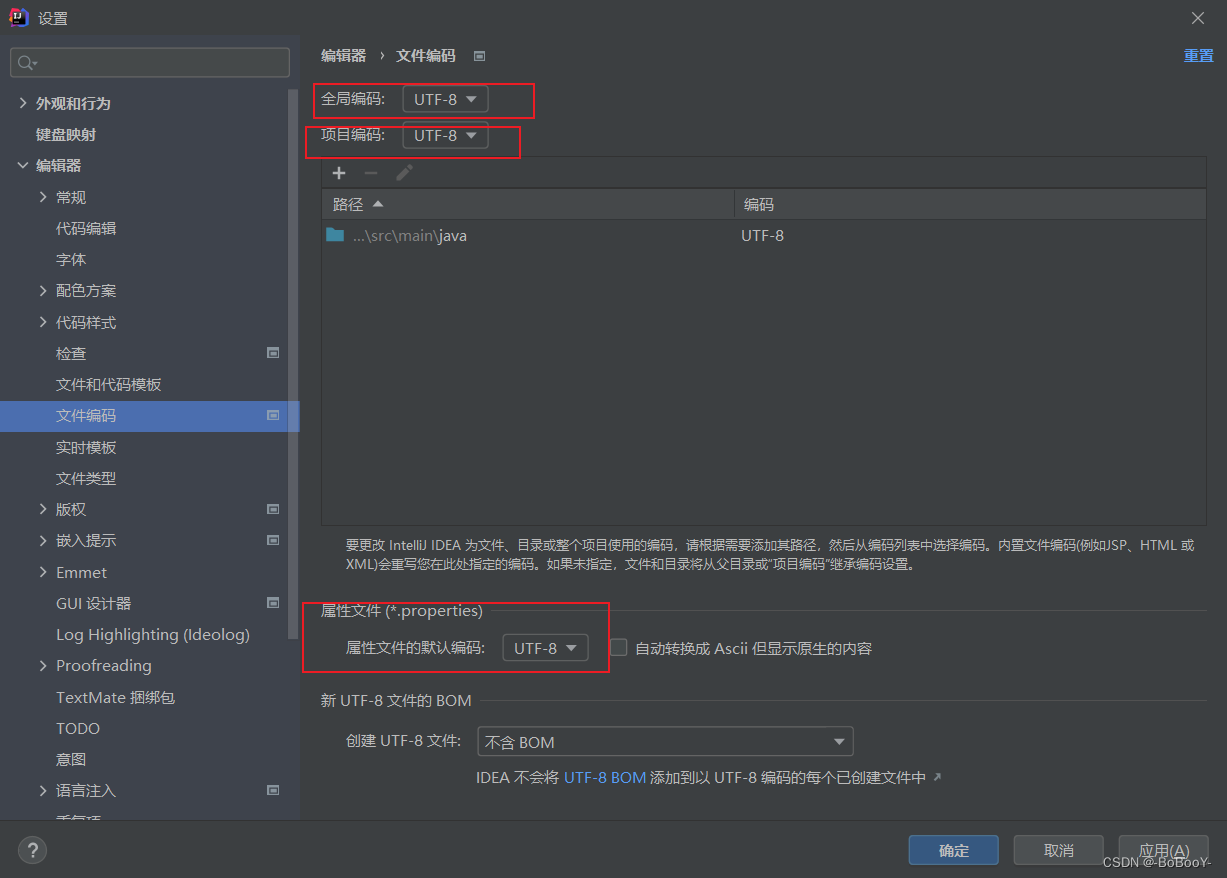
3.1、修改IDEA中properties的编码设置
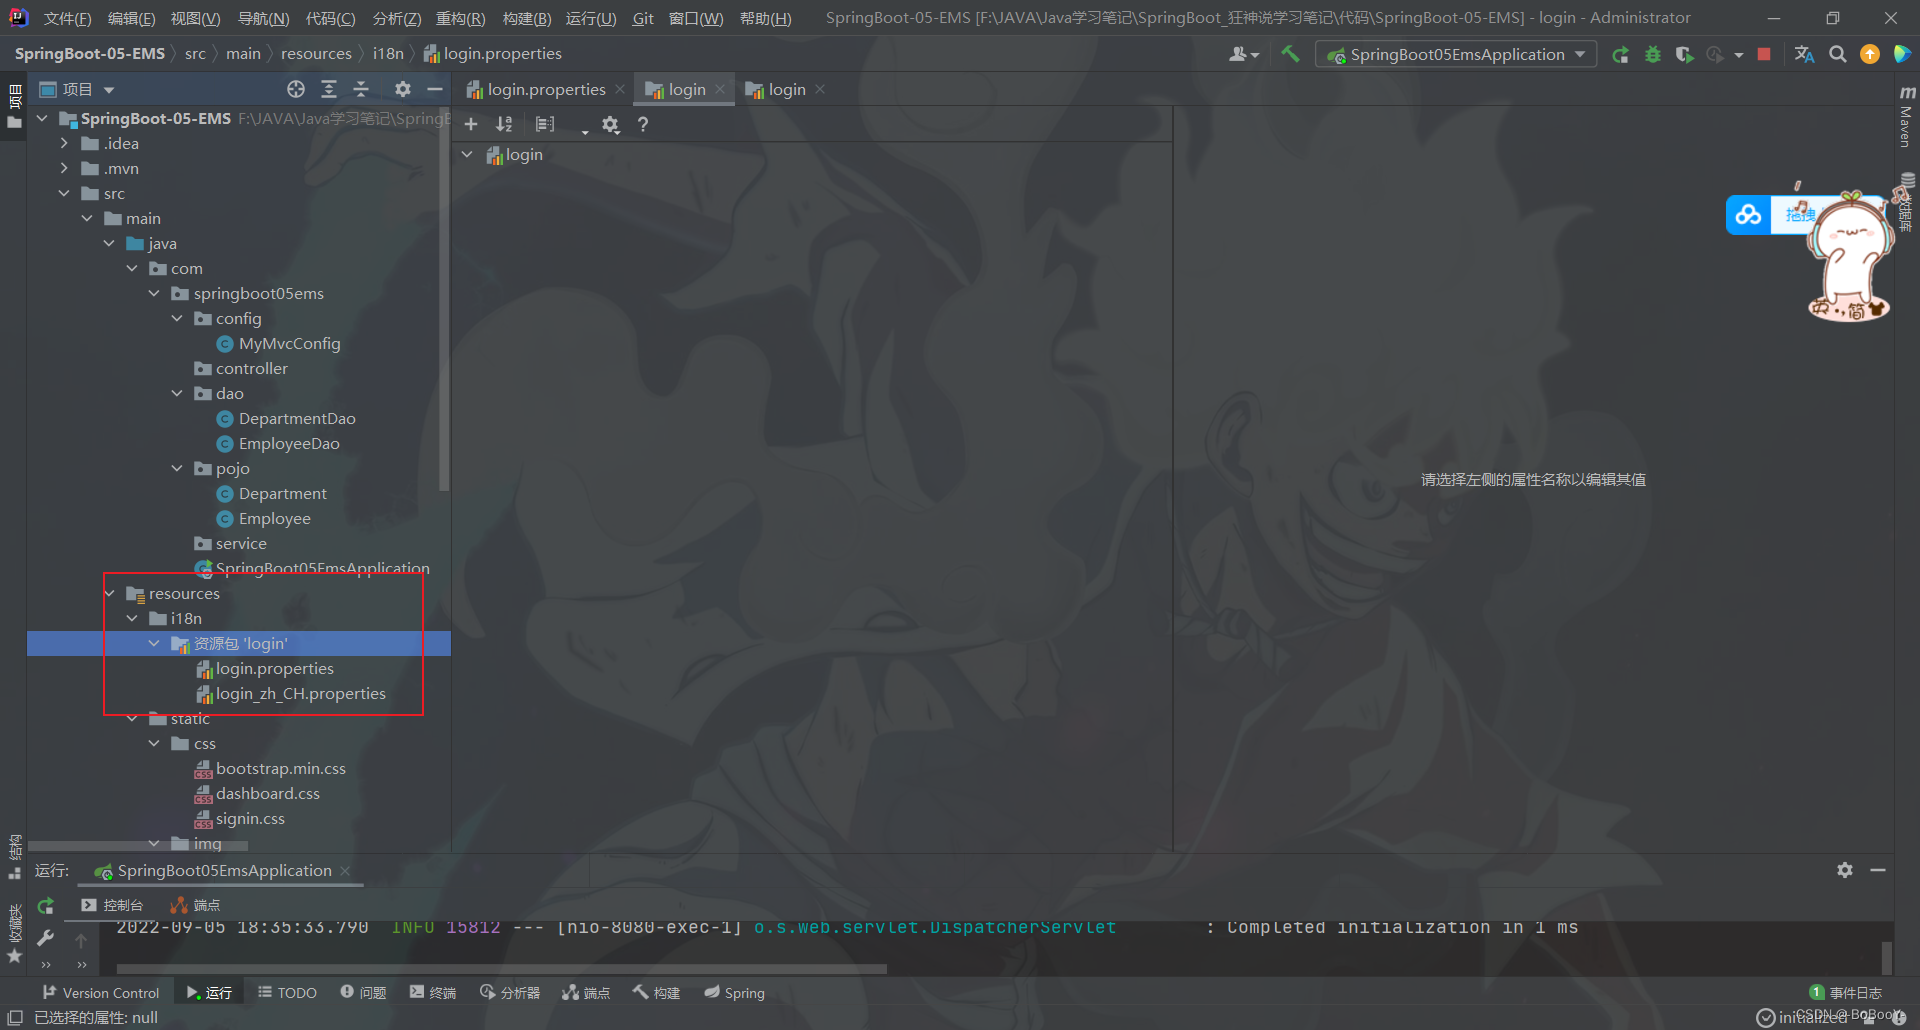
3.2、编写国际化配置文件
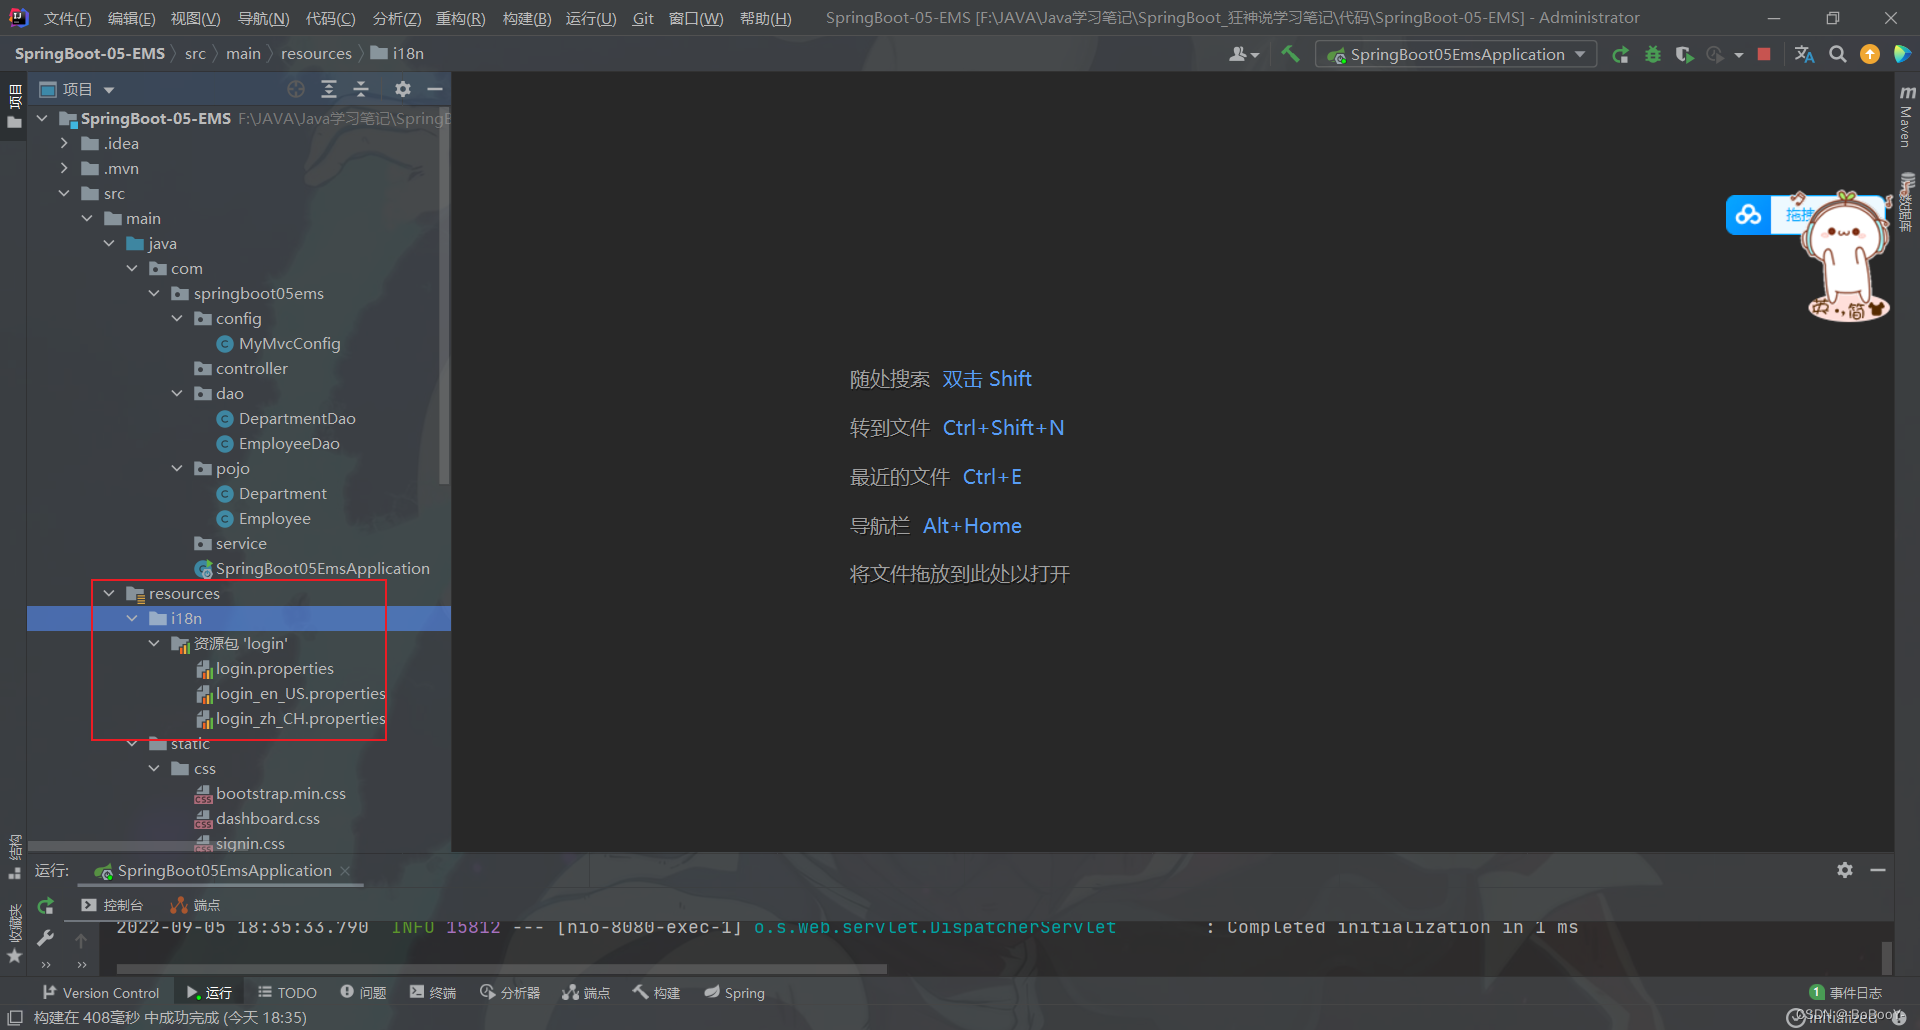
- 在resources资源文件下新建一个i18n目录,存放国际化配置文件
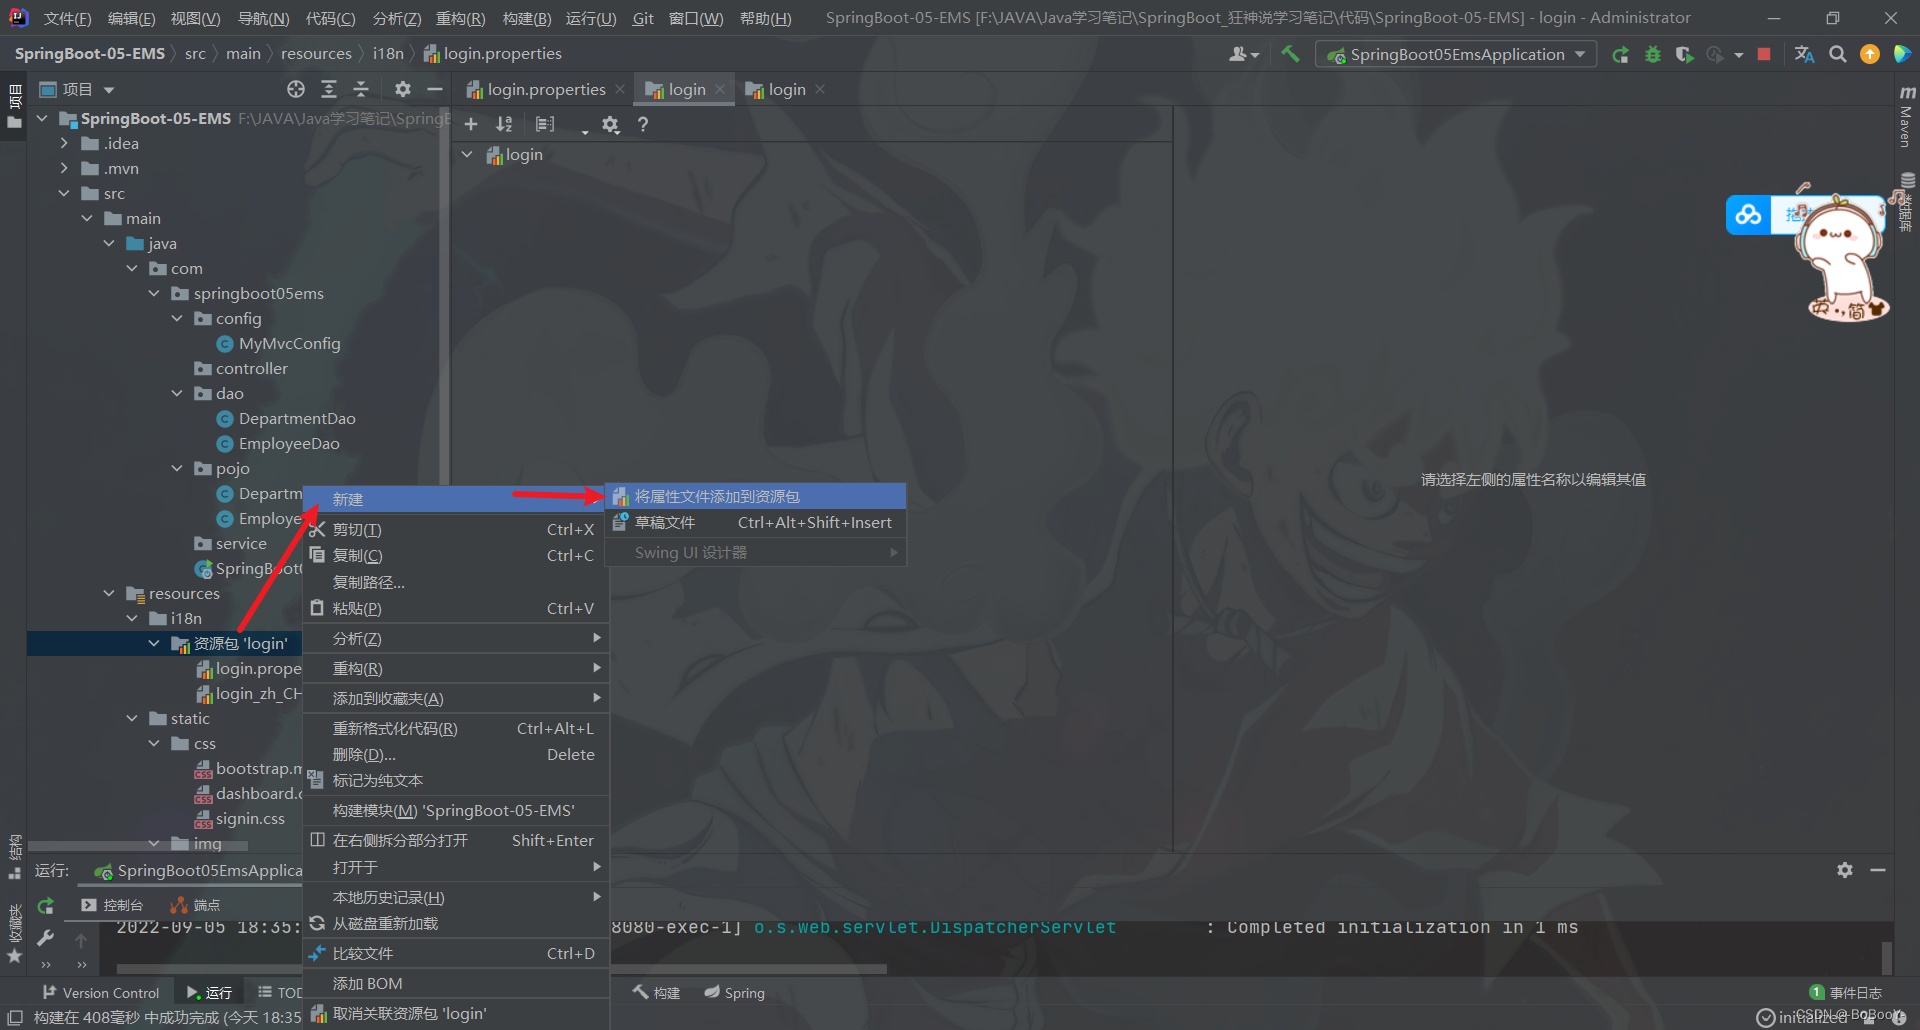
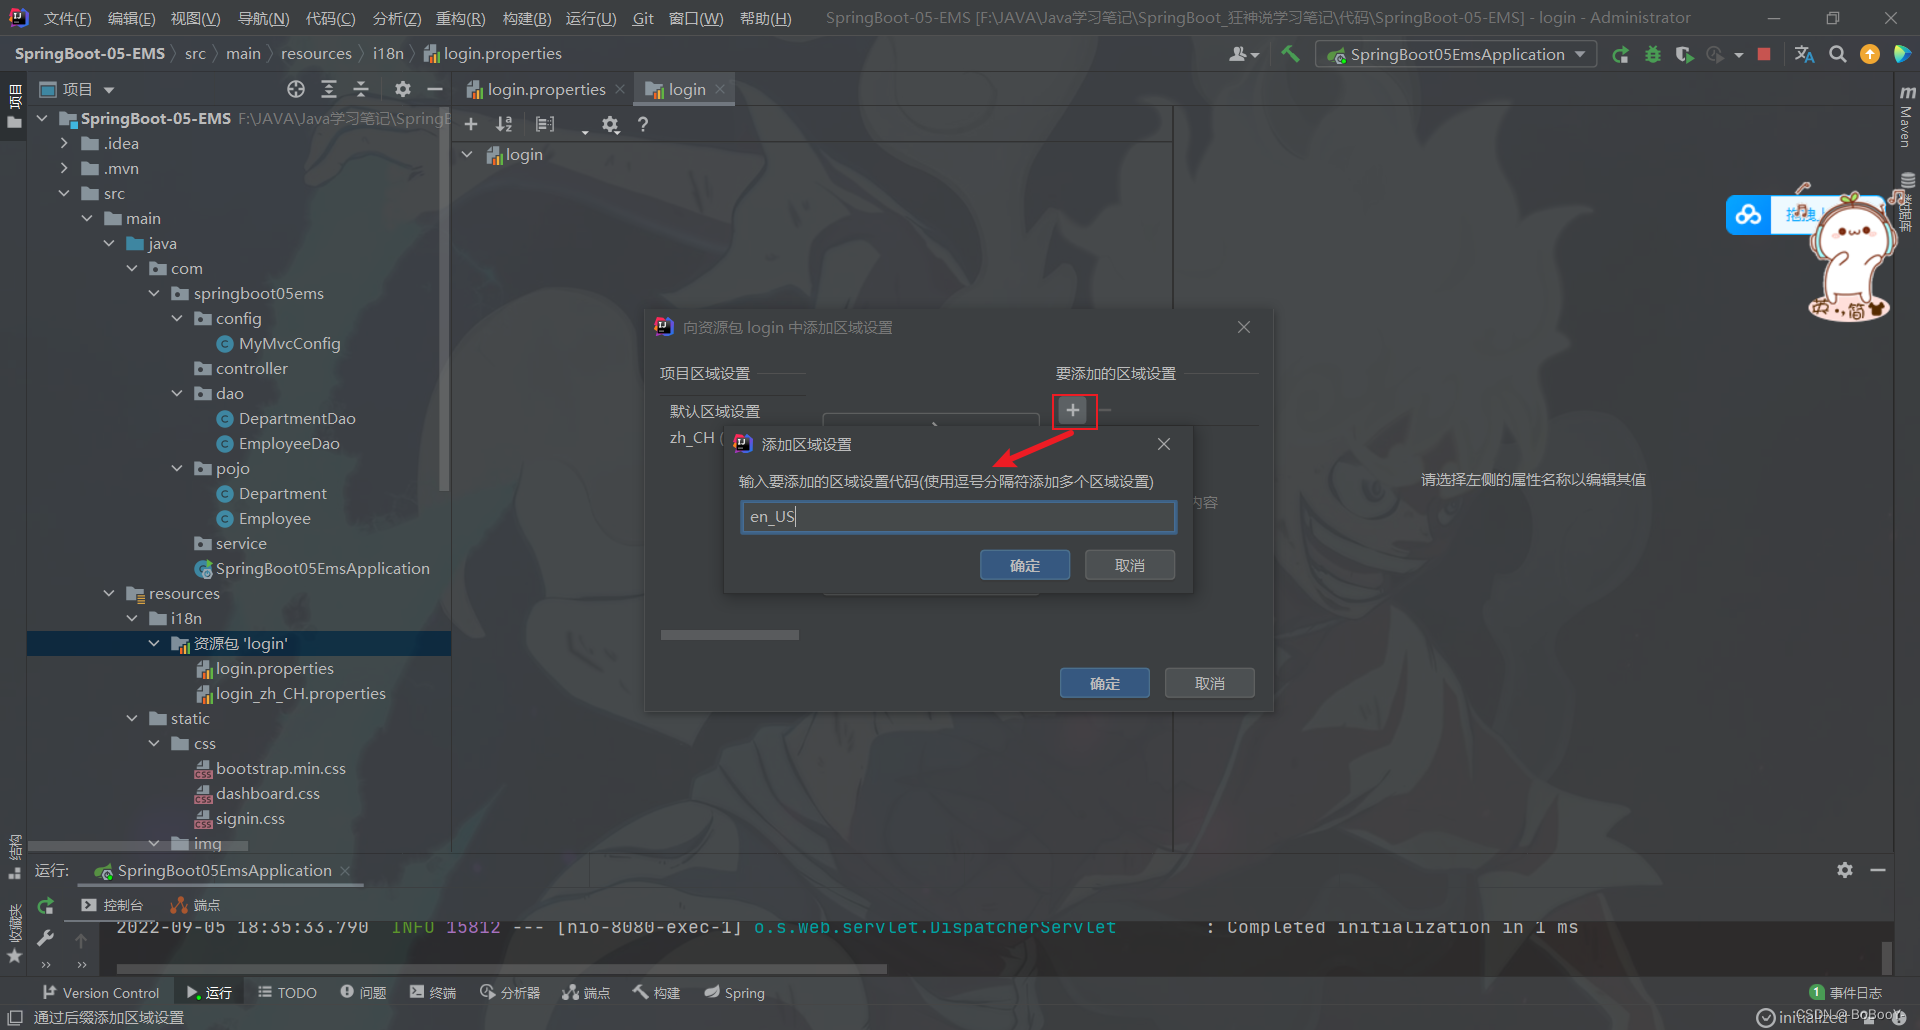
- 在子i18n目录下建立一个 login.properties 文件和一个 login_zh_CN.properties 文件,IDEA自动识别并将其合并
- 右键资源包‘login’添加第三个国际化配置文件 login_en_US.properties
3.3、编写配置
- login.properties : 默认
login.btn=请登录
login.username=用户名
login.password=密码
login.remember=记住我
login.tip=请登录
- login_en_US.properties:英语
login.btn=sign in
login.username=username
login.password=password
login.remember=remember me
login.tip=Please sign in
- login_zh_CH.properties
login.btn=请登录
login.username=用户名
login.password=密码
login.remember=记住我
login.tip=请登录
3.4、查看国际化配置源码
(springboot2.7.3)
- 全局搜索MessageSourceAutoConfiguration类,这个类中有一个方法,是springboot已经自动配置好了管理我们国际化资源文件的组件 ResourceBundleMessageSource
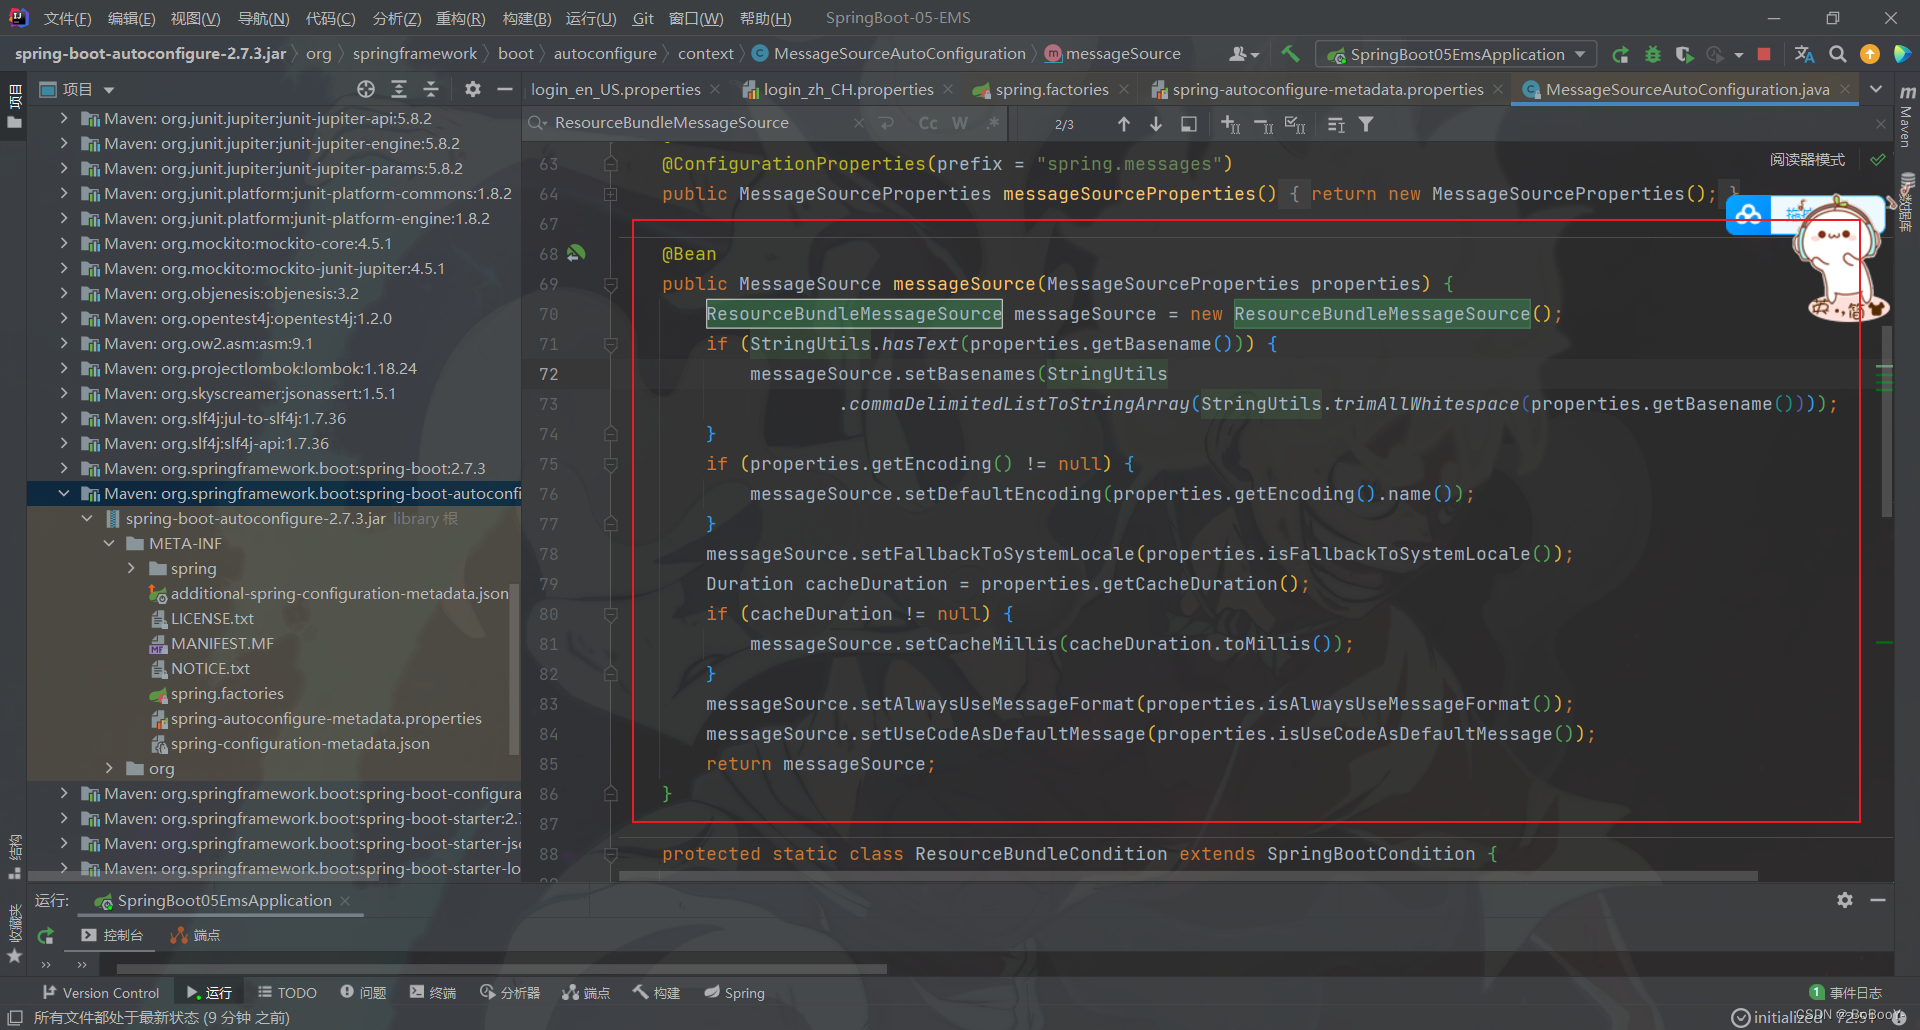
- 真实的情况是放在了i18n目录下,所以要去配置这个messages的路径;
3.5、配置messages路径
spring.messages.basename=i18n.login
3.6、页面获取国际化的值
- Thymeleaf的文档中message取值操作为: #{…}
3.7、配置国际化解析
分析源码
- 在Spring中有一个国际化的Locale (区域信息对象),里面有一个LocaleResolver (获取区域信息 对象)的解析器

- AcceptHeaderLocaleResolver 这个类中有一个方法 resolveLocale()

如果我们想点击链接让个人的国际化资源生效,就需要让我们自己的Locale生效! 需要去自己写一个自己的LocaleResolver,可以在链接上携带区域信息。
配置国际化
- 修改前端页面中英文的请求
<!-- Thymeleaf传参不用 ? 而是使用 (key=value) -->
<a class="btn btn-sm" th:href="@{/index.html(lang='zh_CH')}">中文</a>
<a class="btn btn-sm" th:href="@{/index.html(lang='en_US')}">English</a>
- 编写处理国际化的配置类
package com.springboot05ems.config;import org.springframework.web.servlet.LocaleResolver;
import org.thymeleaf.util.StringUtils;import javax.servlet.http.HttpServletRequest;
import javax.servlet.http.HttpServletResponse;
import java.util.Locale;/*** @author BoBooY* @data 2022/9/5 21:06*/
public class MyLocaleResolver implements LocaleResolver {@Overridepublic Locale resolveLocale(HttpServletRequest request) {String lang = request.getParameter("lang");Locale locale = Locale.getDefault();//如果请求不为空if(!StringUtils.isEmpty(lang)) {//分割请求参数String[] s = lang.split("_");//国家,地区locale = new Locale(s[0],s[1]);}return locale;}@Overridepublic void setLocale(HttpServletRequest request, HttpServletResponse response, Locale locale) {}
}
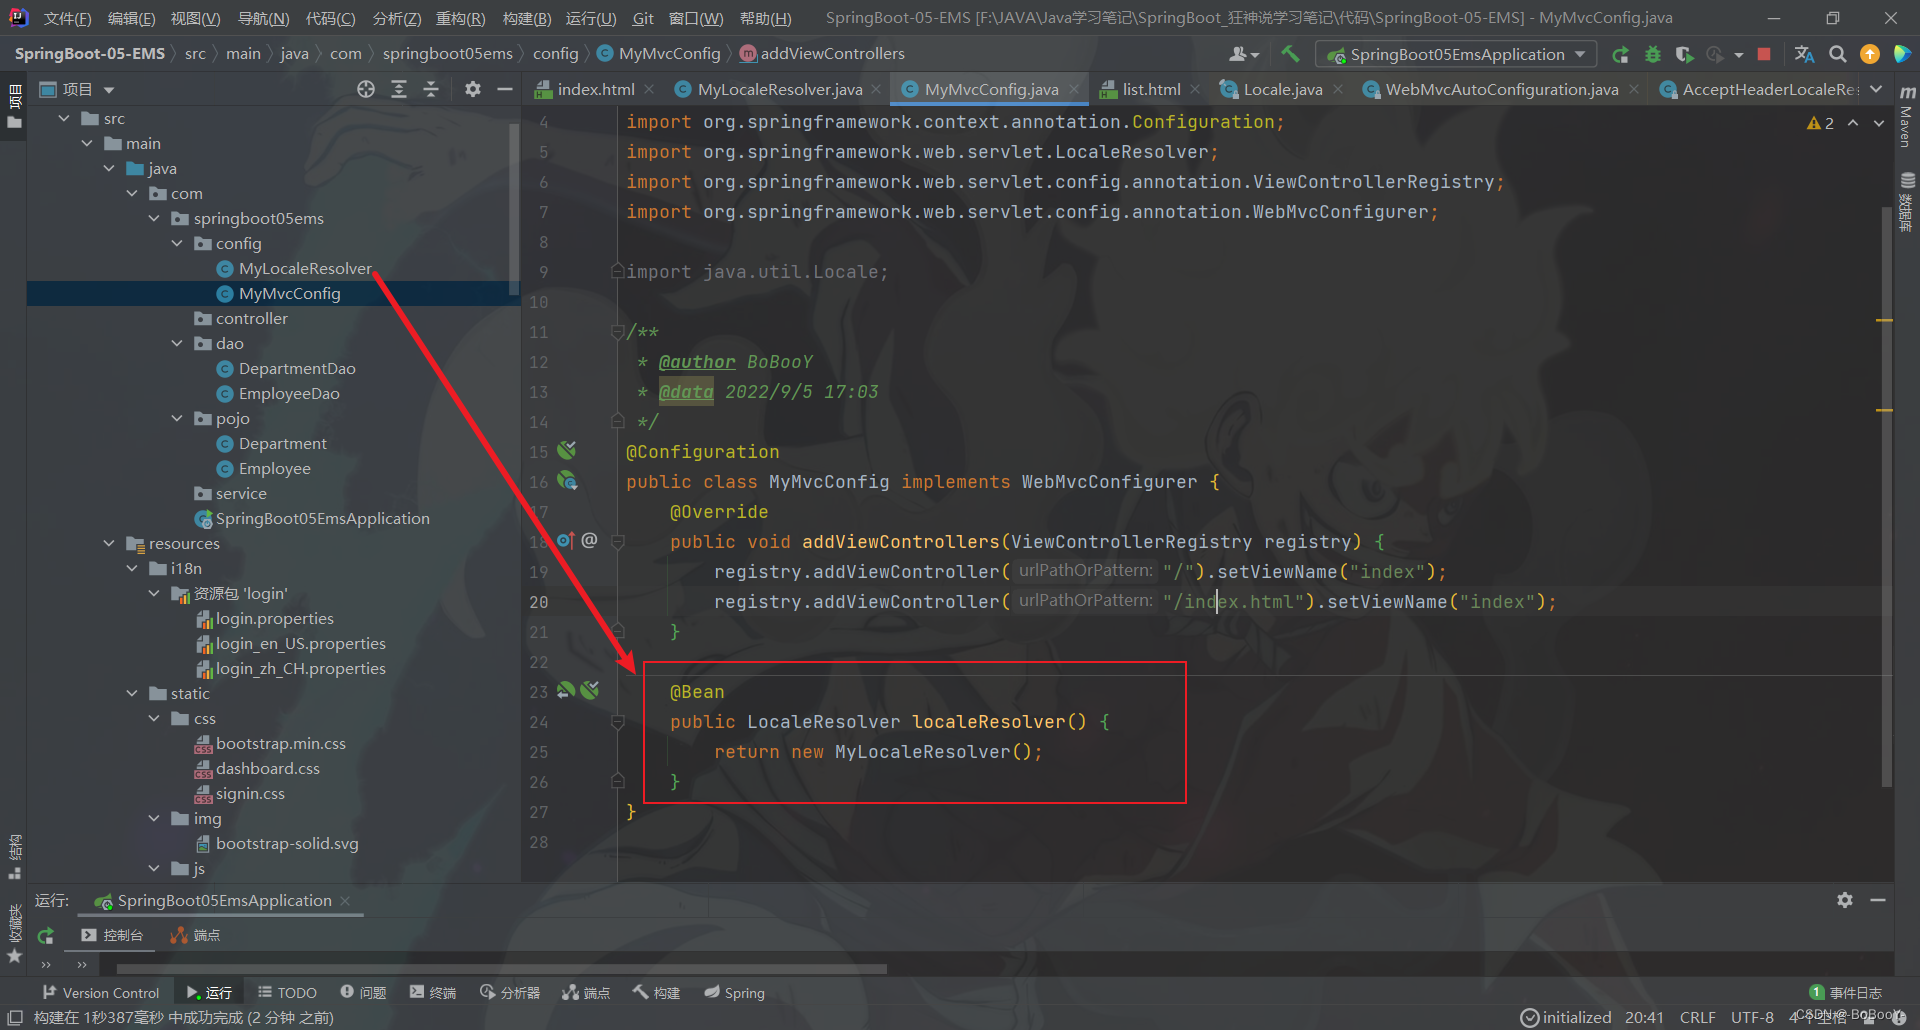
- 在个人的配置类(MyMvcConfig)中注册bean
@Bean
public LocaleResolver localeResolver() {return new MyLocaleResolver();
}
- 重启项目,运行测试效果
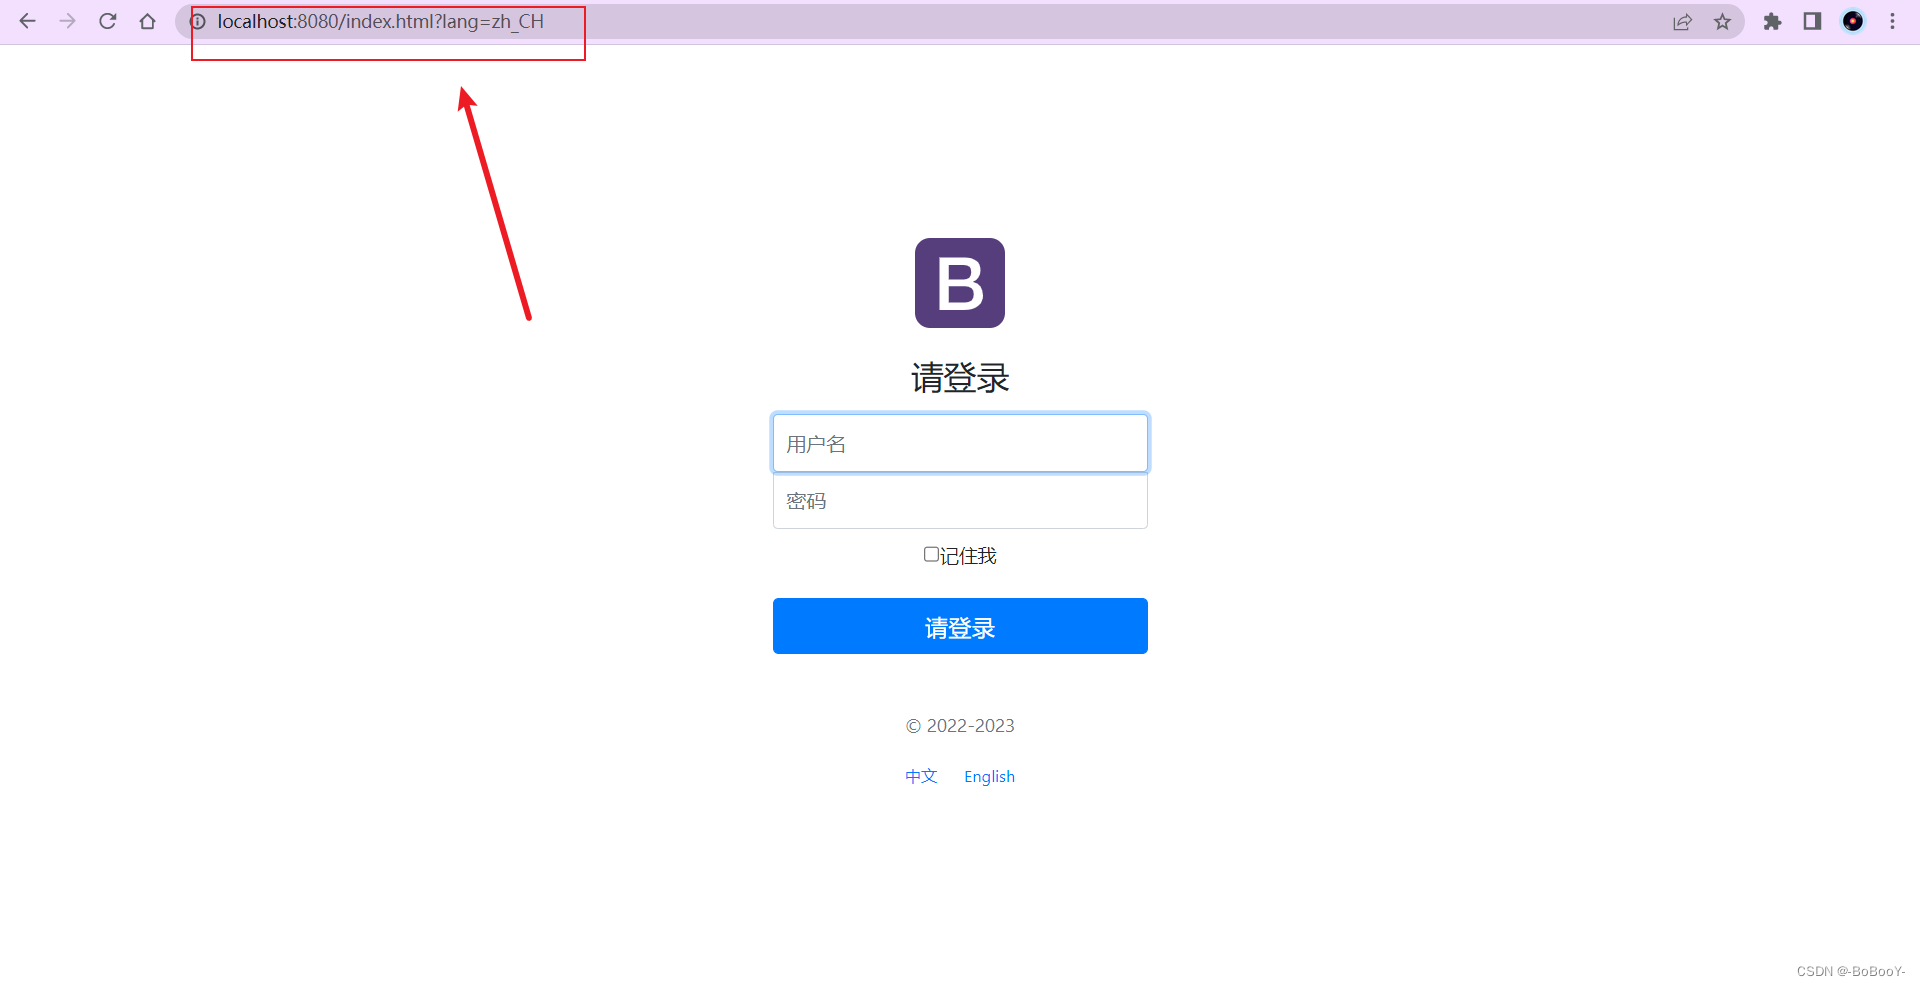
主页面

点击English
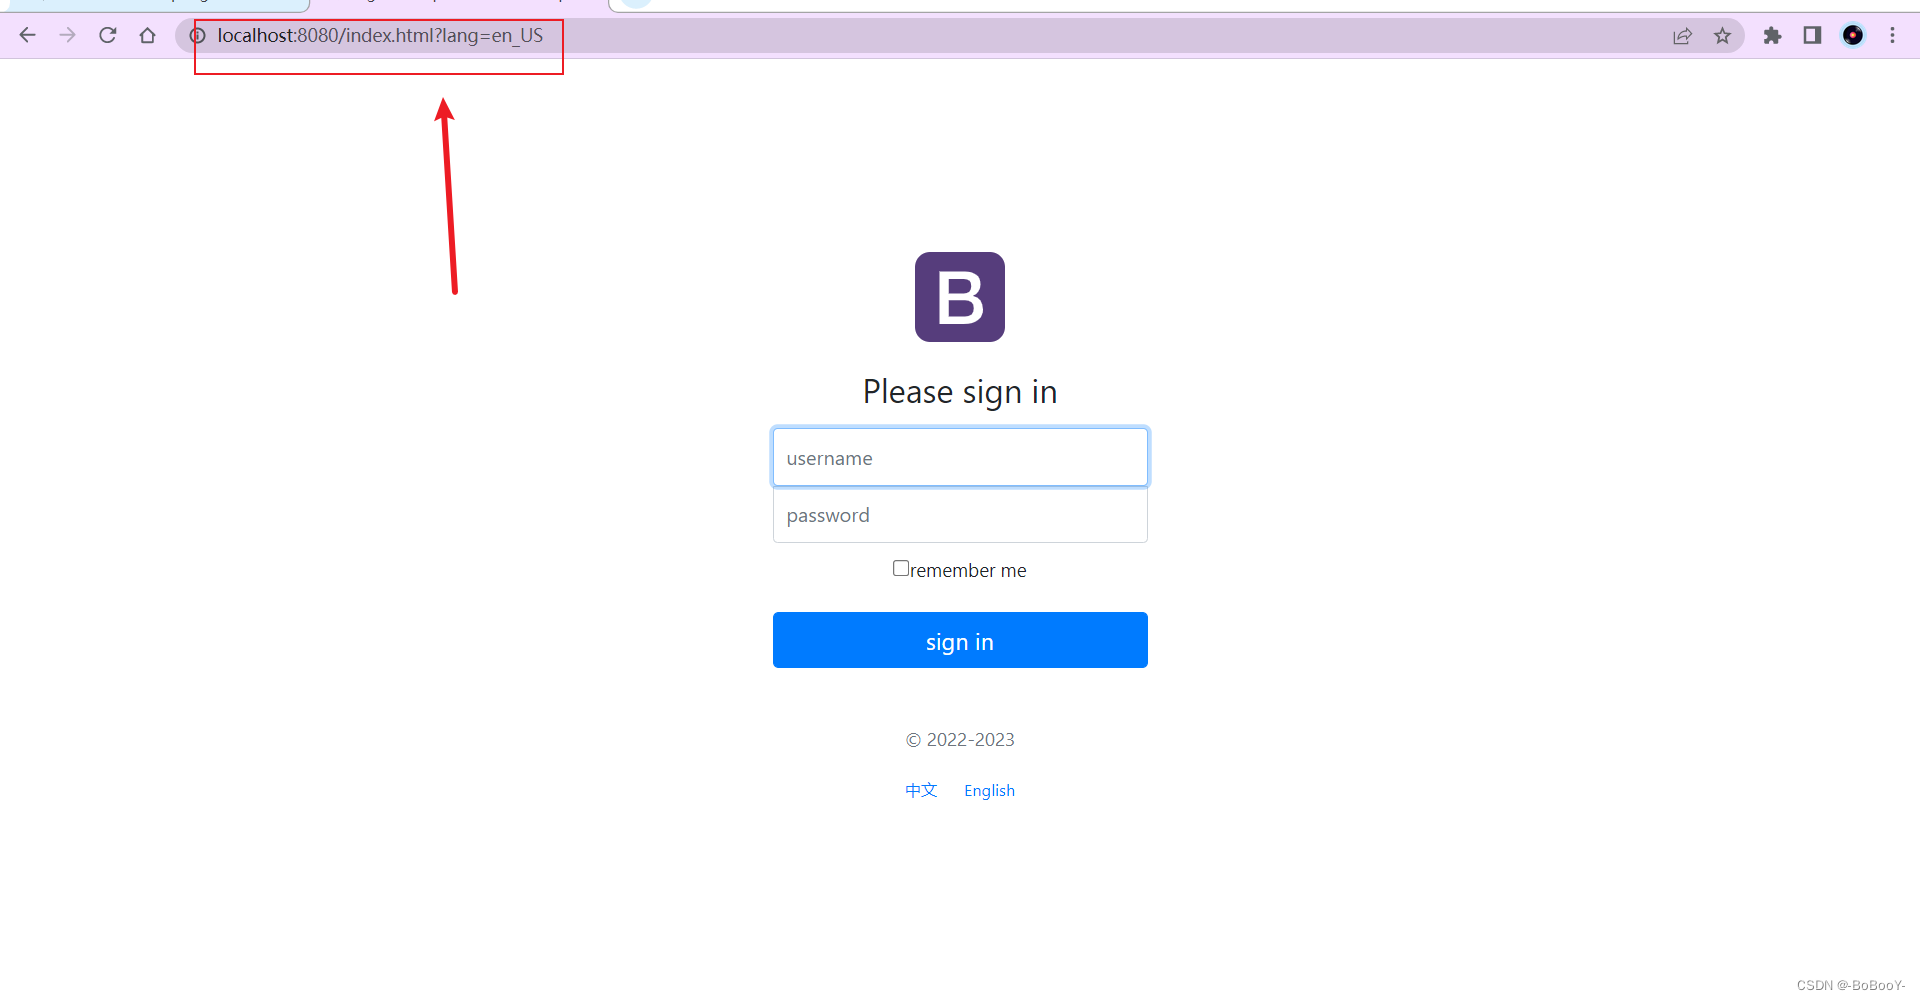
点击中文
4、登录功能实现
4.1、关闭模板引擎缓存
#关闭thymeleaf模板引擎的缓存
spring.thymeleaf.cache=false
4.2、登录
【目前不连接数据库,输入任意用户名密码都可以登录】
- 把登录页面的表单提交地址写一个controller
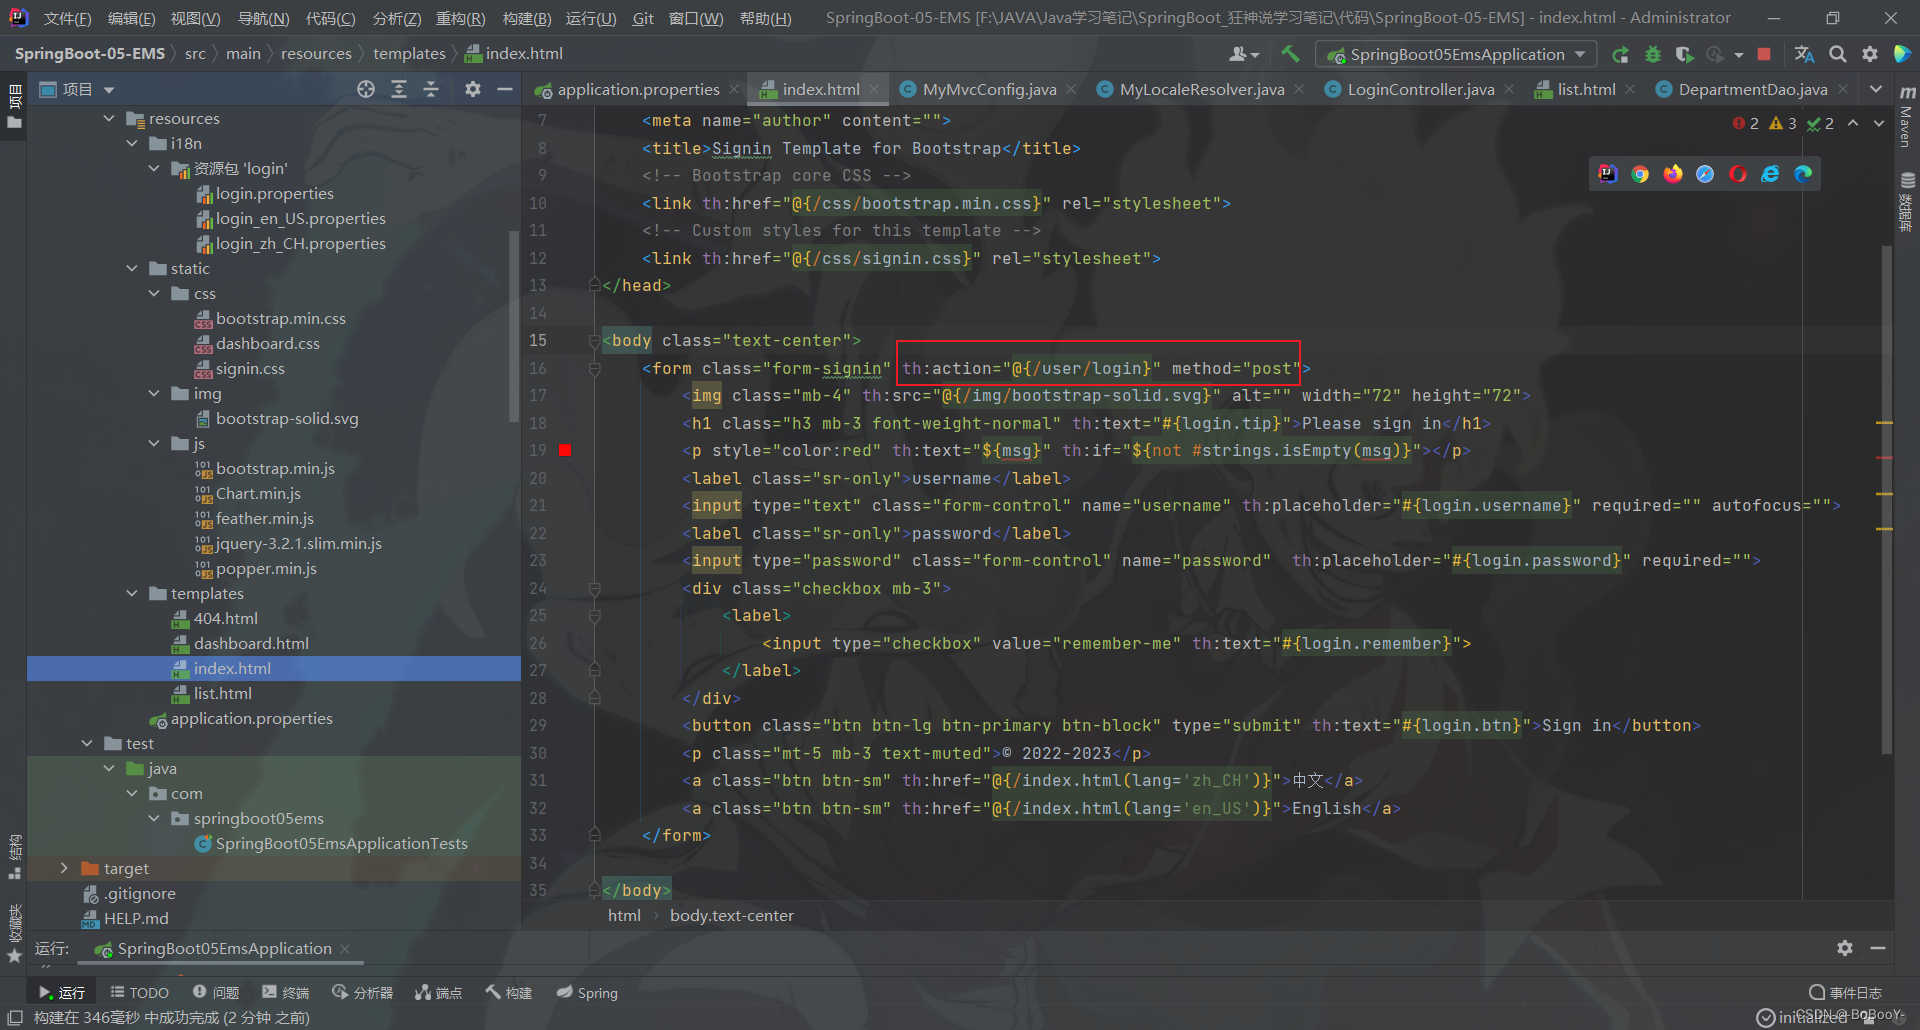
- 给用户名和密码的 input 标签添加 name 属性,并添加一个隐藏信息标签
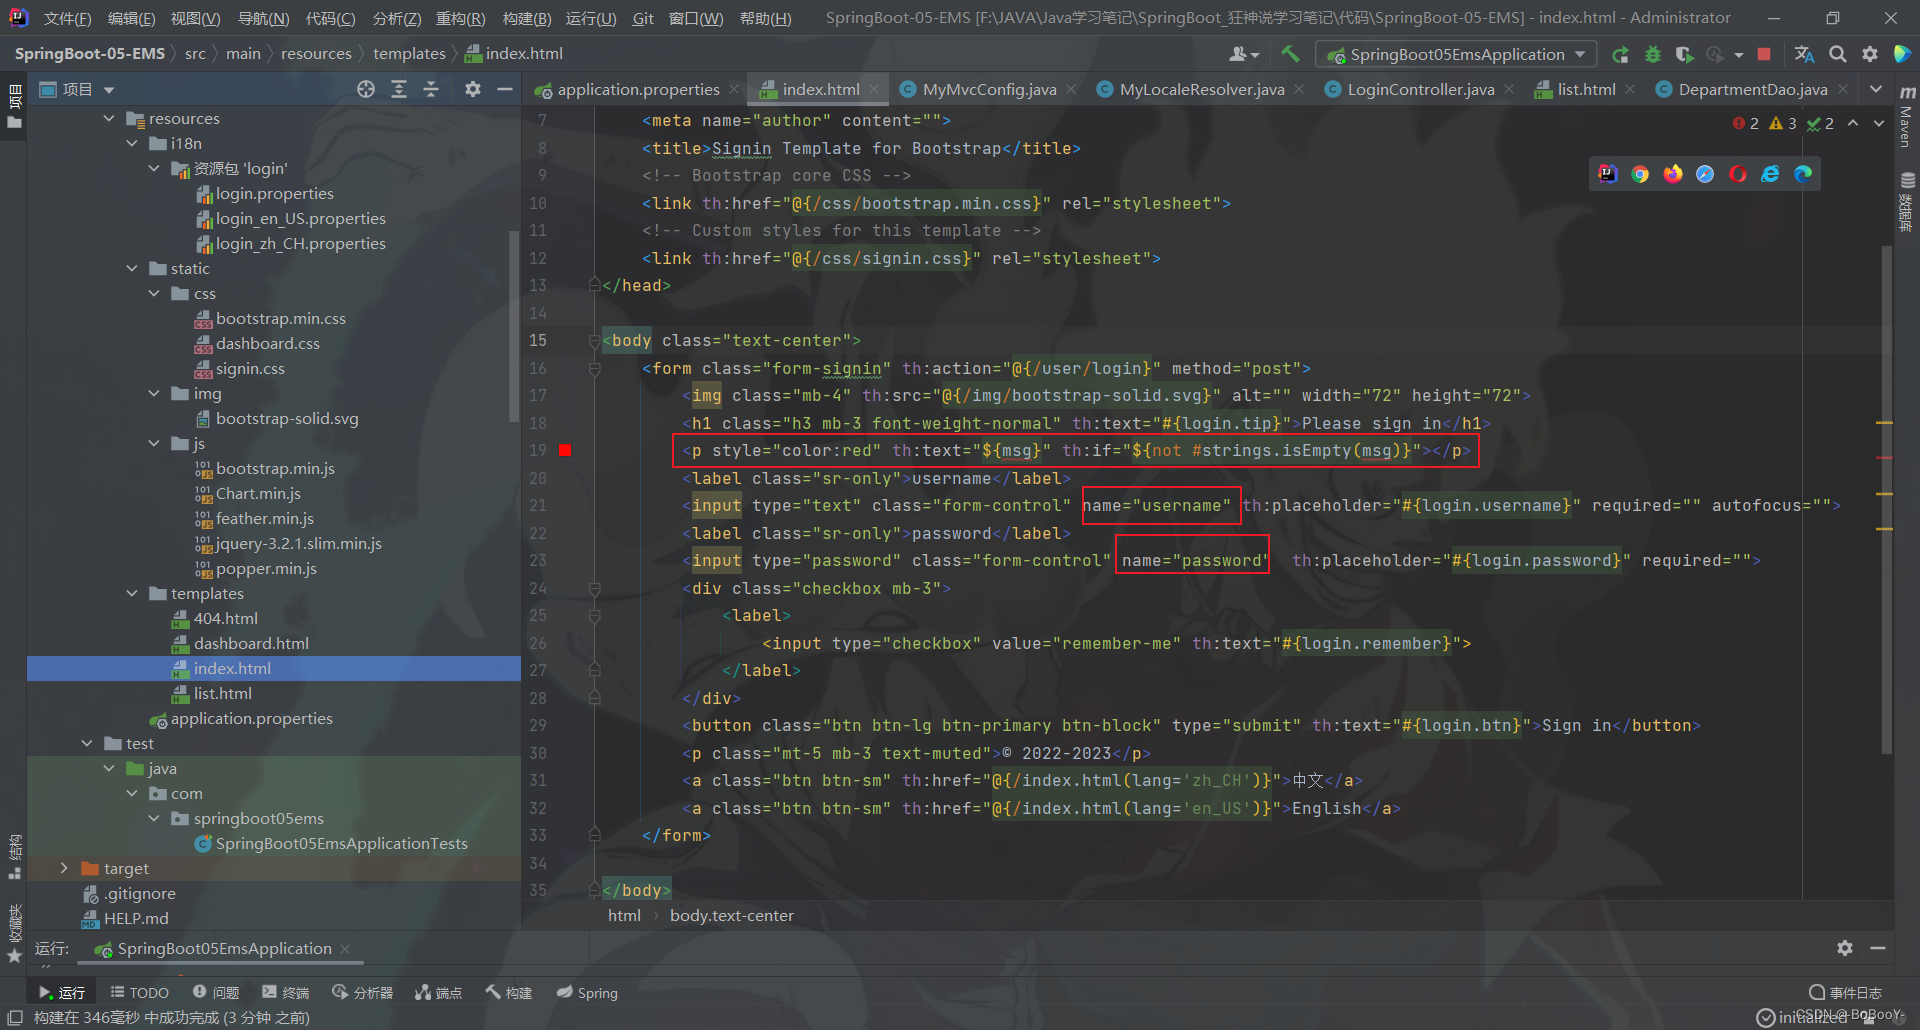
- 编写LoginController
package com.springboot05ems.controller;import org.springframework.stereotype.Controller;
import org.springframework.ui.Model;
import org.springframework.web.bind.annotation.PostMapping;
import org.springframework.web.bind.annotation.RequestParam;
import org.thymeleaf.util.StringUtils;import javax.servlet.http.HttpSession;/*** @author BoBooY* @data 2022/9/6 11:52*/
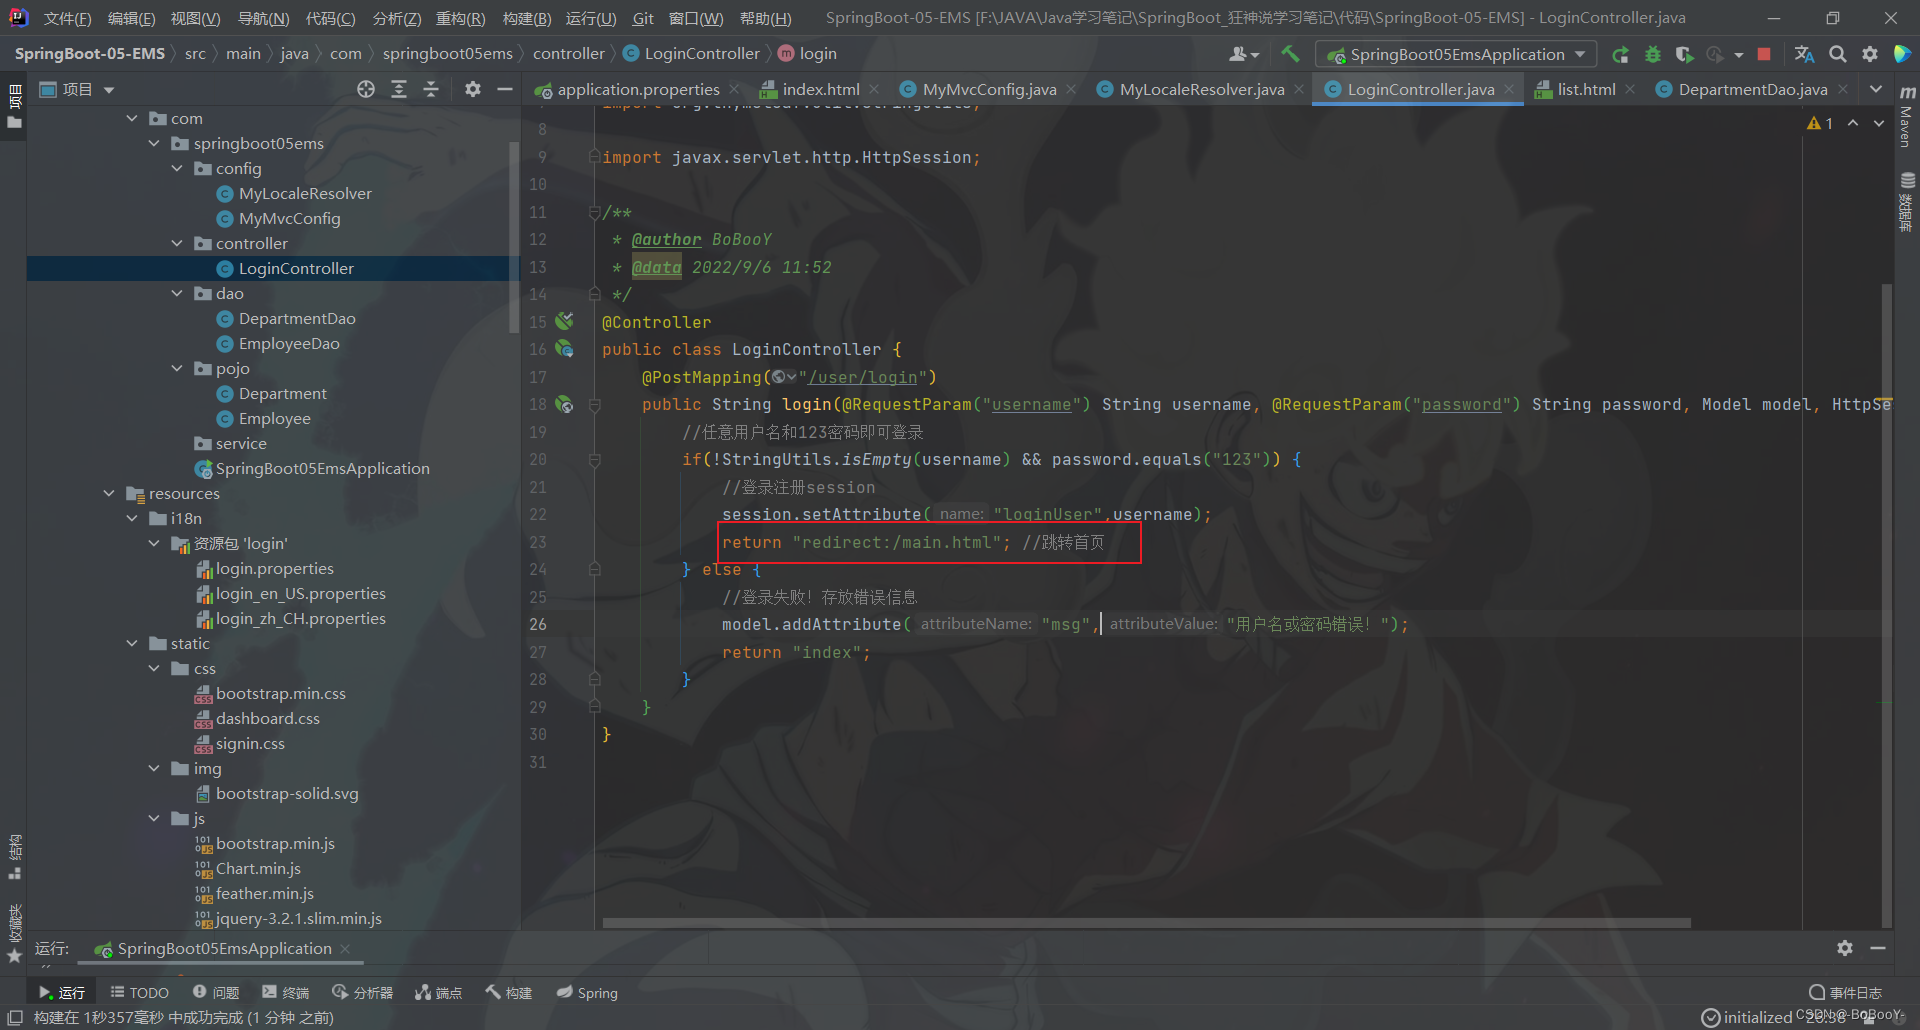
@Controller
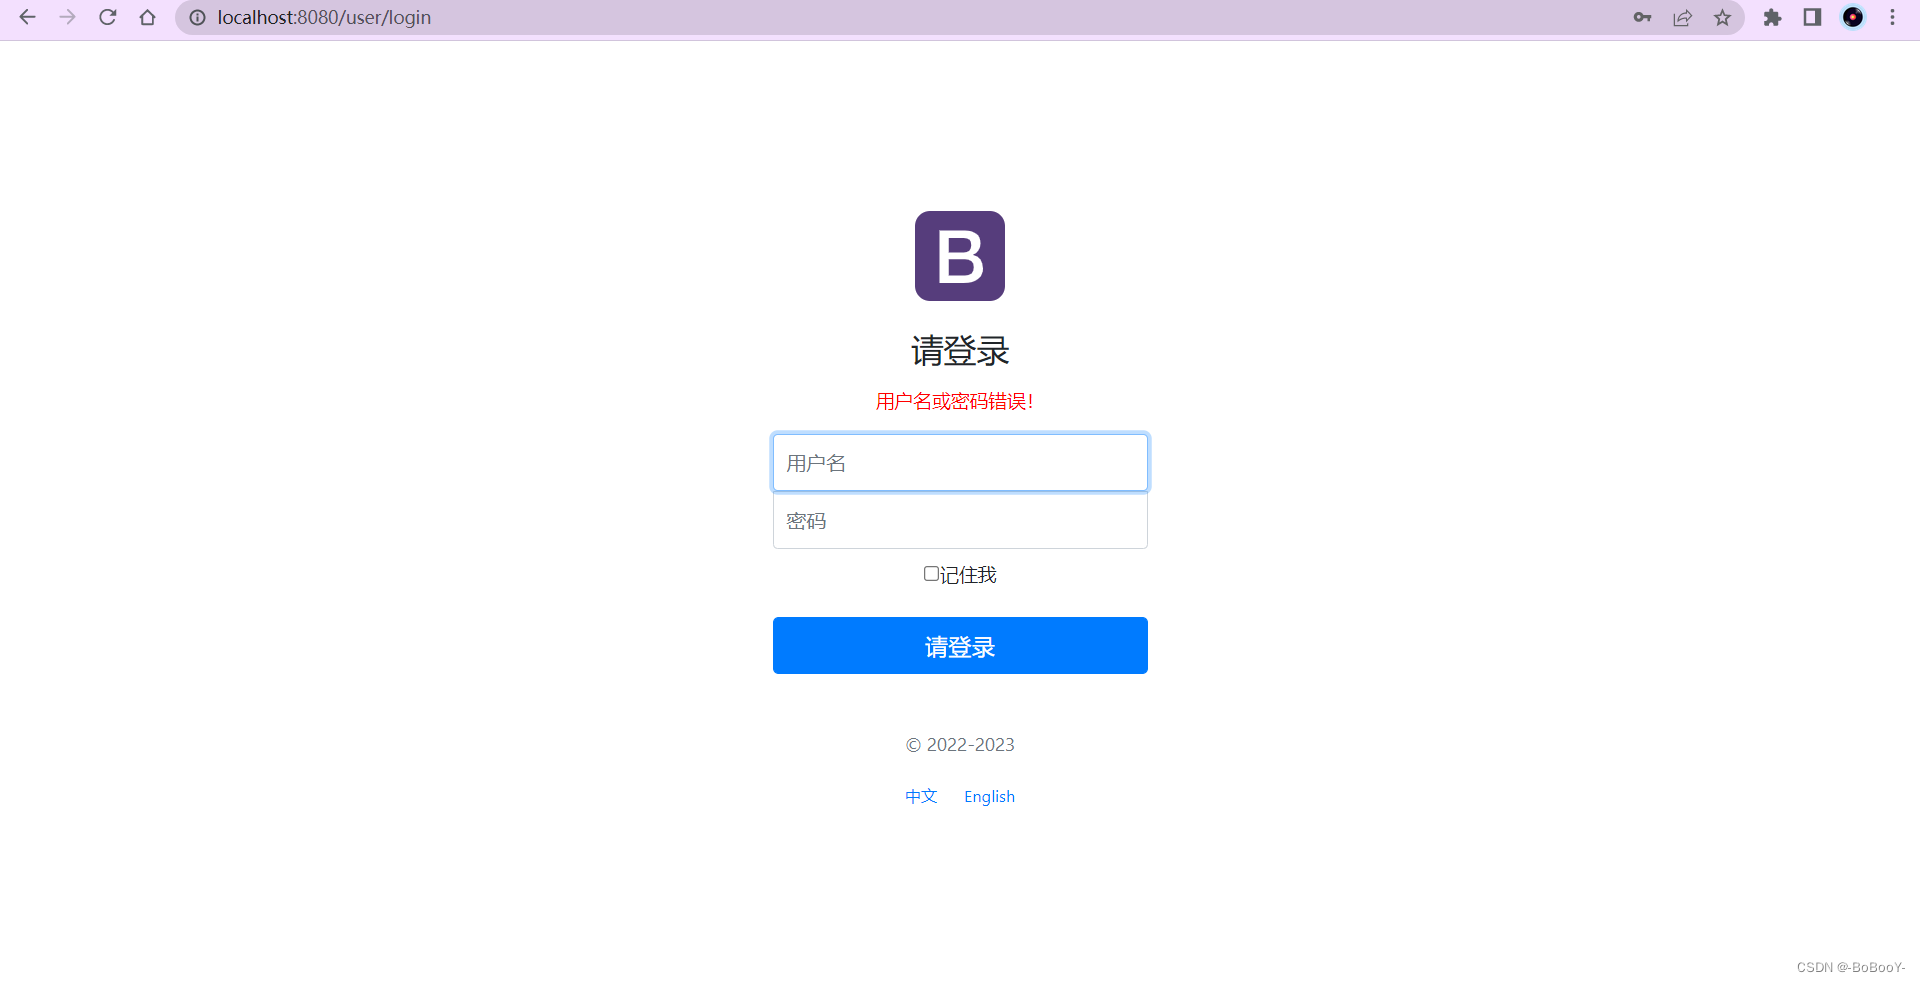
public class LoginController {@PostMapping("/user/login")public String login(@RequestParam("username") String username, @RequestParam("password") String password, Model model, HttpSession session) {//任意用户名和123密码即可登录if(!StringUtils.isEmpty(username) && password.equals("123")) {//登录注册sessionsession.setAttribute("loginUser",username);return "dashboard"; //跳转首页} else {//登录失败!存放错误信息model.addAttribute("msg","用户名或密码错误!");return "index";}}
}
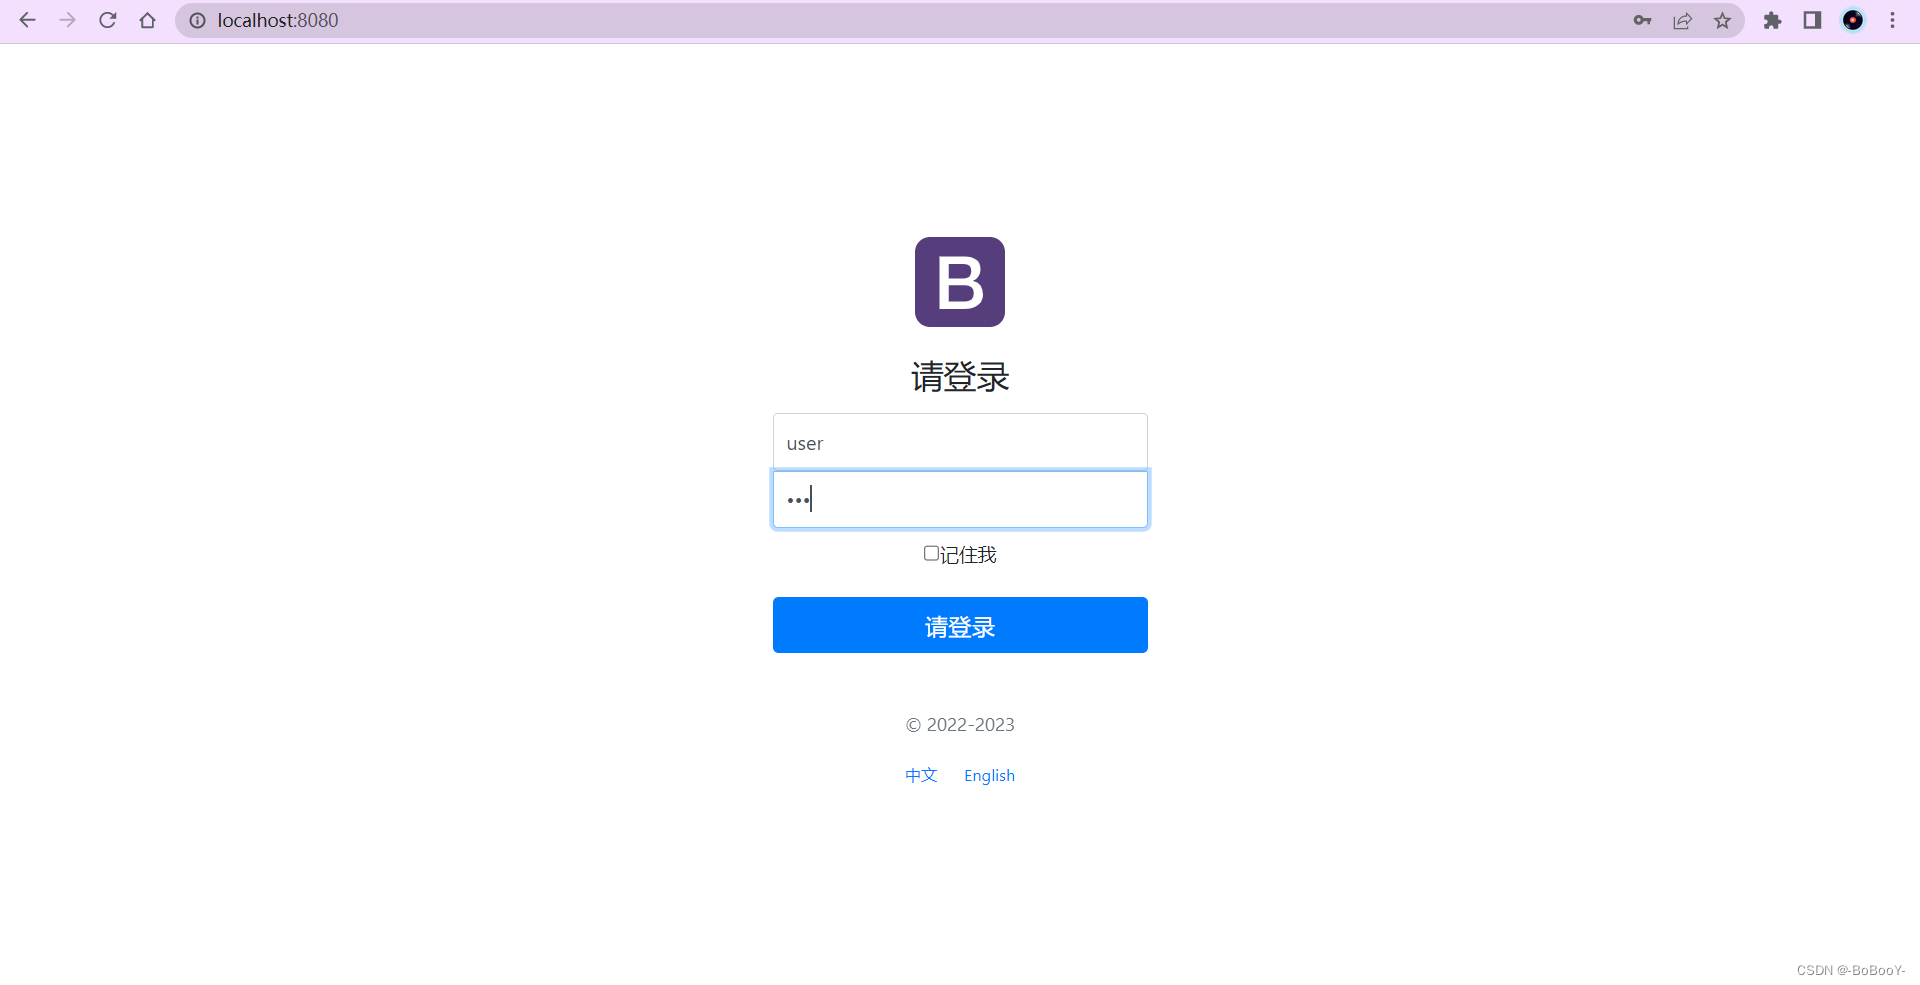
- 重启项目 运行测试登陆成功
- 测试登录失败
4.3、代码优化
为了符合开发规范,登陆成功后应重定向到主页面
- 修改LoginController
return "redirect:/main.html"; //跳转首页
- 在MyMvcConfig中添加配置
registry.addViewController("/main.html").setViewName("dashboard");
5、登录拦截
5.1、编写拦截器LoginHandlerInterceptor
package com.springboot05ems.config;import org.springframework.web.servlet.HandlerInterceptor;import javax.servlet.http.HttpServletRequest;
import javax.servlet.http.HttpServletResponse;
import javax.servlet.http.HttpSession;/*** @author BoBooY* @data 2022/9/6 15:40*/
public class LoginHandlerInterceptor implements HandlerInterceptor {@Overridepublic boolean preHandle(HttpServletRequest request, HttpServletResponse response, Object handler) throws Exception {HttpSession session = request.getSession();if(session.getAttribute("loginUser") == null) {//未登录,返回首页,并传入信息request.setAttribute("msg","没有权限,请先登录!");request.getRequestDispatcher("/index.html").forward(request,response);return false;} else {//登录了,放行return true;}}
}
5.2、在MyMvcConfig配置类中注册拦截器
//注册拦截器@Overridepublic void addInterceptors(InterceptorRegistry registry) {registry.addInterceptor(new LoginHandlerInterceptor()).addPathPatterns("/**").excludePathPatterns("/","/index.html","/user/login","/css/**","/img/**","/js/**");}
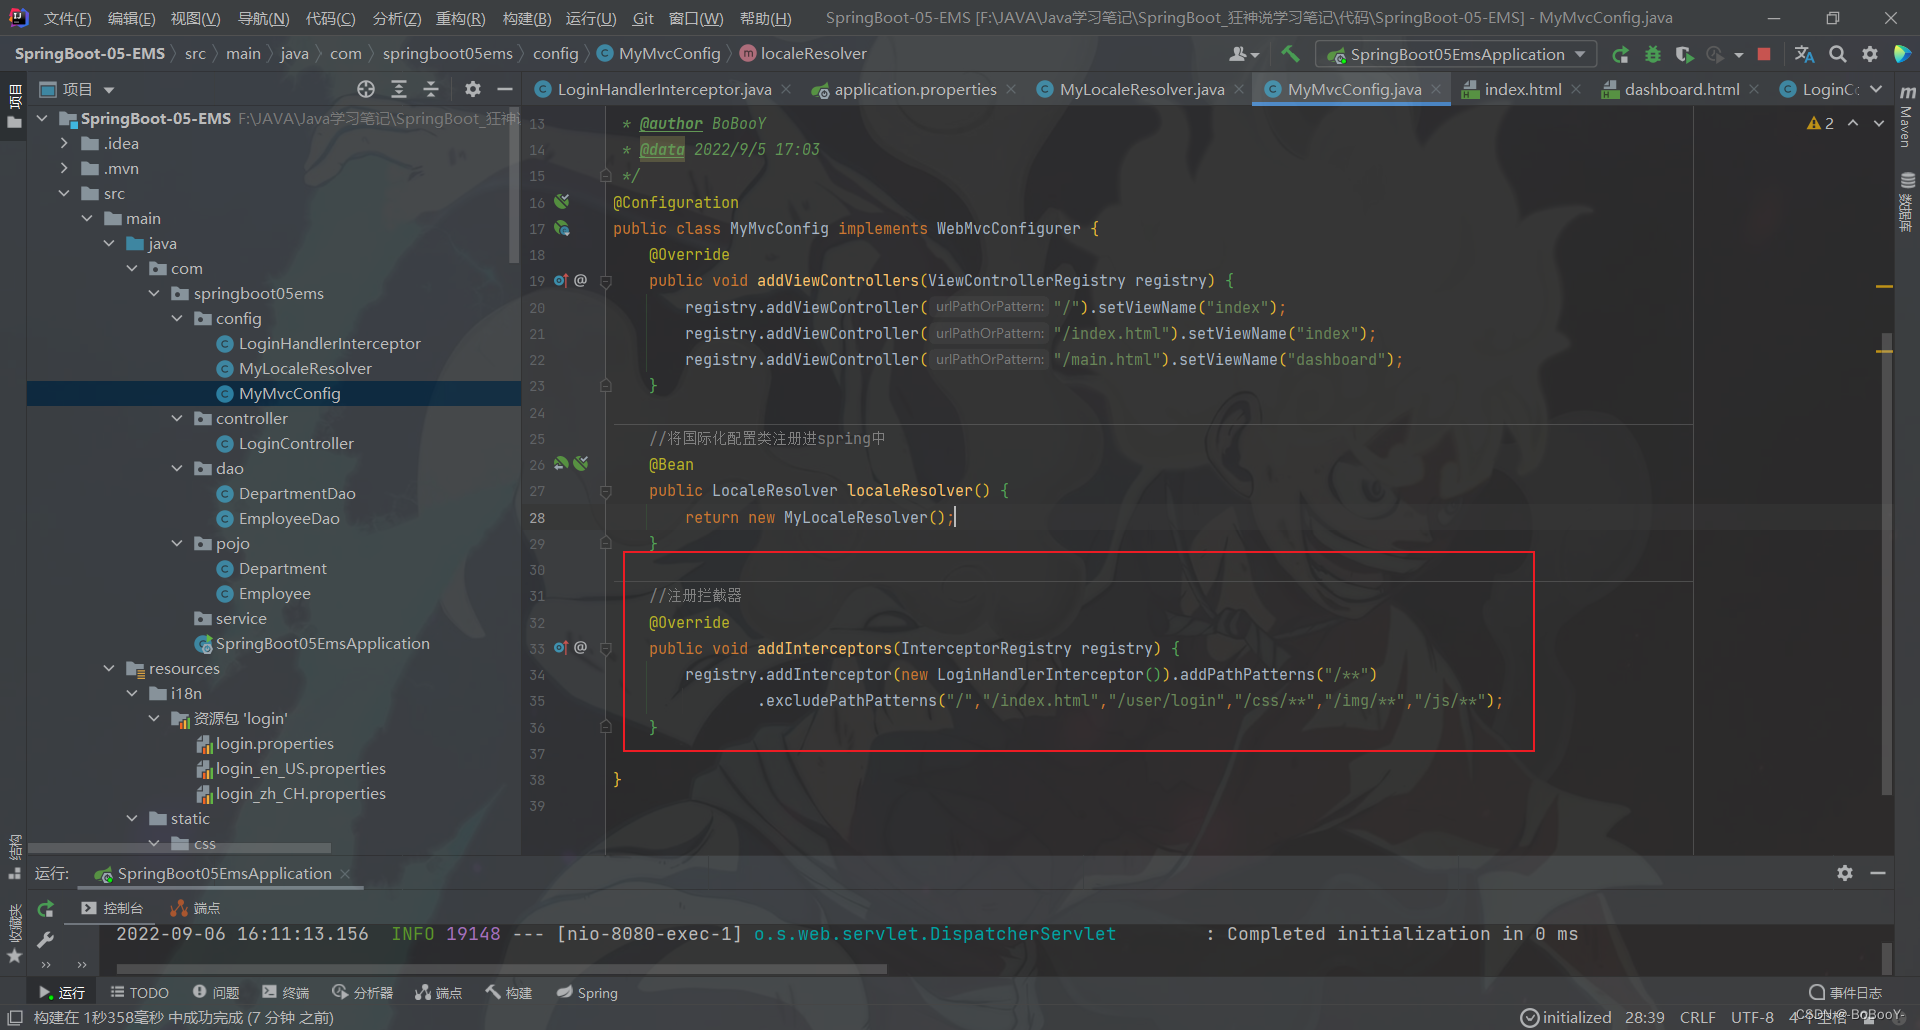
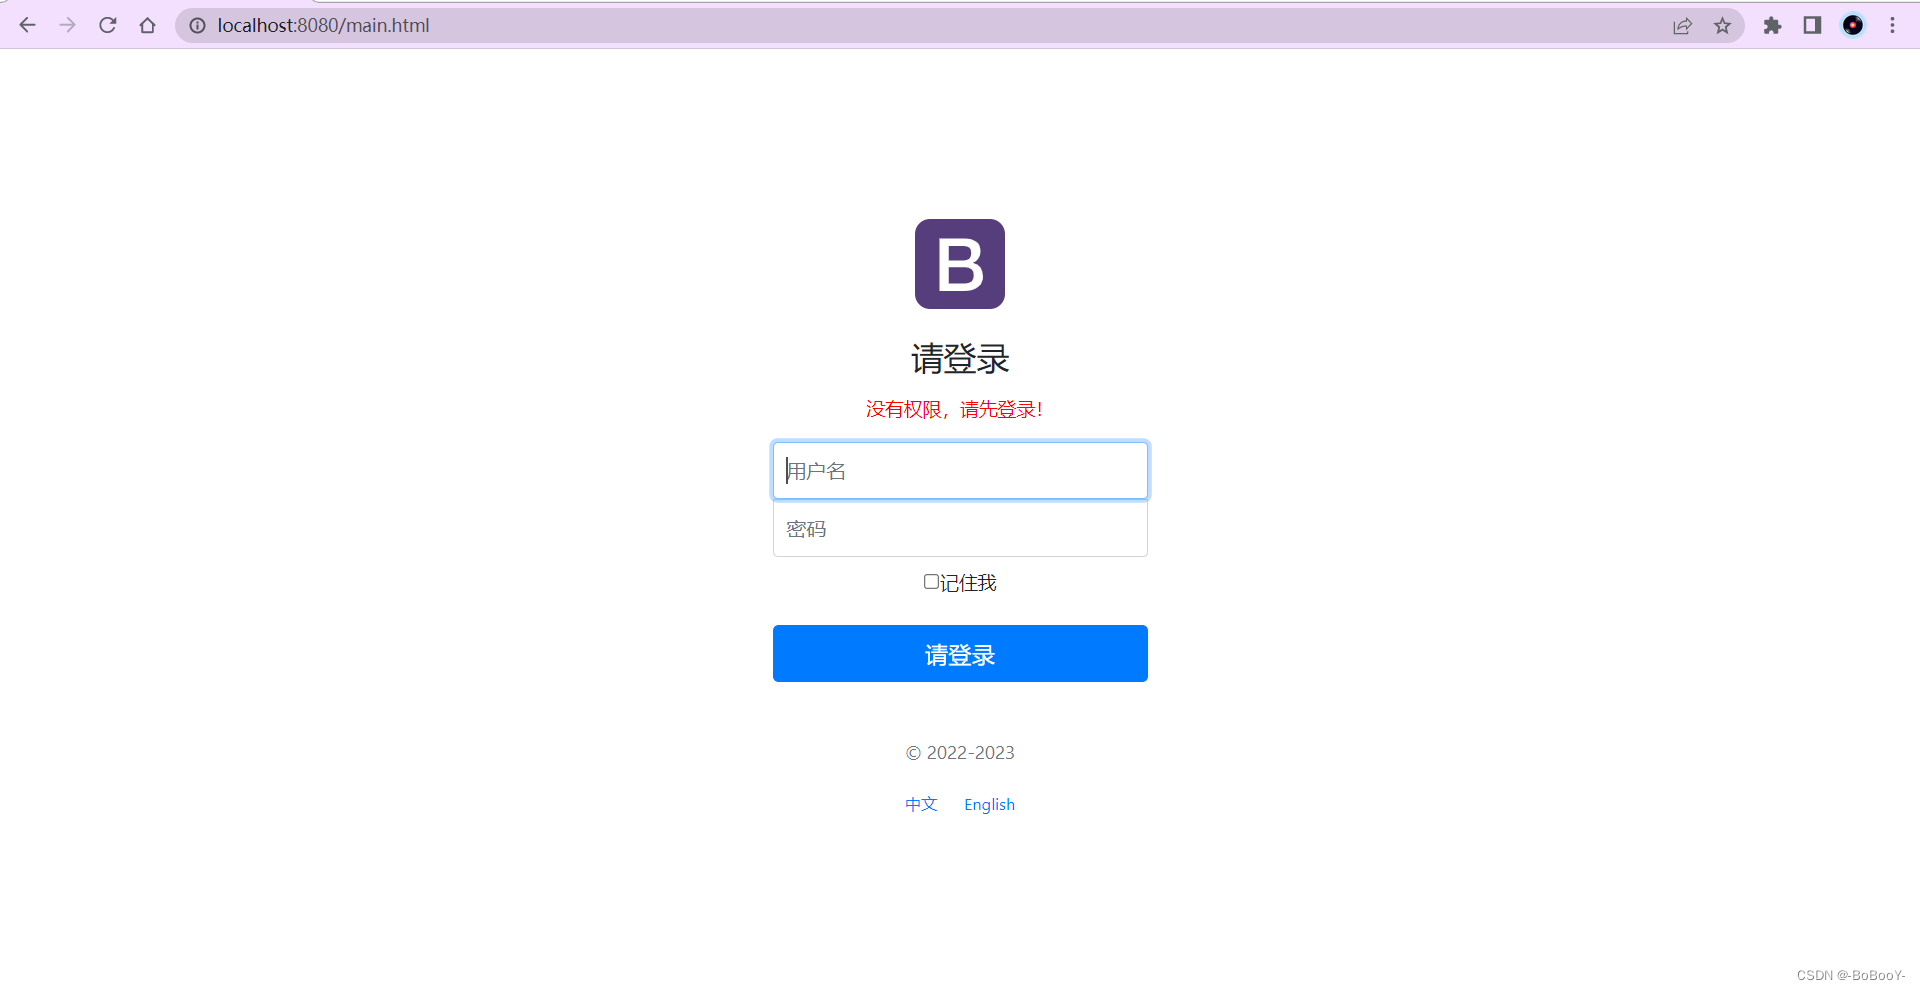
5.3、测试拦截功能
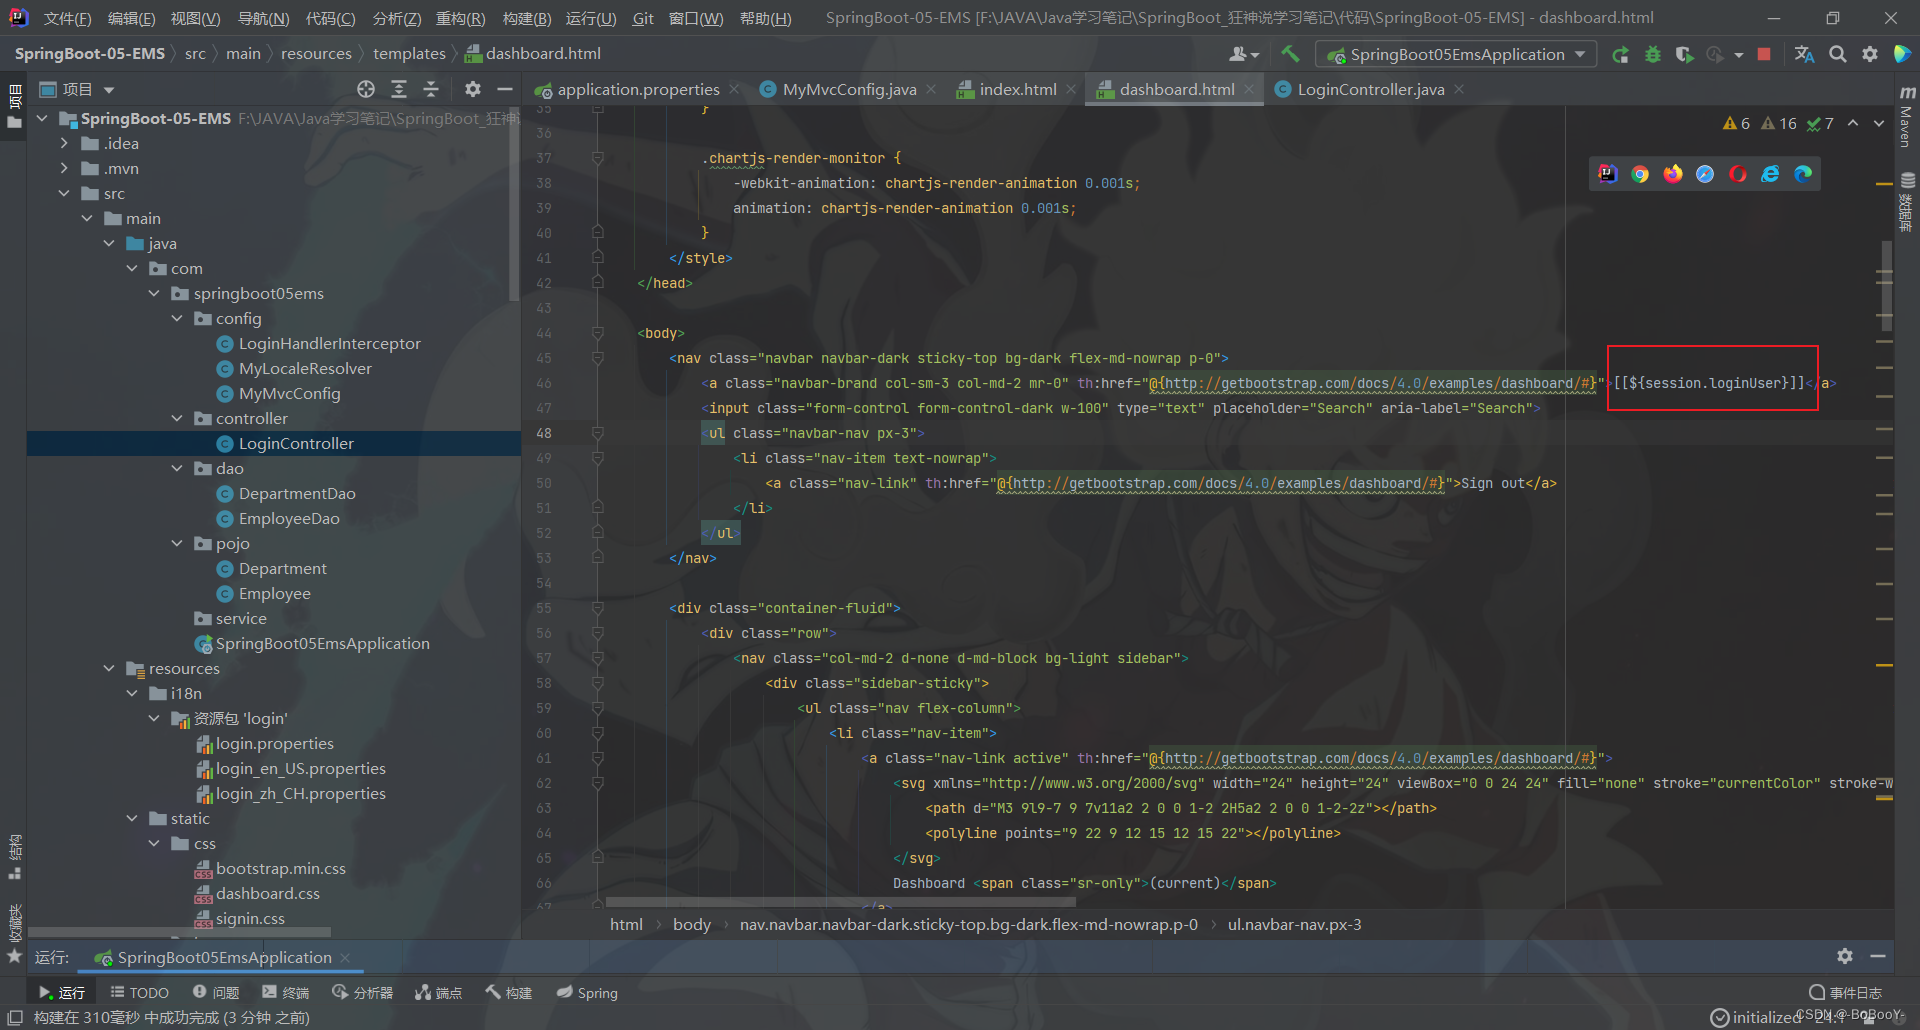
5.4、修改dashboard.html
[[${session.loginUser}]]
- 测试

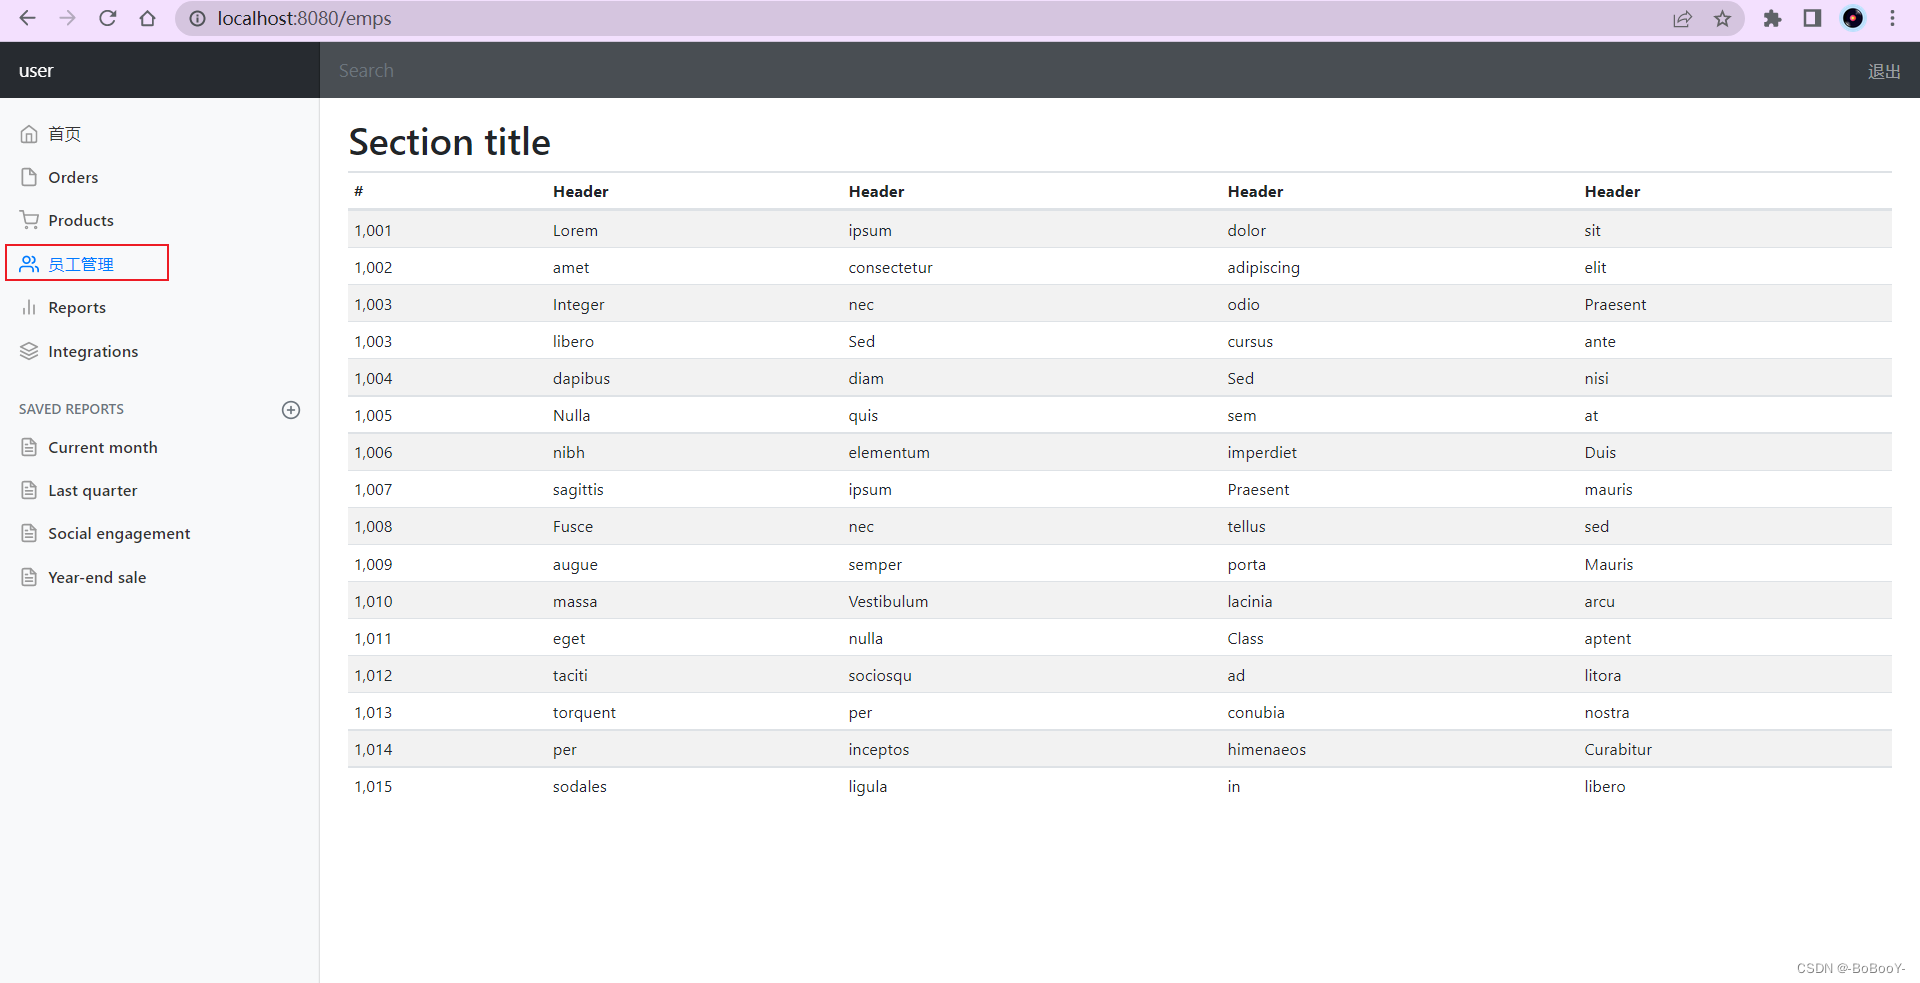
6、员工列表展示
6.1、修改 dashboard.html
- 首页侧边栏的Customers为员工管理。
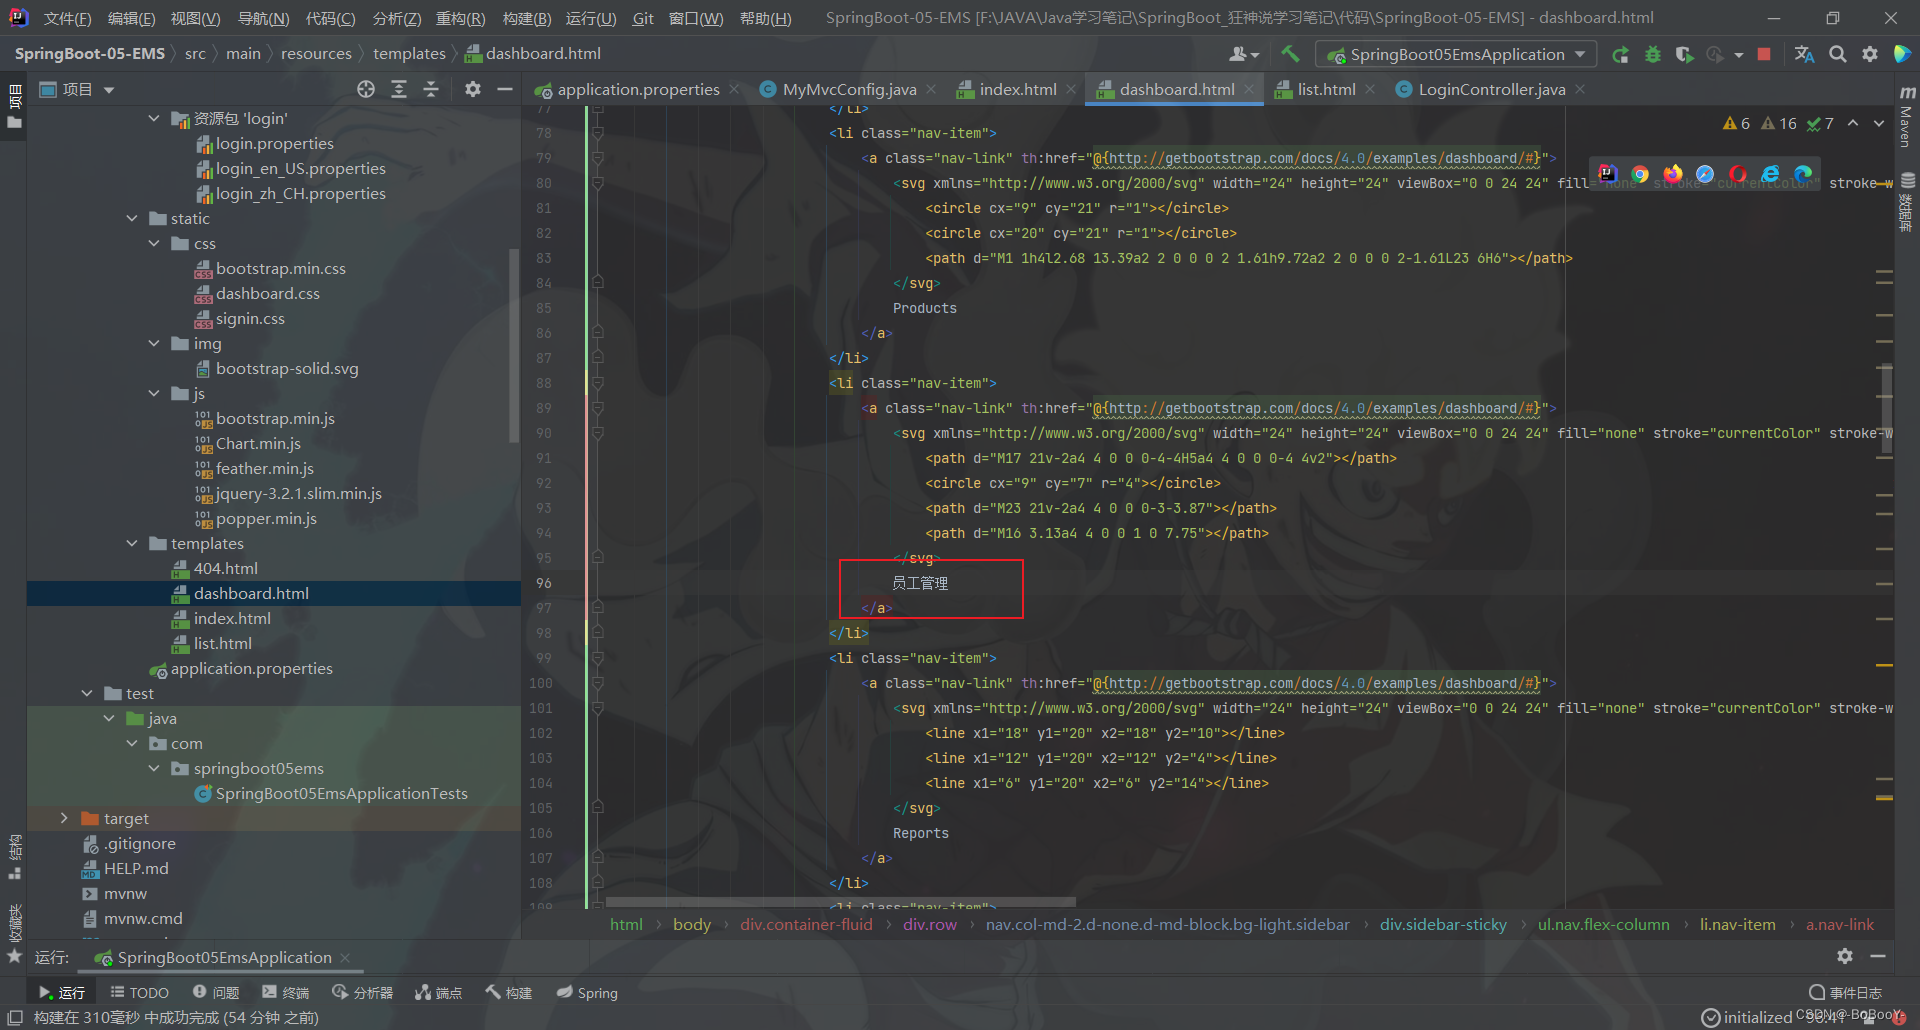
- a链接添加请求
<li class="nav-item"><a class="nav-link" th:href="@{/emps}"><svg xmlns="http://www.w3.org/2000/svg" width="24" height="24" viewBox="0 0 24 24" fill="none" stroke="currentColor" stroke-width="2" stroke-linecap="round" stroke-linejoin="round" class="feather feather-users"><path d="M17 21v-2a4 4 0 0 0-4-4H5a4 4 0 0 0-4 4v2"></path><circle cx="9" cy="7" r="4"></circle><path d="M23 21v-2a4 4 0 0 0-3-3.87"></path><path d="M16 3.13a4 4 0 0 1 0 7.75"></path></svg>员工管理</a>
</li>
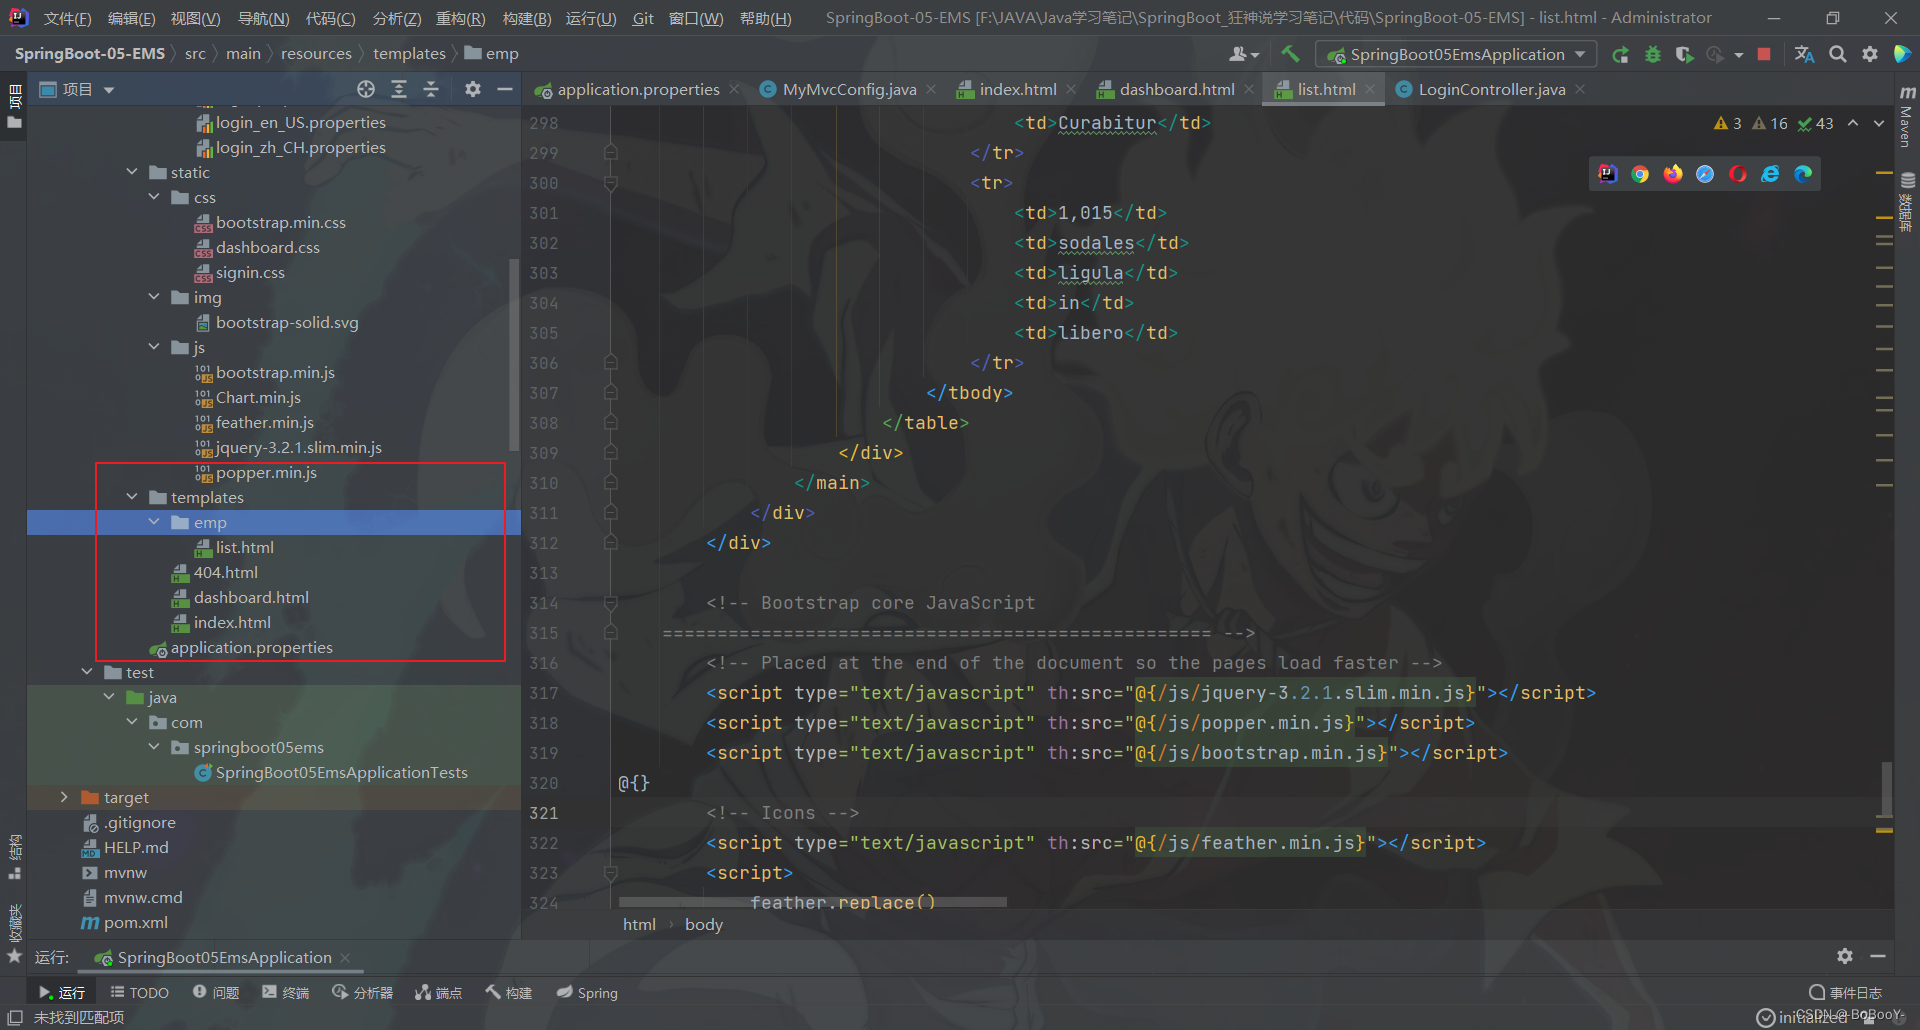
- 将list文件放到emp文件夹下
6.2、编写 EmployeeController
package com.springboot05ems.controller;import com.springboot05ems.dao.EmployeeDao;
import com.springboot05ems.pojo.Employee;
import org.springframework.beans.factory.annotation.Autowired;
import org.springframework.stereotype.Controller;
import org.springframework.ui.Model;
import org.springframework.web.bind.annotation.RequestMapping;import java.util.Collection;/*** @author BoBooY* @data 2022/9/6 18:38*/
@Controller
public class EmployeeController {@Autowiredprivate EmployeeDao employeeDao;//跳转到list页面@RequestMapping("/emps")public String list(Model model) {Collection<Employee> employees = employeeDao.getAll();model.addAttribute("emps",employees);return "emp/list";}
}
- 测试跳转效果
6.3、抽取系统顶部和侧边栏
Thymeleaf 公共页面元素抽取
步骤:
-
抽取公共片段 th:fragment 定义模板名;
-
引入公共片段 th:insert 插入模板名 / 引入th:replace 代替模板 (insert和replace的区别就是前者是在当前标签再插入一个div 后者是替换当前标签,本项目使用replace)
操作:
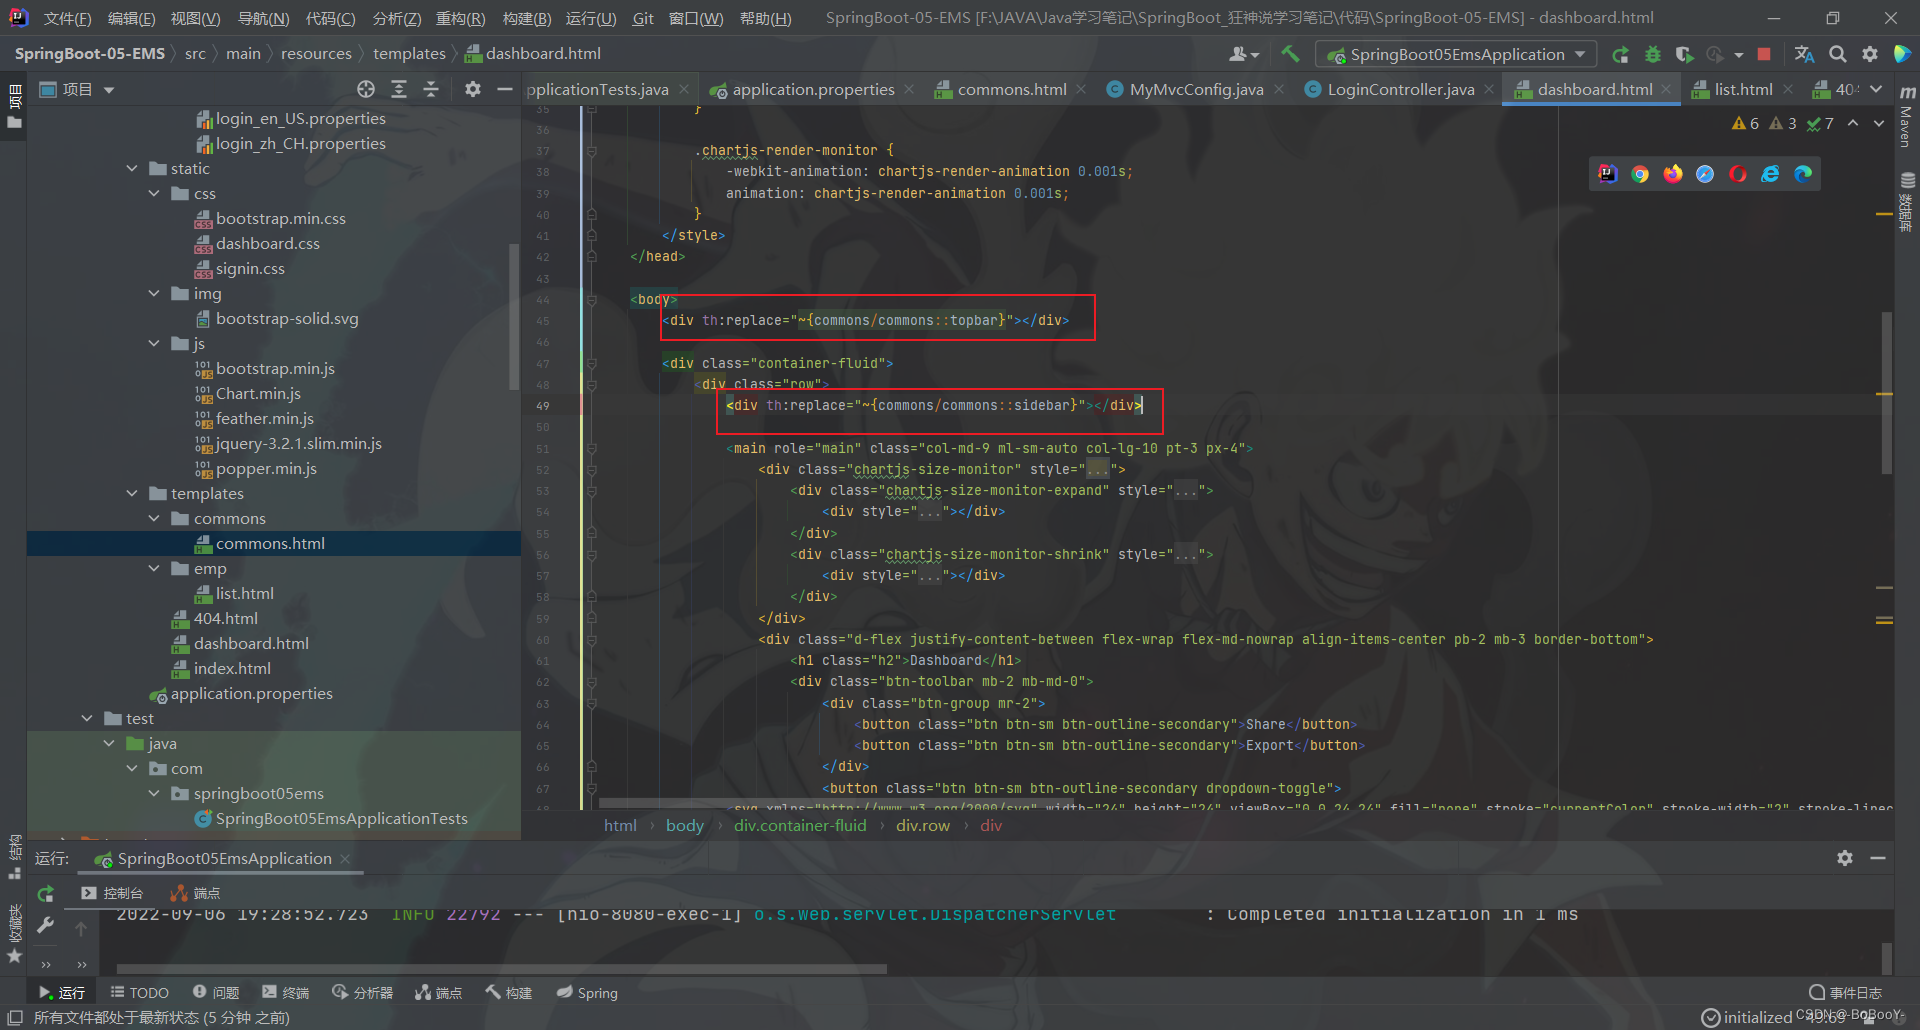
- 在dashboard中将头部和侧边导航栏分别抽取成一个公共模板
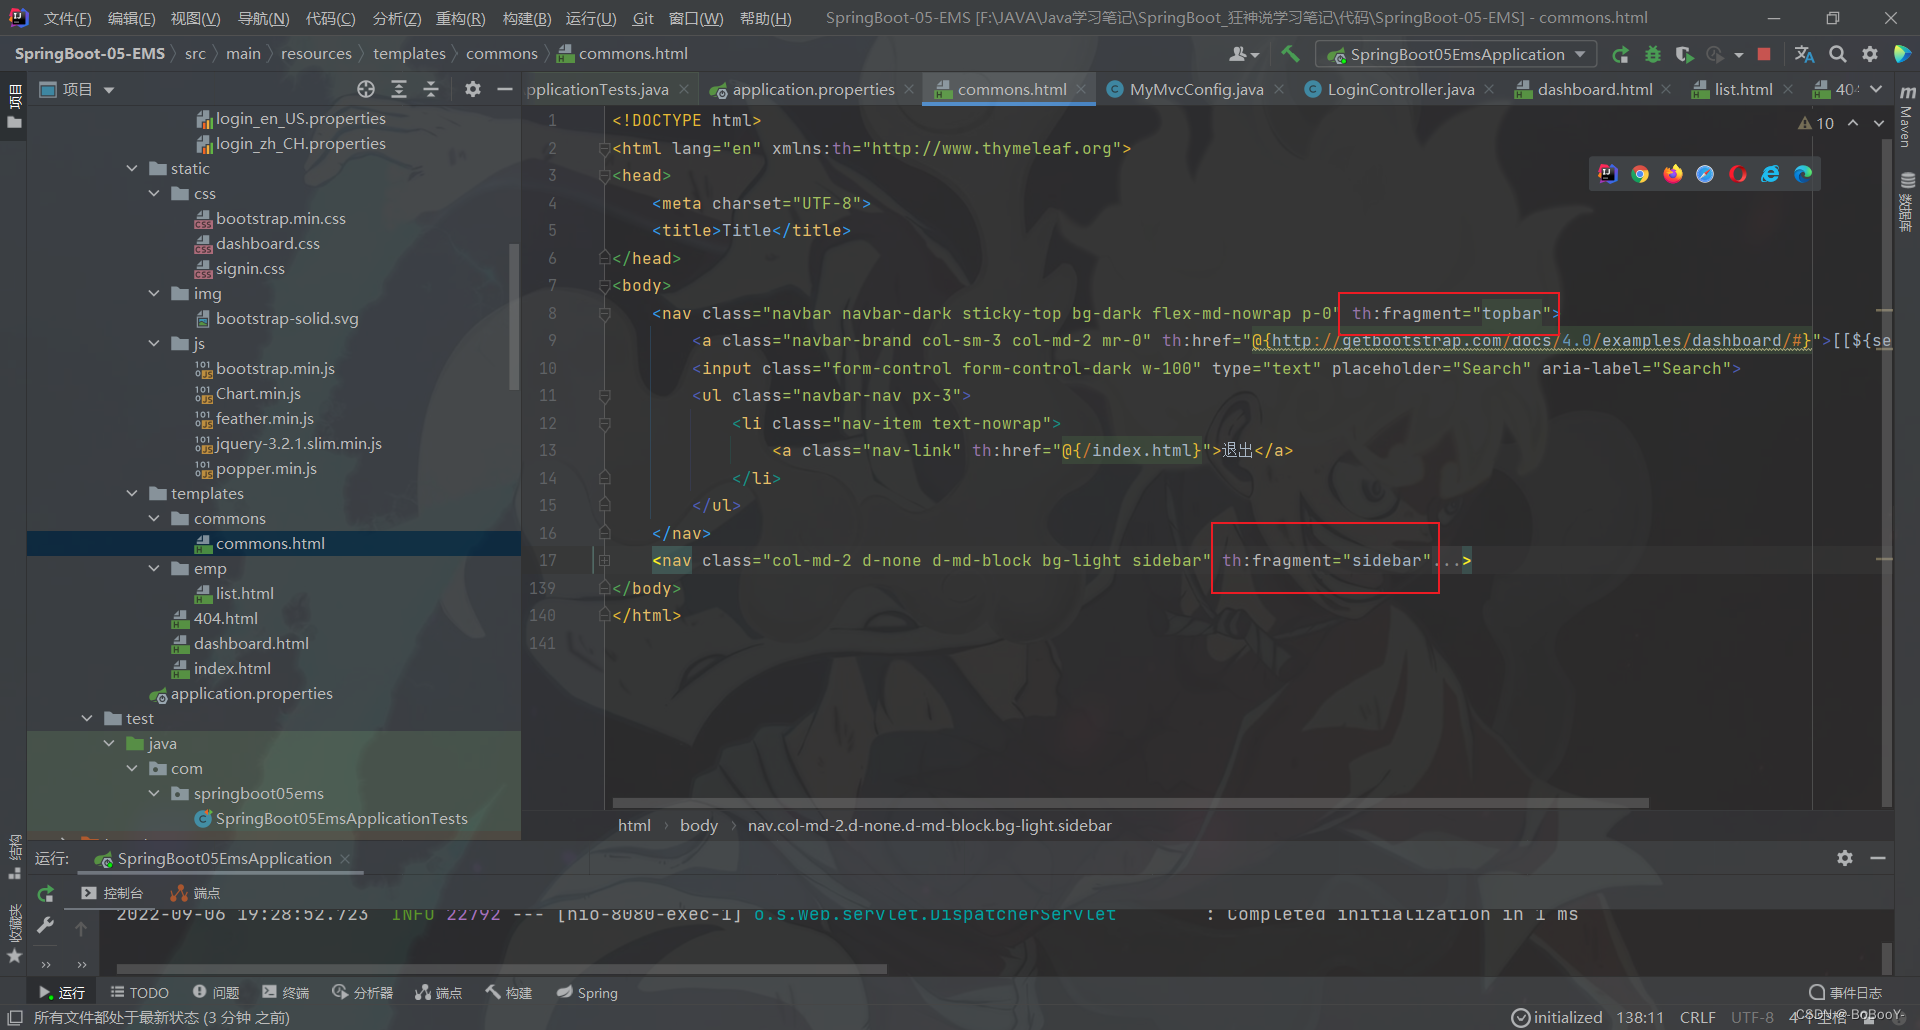
commons.html(topbar 和 sidebar) - 在
templates目录下新建一个commons包,其中新建commons.html用来放置公共页面代码。
<!DOCTYPE html>
<html lang="en" xmlns:th="http://www.thymeleaf.org">
<head><meta charset="UTF-8"><title>Title</title>
</head>
<body><nav class="navbar navbar-dark sticky-top bg-dark flex-md-nowrap p-0" th:fragment="topbar"><a class="navbar-brand col-sm-3 col-md-2 mr-0" th:href="@{http://getbootstrap.com/docs/4.0/examples/dashboard/#}">[[${session.loginUser}]]</a><input class="form-control form-control-dark w-100" type="text" placeholder="Search" aria-label="Search"><ul class="navbar-nav px-3"><li class="nav-item text-nowrap"><a class="nav-link" th:href="@{/index.html}">退出</a></li></ul></nav><nav class="col-md-2 d-none d-md-block bg-light sidebar" th:fragment="sidebar"><div class="sidebar-sticky"><ul class="nav flex-column"><li class="nav-item"><a class="nav-link active" th:href="@{/main.html}"><svg xmlns="http://www.w3.org/2000/svg" width="24" height="24" viewBox="0 0 24 24" fill="none" stroke="currentColor" stroke-width="2" stroke-linecap="round" stroke-linejoin="round" class="feather feather-home"><path d="M3 9l9-7 9 7v11a2 2 0 0 1-2 2H5a2 2 0 0 1-2-2z"></path><polyline points="9 22 9 12 15 12 15 22"></polyline></svg>首页 <span class="sr-only">(current)</span></a></li><li class="nav-item"><a class="nav-link" th:href="@{http://getbootstrap.com/docs/4.0/examples/dashboard/#}"><svg xmlns="http://www.w3.org/2000/svg" width="24" height="24" viewBox="0 0 24 24" fill="none" stroke="currentColor" stroke-width="2" stroke-linecap="round" stroke-linejoin="round" class="feather feather-file"><path d="M13 2H6a2 2 0 0 0-2 2v16a2 2 0 0 0 2 2h12a2 2 0 0 0 2-2V9z"></path><polyline points="13 2 13 9 20 9"></polyline></svg>Orders</a></li><li class="nav-item"><a class="nav-link" th:href="@{http://getbootstrap.com/docs/4.0/examples/dashboard/#}"><svg xmlns="http://www.w3.org/2000/svg" width="24" height="24" viewBox="0 0 24 24" fill="none" stroke="currentColor" stroke-width="2" stroke-linecap="round" stroke-linejoin="round" class="feather feather-shopping-cart"><circle cx="9" cy="21" r="1"></circle><circle cx="20" cy="21" r="1"></circle><path d="M1 1h4l2.68 13.39a2 2 0 0 0 2 1.61h9.72a2 2 0 0 0 2-1.61L23 6H6"></path></svg>Products</a></li><li class="nav-item"><a class="nav-link" th:href="@{/emps}"><svg xmlns="http://www.w3.org/2000/svg" width="24" height="24" viewBox="0 0 24 24" fill="none" stroke="currentColor" stroke-width="2" stroke-linecap="round" stroke-linejoin="round" class="feather feather-users"><path d="M17 21v-2a4 4 0 0 0-4-4H5a4 4 0 0 0-4 4v2"></path><circle cx="9" cy="7" r="4"></circle><path d="M23 21v-2a4 4 0 0 0-3-3.87"></path><path d="M16 3.13a4 4 0 0 1 0 7.75"></path></svg>员工管理</a></li><li class="nav-item"><a class="nav-link" th:href="@{http://getbootstrap.com/docs/4.0/examples/dashboard/#}"><svg xmlns="http://www.w3.org/2000/svg" width="24" height="24" viewBox="0 0 24 24" fill="none" stroke="currentColor" stroke-width="2" stroke-linecap="round" stroke-linejoin="round" class="feather feather-bar-chart-2"><line x1="18" y1="20" x2="18" y2="10"></line><line x1="12" y1="20" x2="12" y2="4"></line><line x1="6" y1="20" x2="6" y2="14"></line></svg>Reports</a></li><li class="nav-item"><a class="nav-link" th:href="@{http://getbootstrap.com/docs/4.0/examples/dashboard/#}"><svg xmlns="http://www.w3.org/2000/svg" width="24" height="24" viewBox="0 0 24 24" fill="none" stroke="currentColor" stroke-width="2" stroke-linecap="round" stroke-linejoin="round" class="feather feather-layers"><polygon points="12 2 2 7 12 12 22 7 12 2"></polygon><polyline points="2 17 12 22 22 17"></polyline><polyline points="2 12 12 17 22 12"></polyline></svg>Integrations</a></li></ul><h6 class="sidebar-heading d-flex justify-content-between align-items-center px-3 mt-4 mb-1 text-muted"><span>Saved reports</span><a class="d-flex align-items-center text-muted" th:href="@{http://getbootstrap.com/docs/4.0/examples/dashboard/#}"><svg xmlns="http://www.w3.org/2000/svg" width="24" height="24" viewBox="0 0 24 24" fill="none" stroke="currentColor" stroke-width="2" stroke-linecap="round" stroke-linejoin="round" class="feather feather-plus-circle"><circle cx="12" cy="12" r="10"></circle><line x1="12" y1="8" x2="12" y2="16"></line><line x1="8" y1="12" x2="16" y2="12"></line></svg></a></h6><ul class="nav flex-column mb-2"><li class="nav-item"><a class="nav-link" th:href="@{http://getbootstrap.com/docs/4.0/examples/dashboard/#}"><svg xmlns="http://www.w3.org/2000/svg" width="24" height="24" viewBox="0 0 24 24" fill="none" stroke="currentColor" stroke-width="2" stroke-linecap="round" stroke-linejoin="round" class="feather feather-file-text"><path d="M14 2H6a2 2 0 0 0-2 2v16a2 2 0 0 0 2 2h12a2 2 0 0 0 2-2V8z"></path><polyline points="14 2 14 8 20 8"></polyline><line x1="16" y1="13" x2="8" y2="13"></line><line x1="16" y1="17" x2="8" y2="17"></line><polyline points="10 9 9 9 8 9"></polyline></svg>Current month</a></li><li class="nav-item"><a class="nav-link" th:href="@{http://getbootstrap.com/docs/4.0/examples/dashboard/#}"><svg xmlns="http://www.w3.org/2000/svg" width="24" height="24" viewBox="0 0 24 24" fill="none" stroke="currentColor" stroke-width="2" stroke-linecap="round" stroke-linejoin="round" class="feather feather-file-text"><path d="M14 2H6a2 2 0 0 0-2 2v16a2 2 0 0 0 2 2h12a2 2 0 0 0 2-2V8z"></path><polyline points="14 2 14 8 20 8"></polyline><line x1="16" y1="13" x2="8" y2="13"></line><line x1="16" y1="17" x2="8" y2="17"></line><polyline points="10 9 9 9 8 9"></polyline></svg>Last quarter</a></li><li class="nav-item"><a class="nav-link" th:href="@{http://getbootstrap.com/docs/4.0/examples/dashboard/#}"><svg xmlns="http://www.w3.org/2000/svg" width="24" height="24" viewBox="0 0 24 24" fill="none" stroke="currentColor" stroke-width="2" stroke-linecap="round" stroke-linejoin="round" class="feather feather-file-text"><path d="M14 2H6a2 2 0 0 0-2 2v16a2 2 0 0 0 2 2h12a2 2 0 0 0 2-2V8z"></path><polyline points="14 2 14 8 20 8"></polyline><line x1="16" y1="13" x2="8" y2="13"></line><line x1="16" y1="17" x2="8" y2="17"></line><polyline points="10 9 9 9 8 9"></polyline></svg>Social engagement</a></li><li class="nav-item"><a class="nav-link" th:href="@{http://getbootstrap.com/docs/4.0/examples/dashboard/#}"><svg xmlns="http://www.w3.org/2000/svg" width="24" height="24" viewBox="0 0 24 24" fill="none" stroke="currentColor" stroke-width="2" stroke-linecap="round" stroke-linejoin="round" class="feather feather-file-text"><path d="M14 2H6a2 2 0 0 0-2 2v16a2 2 0 0 0 2 2h12a2 2 0 0 0 2-2V8z"></path><polyline points="14 2 14 8 20 8"></polyline><line x1="16" y1="13" x2="8" y2="13"></line><line x1="16" y1="17" x2="8" y2="17"></line><polyline points="10 9 9 9 8 9"></polyline></svg>Year-end sale</a></li></ul></div></nav>
</body>
</html>
- 删除
list.html和dashboard.html中头部和侧边栏部分,使用抽取出来的模板代替
<div th:replace="~{commons/commons::topbar}"></div>
<div th:replace="~{commons/commons::sidebar}"></div>
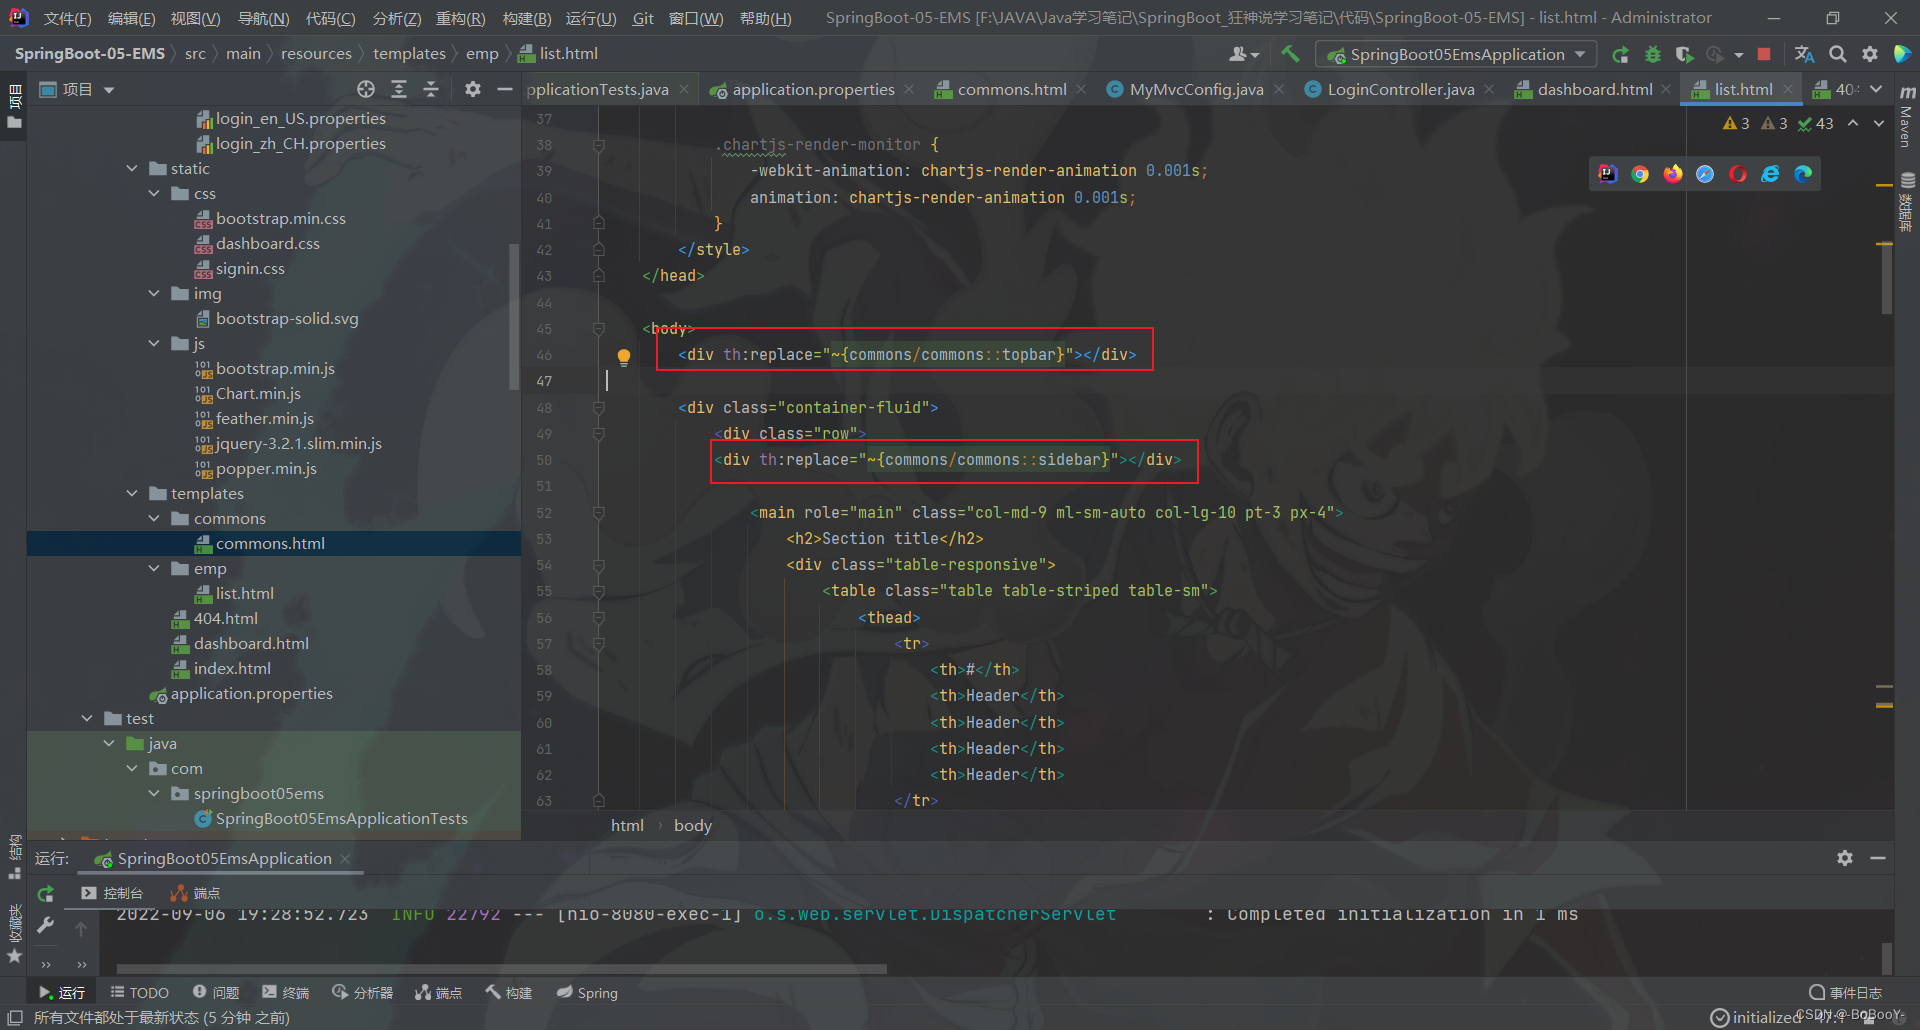
- 测试效果,very nice ~ ~ ~
6.4、点击高亮显示
在页面中,使高亮的代码是class="nav-link active"属性。
- 可以通过传递参数判断点击了哪个标签实现相应的高亮,首先在
dashboard.html的侧边栏标签传递参数active为dashboard.html。
<!--侧边栏-->
<div th:replace="~{commons/commons::siderbar(active='dashboard.html')}"></div>
- 同样的道理设置员工列表页面
list.html要传入的参数active为list.html
<!--侧边栏-->
<div th:replace="~{commons/commons::siderbar(active='list.html')}"></div>
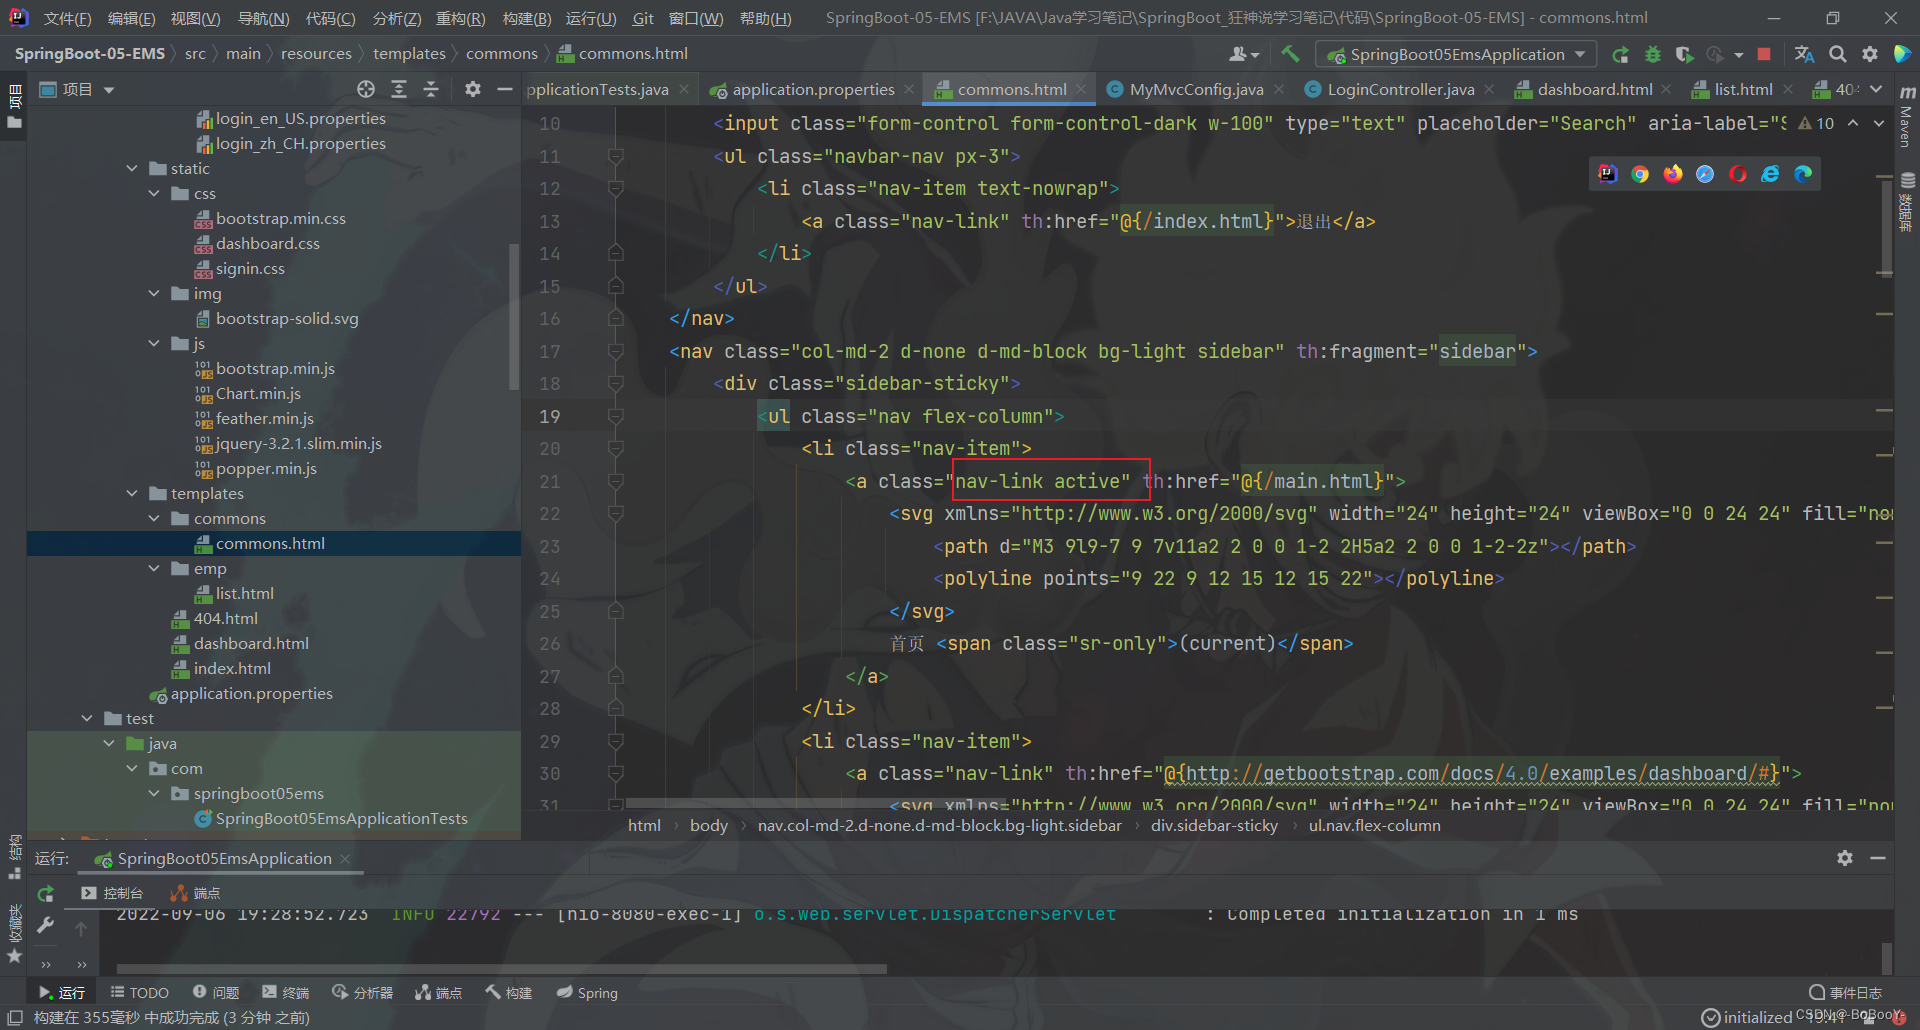
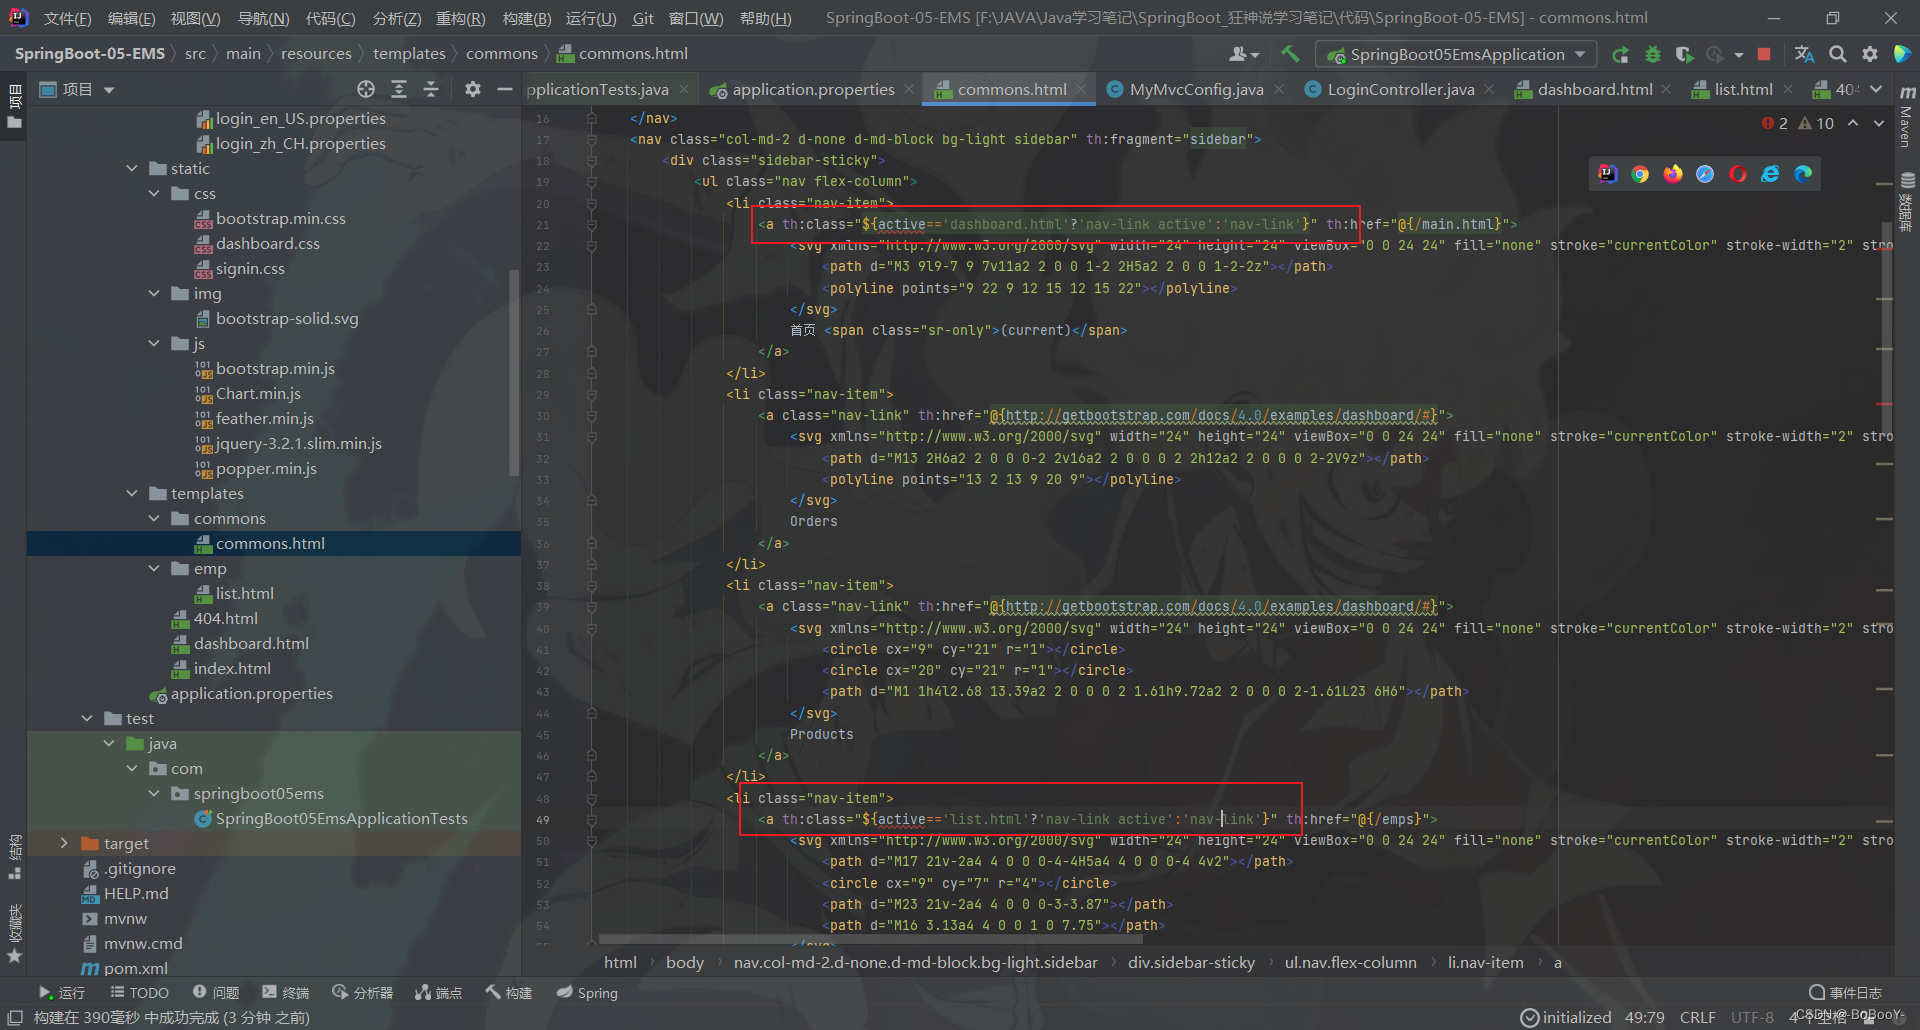
- 在公共页面
commons.html相应标签部分利用thymeleaf接收参数active,利用三元运算符判断决定是否高亮。
<a th:class="${active=='dashboard.html'?'nav-link active':'nav-link'}" th:href="@{/main.html}">
<a th:class="${active=='list.html'?'nav-link active':'nav-link'}" th:href="@{/emps}">
- 启动项目,测试效果
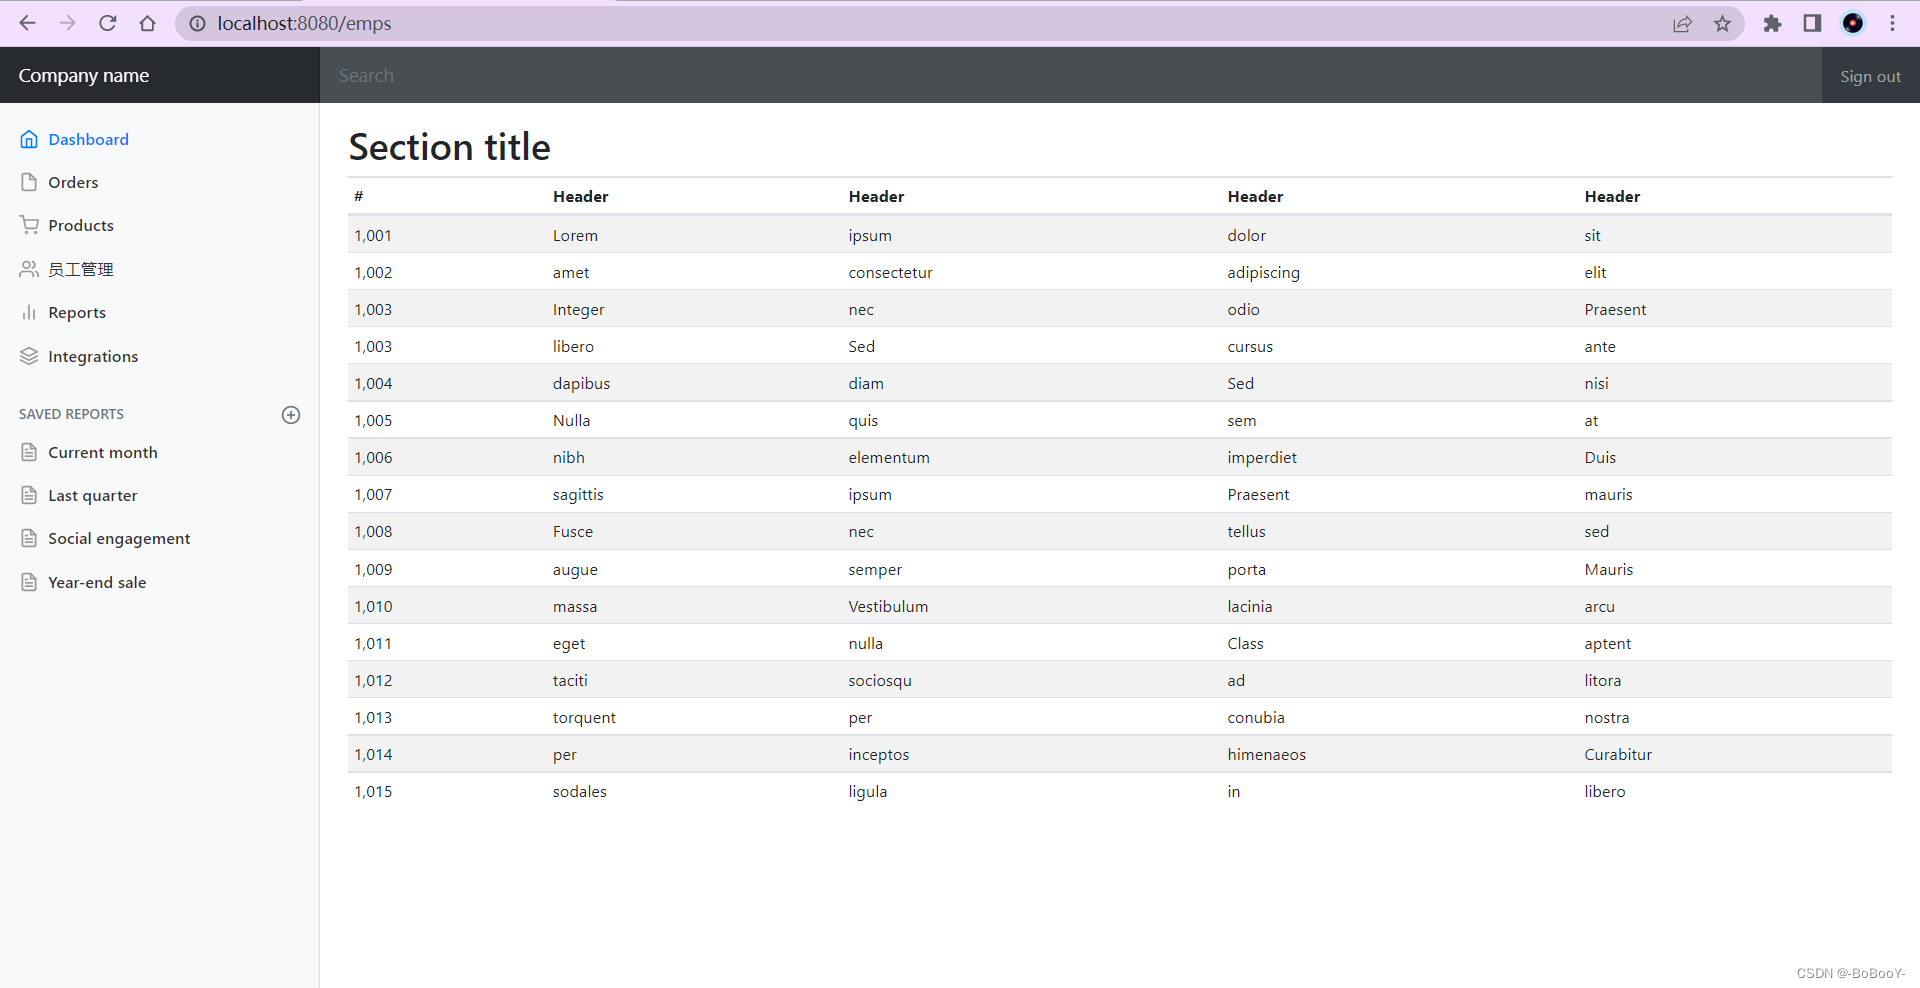
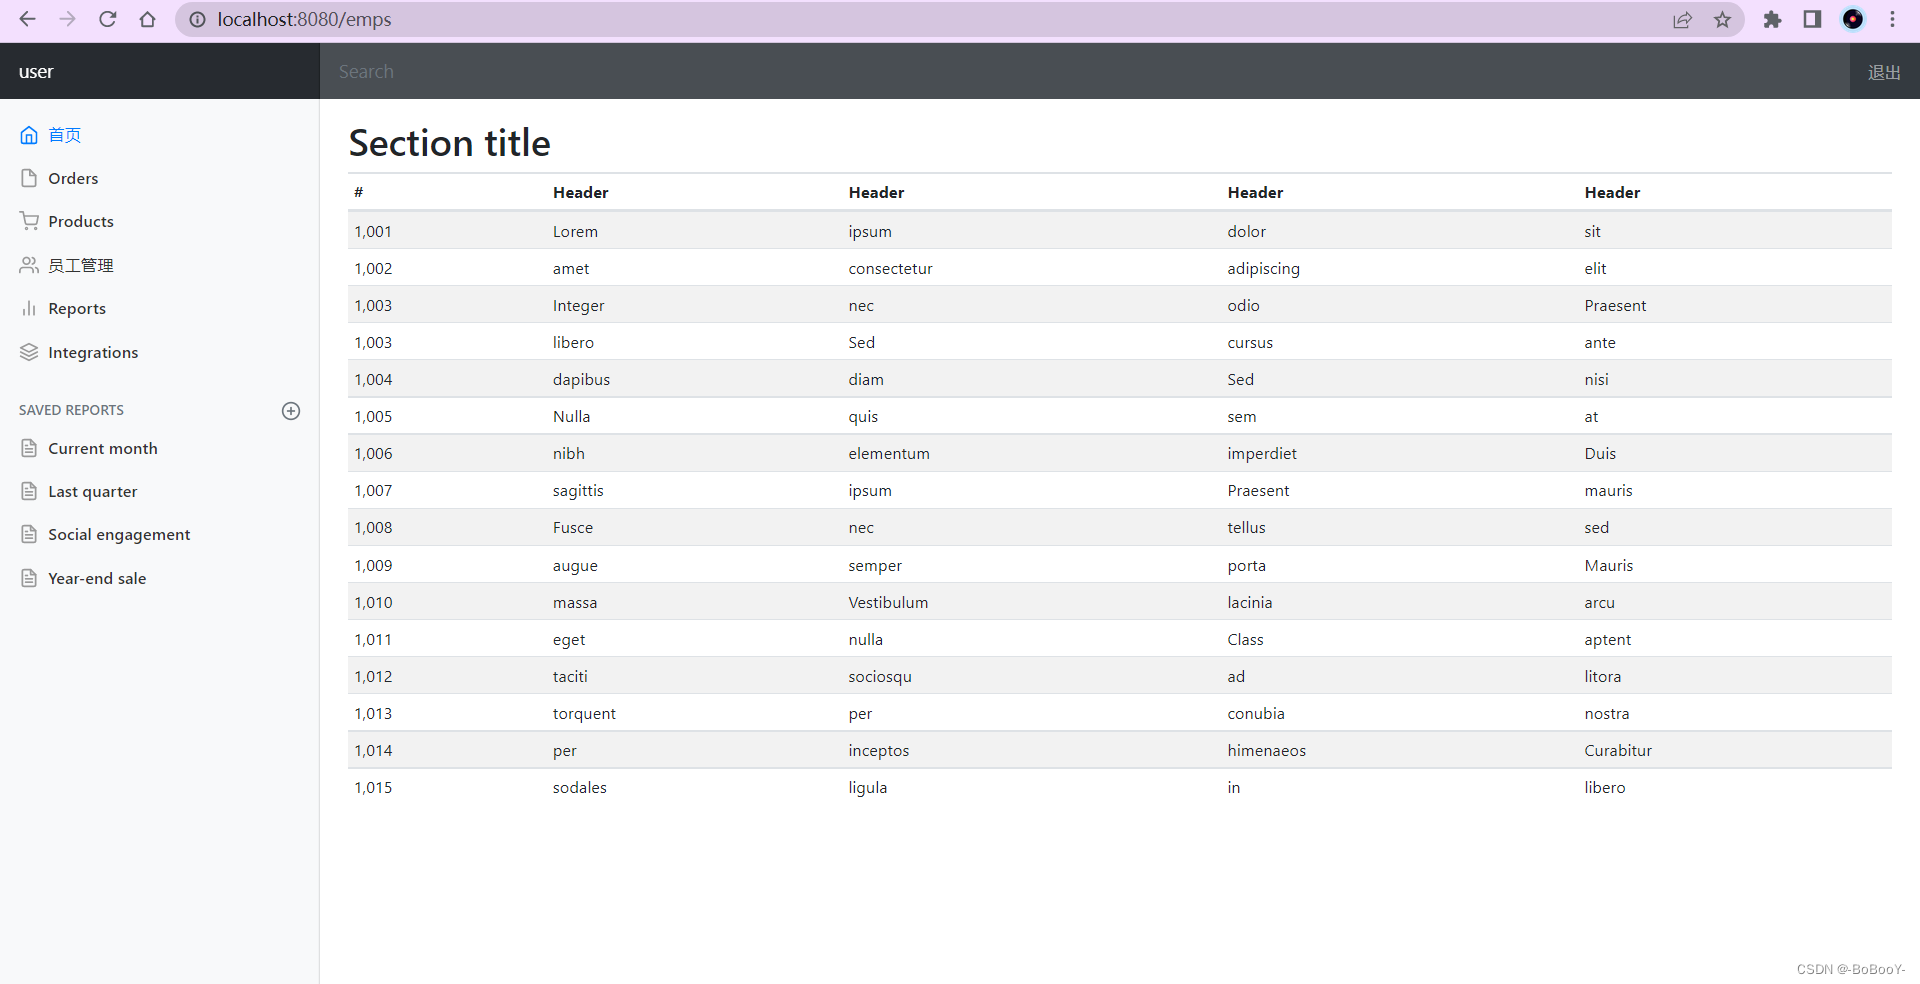
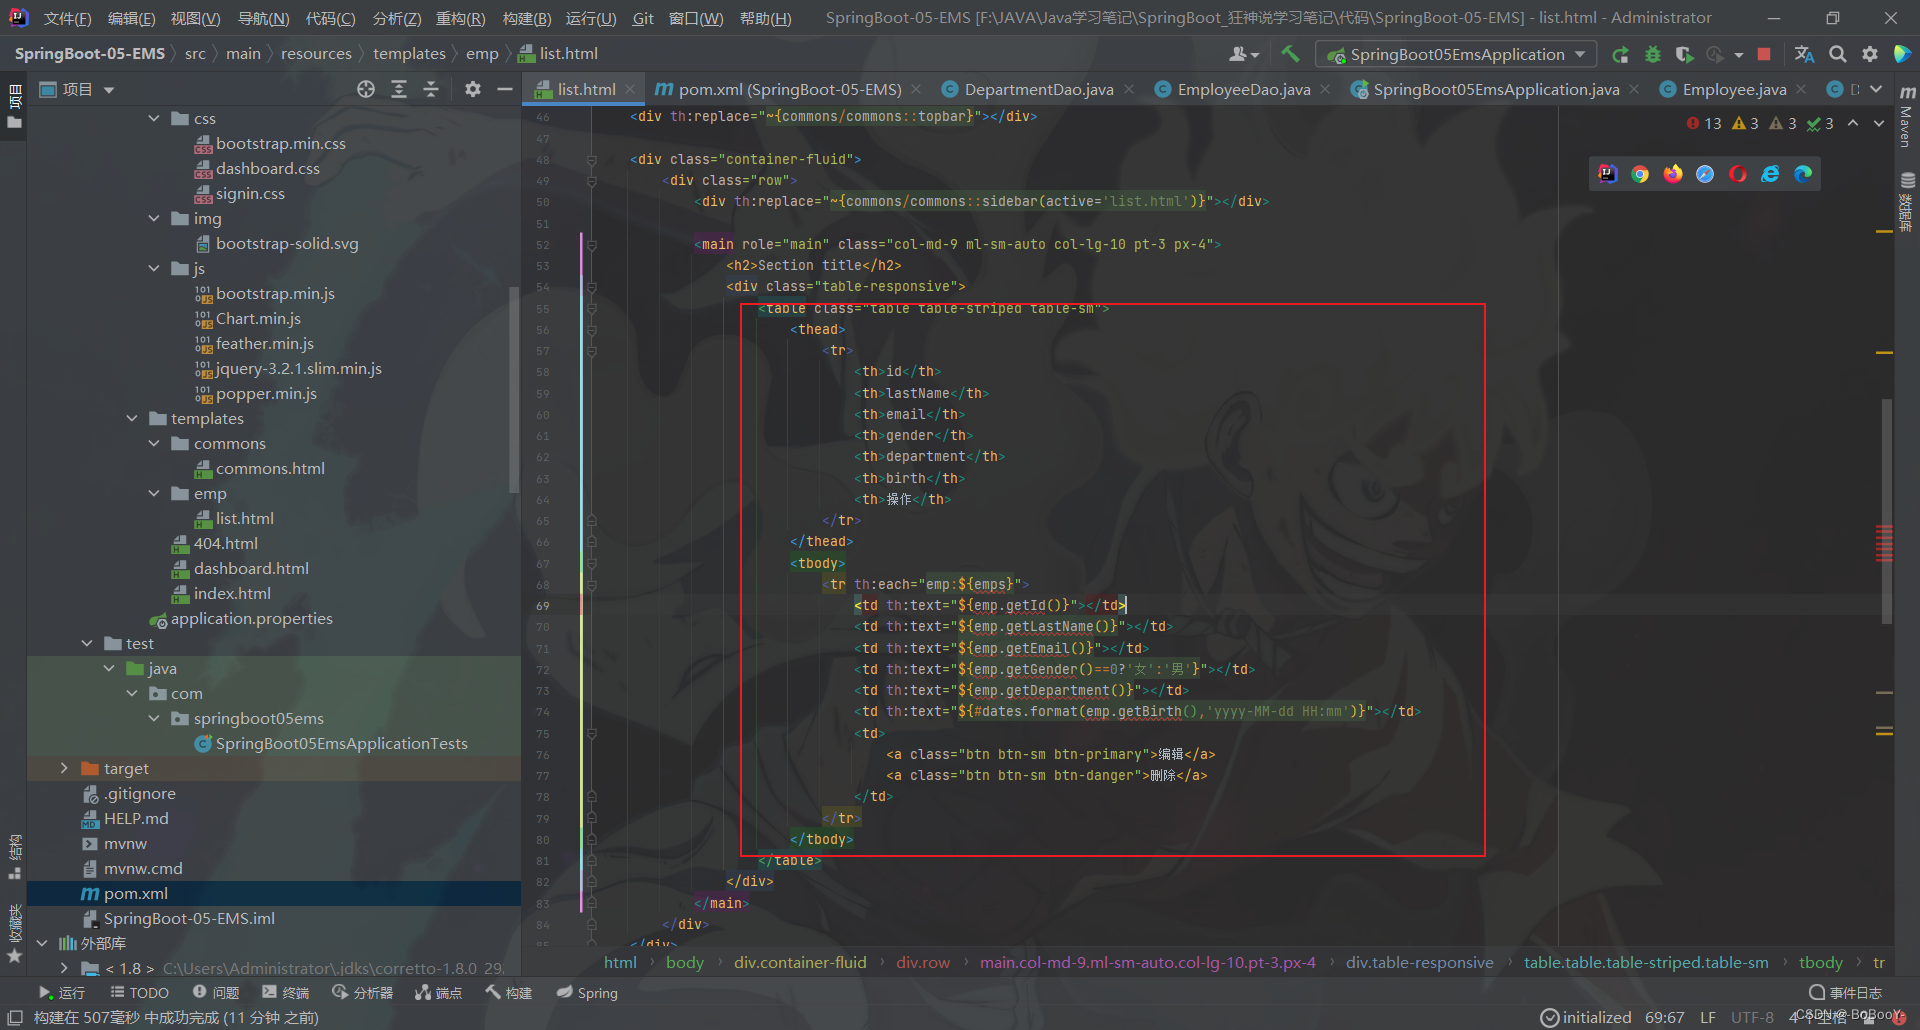
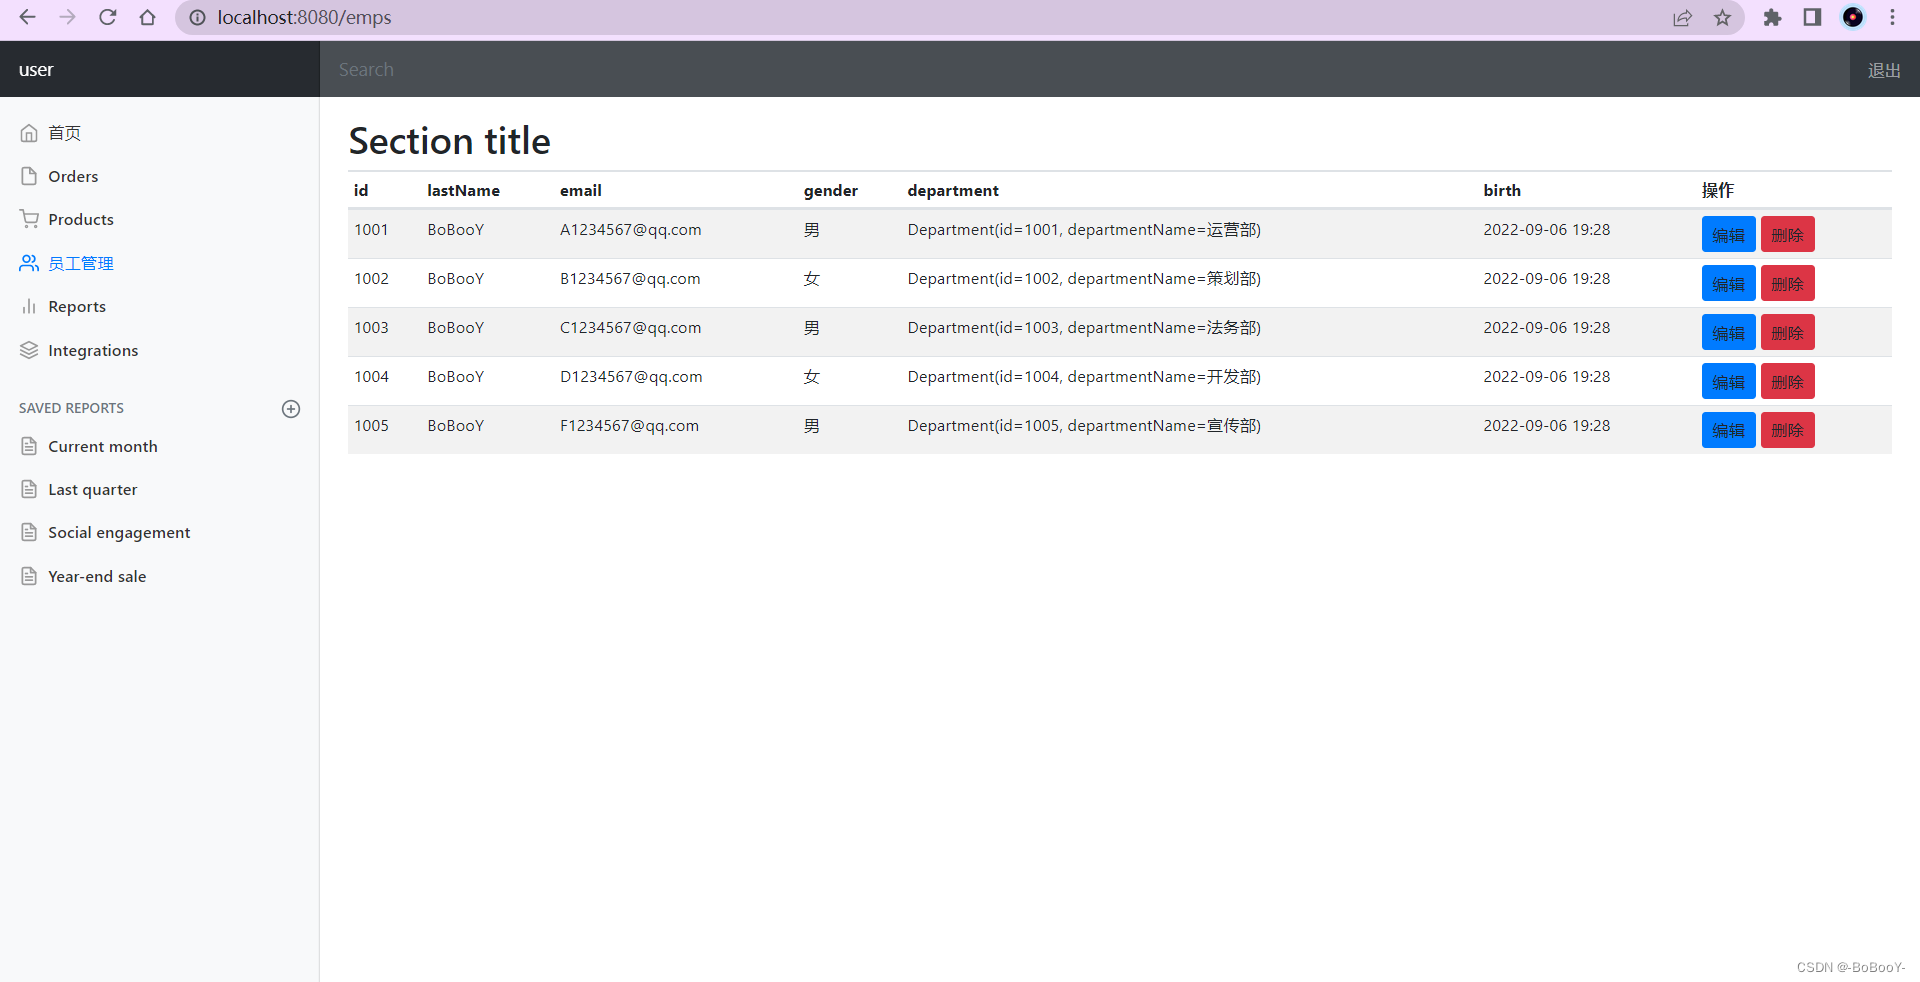
6.5、展示员工列表数据
- 修改
list.html里面的数据,并修改时间日期格式,性别显示,并且添加两个操作按钮
<table class="table table-striped table-sm"><thead><tr><th>id</th><th>lastName</th><th>email</th><th>gender</th><th>department</th><th>birth</th><th>操作</th></tr></thead><tbody><tr th:each="emp:${emps}"><td th:text="${emp.getId()}"></td><td th:text="${emp.getLastName()}"></td><td th:text="${emp.getEmail()}"></td><td th:text="${emp.getGender()==0?'女':'男'}"></td><td th:text="${emp.getDepartment()}"></td><td th:text="${#dates.format(emp.getBirth(),'yyyy-MM-dd HH:mm')}"></td><td><a class="btn btn-sm btn-primary">编辑</a><a class="btn btn-sm btn-danger">删除</a></td></tr></tbody>
</table>
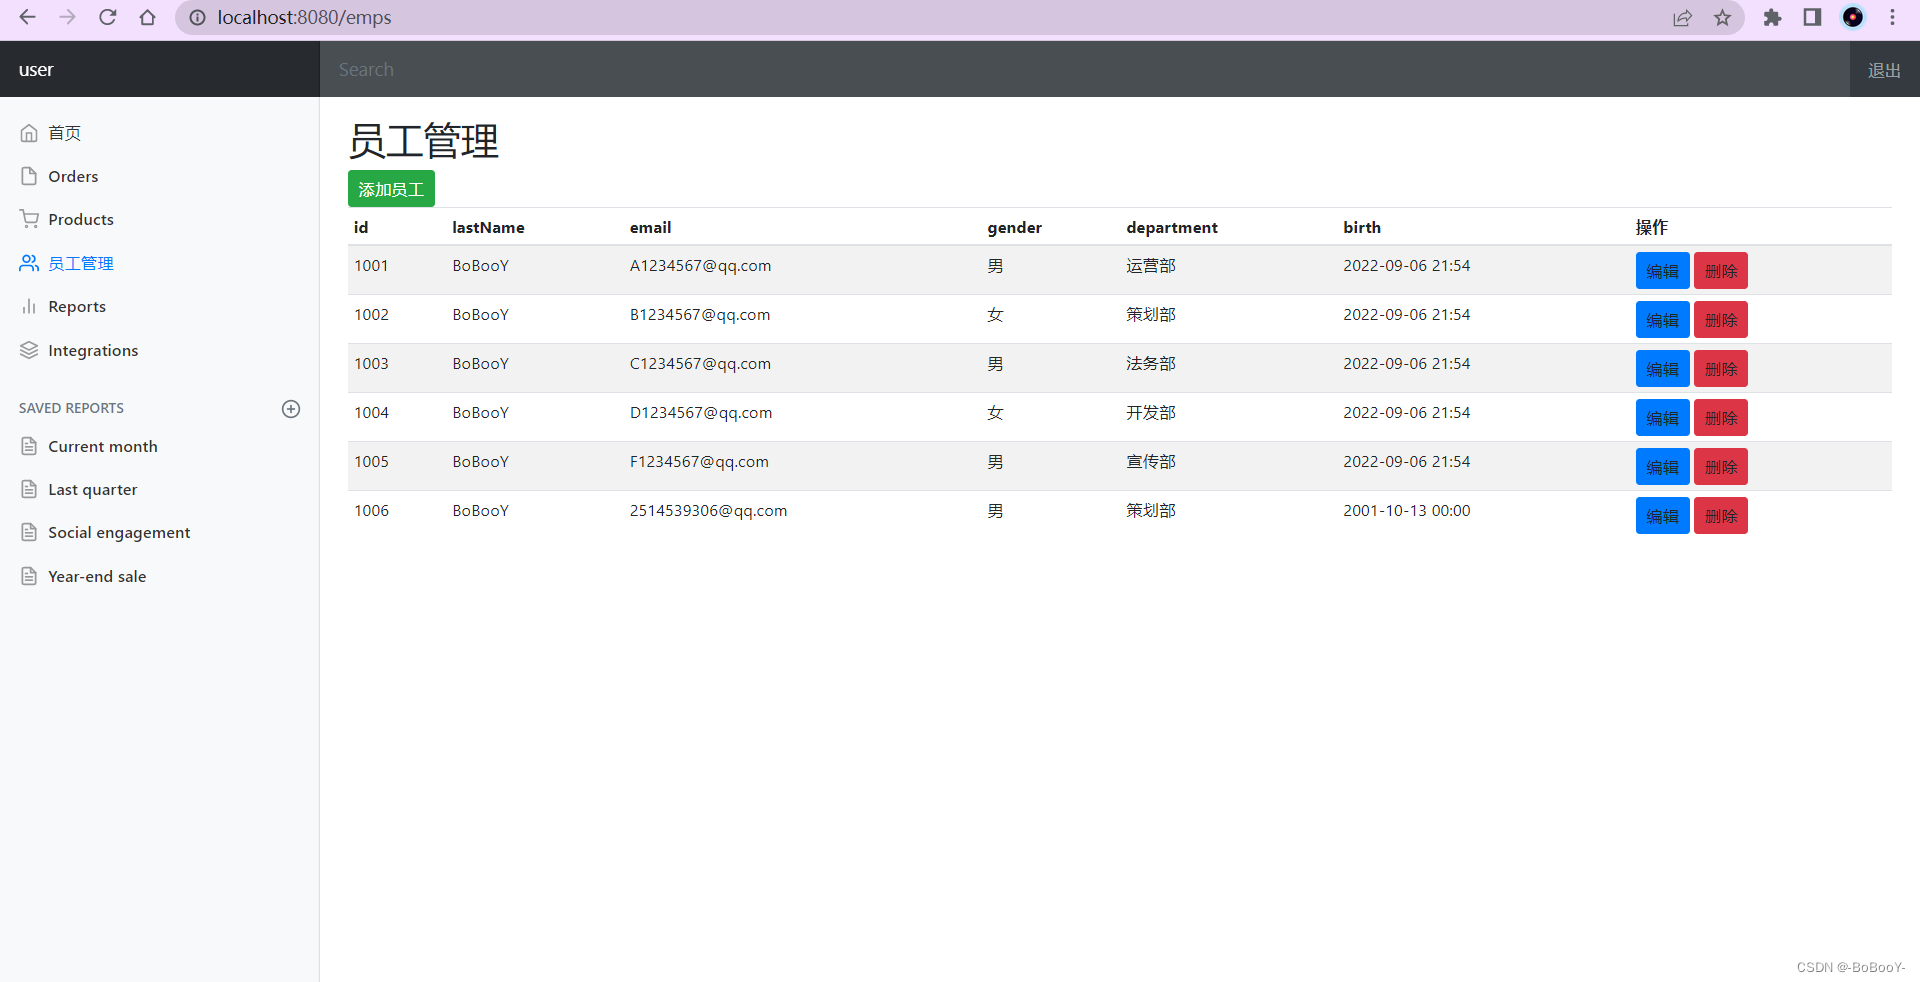
- 重启项目,查看效果
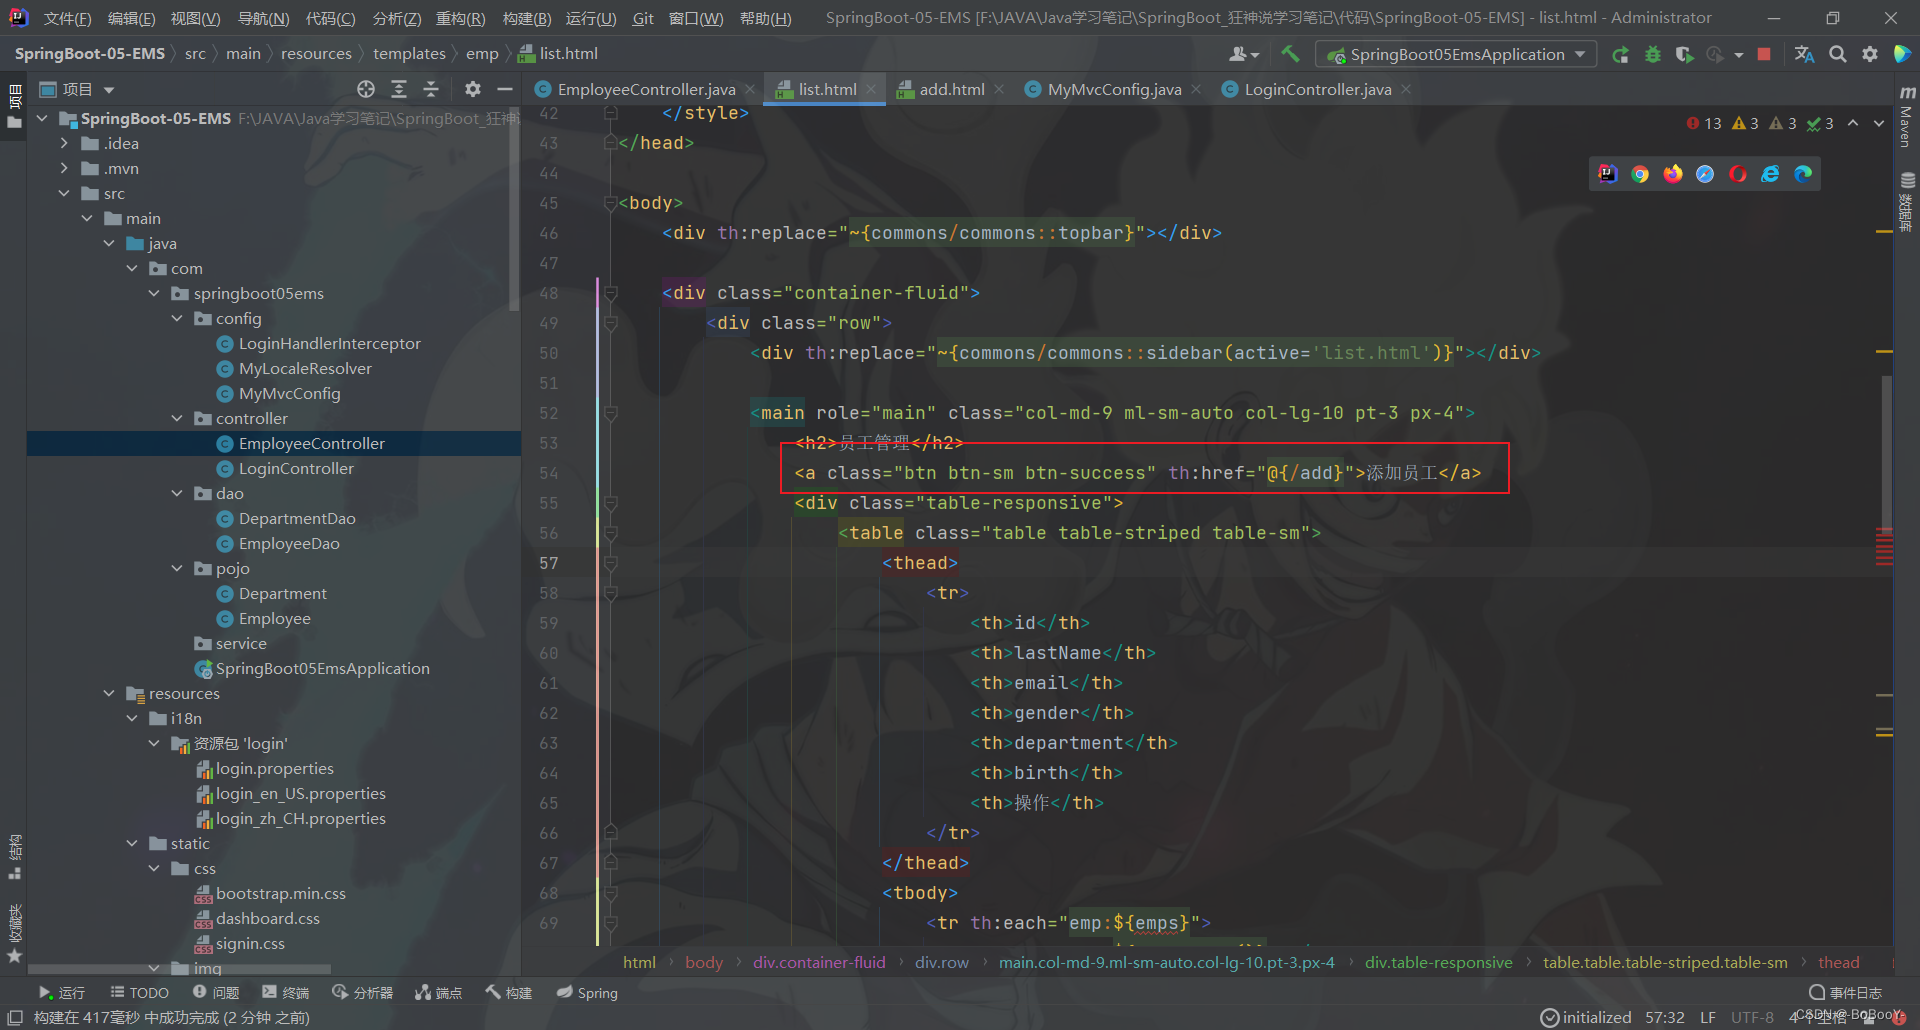
7、增加员工
7.1、编写添加员工页面
- 在
list.html页面增添一个增加员工按钮,点击该按钮时发起一个请求/add。
<a class="btn btn-sm btn-success" th:href="@{/add}">添加员工</a>
- 编写对应的
EmployeeController。
//添加员工
@RequestMapping("/add")
public String add(Model model) {return "emp/add";}
- 在
templates/emp创建添加员工页面add.html
bootstrap官网文档 点此处
<form><div class="form-group"><label>LastName</label><input type="text" class="form-control" placeholder="BoBooY"></div><div class="form-group"><label>Email</label><input type="email" class="form-control"placeholder="1524368@qq.com"></div><div class="form-group"><label>Gender</label><br/><div class="form-check form-check-inline"><input class="form-check-input" type="radio" name="gender"value="1"><label class="form-check-label">男</label></div><div class="form-check form-check-inline"><input class="form-check-input" type="radio" name="gender"value="0"><label class="form-check-label">女</label></div></div><div class="form-group"><label>department</label><select class="form-control"><option>1</option><option>2</option><option>3</option><option>4</option><option>5</option></select></div><div class="form-group"><label>Birth</label><input type="text" class="form-control" placeholder="BoBooY"></div><button type="submit" class="btn btn-primary">添加</button>
</form>
- 修改EmployeeController,改为Get请求,将部门作为参数返回给前端
//添加员工
@GetMapping("/add")
public String add(Model model) {Collection<Department> departments = departmentDao.getDepartments();model.addAttribute("depts",departments);return "emp/add";
}
- 修改前端
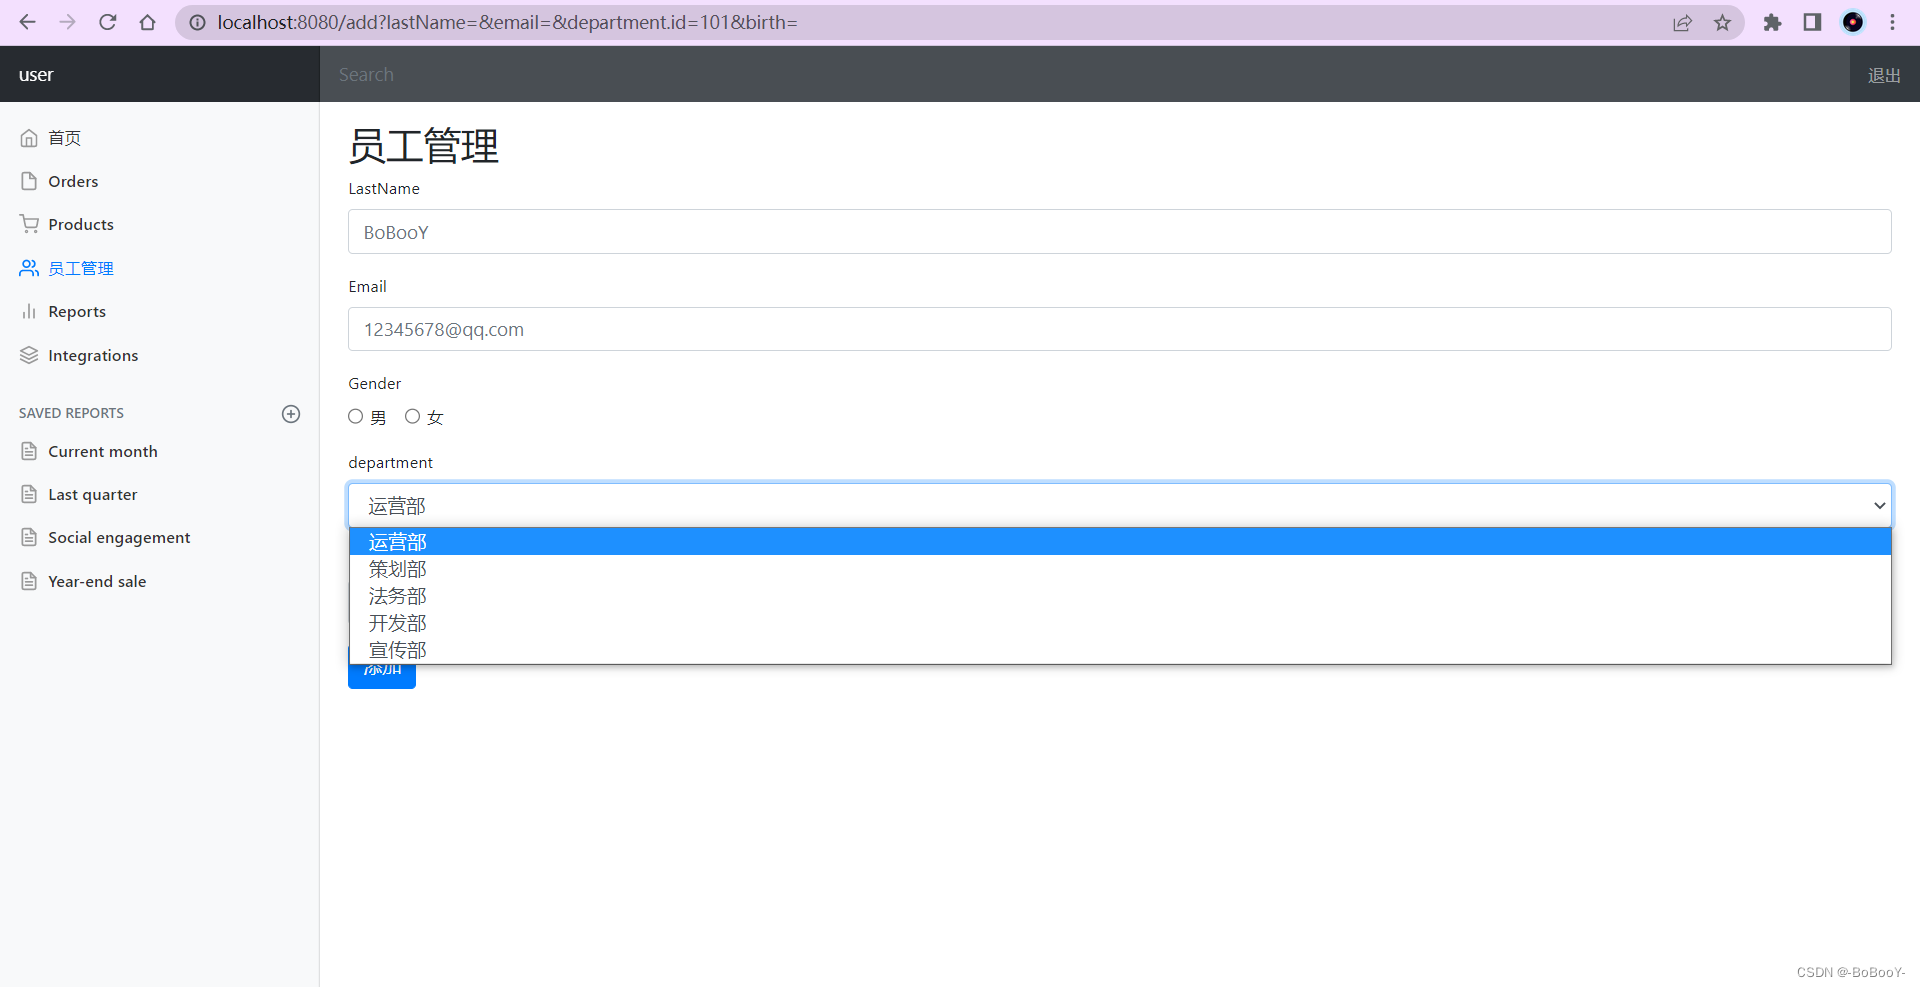
<main role="main" class="col-md-9 ml-sm-auto col-lg-10 pt-3 px-4"><h2>员工管理</h2><form><div class="form-group"><label>LastName</label><input type="text" name="lastName" class="form-control" placeholder="BoBooY"></div><div class="form-group"><label>Email</label><input type="email" name="email" class="form-control" placeholder="12345678@qq.com"></div><div class="form-group"><label>Gender</label><br/><div class="form-check form-check-inline"><input class="form-check-input" type="radio" name="gender" value="1"><label class="form-check-label">男</label></div><div class="form-check form-check-inline"><input class="form-check-input" type="radio" name="gender" value="0"><label class="form-check-label">女</label></div></div><div class="form-group"><label>department</label><select class="form-control" name="department.id"><option th:each="dept:${depts}" th:text="${dept.getDepartmentName()}" th:value="${dept.getId()}">				</option></select></div><div class="form-group"><label>Birth</label><input type="text" class="form-control" name="birth" placeholder="birth:yyyy/MM/dd"></div><button type="submit" class="btn btn-primary">添加</button></form>
</main>
- 测试功能
7.2、实现添加功能
- 给
form表单添加action属性和post请求
<form action="/addEmp" method="post"></form>
- 在EmployeeController处理 /addEmp 请求
//添加员工
@PostMapping("/addEmp")
public String addEmp(Employee employee) {System.out.println(employee);employeeDao.save(employee);return "redirect:/emps";
}
- 补修一个之前的小bug :部门栏显示错误问题
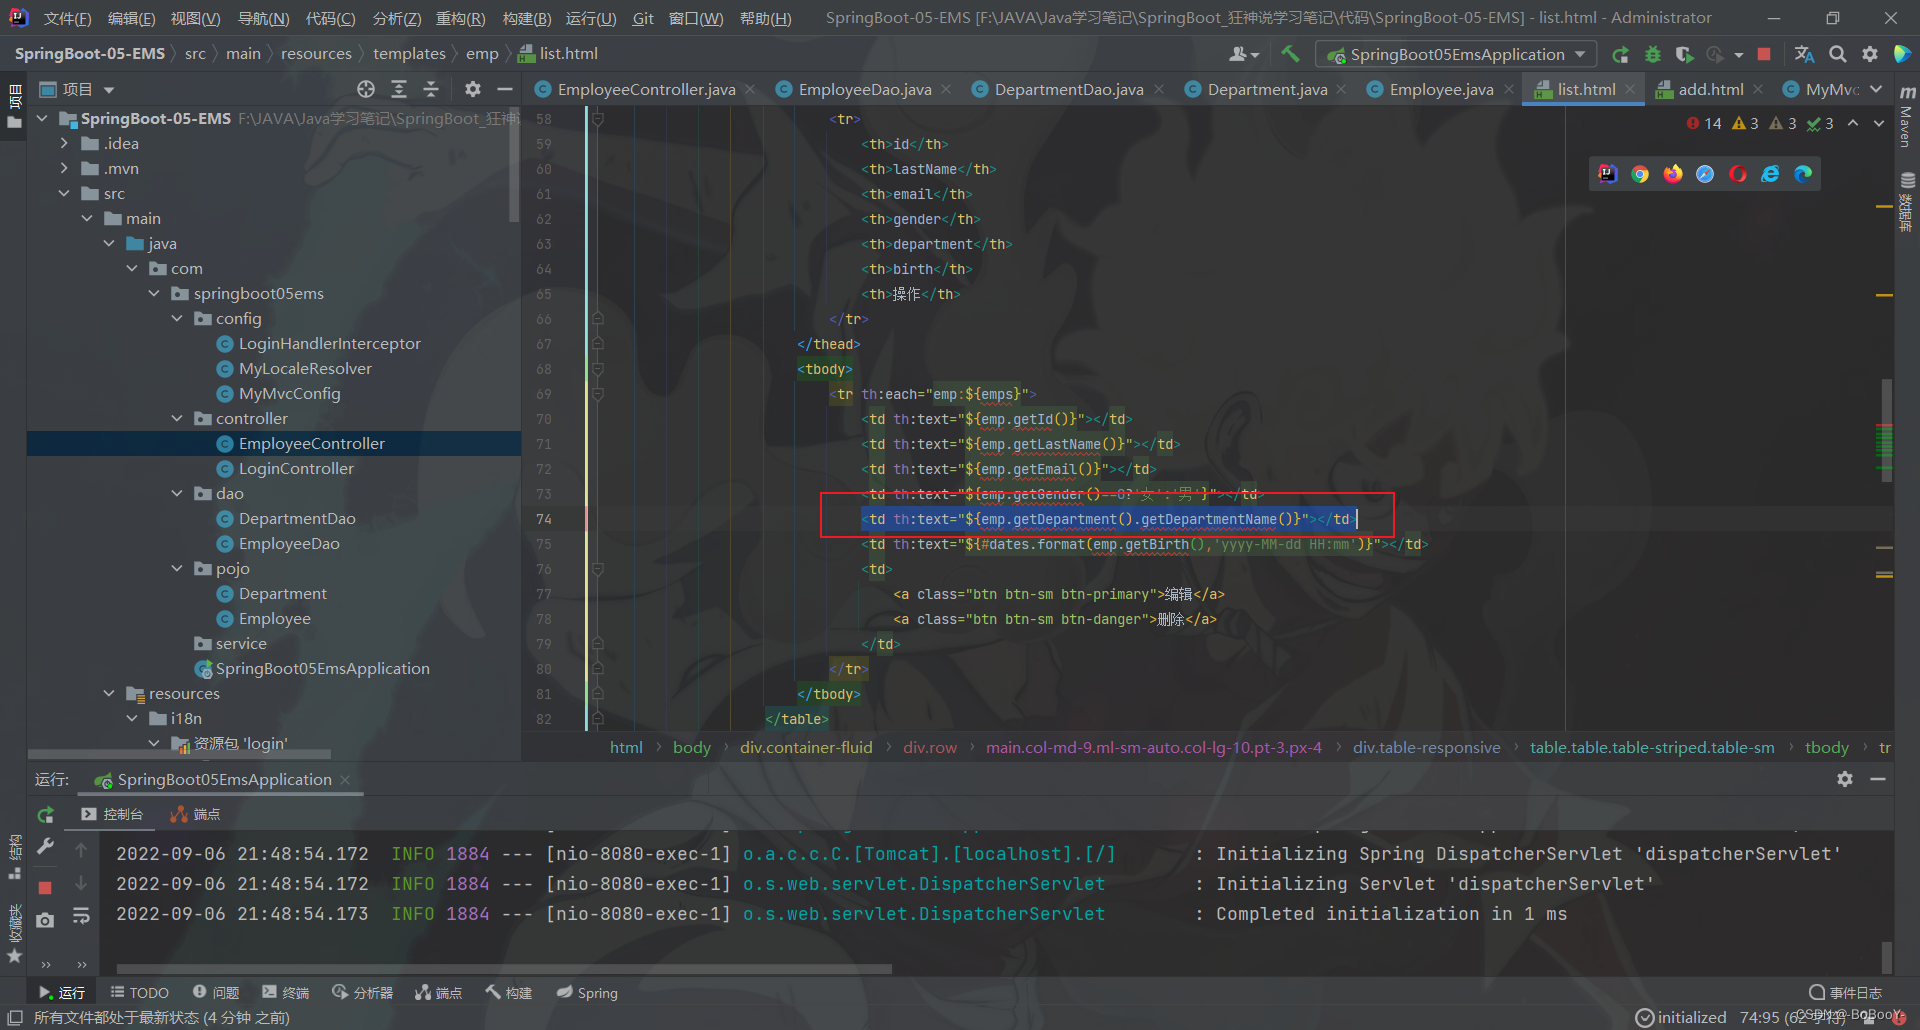
修改list页面代码
<td th:text="${emp.getDepartment().getDepartmentName()}"></td>
- 测试功能
7.3、修改日期格式
- 提交错误日期格式

- 报错400
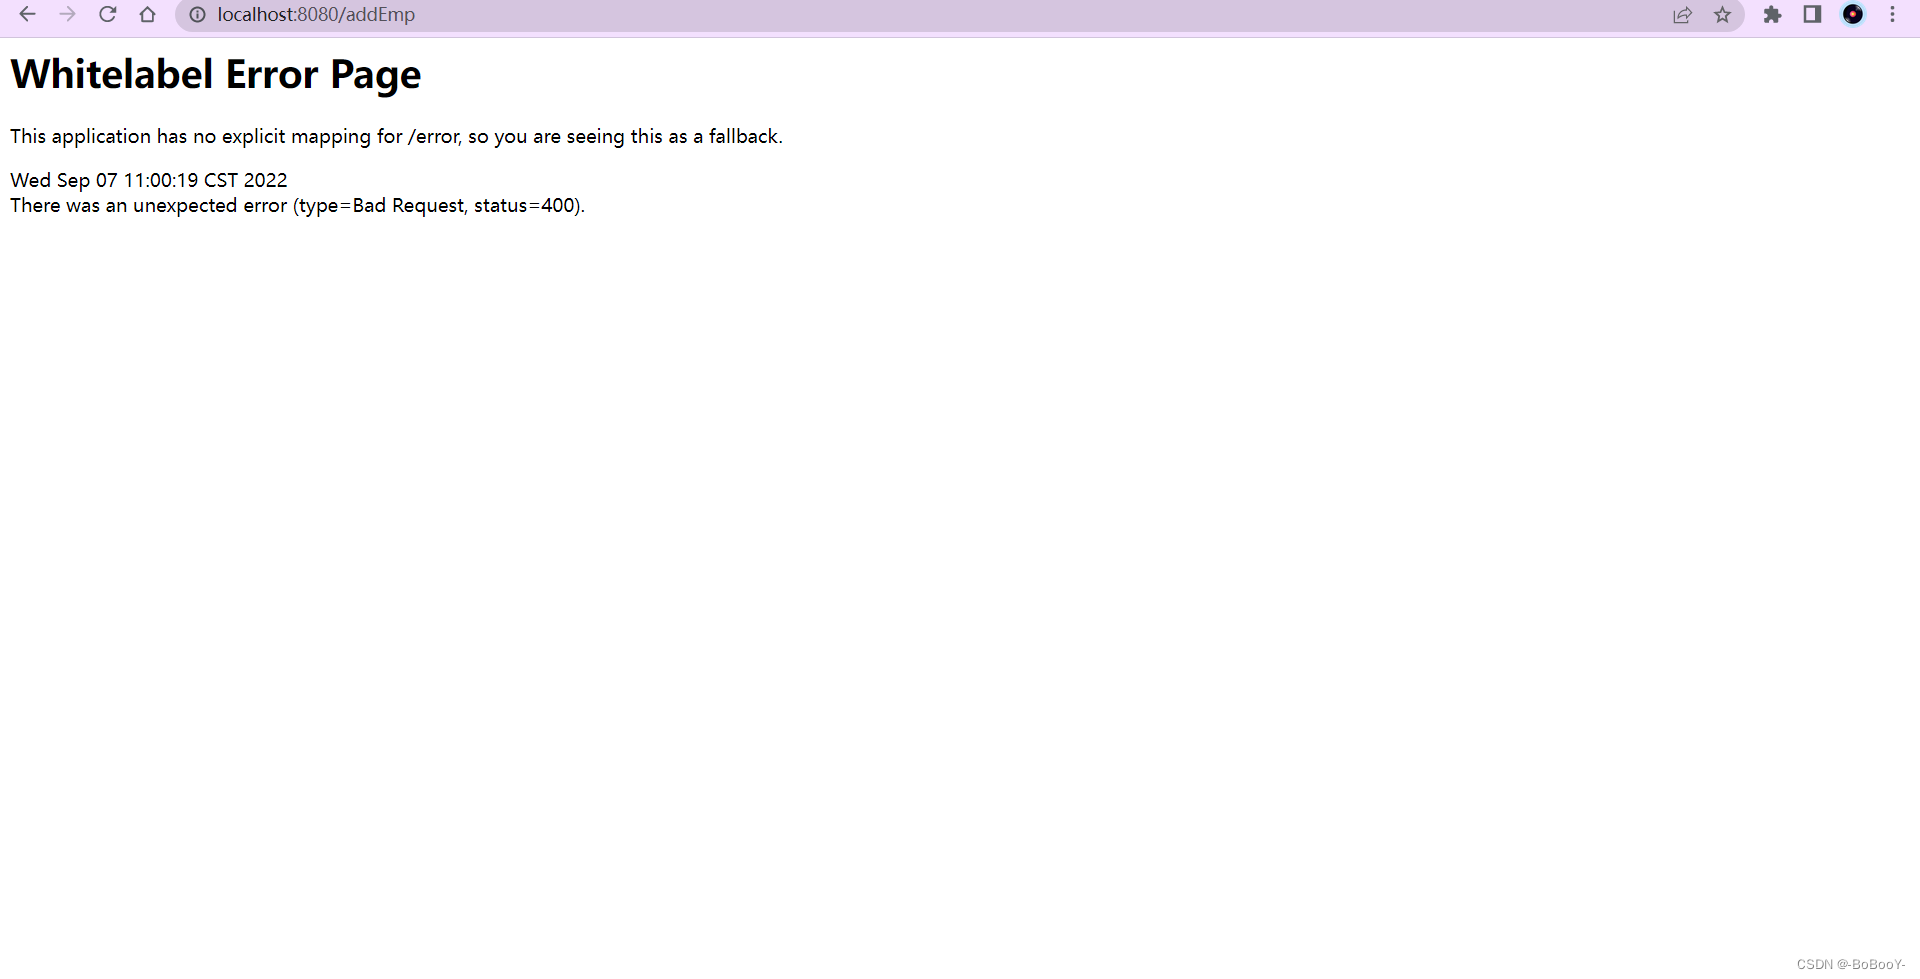
- 原理探究 : ThymeleafViewResolver
public static final String REDIRECT_URL_PREFIX = "redirect:";
public static final String FORWARD_URL_PREFIX = "forward:";protected View createView(String viewName, Locale locale) throws Exception {if (!this.alwaysProcessRedirectAndForward && !this.canHandle(viewName, locale)) {vrlogger.trace("[THYMELEAF] View \"{}\" cannot be handled by ThymeleafViewResolver. Passing on to the next resolver in the chain.", viewName);return null;} else {String forwardUrl;if (viewName.startsWith("redirect:")) {vrlogger.trace("[THYMELEAF] View \"{}\" is a redirect, and will not be handled directly by ThymeleafViewResolver.", viewName);forwardUrl = viewName.substring("redirect:".length(), viewName.length());RedirectView view = new RedirectView(forwardUrl, this.isRedirectContextRelative(), this.isRedirectHttp10Compatible());return (View)this.getApplicationContext().getAutowireCapableBeanFactory().initializeBean(view, viewName);} else if (viewName.startsWith("forward:")) {vrlogger.trace("[THYMELEAF] View \"{}\" is a forward, and will not be handled directly by ThymeleafViewResolver.", viewName);forwardUrl = viewName.substring("forward:".length(), viewName.length());return new InternalResourceView(forwardUrl);} else if (this.alwaysProcessRedirectAndForward && !this.canHandle(viewName, locale)) {vrlogger.trace("[THYMELEAF] View \"{}\" cannot be handled by ThymeleafViewResolver. Passing on to the next resolver in the chain.", viewName);return null;} else {vrlogger.trace("[THYMELEAF] View {} will be handled by ThymeleafViewResolver and a {} instance will be created for it", viewName, this.getViewClass().getSimpleName());return this.loadView(viewName, locale);}}
}
- webmvc的自动配置文件;找到一个日期格式化的方法:
@Bean
public FormattingConversionService mvcConversionService() {WebConversionService conversionService = new WebConversionService(this.mvcProperties.getDateFormat());this.addFormatters(conversionService);return conversionService;
}
- 调用了 getDateFormat 方法;
public String getDateFormat() {return this.dateFormat;
}
- 所以可以自定义的去修改这个时间格式化问题,在配置文件中修改一下;
# 日期格式化
spring.mvc.date-format=yyyy-MM-dd hh:mm
8、修改员工信息
8.1、补充RestFul风格
- 要求: 需要使用 Restful风格实现CRUD操作!
| 普通CRUD(uri来区分操作) | RestfulCRUD | |
|---|---|---|
| 查询 | getEmp | emp–GET |
| 添加 | addEmp?xxx | emp–POST |
| 修改 | updateEmp?id=xxx&xxx=xx | emp/{id}–PUT |
| 删除 | deleteEmp?id=1 | emp/{id}—DELETE |
- 看看一些具体的要求,就是需要实现的架构;
| 实验功能 | 请求URI | 请求方式 |
|---|---|---|
| 查询所有员工 | emps | GET |
| 查询某个员工(来到修改页面) | emp/1 | GET |
| 来到添加页面 | emp | GET |
| 添加员工 | emp | POST |
| 来到修改页面(查出员工进行信息回显) | emp/1 | GET |
| 修改员工 | emp | PUT |
| 删除员工 | emp/1 | DELETE |
8.2、给编辑按钮添加请求
- 修改
list.html
<a class="btn btn-sm btn-primary" th:href="@{/update/{id}(id=${emp.getId()})}">编辑</a>
8.3、添加一个更新员工信息页面
- 复制
add.html到新建的update.html中,并修改其中的标签属性,如下:
<!DOCTYPE html>
<!-- saved from url=(0052)http://getbootstrap.com/docs/4.0/examples/dashboard/ -->
<html lang="en" xmlns:th="http://www.thymeleaf.org"><head><meta http-equiv="Content-Type" content="text/html; charset=UTF-8"><meta name="viewport" content="width=device-width, initial-scale=1, shrink-to-fit=no"><meta name="description" content=""><meta name="author" content=""><title>Dashboard Template for Bootstrap</title><!-- Bootstrap core CSS --><link th:href="@{/css/bootstrap.min.css}" rel="stylesheet"><!-- Custom styles for this template --><link th:href="@{/css/dashboard.css}" rel="stylesheet"><style type="text/css">/* Chart.js */@-webkit-keyframes chartjs-render-animation {from {opacity: 0.99}to {opacity: 1}}@keyframes chartjs-render-animation {from {opacity: 0.99}to {opacity: 1}}.chartjs-render-monitor {-webkit-animation: chartjs-render-animation 0.001s;animation: chartjs-render-animation 0.001s;}</style>
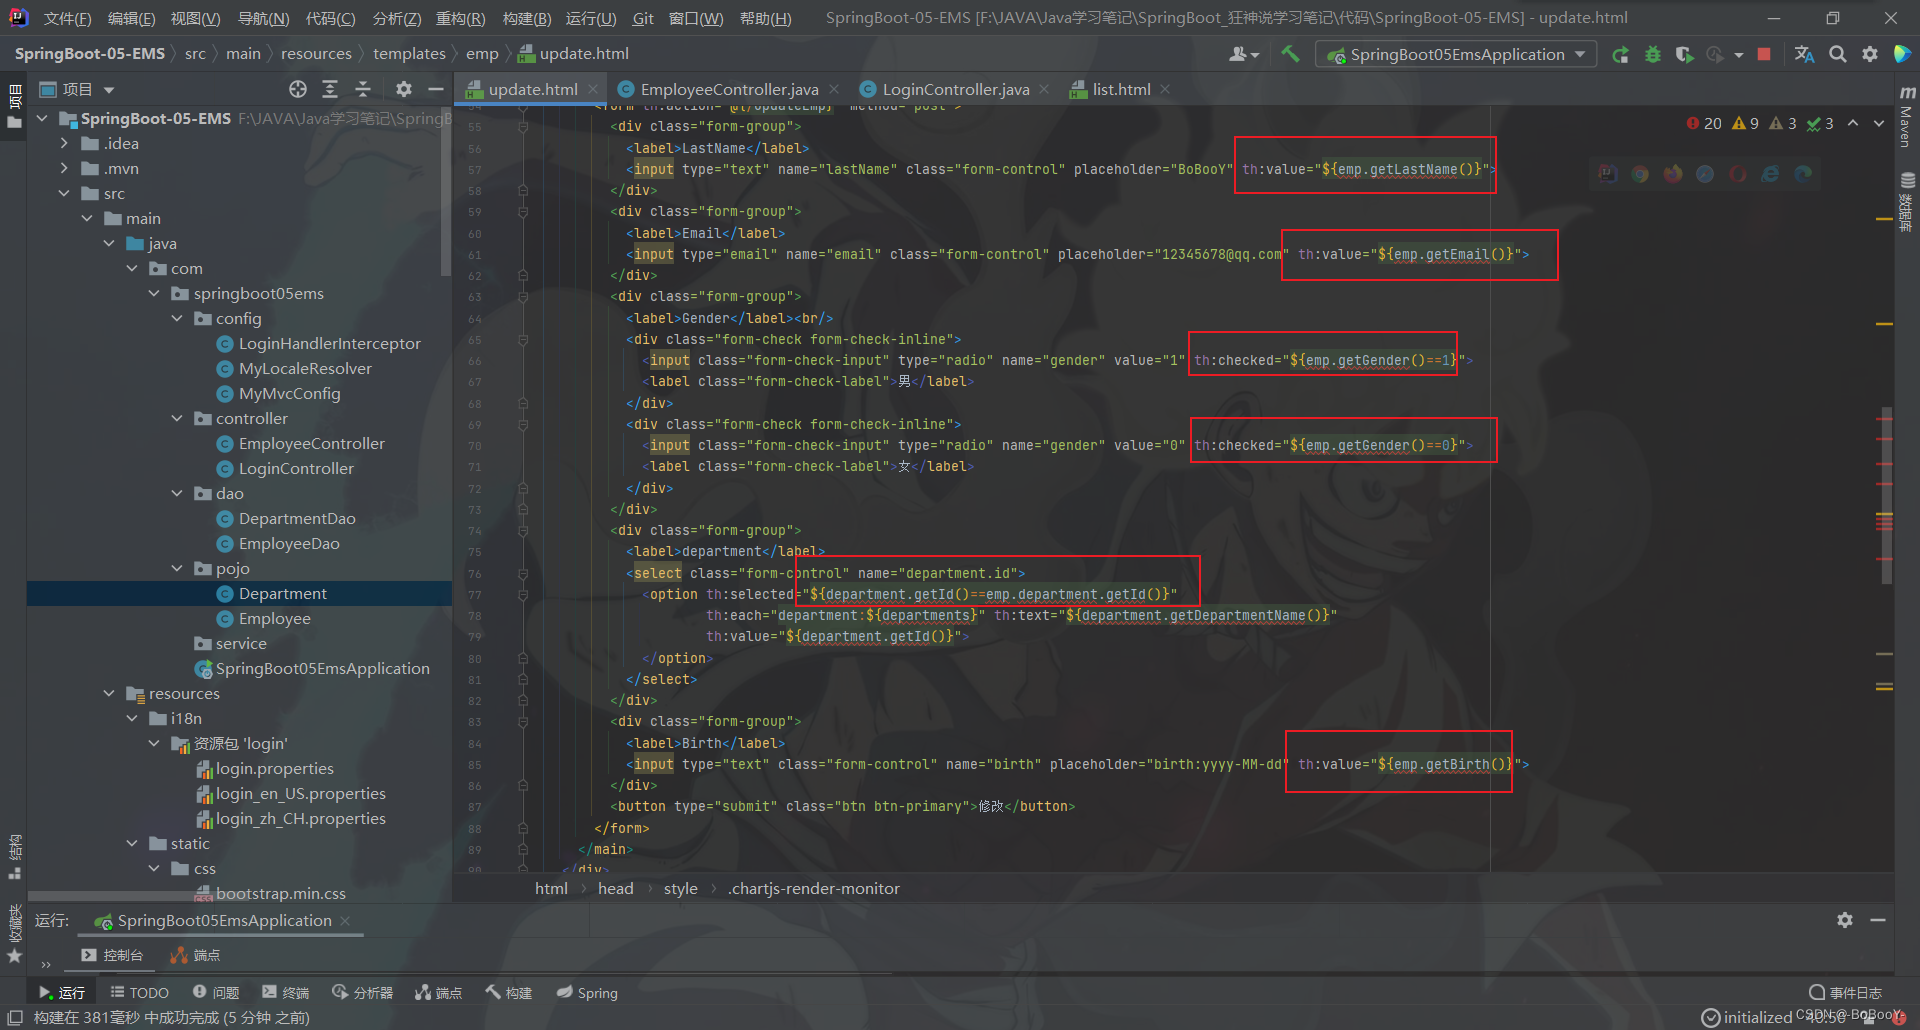
</head><body><div th:replace="~{commons/commons::topbar}"></div><div class="container-fluid"><div class="row"><div th:replace="~{commons/commons::sidebar(active='list.html')}"></div><main role="main" class="col-md-9 ml-sm-auto col-lg-10 pt-3 px-4"><h2>修改员工</h2><form th:action="@{/updateEmp}" method="post"><div class="form-group"><label>LastName</label><input type="text" name="lastName" class="form-control" placeholder="BoBooY" th:value="${emp.getLastName()}"></div><div class="form-group"><label>Email</label><input type="email" name="email" class="form-control" placeholder="12345678@qq.com" th:value="${emp.getEmail()}"></div><div class="form-group"><label>Gender</label><br/><div class="form-check form-check-inline"><input class="form-check-input" type="radio" name="gender" value="1" th:checked="${emp.getGender()==1}"><label class="form-check-label">男</label></div><div class="form-check form-check-inline"><input class="form-check-input" type="radio" name="gender" value="0" th:checked="${emp.getGender()==0}"><label class="form-check-label">女</label></div></div><div class="form-group"><label>department</label><select class="form-control" name="department.id"><option th:selected="${department.getId()==emp.department.getId()}"th:each="department:${departments}" th:text="${department.getDepartmentName()}"th:value="${department.getId()}"></option></select></div><div class="form-group"><label>Birth</label><input type="text" class="form-control" name="birth" placeholder="birth:yyyy-MM-dd" th:value="${emp.getBirth()}"></div><button type="submit" class="btn btn-primary">修改</button></form></main></div></div>${#dates.format(emp.getBirth(),'yyyy-MM-dd HH:mm')}<!-- Bootstrap core JavaScript
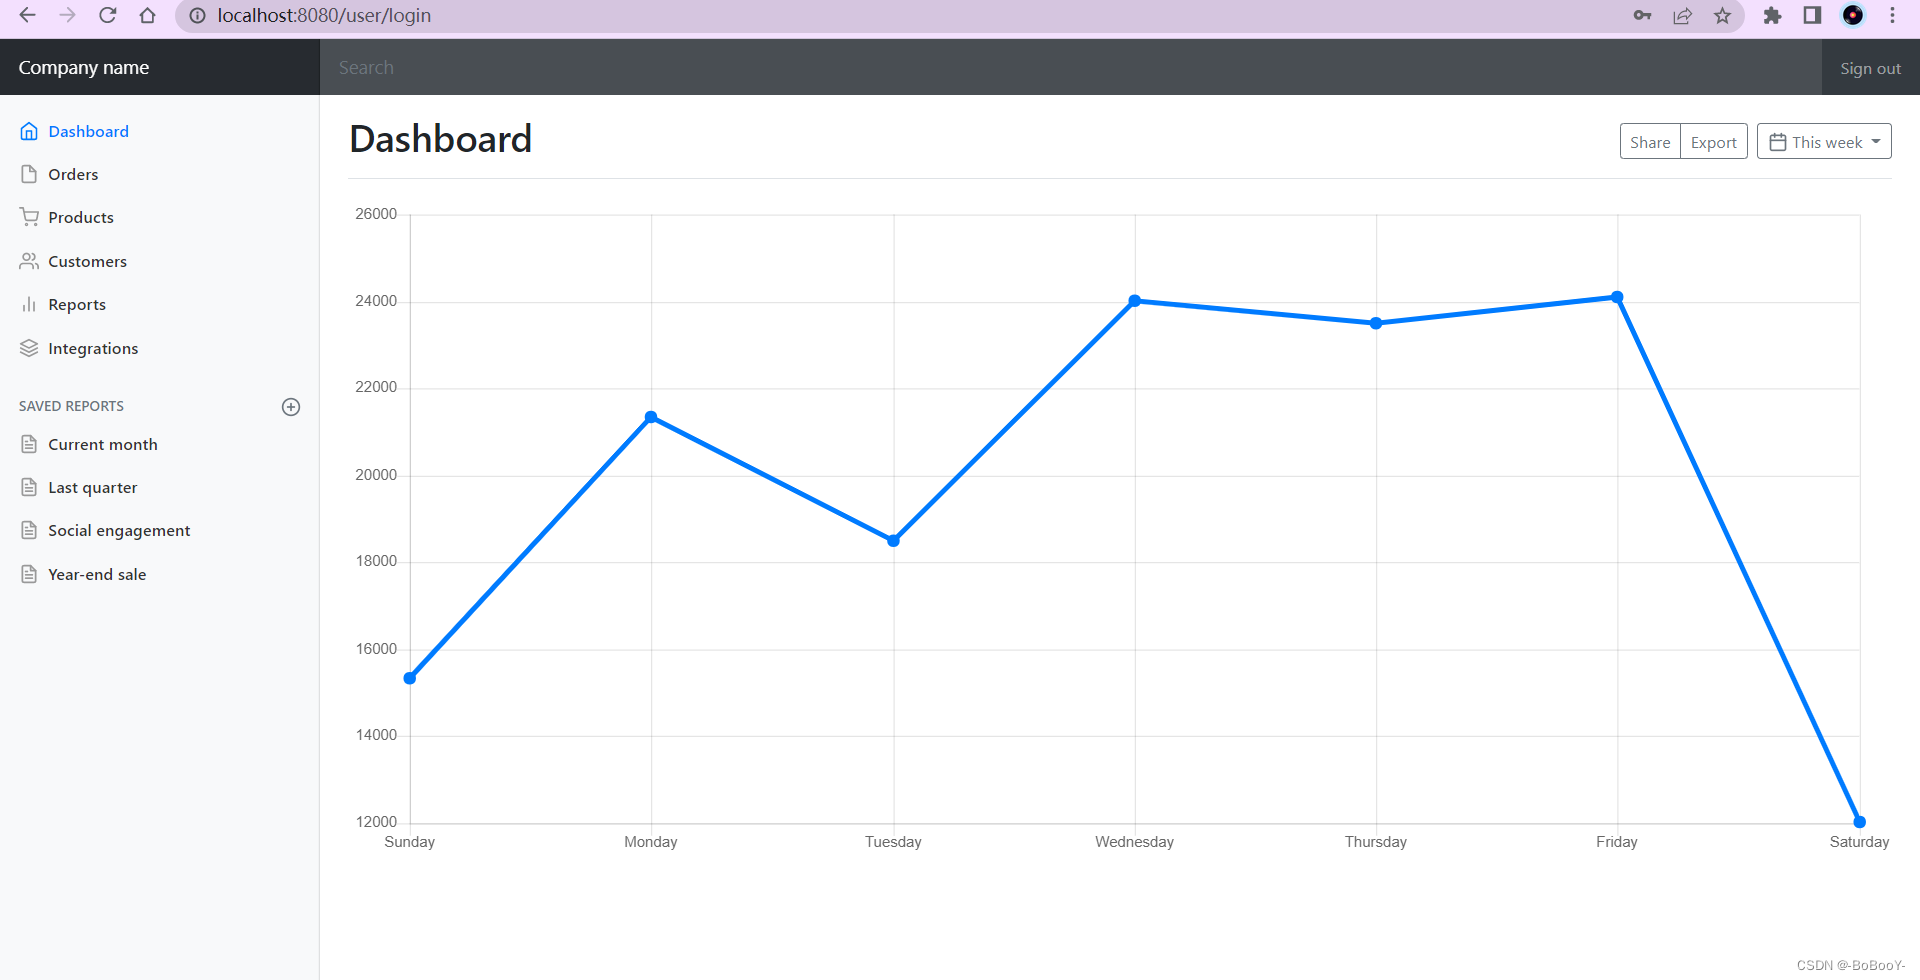
================================================== --><!-- Placed at the end of the document so the pages load faster --><script type="text/javascript" th:src="@{/js/jquery-3.2.1.slim.min.js}"></script><script type="text/javascript" th:src="@{/js/popper.min.js}"></script><script type="text/javascript" th:src="@{/js/bootstrap.min.js}"></script>@{}<!-- Icons --><script type="text/javascript" th:src="@{/js/feather.min.js}"></script><script>feather.replace()</script><!-- Graphs --><script type="text/javascript" th:src="@{/js/Chart.min.js}"></script><script>var ctx = document.getElementById("myChart");var myChart = new Chart(ctx, {type: 'line',data: {labels: ["Sunday", "Monday", "Tuesday", "Wednesday", "Thursday", "Friday", "Saturday"],datasets: [{data: [15339, 21345, 18483, 24003, 23489, 24092, 12034],lineTension: 0,backgroundColor: 'transparent',borderColor: '#007bff',borderWidth: 4,pointBackgroundColor: '#007bff'}]},options: {scales: {yAxes: [{ticks: {beginAtZero: false}}]},legend: {display: false,}}});</script></body></html>
8.4、处理请求
- 在
EmployeeController中处理/update/{id}(id=${emp.getId()})请求
//跳转至编辑员工信息页面
@GetMapping ("/update/{id}")
public String update(@PathVariable("id") int id, Model model) {System.out.println("进入了update");Employee employee = employeeDao.getEmployee(id);System.out.println(employee);model.addAttribute("emp",employee);Collection<Department> departments = departmentDao.getDepartments();model.addAttribute("departments",departments);return "/emp/update";
}
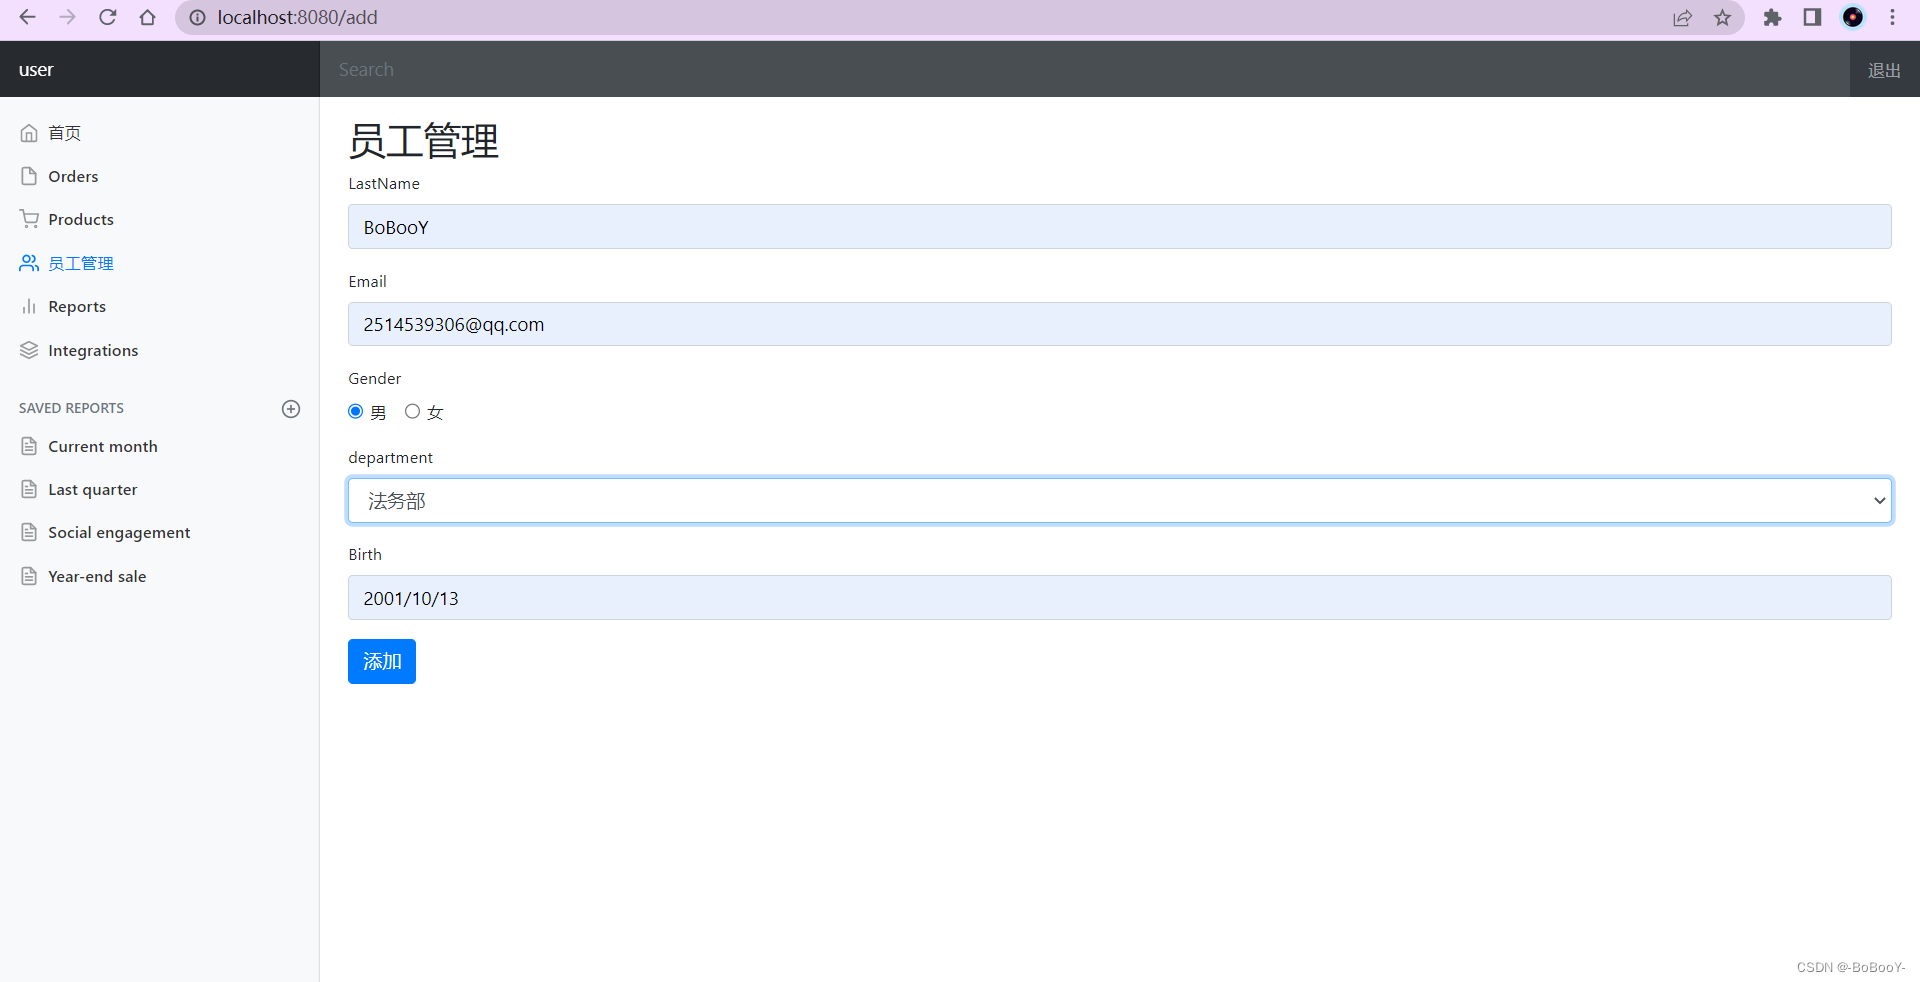
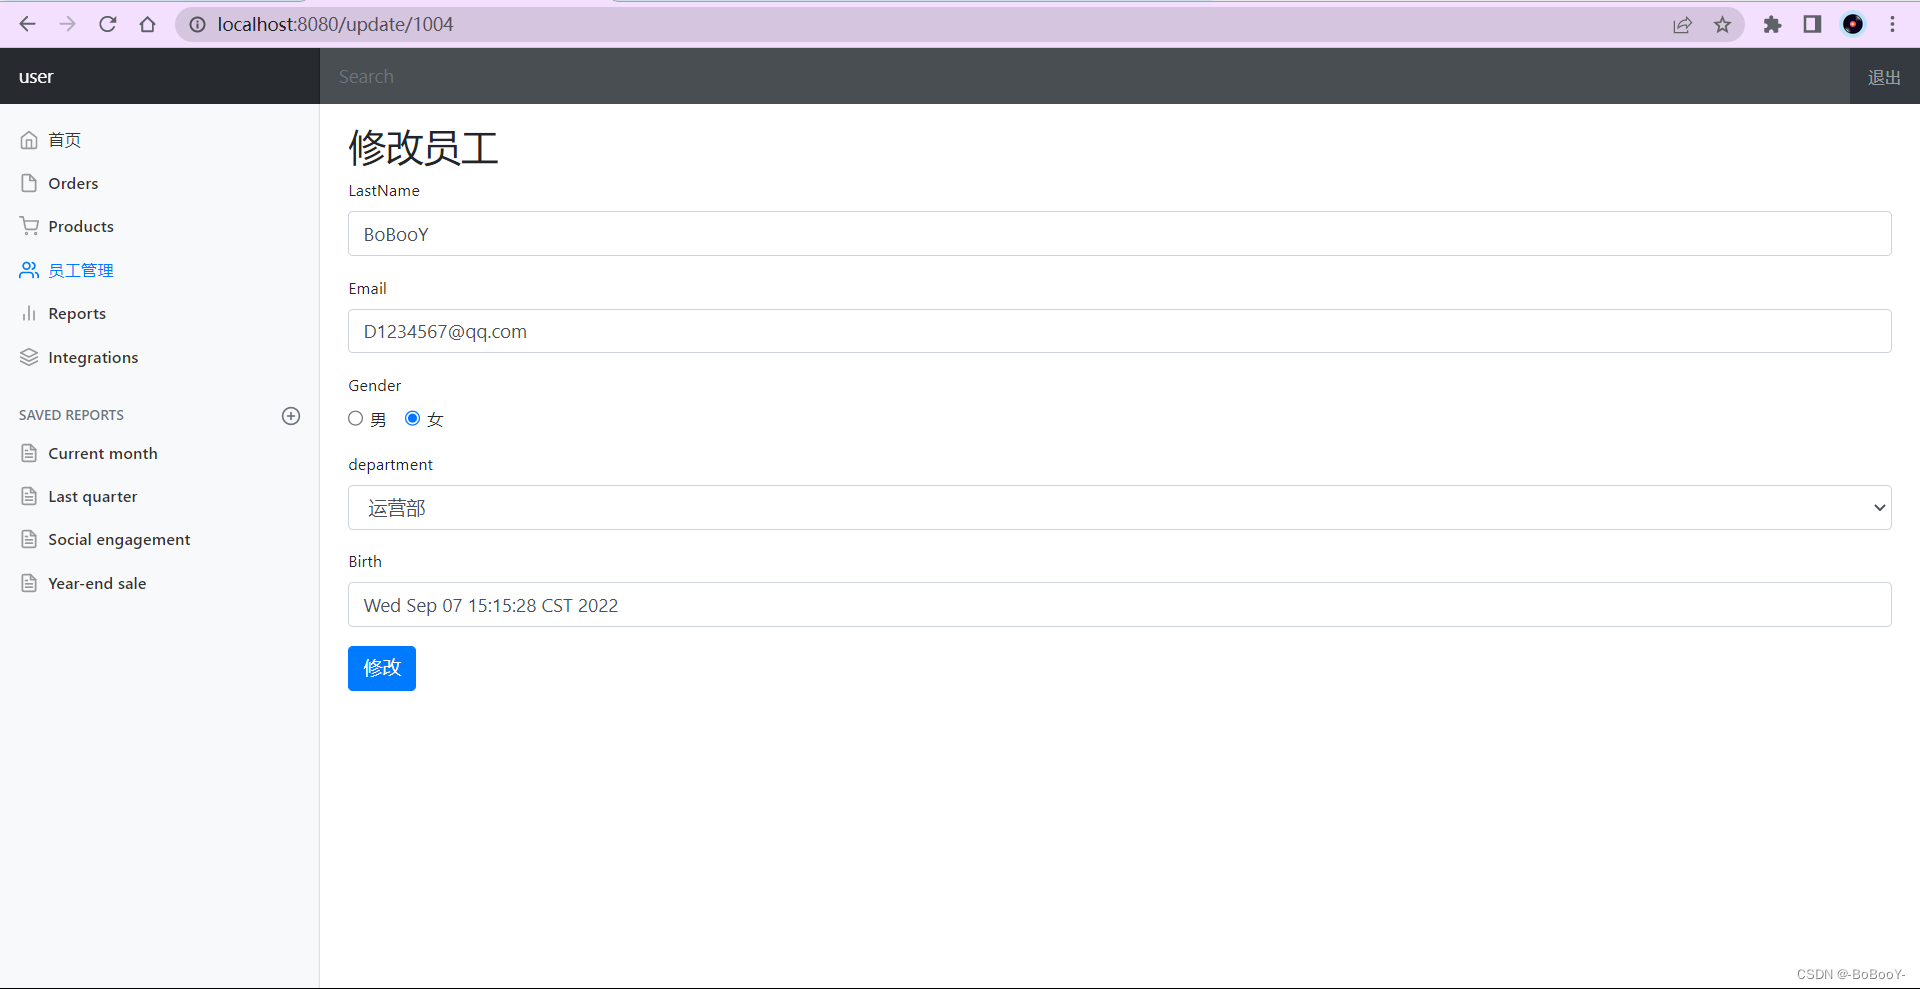
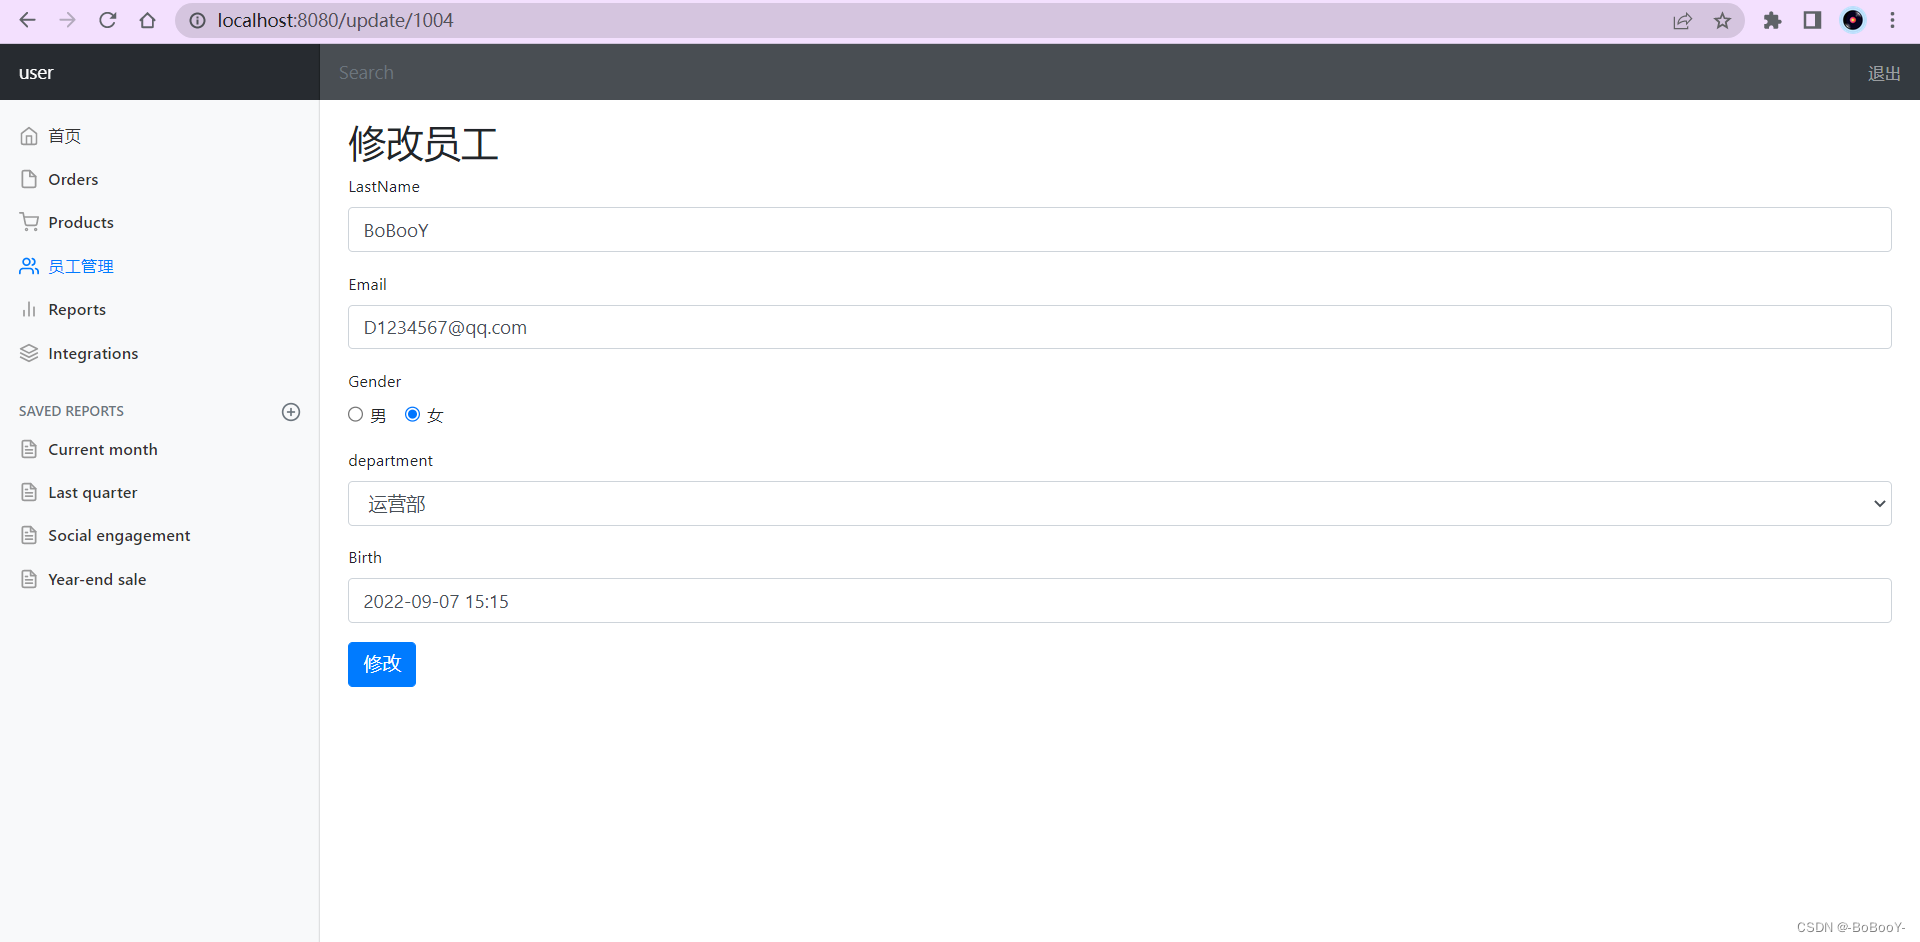
8.5、测试功能
- 启动项目 查看效果
8.6、修改日期格式
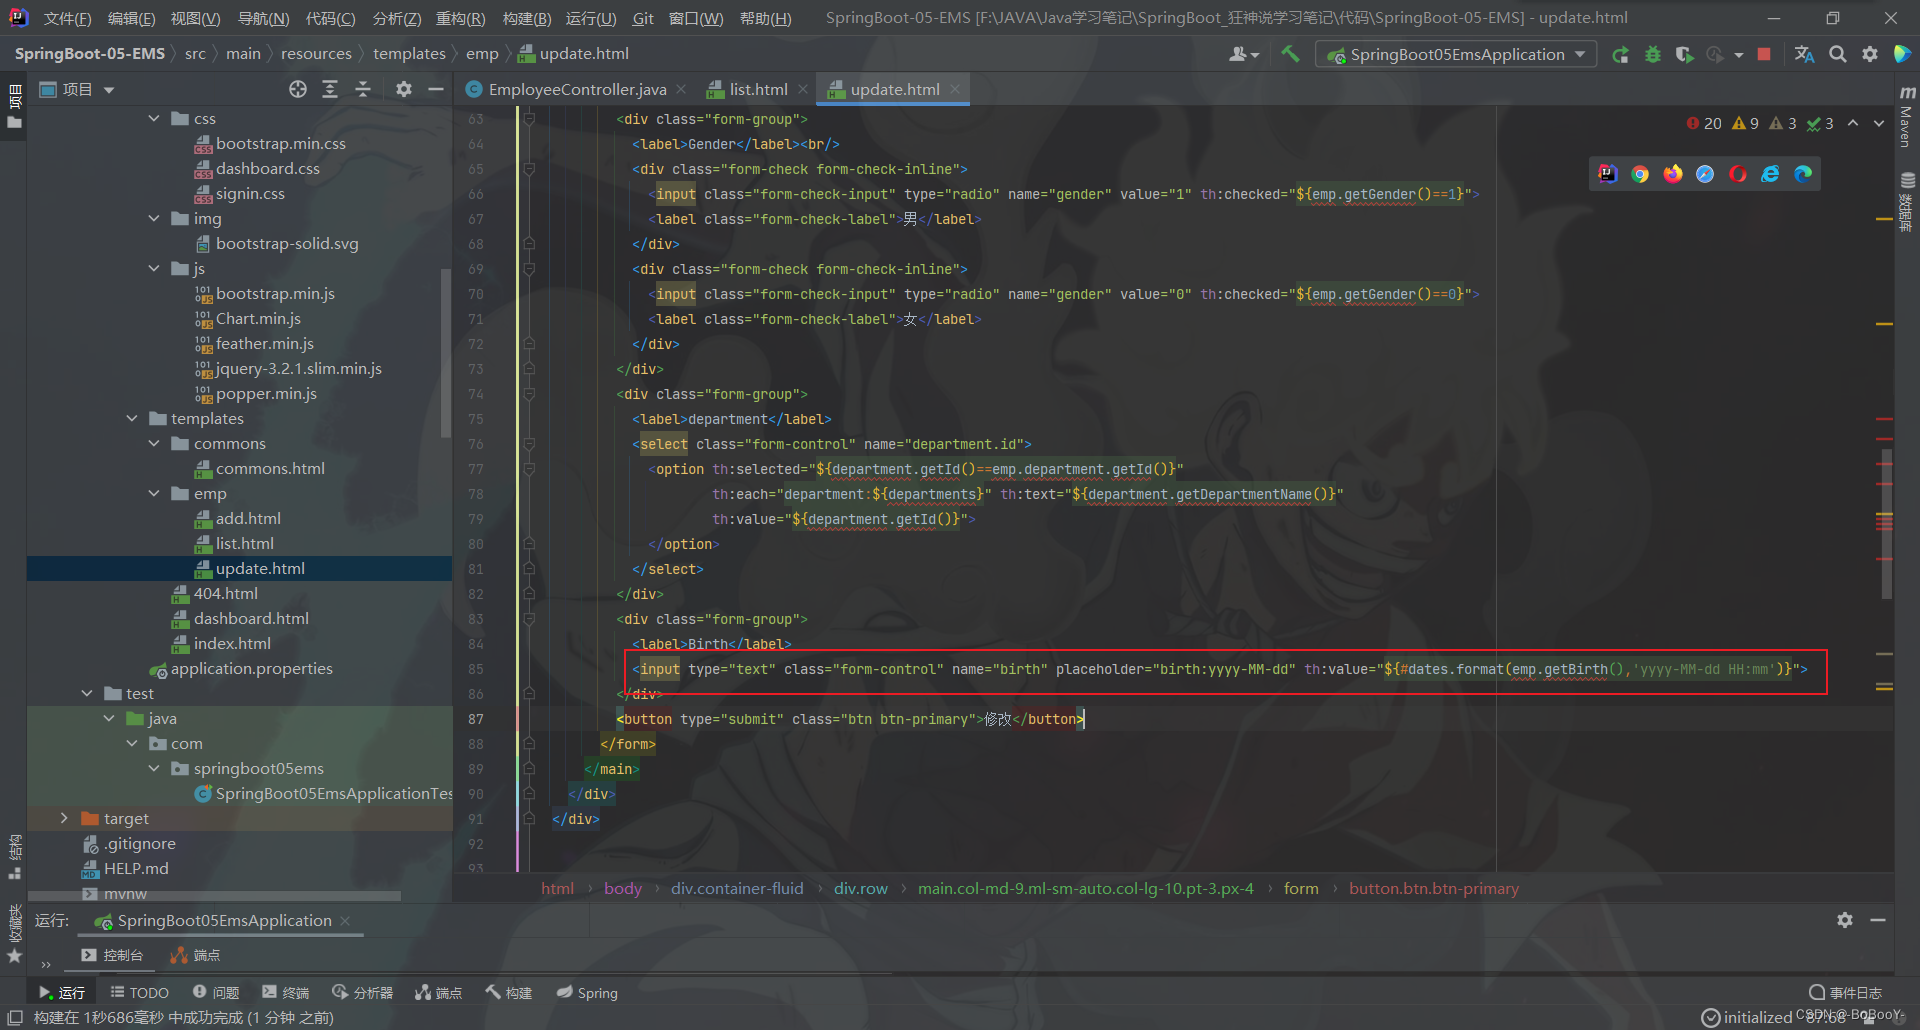
- 修改
update.html
<input type="text" class="form-control" name="birth" placeholder="birth:yyyy-MM-dd" th:value="${#dates.format(emp.getBirth(),'yyyy-MM-dd HH:mm')}">
- 重启项目,查看效果
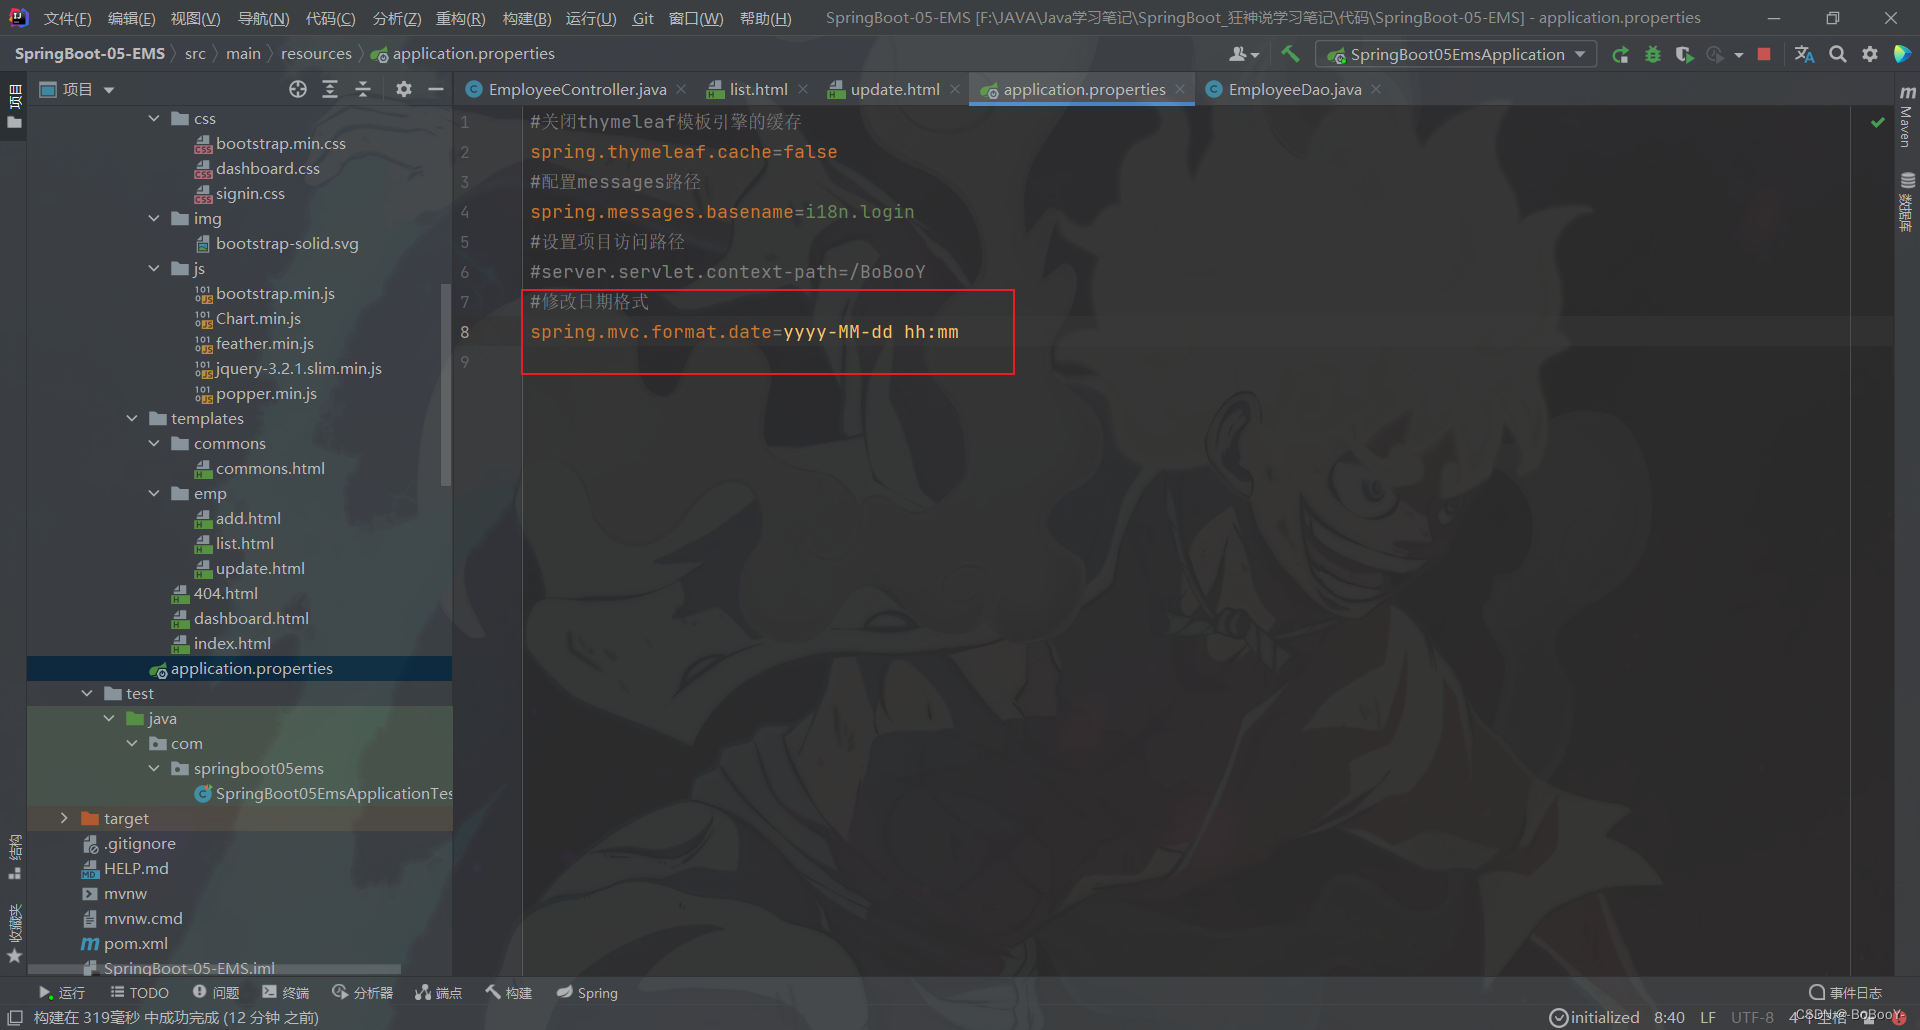
- 在Application.properties中修改SpringBoot默认日期格式,与前端保持一致
#修改日期格式
spring.mvc.format.date=yyyy-MM-dd HH:mm
8.7、处理修改请求
- 在
EmployeeController中添加updateEmp方法
//修改员工信息
@PostMapping("/updateEmp")
public String updateEmp(Employee employee) {System.out.println(employee);employeeDao.save(employee);return "redirect:/emps";
}
- 重启项目,成功修改!
9、删除员工
9.1、给删除按钮添加请求
- 修改
list.html,给a标签添加删除请求
<a class="btn btn-sm btn-danger" th:href="@{/delete/{id}(id=${emp.getId()})}">删除</a>
9.2、处理删除请求
- 在
EmployeeController中添加delete方法
//删除员工信息
@GetMapping("/delete/{id}")
public String delete(@PathVariable("id") int id) {employeeDao.delete(id);return "redirect:/emps";
}
- 重启项目测试,成功删除!
10、注销功能实现
10.1、给退出按钮添加请求
- 修改
commons.html
<a class="nav-link" th:href="@{/logout}">退出</a>
10.2、处理logout请求
- 在
EmployeeController中添加logout方法
//注销
@RequestMapping("/logout")
public String logout(HttpSession session) {session.invalidate();   // 让当前的session失效,但是失效的时候浏览器会立刻创建一个新的session,所以调用原来session的getAttribute方法时候一定会抛出NullPointerExceptionreturn "redirect:/index.html";
}
- 测试,退出成功!
11、定制404页面
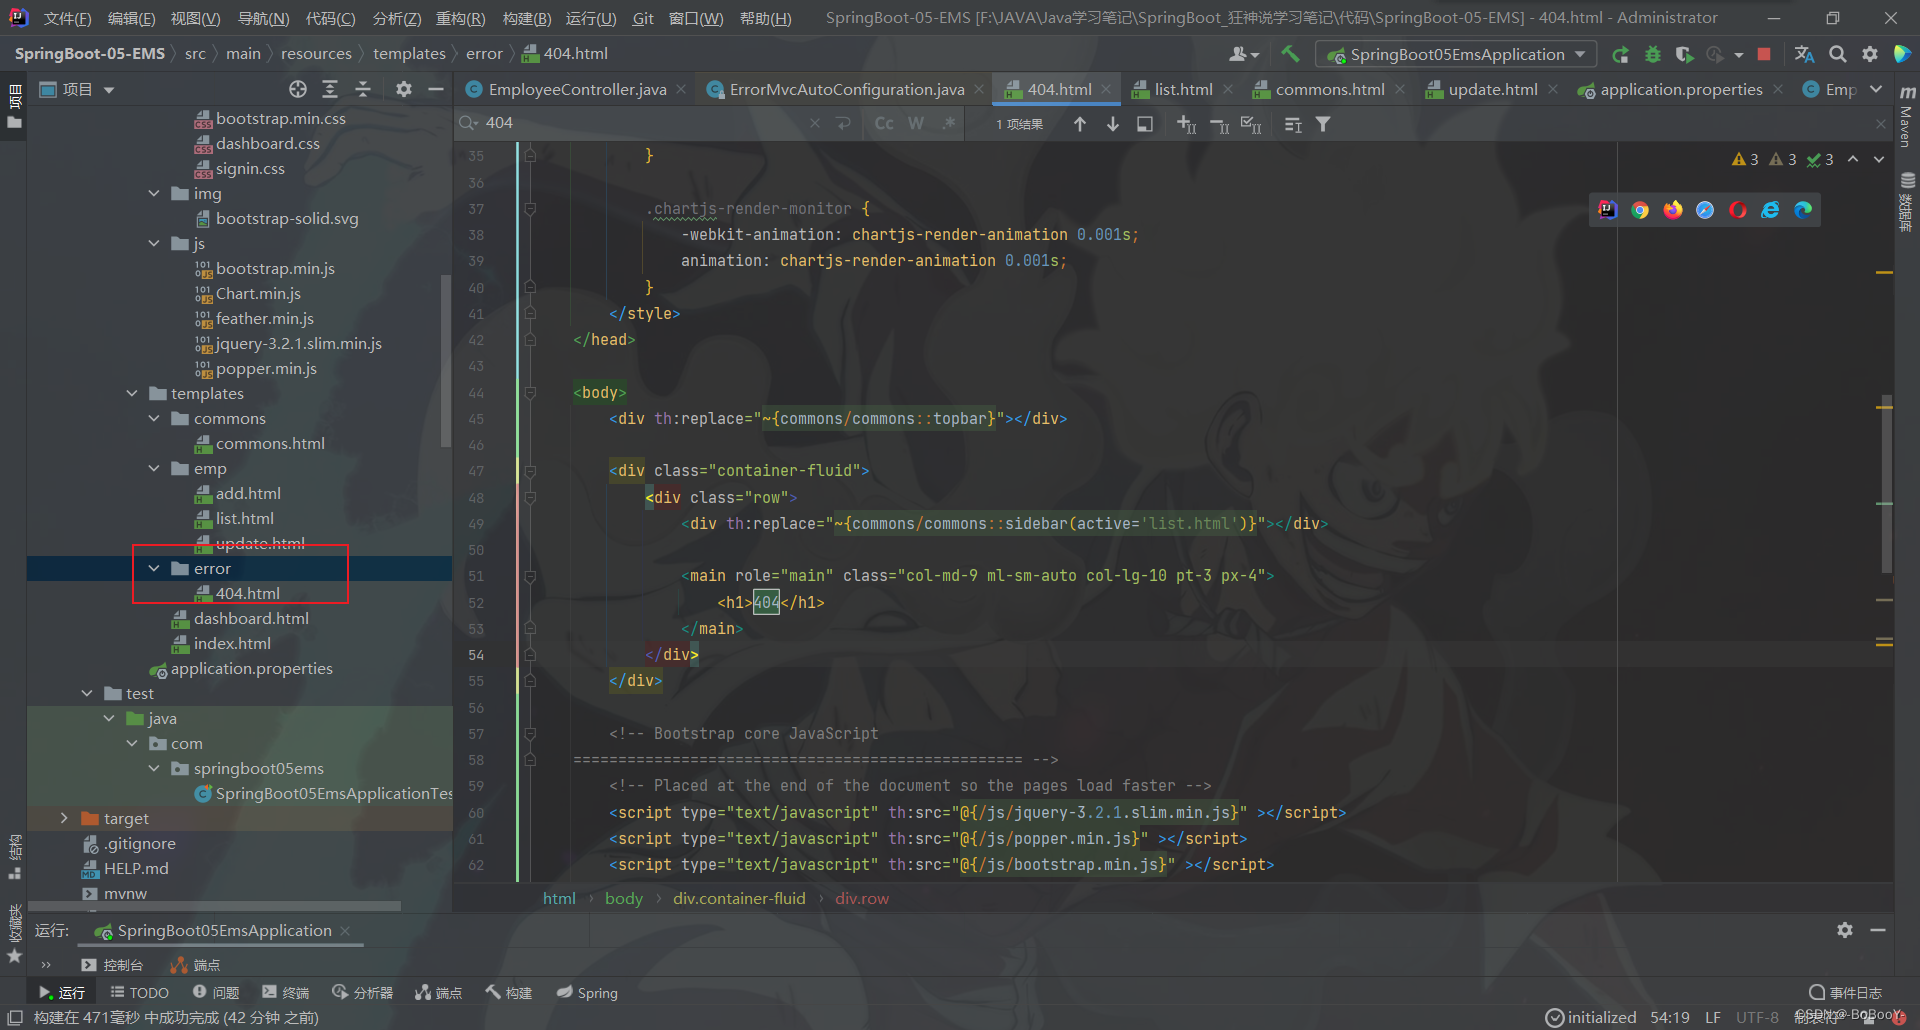
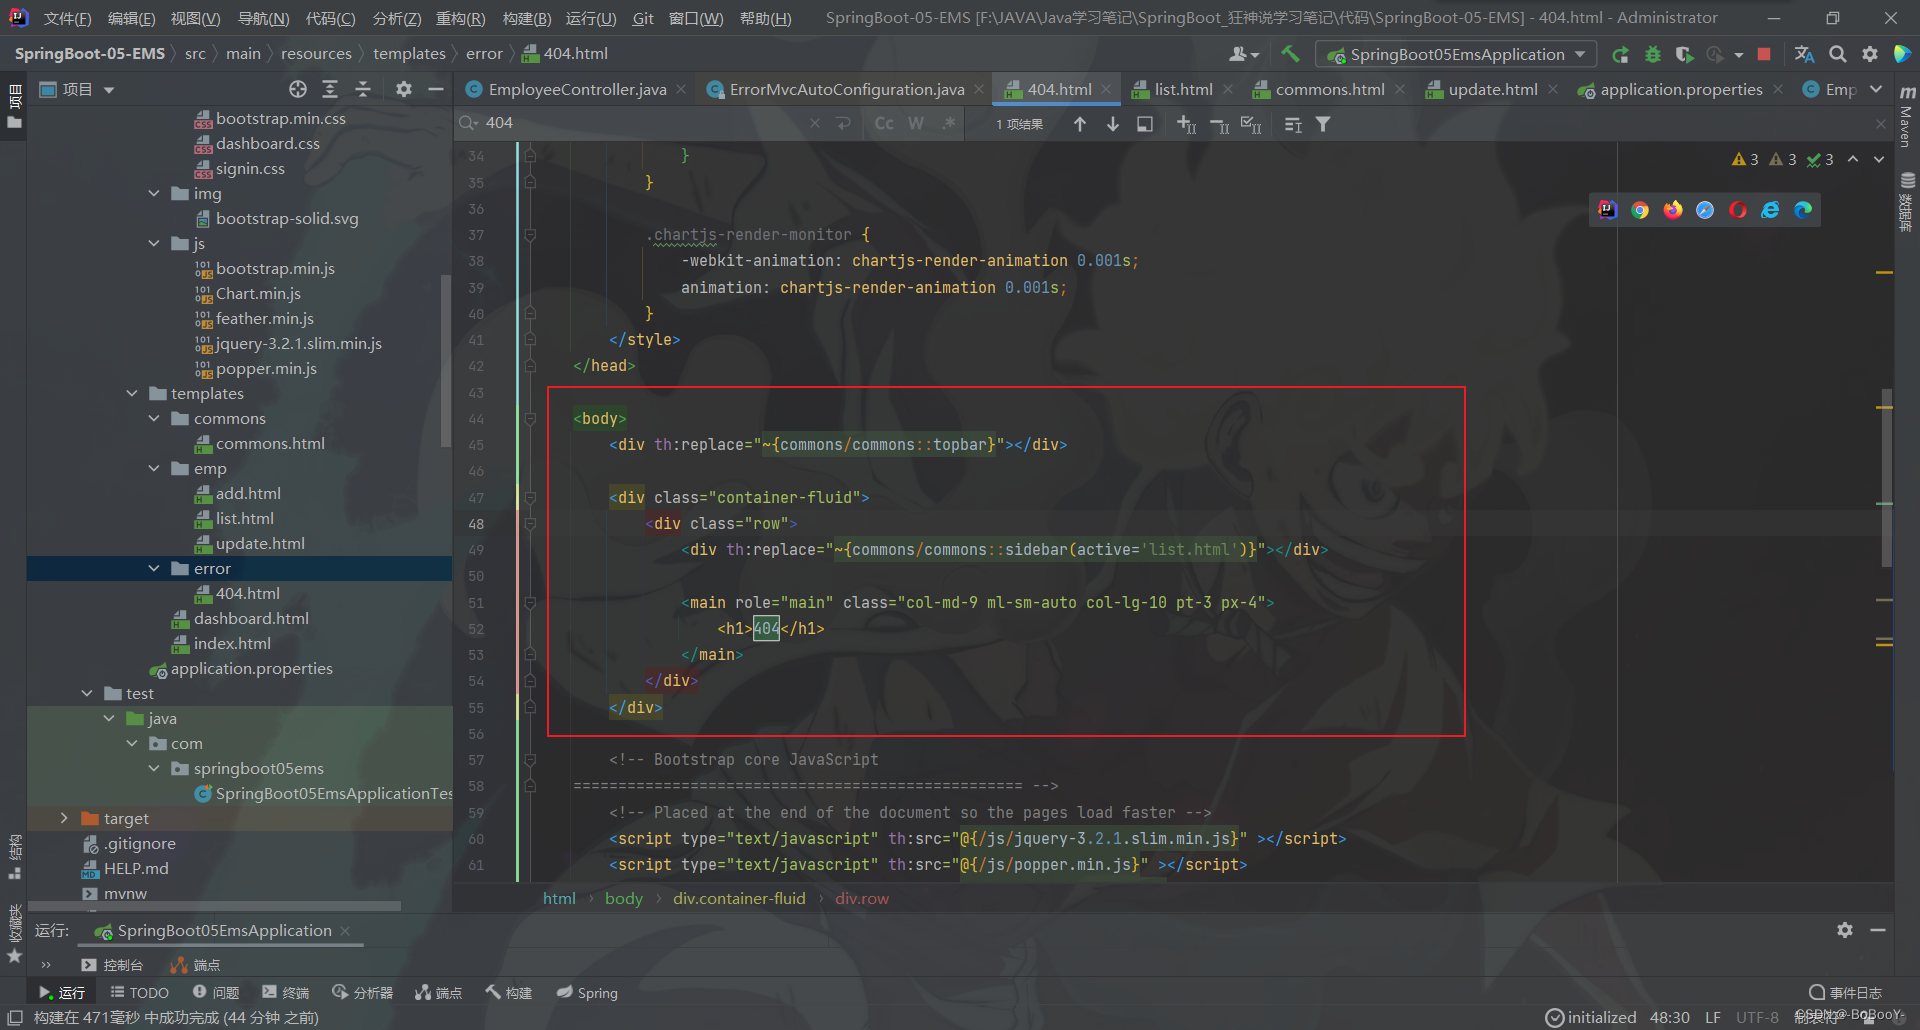
11.1、源码分析
- 查看
ErrorMvcAutoConfiguration这个配置类,这里面注入了几个很重要的 bean;
- DefaultErrorAttributes
- BasicErrorController
- ErrorPageCustomizer
- DefaultErrorViewResolver

错误处理步骤:
- 一旦系统出现了 4xx 或者 5xx 之类的错误,
ErrorPageCustomizer就会生效(定制错误的响应规则)
@Beanpublic ErrorPageCustomizer errorPageCustomizer(DispatcherServletPathdispatcherServletPath) {// 点进这个类return new ErrorPageCustomizer(this.serverProperties,dispatcherServletPath);}
- 发现一个方法
registerErrorPages注册错误页面:
@Override
public void registerErrorPages(ErrorPageRegistry errorPageRegistry) {ErrorPage errorPage = new ErrorPage(// 这里有个 getPath() 路径,我们点进去this.dispatcherServletPath.getRelativePath(this.properties.getError().getPath()));errorPageRegistry.addErrorPages(errorPage);
}
// getPath
public String getPath() {return this.path;
}
// this.path;
@Value("${error.path:/error}")
private String path = "/error";
- 系统一旦出现错误之后就会来到 /error 请求进行处理;这个请求会被
BasicErrorController处理:
@Controller
// 处理默认的 /error 请求
@RequestMapping("${server.error.path:${error.path:/error}}")
public class BasicErrorController extends AbstractErrorController {
}
- 这个类有两个方法:
// 产生html类型的数据,浏览器发送的请求会被这个方法处理
@RequestMapping(produces = MediaType.TEXT_HTML_VALUE)
public ModelAndView errorHtml(HttpServletRequest request,HttpServletResponse response) {HttpStatus status = getStatus(request);Map<String, Object> model = Collections.unmodifiableMap(getErrorAttributes(request,isIncludeStackTrace(request, MediaType.TEXT_HTML)));response.setStatus(status.value());// 去哪个页面拿错误页面呢?resolveErrorView 方法ModelAndView modelAndView = resolveErrorView(request, response, status,model);return (modelAndView != null) ? modelAndView : new ModelAndView("error",model);
}
// 返回 json 类型的数据,其他的客户端请求会被这个方法处理
@RequestMapping
public ResponseEntity<Map<String, Object>> error(HttpServletRequest request)
{HttpStatus status = getStatus(request);if (status == HttpStatus.NO_CONTENT) {return new ResponseEntity<>(status);}Map<String, Object> body = getErrorAttributes(request,isIncludeStackTrace(request, MediaType.ALL));return new ResponseEntity<>(body, status);
}
- 来看看
resolveErrorView这个方法:
protected ModelAndView resolveErrorView(HttpServletRequest request,HttpServletResponse response,HttpStatus status,Map<String, Object> model) {// 拿到所有的 errorViewResolvers 错误视图解析器for (ErrorViewResolver resolver : this.errorViewResolvers) {ModelAndView modelAndView = resolver.resolveErrorView(request,status, model);if (modelAndView != null) {return modelAndView;}}return null;
}
- 在之前看到有这样一个bean
DefaultErrorViewResolver默认的错误视图解析器 :
public class DefaultErrorViewResolver implements ErrorViewResolver, Ordered
{private static final Map<Series, String> SERIES_VIEWS;static {Map<Series, String> views = new EnumMap<>(Series.class);views.put(Series.CLIENT_ERROR, "4xx"); // 客户端错误views.put(Series.SERVER_ERROR, "5xx"); // 服务端错误SERIES_VIEWS = Collections.unmodifiableMap(views);}// .....@Override // HttpStatus 状态码public ModelAndView resolveErrorView(HttpServletRequest request,HttpStatus status, Map<String, Object> model) {ModelAndView modelAndView = resolve(String.valueOf(status.value()),model);if (modelAndView == null &&SERIES_VIEWS.containsKey(status.series())) {
// 通过状态码解析视图modelAndView = resolve(SERIES_VIEWS.get(status.series()),model);}return modelAndView;}// 去 error 路径下解析视图private ModelAndView resolve(String viewName, Map<String, Object> model){
// 比如 error/404 error/500String errorViewName = "error/" + viewName;TemplateAvailabilityProvider provider =this.templateAvailabilityProviders.getProvider(errorViewName,this.applicationContext);if (provider != null) {return new ModelAndView(errorViewName, model);}return resolveResource(errorViewName, model);}
}
总结
**定制错误页面,我们可以建立一个 error 目录,然后放入对应的错误码html文件! 比如:404.html 500.html **
11.1、实现定制404页面
- 在templates下面添加一个error目录,将404.html放入
- 修改404.html页面,使用公共的头部和侧边栏
<div th:replace="~{commons/commons::topbar}"></div><div th:replace="~{commons/commons::sidebar(active='list.html')}"></div>
- 重启项目测试
12、问题总结
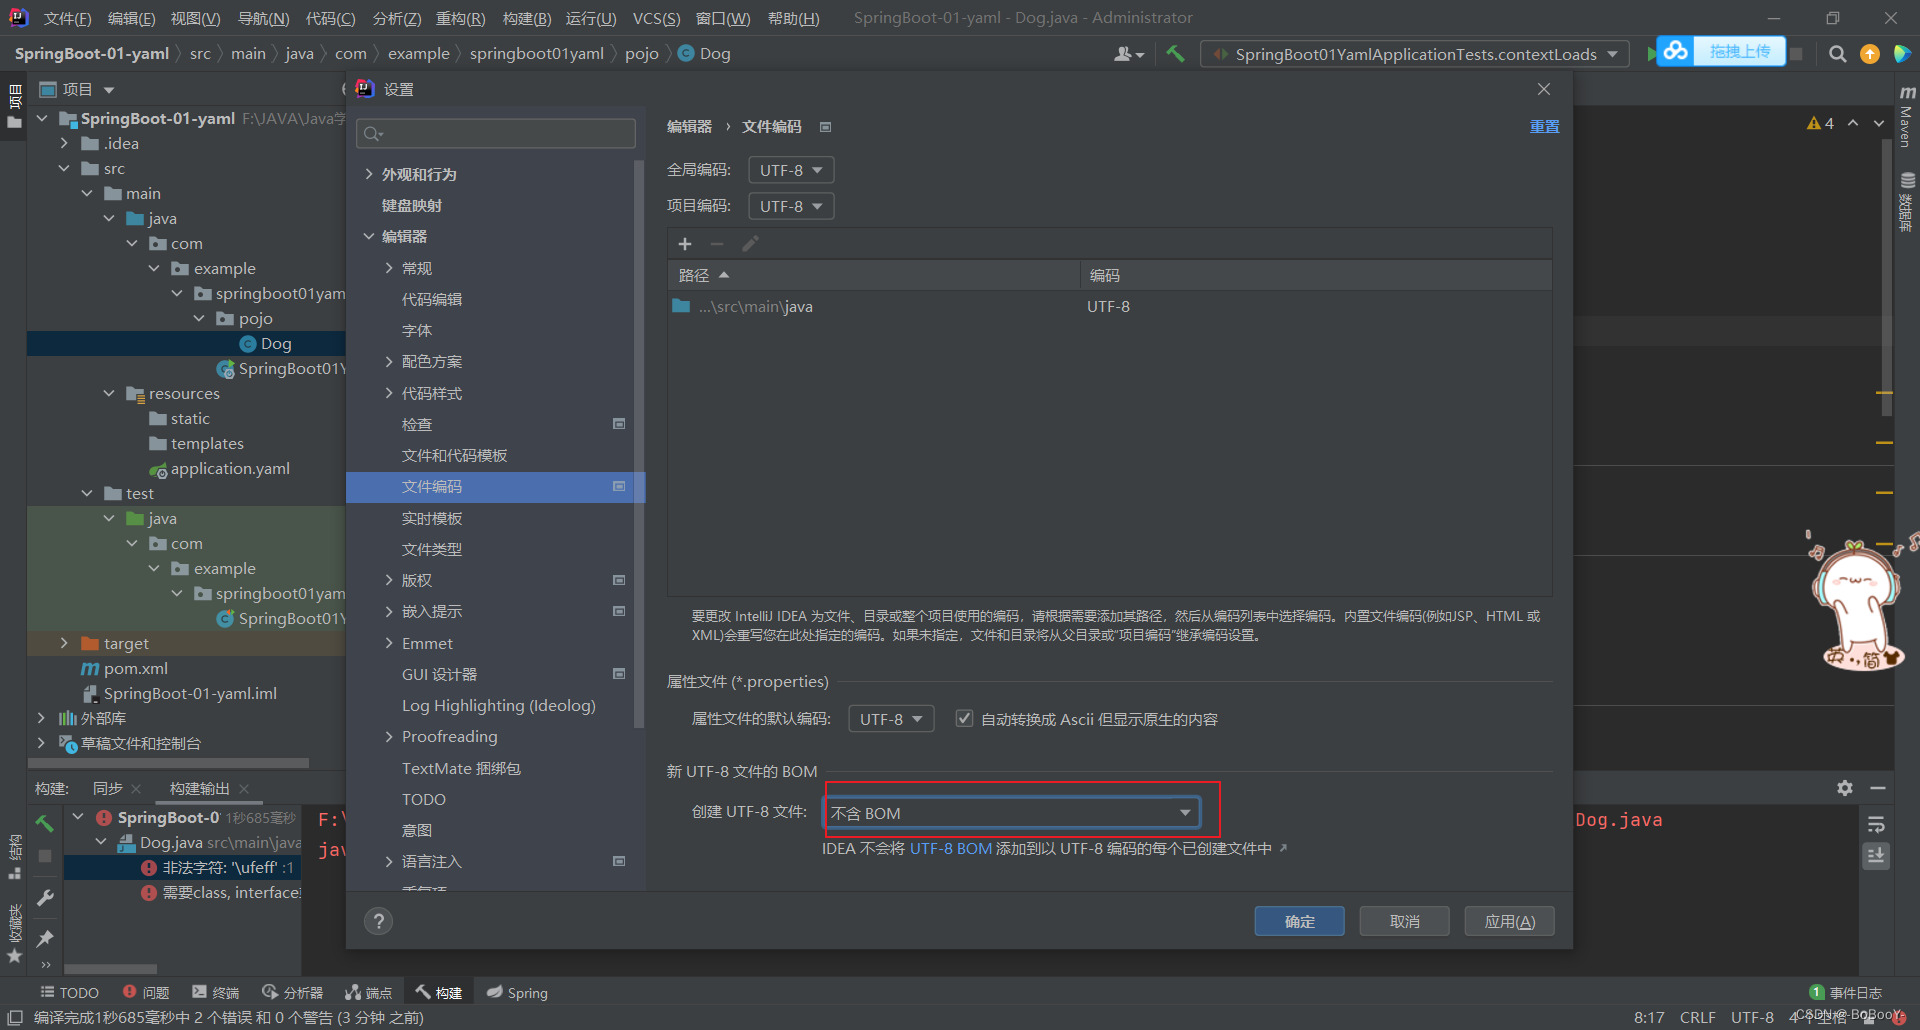
12.1、java: 非法字符: ‘\ufeff’
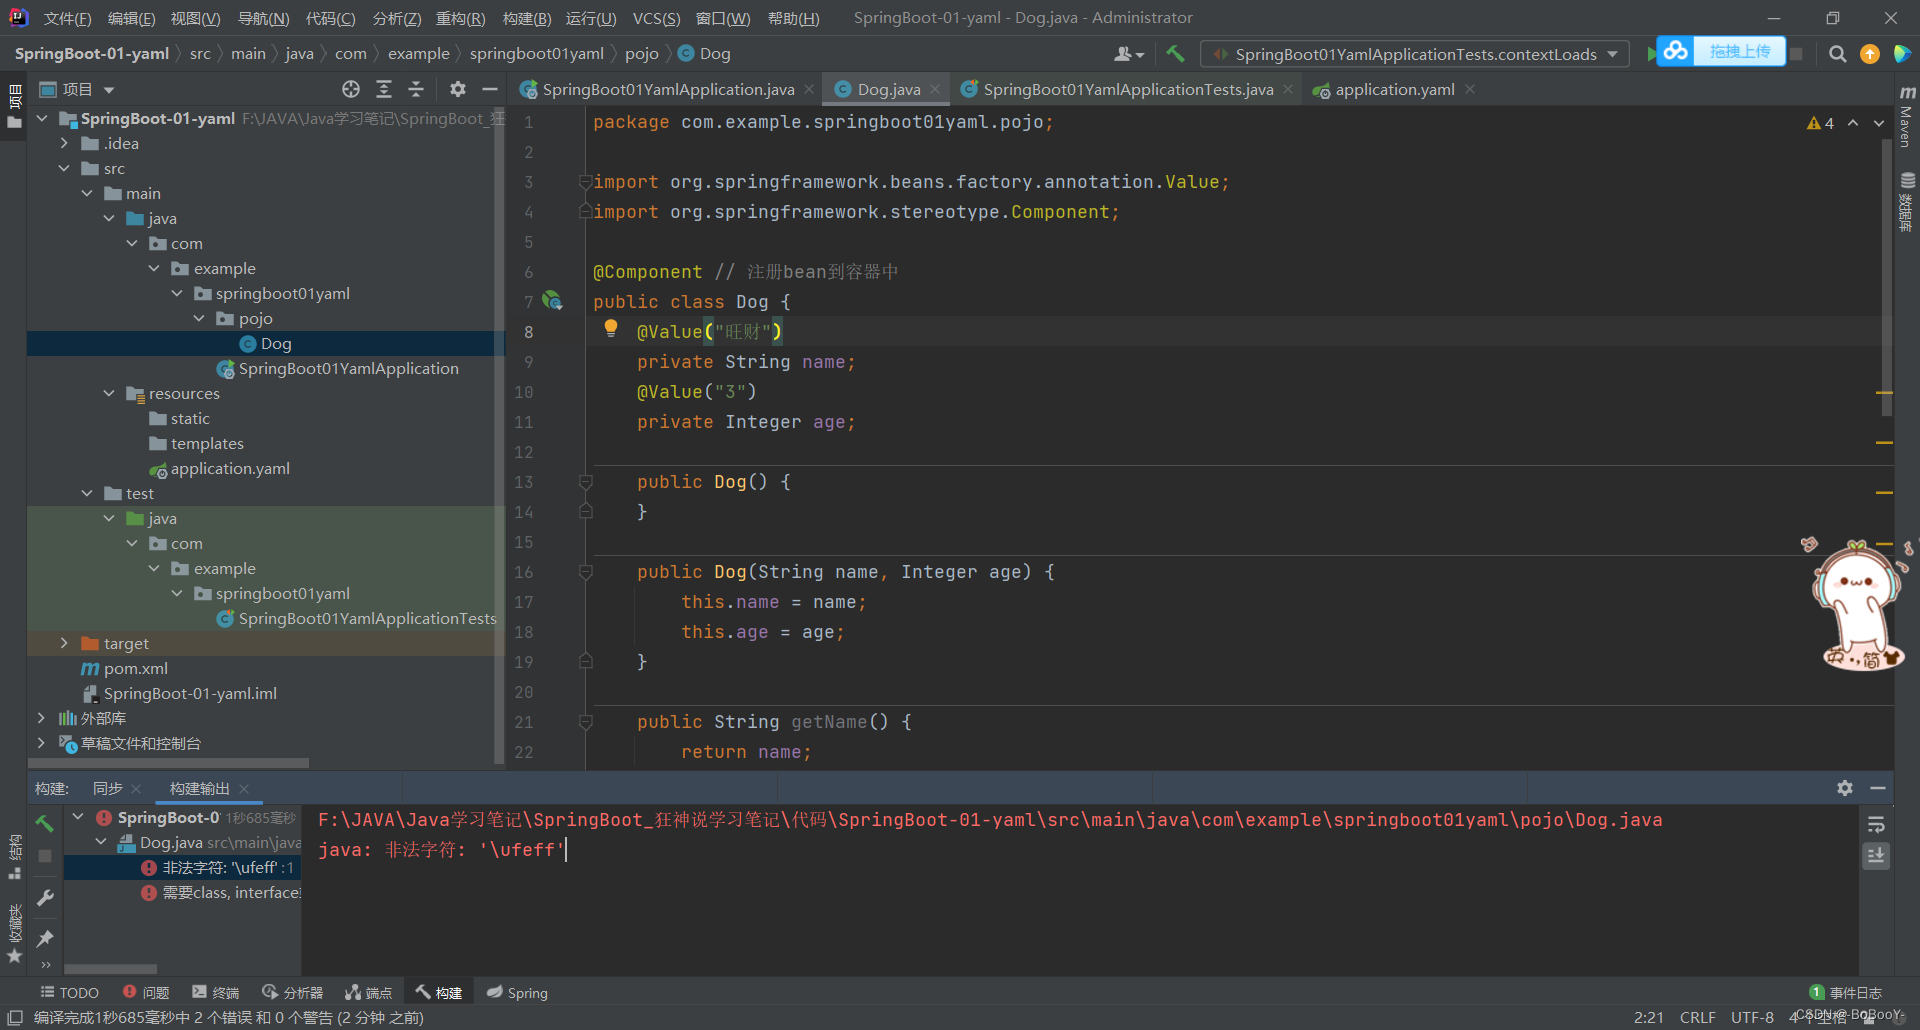
解决方式:设置编码移除BOM
12.2、修改员工信息报错400
控制台报错
2022-09-12 15:49:39.658 WARN 18724 — [nio-8080-exec-6] .w.s.m.s.DefaultHandlerExceptionResolver : Resolved [org.springframework.validation.BindException: org.springframework.validation.BeanPropertyBindingResult: 1 errorsField error in object ‘employee’ on field ‘birth’: rejected value [2022-10-12 15:49]; codes [typeMismatch.employee.birth,typeMismatch.birth,typeMismatch.java.util.Date,typeMismatch]; arguments [org.springframework.context.support.DefaultMessageSourceResolvable: codes [employee.birth,birth]; arguments []; default message [birth]]; default message [Failed to convert property value of type ‘java.lang.String’ to required type ‘java.util.Date’ for property ‘birth’; nested exception is org.springframework.core.convert.ConversionFailedException: Failed to convert from type [java.lang.String] to type [java.util.Date] for value ‘2022-10-12 15:49’; nested exception is java.lang.IllegalArgumentException: Parse attempt failed for value [2022-10-12 15:49]]]
大概意思是:日期在转换时 格式错误 String类型无法转换成Util.Date类型
网页报错
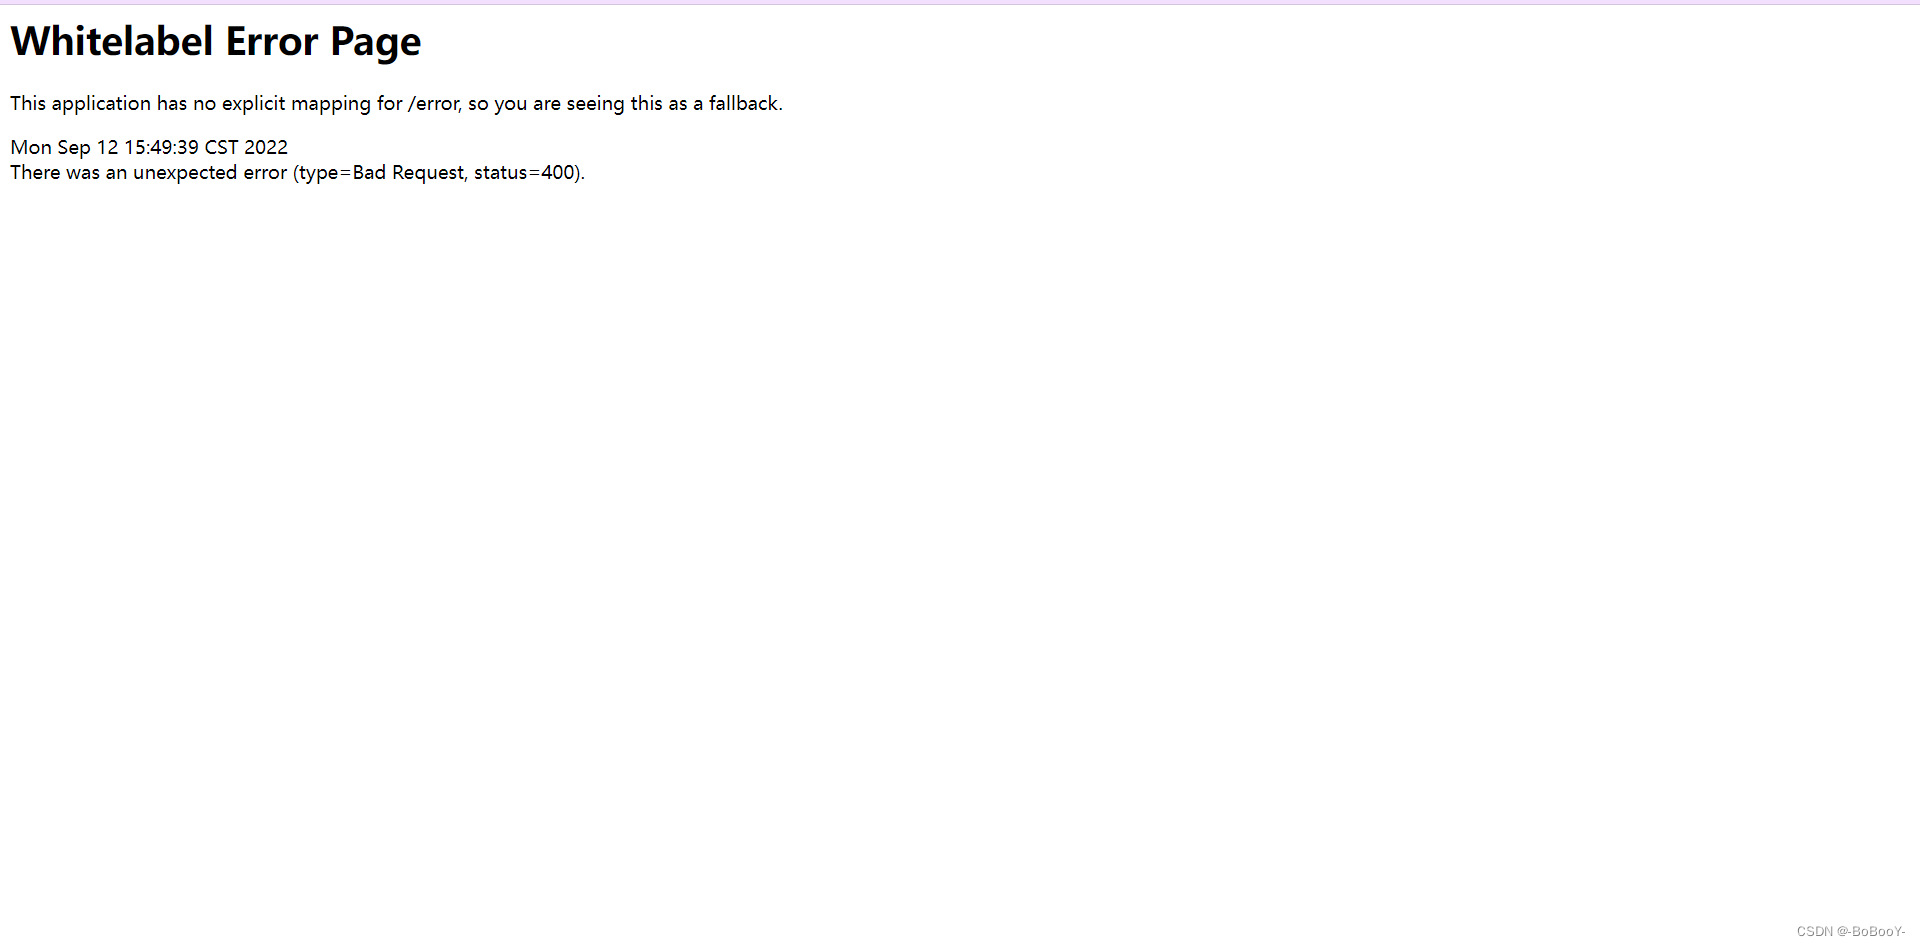
解决问题
-
springboot默认日期格式为:2018-06-17T07:24:07.430+0000。
-
springboot在配置文件中可以修改日期格式
-
日期格式转换出现问题,检查前端页面传来的日期格式和后端能接受日期格式
按照上图所示,后端配置的日期格式为:yyyy-MM-dd hh:mm
查看前端update页面设置的日期格式:yyyy-MM-dd HH:mm
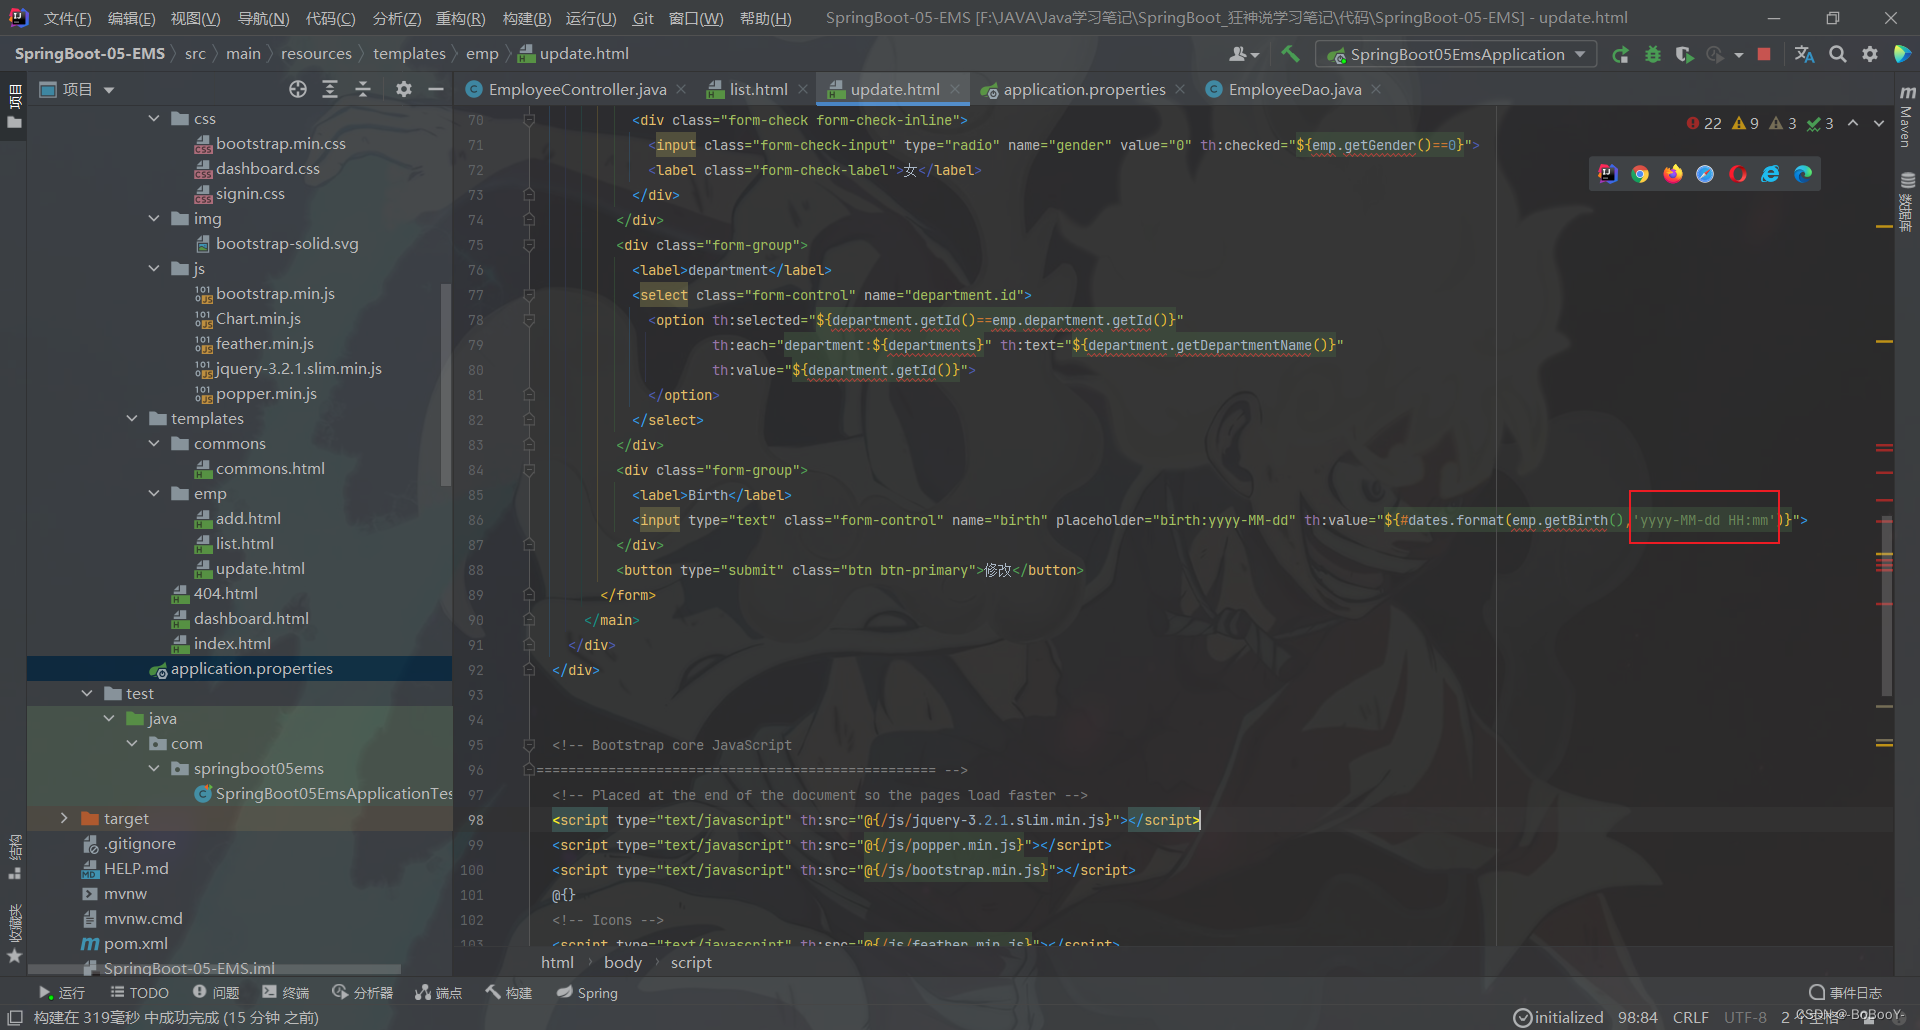
由此可以发现 HH 和 hh格式不一样,才导致了错误
HH:24小时制
hh: 12小时制
- 修改后端配置文件中的日期格式与前端保持一致即可解决问题
补充
- 在实体类的字段上方加如下注解也可实现自定义日期格式
@DateTimeFormat(pattern = "yyyy-MM-dd HH:mm")

13、完整源码
GitHub地址:https://github.com/BoBooY-GitHub/EMS_NoDatabase
百度网盘地址:https://blog.csdn.net/qq_58233406/article/details/126855928?spm=1001.2014.3001.5502
这篇关于SpringBoot | SpringBoot员工管理系统(超细笔记+静态资源链接+附完整源码)的文章就介绍到这儿,希望我们推荐的文章对编程师们有所帮助!


